battery CADILLAC CT5 2021 Owner's Guide
[x] Cancel search | Manufacturer: CADILLAC, Model Year: 2021, Model line: CT5, Model: CADILLAC CT5 2021Pages: 435, PDF Size: 8.9 MB
Page 139 of 435
Cadillac CT5 Owner Manual (GMNA-Localizing-U.S./Canada-14584312) -
2021 - CRC - 11/23/20
138 LIGHTING
If the vehicle has remained parked for
an extended period of time with no
remote key use or Keyless Access
operation, approach detection will be
disabled. To reactivate, press any
button on the remote key or open and
close all vehicle doors to re-enable the
entry lighting feature on approach.
Approach detection will not work if:
.The vehicle battery is low.
.The ignition is on or in ACC/
ACCESSORY.
.Entry lighting is set to Off. See
“Vehicle Locator Lights”under
Vehicle Personalization 0123.
Approach detection will not work with
a single remote key if:
.The remote key is left within a 5 m
(16 ft) range of the vehicle for
several minutes
.The remote key is left inside the
vehicle and all the doors are closed
To help maximize remote key battery
life, do not store the remote key
within 5 m (16 ft) of the vehicle.
Exit Lighting
Some exterior lamps come on at night,
or in areas with limited lighting, when
the driver door is opened after the
ignition is turned off.
The dome lamp comes on after the
ignition is turned off or any door is
opened. The exterior lamps and dome
lamp remain on after the door is
closed for a set amount of time, then
automatically turn off.
The exterior lamps turn off
immediately by turning the exterior
lamp control off.
The exit lighting for exterior lights can
be changed. See Vehicle Personalization
0 123.
Battery Load Management
The vehicle has Electric Power
Management (EPM), which estimates
the battery's temperature and state of
charge. It then adjusts the voltage for
best performance and extended life of
the battery. When the battery's state of charge is
low, the voltage is raised slightly to
quickly bring the charge back up.
When the state of charge is high, the
voltage is lowered slightly to prevent
overcharging. If the vehicle has a
voltmeter gauge or a voltage display
on the Driver Information Center
(DIC), you may see the voltage move
up or down. This is normal. If there is
a problem, an alert will be displayed.
The battery can be discharged at idle
if the electrical loads are very high.
This is true for all vehicles. This is
because the generator (alternator)
may not be spinning fast enough at
idle to produce all the power that is
needed for very high electrical loads.
A high electrical load occurs when
several of the following are on, such
as: headlamps, high beams, fog lamps,
rear window defogger, climate control
fan at high speed, heated seats, engine
cooling fans, and loads plugged into
accessory power outlets.
EPM works to prevent excessive
discharge of the battery. It does this
by balancing the generator's output
and the vehicle's electrical needs.
Page 140 of 435
Cadillac CT5 Owner Manual (GMNA-Localizing-U.S./Canada-14584312) -
2021 - CRC - 11/23/20
LIGHTING 139
It can increase engine idle speed to
generate more power, whenever
needed. It can temporarily reduce the
power demands of some accessories.
Normally, these actions occur in steps
or levels, without being noticeable. In
rare cases at the highest levels of
corrective action, this action may be
noticeable to the driver. If so, a DIC
message might be displayed. If a
battery message is displayed, it is
recommended that the driver reduce
the electrical loads as much as
possible. SeeDriver Information Center
(DIC) (Base Level) 0113 or
Driver Information Center (DIC)
(Uplevel) 0116.
Battery Power Protection
The battery saver feature is designed
to protect the vehicle's battery.
If some interior lamps are left on and
the ignition is turned off, the battery
rundown protection system
automatically turns the lamp off after
some time.
Exterior Lighting Battery
Saver
The exterior lamps turn off about
10 minutes after the ignition is turned
off, if the parking lamps or headlamps
have been manually left on. This
protects against draining the battery.
To restart the 10-minute timer, turn
the exterior lamp control to the
O
position and then back to the;or
2position.
To keep the lamps on for more than
10 minutes, the ignition must be on or
in ACC/ACCESSORY.
Page 169 of 435
Cadillac CT5 Owner Manual (GMNA-Localizing-U.S./Canada-14584312) -
2021 - CRC - 11/23/20
168 INFOTAINMENT SYSTEM
For more information if the GPS is not
functioning properly, seeProblems
with Route Guidance 0168 and
If the System Needs Service 0169.
Vehicle Positioning
At times, the position of the vehicle
on the map could be inaccurate due to
one or more of the following reasons:
.The road system has changed.
.The vehicle is driving on slippery
road surfaces such as sand, gravel,
or snow.
.The vehicle is traveling on winding
roads or long, straight roads.
.The vehicle is approaching a tall
building or a large vehicle.
.The surface streets run parallel to a
freeway.
.The vehicle has been transferred by
a vehicle carrier or a ferry.
.The current position calibration is
set incorrectly.
.The vehicle is traveling at high
speed.
.The vehicle changes directions more
than once, or the vehicle is turning
on a turn table in a parking lot.
.The vehicle is entering and/or
exiting a parking lot, garage, or a lot
with a roof.
.The GPS signal is not received.
.A roof carrier is installed on the
vehicle.
.Tire chains are installed on the
vehicle.
.The tires are replaced or worn.
.The tire pressure for the tires is
incorrect.
.This is the first navigation use after
the map data is updated.
.The 12-volt battery has been
disconnected for several days.
.The vehicle is driving in heavy
traffic where driving is at low
speeds, and the vehicle is stopped
and started repeatedly.
Problems with Route
Guidance
Inappropriate route guidance can
occur under one or more of the
following conditions:
.The turn was not made on the road
indicated.
.Route guidance might not be
available when using automatic
rerouting for the next right or
left turn.
.The route might not be changed
when using automatic rerouting.
.There is no route guidance when
turning at an intersection.
.Plural names of places might be
announced occasionally.
.It could take a long time to operate
automatic rerouting during
high-speed driving.
.Automatic rerouting might display a
route returning to the set waypoint
if heading for a destination without
passing through a set waypoint.
.The route prohibits the entry of a
vehicle due to a regulation by time
or season or any other regulation
which may be given.
.Some routes might not be searched.
.The route to the destination might
not be shown if there are new roads,
if roads have recently changed, or if
certain roads are not listed in the
map data. See Maps0159.
Page 220 of 435
Cadillac CT5 Owner Manual (GMNA-Localizing-U.S./Canada-14584312) -
2021 - CRC - 11/23/20
DRIVING AND OPERATING 219
Warning (Continued)
If the vehicle is stuck in snow:
.Clear snow from the base of the
vehicle, especially any blocking
the exhaust pipe.
.Open a window about 5 cm (2 in)
on the vehicle side that is away
from the wind, to bring in
fresh air.
.Fully open the air outlets on or
under the instrument panel.
.Adjust the climate control
system to circulate the air inside
the vehicle and set the fan speed
to the highest setting. See
“Climate Control Systems.”
For more information about CO, see
Engine Exhaust 0231.
To save fuel, run the engine for short
periods to warm the vehicle and then
shut the engine off and partially close
the window. Moving about to keep
warm also helps.
If it takes time for help to arrive,
when running the engine, push the
accelerator pedal slightly so the engine runs faster than the idle speed.
This keeps the battery charged to
restart the vehicle and to signal for
help with the headlamps. Do this as
little as possible, to save fuel.
If the Vehicle Is Stuck
Slowly and cautiously spin the wheels
to free the vehicle when stuck in sand,
mud, ice, or snow.
If stuck too severely for the traction
system to free the vehicle, turn the
traction system off and use the
rocking method. See
Traction Control/
Electronic Stability Control 0240.
{Warning
If the vehicle's tires spin at high
speed, they can explode, and you or
others could be injured. The vehicle
can overheat, causing an engine
compartment fire or other damage.
Spin the wheels as little as possible
and avoid going above 56 km/h
(35 mph).
Rocking the Vehicle to Get it Out
Turn the steering wheel left and right
to clear the area around the front
wheels. Turn off any traction system.
Shift back and forth between
R (Reverse) and a low forward gear,
spinning the wheels as little as
possible. To prevent transmission
wear, wait until the wheels stop
spinning before shifting gears. Release
the accelerator pedal while shifting,
and press lightly on the accelerator
pedal when the transmission is in
gear. Slowly spinning the wheels in
the forward and reverse directions
causes a rocking motion that could
free the vehicle. If that does not get
the vehicle out after a few tries, it
might need to be towed out. If the
vehicle does need to be towed out, see
Towing the Vehicle 0371.
Vehicle Load Limits
It is very important to know how
much weight the vehicle can carry.
This weight is called the vehicle
capacity weight and includes the
weight of all occupants, cargo, and
all nonfactory-installed options.
Page 226 of 435

Cadillac CT5 Owner Manual (GMNA-Localizing-U.S./Canada-14584312) -
2021 - CRC - 11/23/20
DRIVING AND OPERATING 225
{Warning
Turning off the vehicle while
moving may cause loss of power
assist in the brake and steering
systems and disable the airbags.
While driving, only shut the vehicle
off in an emergency.
If the vehicle cannot be pulled over,
and must be shut off while driving,
press and hold the ENGINE START/
STOP button for longer than
two seconds, or press twice in
five seconds.
ACC/ACCESSORY (Amber Indicator
Light) : This mode allows you to use
some electrical accessories when the
engine is off.
With the ignition off, pressing the
button one time without the brake
pedal applied will place the ignition
system in ACC/ACCESSORY.
The ignition will switch from ACC/
ACCESSORY to OFF after five minutes
to prevent battery rundown. ON/RUN/START (Green Indicator
Light) :
This mode is for driving and
starting. With the ignition off, and the
brake pedal applied, pressing the
button once will place the ignition
system in ON/RUN/START. Once
engine cranking begins, release the
button. Engine cranking will continue
until the engine starts. See Starting the
Engine 0225. The vehicle will then
remain on.
Service Mode
This power mode is available for
service and diagnostics, and to verify
the proper operation of the
malfunction indicator lamp as may be
required for emission inspection
purposes. With the vehicle off, and the
brake pedal not applied, pressing and
holding the button for more than
five seconds will place the vehicle in
Service Mode. The instruments and
audio systems will operate as they do
in ON/RUN, but the vehicle will not be
able to be driven. The engine will not
start in Service Mode. Press the
button again to turn the vehicle off.
Starting the Engine
Place the transmission in the
proper gear
Caution
If you add electrical parts or
accessories, you could change the
way the engine operates. Any
resulting damage would not be
covered by the vehicle warranty. See
Add-On Electrical Equipment 0307.
Move the shift lever to P (Park) or
N (Neutral). To restart the vehicle
when it is already moving, use
N (Neutral) only.
Caution
Do not try to shift to P (Park) if the
vehicle is moving. If you do, you
could damage the transmission.
Shift to P (Park) only when the
vehicle is stopped.
Starting the Vehicle 1. Press the brake pedal, then press ENGINE START/STOP on the
instrument panel.
Page 227 of 435

Cadillac CT5 Owner Manual (GMNA-Localizing-U.S./Canada-14584312) -
2021 - CRC - 11/23/20
226 DRIVING AND OPERATING
If the remote key is not in the
vehicle, if there is interference, or if
the remote key battery is low, a
Driver Information Center (DIC)
message will display. SeeRemote
Keyless Entry (RKE) System
Operation 07.
Caution
Cranking the engine for long
periods of time, by pressing
ENGINE START/STOP immediately
after cranking has ended, can
overheat and damage the cranking
motor, and drain the battery. Wait
at least 15 seconds between each
try, to let the cranking motor
cool down.
2. If the engine does not start after five to 10 seconds, especially in
very cold weather (below −18 °C or
0 °F), it could be flooded with too
much gasoline. Try pushing the
accelerator pedal all the way to the
floor and hold it there, then press
ENGINE START/STOP for up to a
maximum of 15 seconds. Wait at
least 15 seconds between each try,
to allow the cranking motor to cool down. When the engine starts, let
go of the button and the
accelerator. If the vehicle starts
briefly but then stops again, do the
same thing. This clears the extra
gasoline from the engine. Do not
race the engine immediately after
starting it. Operate the engine and
transmission gently until the oil
warms up and lubricates all
moving parts.
Stopping the Engine
Move the shift lever to P (Park) and
press and hold ENGINE START/STOP
on the instrument panel, until the
engine shuts off. If the shift lever is
not in P (Park), the engine shuts off
and the ignition goes to ACC/
ACCESSORY. The DIC displays SHIFT
TO PARK. Once the shift lever is
moved to P (Park), the vehicle
turns off.
If the remote key is not detected
inside the vehicle when it is turned off
the DIC displays a message.
Stop/Start System
This vehicle has a Stop/Start system
to shut off the engine to help
conserve fuel. It has components
designed for the increased number of
starts.
{Warning
The automatic engine Stop/Start
feature causes the engine to shut
off while the vehicle is still on. Do
not exit the vehicle before shifting
to P (Park). The vehicle may restart
and move unexpectedly. Always
shift to P (Park), and then turn the
ignition off before exiting the
vehicle.
Auto Engine Stop/Start
When the brakes are applied and the
vehicle is at a complete stop, the
engine may turn off. When stopped,
the tachometer displays AUTO STOP.
See Tachometer 099. When the brake
pedal is released or the accelerator
pedal is pressed, the engine will
restart.
Page 228 of 435
Cadillac CT5 Owner Manual (GMNA-Localizing-U.S./Canada-14584312) -
2021 - CRC - 11/23/20
DRIVING AND OPERATING 227
To maintain vehicle performance,
other conditions may cause the engine
to automatically restart before the
brake pedal is released.
Auto Stops may not occur and/or Auto
Starts may occur because:
.The climate control settings require
the engine to be running to cool or
heat the vehicle interior.
.The vehicle battery needs to charge.
.The vehicle battery has recently
been disconnected.
.Minimum vehicle speed has not
been reached since the last
Auto Stop.
.The accelerator pedal is pressed.
.The engine or transmission is not at
the required operating temperature.
.The outside temperature is not in
the required operating range.
.The vehicle is shifted out of D
(Drive) to any gear other than
P (Park).
.Certain driver modes have been
selected. SeeDriver Mode Control
0 242.
.The vehicle is on a steep hill or
grade.
.The driver door has been opened or
the driver seat belt has been
unbuckled.
.The hood has been opened.
.The Auto Stop has reached the
maximum allowed time.
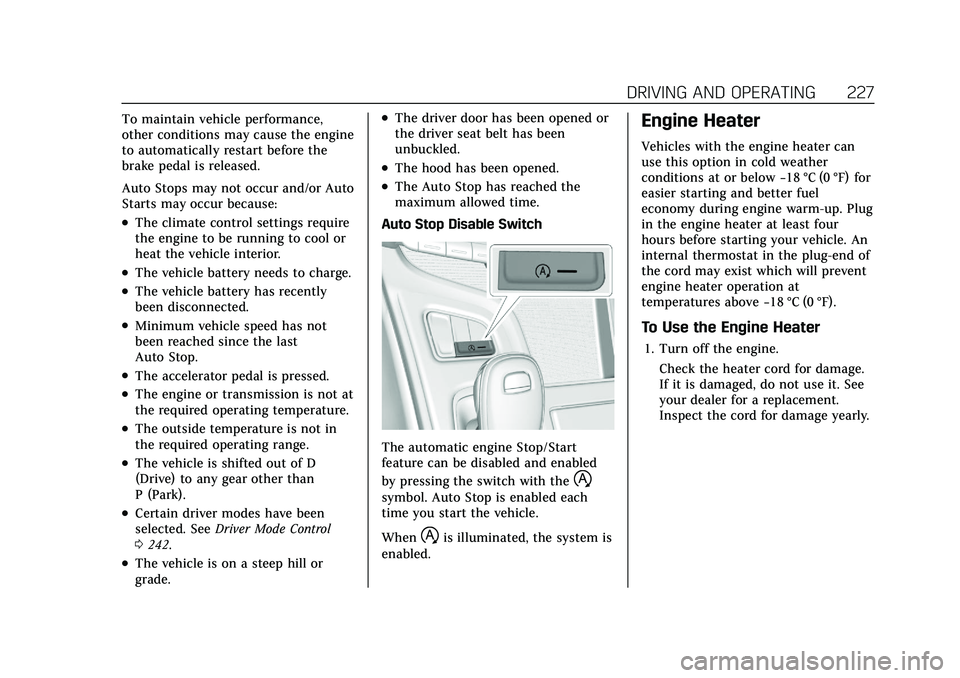
Auto Stop Disable Switch
The automatic engine Stop/Start
feature can be disabled and enabled
by pressing the switch with the
h
symbol. Auto Stop is enabled each
time you start the vehicle.
When
his illuminated, the system is
enabled.
Engine Heater
Vehicles with the engine heater can
use this option in cold weather
conditions at or below −18 °C (0 °F) for
easier starting and better fuel
economy during engine warm-up. Plug
in the engine heater at least four
hours before starting your vehicle. An
internal thermostat in the plug-end of
the cord may exist which will prevent
engine heater operation at
temperatures above −18 °C (0 °F).
To Use the Engine Heater
1. Turn off the engine.
Check the heater cord for damage.
If it is damaged, do not use it. See
your dealer for a replacement.
Inspect the cord for damage yearly.
Page 239 of 435
Cadillac CT5 Owner Manual (GMNA-Localizing-U.S./Canada-14584312) -
2021 - CRC - 11/23/20
238 DRIVING AND OPERATING
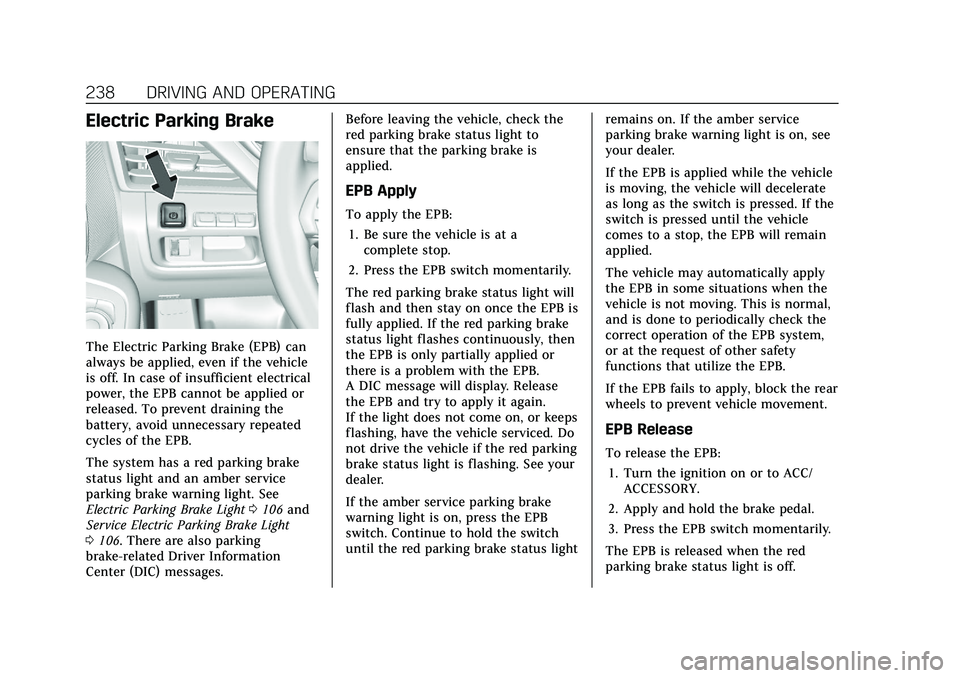
Electric Parking Brake
The Electric Parking Brake (EPB) can
always be applied, even if the vehicle
is off. In case of insufficient electrical
power, the EPB cannot be applied or
released. To prevent draining the
battery, avoid unnecessary repeated
cycles of the EPB.
The system has a red parking brake
status light and an amber service
parking brake warning light. See
Electric Parking Brake Light0106 and
Service Electric Parking Brake Light
0 106. There are also parking
brake-related Driver Information
Center (DIC) messages. Before leaving the vehicle, check the
red parking brake status light to
ensure that the parking brake is
applied.
EPB Apply
To apply the EPB:
1. Be sure the vehicle is at a complete stop.
2. Press the EPB switch momentarily.
The red parking brake status light will
flash and then stay on once the EPB is
fully applied. If the red parking brake
status light flashes continuously, then
the EPB is only partially applied or
there is a problem with the EPB.
A DIC message will display. Release
the EPB and try to apply it again.
If the light does not come on, or keeps
flashing, have the vehicle serviced. Do
not drive the vehicle if the red parking
brake status light is flashing. See your
dealer.
If the amber service parking brake
warning light is on, press the EPB
switch. Continue to hold the switch
until the red parking brake status light remains on. If the amber service
parking brake warning light is on, see
your dealer.
If the EPB is applied while the vehicle
is moving, the vehicle will decelerate
as long as the switch is pressed. If the
switch is pressed until the vehicle
comes to a stop, the EPB will remain
applied.
The vehicle may automatically apply
the EPB in some situations when the
vehicle is not moving. This is normal,
and is done to periodically check the
correct operation of the EPB system,
or at the request of other safety
functions that utilize the EPB.
If the EPB fails to apply, block the rear
wheels to prevent vehicle movement.
EPB Release
To release the EPB:
1. Turn the ignition on or to ACC/ ACCESSORY.
2. Apply and hold the brake pedal.
3. Press the EPB switch momentarily.
The EPB is released when the red
parking brake status light is off.
Page 308 of 435

Cadillac CT5 Owner Manual (GMNA-Localizing-U.S./Canada-14584312) -
2021 - CRC - 11/23/20
DRIVING AND OPERATING 307
Conversions and
Add-Ons
Add-On Electrical
Equipment
{Warning
The Data Link Connector (DLC) is
used for vehicle service and
Emission Inspection/Maintenance
testing. SeeMalfunction Indicator
Lamp (Check Engine Light) 0103.
A device connected to the DLC —
such as an aftermarket fleet or
driver-behavior tracking device —
may interfere with vehicle systems.
This could affect vehicle operation
and cause a crash. Such devices
may also access information stored
in the vehicle’s systems.
Caution
Some electrical equipment can
damage the vehicle or cause
components to not work and would (Continued)
Caution (Continued)
not be covered by the vehicle
warranty. Always check with your
dealer before adding electrical
equipment.
Add-on equipment can drain the
vehicle's 12-volt battery, even if the
vehicle is not operating.
The vehicle has an airbag system.
Before attempting to add anything
electrical to the vehicle, see Servicing
the Airbag-Equipped Vehicle 064 and
Adding Equipment to the
Airbag-Equipped Vehicle 064.
Page 309 of 435
Cadillac CT5 Owner Manual (GMNA-Localizing-U.S./Canada-14584312) -
2021 - CRC - 11/23/20
308 VEHICLE CARE
Vehicle Care
General Information
General Information . . . . . . . . . . . . . 309
California Proposition65 Warning . . . . . . . . . . . . . . . . . . . . . 309
California Perchlorate Materials Requirements . . . . . . . . . . . . . . . . . . . 309
Accessories and Modifications . . . . . . . . . . . . . . . . . . . 310
Vehicle Checks
Doing Your OwnService Work . . . . . . . . . . . . . . . . . . . . 310
Hood . . . . . . . . . . . . . . . . . . . . . . . . . . . . . . 311
Engine Compartment Overview . . . . . . . . . . . . . . . . . . . . . . . . . 313
Engine Oil . . . . . . . . . . . . . . . . . . . . . . . . . 316
Engine Oil Life System . . . . . . . . . . . 318
Automatic Transmission Fluid . . . . . . . . . . . . . . . . . . . . . . . . . . . . . 319
Engine Air Filter Life System . . . . 319
Engine Air Cleaner/Filter . . . . . . . . . 320
Cooling System . . . . . . . . . . . . . . . . . . . 322
Engine Overheating . . . . . . . . . . . . . . 326
Washer Fluid . . . . . . . . . . . . . . . . . . . . . 327
Brakes . . . . . . . . . . . . . . . . . . . . . . . . . . . . . 328
Brake Pad Life System (If Equipped) . . . . . . . . . . . . . . . . . . . . . . . 328
Brake Fluid . . . . . . . . . . . . . . . . . . . . . . . 329 Battery - North America . . . . . . . . . 330
All-Wheel Drive . . . . . . . . . . . . . . . . . . 331
Park Brake and P (Park)
Mechanism Check . . . . . . . . . . . . . . 331
Wiper Blade Replacement . . . . . . . 331
Windshield Replacement . . . . . . . . 332
Gas Strut(s) . . . . . . . . . . . . . . . . . . . . . . . 332
Headlamp Aiming
Front Headlamp Aiming . . . . . . . . . 333
Bulb Replacement
LED Lighting . . . . . . . . . . . . . . . . . . . . . 334
Electrical System
Electrical System Overload . . . . . . 334
Fuses and Circuit Breakers . . . . . . 334
Engine Compartment Fuse
Block . . . . . . . . . . . . . . . . . . . . . . . . . . . . 335
Instrument Panel Fuse Block . . . . 337
Rear Compartment Fuse Block . . . . . . . . . . . . . . . . . . . . . . . . . . . . 340
Wheels and Tires
Tires . . . . . . . . . . . . . . . . . . . . . . . . . . . . . . . 342
All-Season Tires . . . . . . . . . . . . . . . . . . 342
Winter Tires . . . . . . . . . . . . . . . . . . . . . . 343
Run-Flat Tires . . . . . . . . . . . . . . . . . . . . 343
Self-Sealing Tires . . . . . . . . . . . . . . . . . 344
Low-Profile Tires . . . . . . . . . . . . . . . . . 344
Summer Tires . . . . . . . . . . . . . . . . . . . . 344
Tire Sidewall Labeling . . . . . . . . . . . 345 Tire Designations . . . . . . . . . . . . . . . . . 346
Tire Terminology and
Definitions . . . . . . . . . . . . . . . . . . . . . . 347
Tire Pressure . . . . . . . . . . . . . . . . . . . . . . 349
Tire Pressure for High-Speed Operation . . . . . . . . . . . . . . . . . . . . . . . . 350
Tire Pressure Monitor System . . . 351
Tire Pressure Monitor Operation . . . . . . . . . . . . . . . . . . . . . . . . 352
Tire Inspection . . . . . . . . . . . . . . . . . . . 355
Tire Rotation . . . . . . . . . . . . . . . . . . . . . 355
When It Is Time for New Tires . . . . . . . . . . . . . . . . . . . . . . . . . . . . . 356
Buying New Tires . . . . . . . . . . . . . . . . 357
Different Size Tires and Wheels . . . . . . . . . . . . . . . . . . . . . . . . . . 358
Uniform Tire Quality Grading . . . 359
Wheel Alignment and Tire Balance . . . . . . . . . . . . . . . . . . . . . . . . . . 360
Wheel Replacement . . . . . . . . . . . . . . 360
Tire Chains . . . . . . . . . . . . . . . . . . . . . . . 361
If a Tire Goes Flat . . . . . . . . . . . . . . . . 361
Tire Sealant and Compressor Kit . . . . . . . . . . . . . . . . . 362
Storing the Tire Sealant and Compressor Kit . . . . . . . . . . . . . . . . . 368
Jump Starting
Jump Starting - NorthAmerica . . . . . . . . . . . . . . . . . . . . . . . . . 368