ECO mode CADILLAC CT5 2021 Owner's Manual
[x] Cancel search | Manufacturer: CADILLAC, Model Year: 2021, Model line: CT5, Model: CADILLAC CT5 2021Pages: 435, PDF Size: 8.9 MB
Page 2 of 435
Cadillac CT5 Owner Manual (GMNA-Localizing-U.S./Canada-14584312) -
2021 - CRC - 11/23/20
Contents
Introduction . . . . . . . . . . . . . . . . . . . . . . . . . . 1
Keys, Doors, and Windows . . . . . . . . . . 6
Seats and Restraints . . . . . . . . . . . . . . . 35
Storage . . . . . . . . . . . . . . . . . . . . . . . . . . . . . . 83
Instruments and Controls . . . . . . . . . . 86
Lighting . . . . . . . . . . . . . . . . . . . . . . . . . . . . 132
Infotainment System . . . . . . . . . . . . . 140
Climate Controls . . . . . . . . . . . . . . . . . . 202
Driving and Operating . . . . . . . . . . . . 208
Vehicle Care . . . . . . . . . . . . . . . . . . . . . . . 308
Service and Maintenance . . . . . . . . . 381
Technical Data . . . . . . . . . . . . . . . . . . . . 396
Customer Information . . . . . . . . . . . . 401
Reporting Safety Defects . . . . . . . . . 411
OnStar . . . . . . . . . . . . . . . . . . . . . . . . . . . . . . 414
Connected Services . . . . . . . . . . . . . . . 419
Index . . . . . . . . . . . . . . . . . . . . . . . . 422
Introduction
The names, logos, emblems, slogans,
vehicle model names, and vehicle
body designs appearing in this manual
including, but not limited to, GM, the
GM logo, CADILLAC, the CADILLAC
Emblem, and CT5, are trademarks
and/or service marks of General
Motors LLC, its subsidiaries, affiliates,
or licensors.
For vehicles first sold in Canada,
substitute the name“General Motors
of Canada Company ”for Cadillac
Motor Car Division wherever it
appears in this manual.
This manual describes features that
may or may not be on the vehicle
because of optional equipment that
was not purchased on the vehicle, model variants, country specifications,
features/applications that may not be
available in your region, or changes
subsequent to the printing of this
owner’s manual.
Refer to the purchase documentation
relating to your specific vehicle to
confirm the features.
Keep this manual in the vehicle for
quick reference.
Canadian Vehicle Owners
A French language manual can be
obtained from your dealer, at
www.helminc.com, or from:
Propriétaires Canadiens
On peut obtenir un exemplaire de ce
guide en français auprès du
concessionnaire ou à l'adresse
suivante:
Helm, Incorporated
Attention: Customer Service
47911 Halyard Drive
Plymouth, MI 48170
USA
Litho in U.S.A.
Part No. 84432196 B Second Printing©2020 General Motors LLC. All Rights Reserved.
Page 12 of 435
Cadillac CT5 Owner Manual (GMNA-Localizing-U.S./Canada-14584312) -
2021 - CRC - 11/23/20
KEYS, DOORS, AND WINDOWS 11
your dealer. The vehicle can be
reprogrammed so that lost or stolen
remote keys no longer work. Each
vehicle can have up to eight remote
keys matched to it.
Programming with Recognized
Remote Keys
A new key can be programmed to the
vehicle when there are two
recognized keys.
To program, the vehicle must be in
RUN and all remote keys, both
currently recognized and new, must
be with you.1. Place the two recognized remote keys on the passenger seat.
2. Scroll to the DIC menu to "Remote Key Learn" menu and select.
The DIC displays READY FOR
REMOTE #3, 4, 5, ETC.
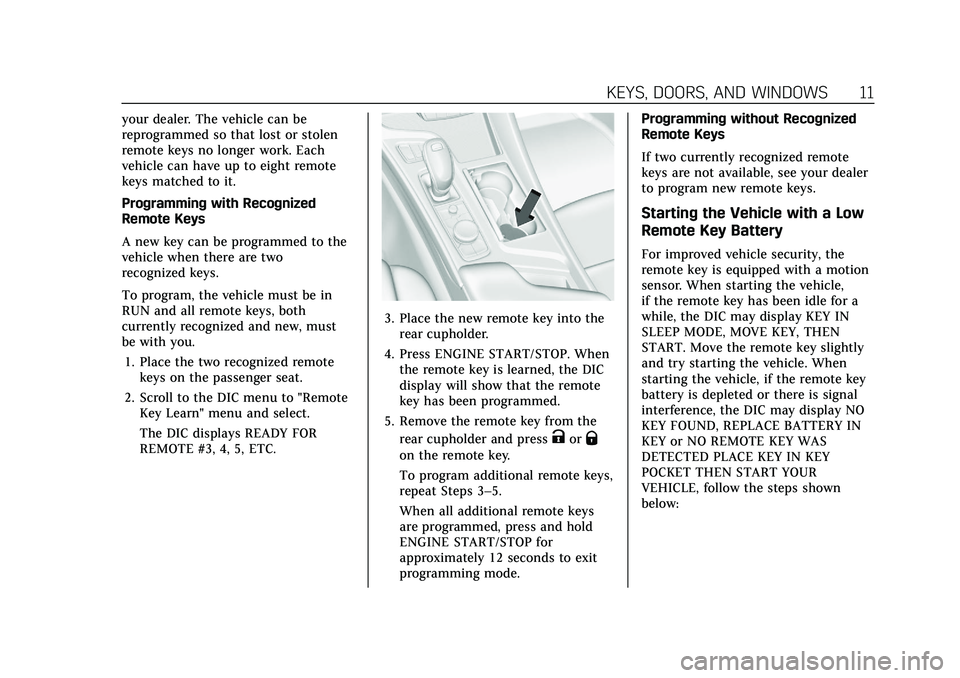
3. Place the new remote key into therear cupholder.
4. Press ENGINE START/STOP. When the remote key is learned, the DIC
display will show that the remote
key has been programmed.
5. Remove the remote key from the rear cupholder and press
KorQ
on the remote key.
To program additional remote keys,
repeat Steps 3–5.
When all additional remote keys
are programmed, press and hold
ENGINE START/STOP for
approximately 12 seconds to exit
programming mode. Programming without Recognized
Remote Keys
If two currently recognized remote
keys are not available, see your dealer
to program new remote keys.
Starting the Vehicle with a Low
Remote Key Battery
For improved vehicle security, the
remote key is equipped with a motion
sensor. When starting the vehicle,
if the remote key has been idle for a
while, the DIC may display KEY IN
SLEEP MODE, MOVE KEY, THEN
START. Move the remote key slightly
and try starting the vehicle. When
starting the vehicle, if the remote key
battery is depleted or there is signal
interference, the DIC may display NO
KEY FOUND, REPLACE BATTERY IN
KEY or NO REMOTE KEY WAS
DETECTED PLACE KEY IN KEY
POCKET THEN START YOUR
VEHICLE, follow the steps shown
below:
Page 32 of 435
Cadillac CT5 Owner Manual (GMNA-Localizing-U.S./Canada-14584312) -
2021 - CRC - 11/23/20
KEYS, DOORS, AND WINDOWS 31
See your dealer for service if a blue
screen and
3are displayed in the
mirror, and the display shuts off. Also,
push the tab as indicated to return to
the automatic dimming mode.
The Rear Camera Mirror may not work
properly or display a clear image if:
.There is glare from the sun or
headlamps. This may obstruct
objects from view. If needed, push
the tab to turn off the display.
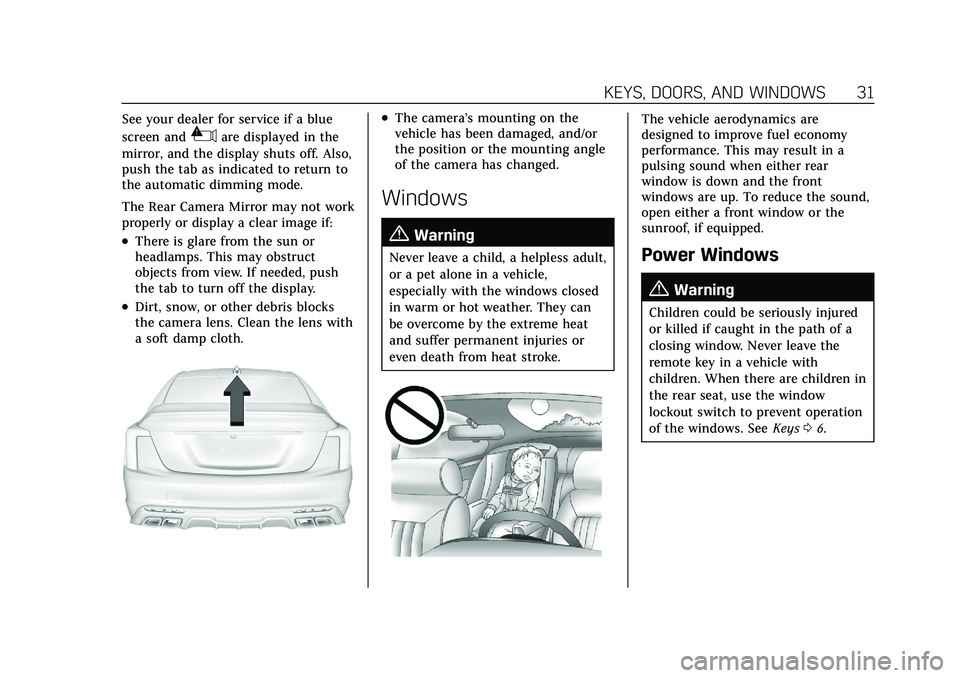
.Dirt, snow, or other debris blocks
the camera lens. Clean the lens with
a soft damp cloth.
.The camera’s mounting on the
vehicle has been damaged, and/or
the position or the mounting angle
of the camera has changed.
Windows
{
Warning
Never leave a child, a helpless adult,
or a pet alone in a vehicle,
especially with the windows closed
in warm or hot weather. They can
be overcome by the extreme heat
and suffer permanent injuries or
even death from heat stroke.
The vehicle aerodynamics are
designed to improve fuel economy
performance. This may result in a
pulsing sound when either rear
window is down and the front
windows are up. To reduce the sound,
open either a front window or the
sunroof, if equipped.
Power Windows
{Warning
Children could be seriously injured
or killed if caught in the path of a
closing window. Never leave the
remote key in a vehicle with
children. When there are children in
the rear seat, use the window
lockout switch to prevent operation
of the windows. See Keys06.
Page 48 of 435
Cadillac CT5 Owner Manual (GMNA-Localizing-U.S./Canada-14584312) -
2021 - CRC - 11/23/20
SEATS AND RESTRAINTS 47
Buckle To Drive
If equipped, this feature prevents the
vehicle from shifting out of P (Park)
when the driver seat belt is not
buckled. The Buckle to Drive feature
must be turned ON in the
infotainment system to work. See
Vehicle Personalization0123 and if
equipped, Teen Driver 0189. If the
engine is running, the driver seat belt
is not buckled, and the brake pedal is
pressed with the vehicle in P (Park), a
message displays in the Driver
Information Center (DIC). Buckle the
driver seat belt to shift out of P (Park).
Shifting from P (Park) will be
prevented once for each ignition cycle.
For some fleet vehicles, the feature is
always ON and it cannot be turned
OFF in the infotainment system.
Shifting from P (Park) will be
prevented each time the above
conditions exist.
On some models, Buckle to Drive may
also prevent shifting out of P (Park) if
a front passenger is unbuckled under
similar conditions. A message displays
in the DIC. Buckle the front passenger
seat belt to shift out of P (Park). This feature may not allow the vehicle to
shift out of P (Park) if an object, such
as a briefcase, handbag, grocery bag,
laptop, or other electronic device, is
on the front passenger seat. If this
happens, remove the object from the
seat or buckle the seat belt to shift
out of P (Park).
If the driver, or on some vehicles, the
present front passenger remains
unbuckled, the DIC message will turn
off after several seconds and the
vehicle can be shifted out of P (Park).
See
“Seat Belts” and“Child Restraints”
in the Index for information about the
importance of proper restraint use.
If the driver seat belt, and in some
vehicles the front passenger seat belt,
is unbuckled when driving, the seat
belt reminder chime and light(s) will
come on. See Seat Belt Reminders
0 101. This feature may not function
properly if the airbag readiness light is
on. See Airbag Readiness Light 0102.
How to Wear Seat Belts
Properly
Follow these rules for everyone's
protection. There are additional things to know
about seat belts and children,
including smaller children and infants.
If a child will be riding in the vehicle,
see
Older Children 065 or
Infants and Young Children 067.
Review and follow the rules for
children in addition to the following
rules.
It is very important for all occupants
to buckle up. Statistics show that
unbelted people are hurt more often
in crashes than those who are wearing
seat belts.
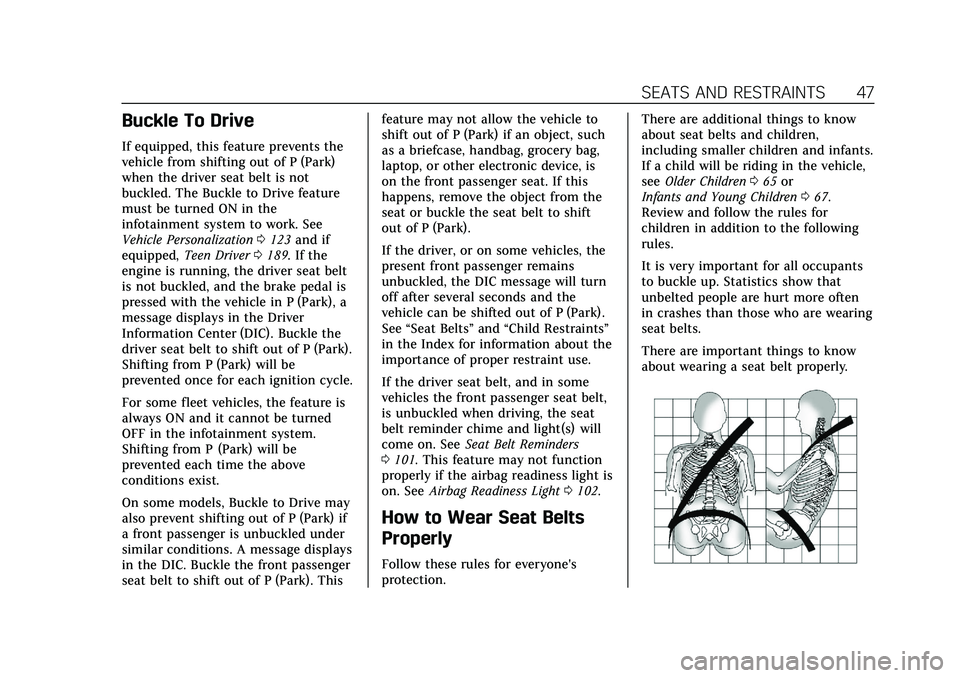
There are important things to know
about wearing a seat belt properly.
Page 58 of 435
Cadillac CT5 Owner Manual (GMNA-Localizing-U.S./Canada-14584312) -
2021 - CRC - 11/23/20
SEATS AND RESTRAINTS 57
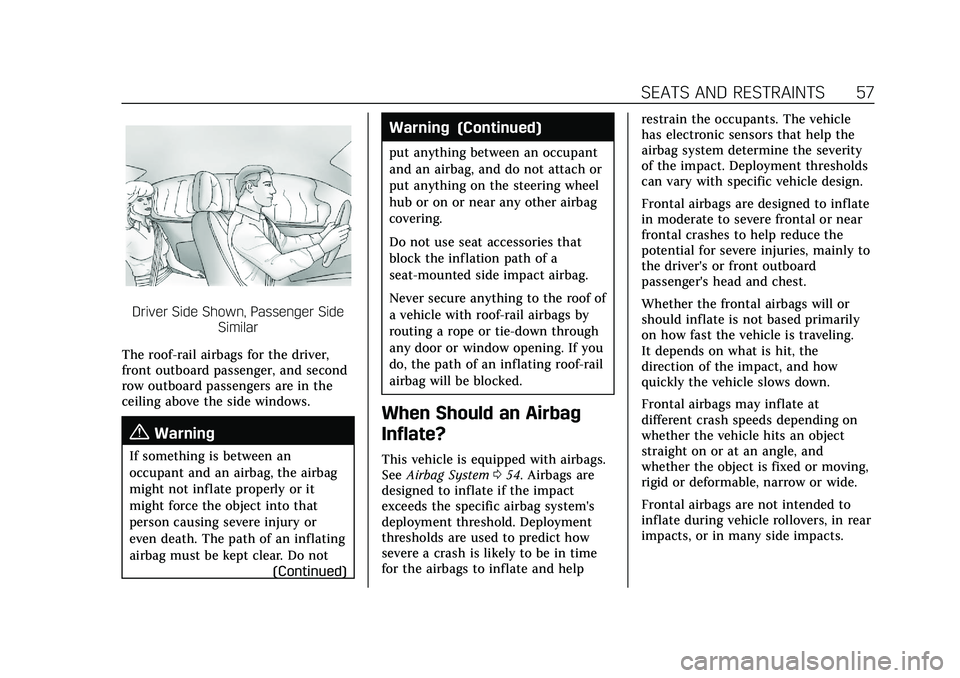
Driver Side Shown, Passenger SideSimilar
The roof-rail airbags for the driver,
front outboard passenger, and second
row outboard passengers are in the
ceiling above the side windows.
{Warning
If something is between an
occupant and an airbag, the airbag
might not inflate properly or it
might force the object into that
person causing severe injury or
even death. The path of an inflating
airbag must be kept clear. Do not (Continued)
Warning (Continued)
put anything between an occupant
and an airbag, and do not attach or
put anything on the steering wheel
hub or on or near any other airbag
covering.
Do not use seat accessories that
block the inflation path of a
seat-mounted side impact airbag.
Never secure anything to the roof of
a vehicle with roof-rail airbags by
routing a rope or tie‐down through
any door or window opening. If you
do, the path of an inflating roof-rail
airbag will be blocked.
When Should an Airbag
Inflate?
This vehicle is equipped with airbags.
SeeAirbag System 054. Airbags are
designed to inflate if the impact
exceeds the specific airbag system's
deployment threshold. Deployment
thresholds are used to predict how
severe a crash is likely to be in time
for the airbags to inflate and help restrain the occupants. The vehicle
has electronic sensors that help the
airbag system determine the severity
of the impact. Deployment thresholds
can vary with specific vehicle design.
Frontal airbags are designed to inflate
in moderate to severe frontal or near
frontal crashes to help reduce the
potential for severe injuries, mainly to
the driver's or front outboard
passenger's head and chest.
Whether the frontal airbags will or
should inflate is not based primarily
on how fast the vehicle is traveling.
It depends on what is hit, the
direction of the impact, and how
quickly the vehicle slows down.
Frontal airbags may inflate at
different crash speeds depending on
whether the vehicle hits an object
straight on or at an angle, and
whether the object is fixed or moving,
rigid or deformable, narrow or wide.
Frontal airbags are not intended to
inflate during vehicle rollovers, in rear
impacts, or in many side impacts.
Page 59 of 435
Cadillac CT5 Owner Manual (GMNA-Localizing-U.S./Canada-14584312) -
2021 - CRC - 11/23/20
58 SEATS AND RESTRAINTS
In addition, the vehicle has advanced
technology frontal airbags. Advanced
technology frontal airbags adjust the
restraint according to crash severity.
Knee airbags are designed to inflate in
moderate to severe frontal or near
frontal impacts. Knee airbags are not
designed to inflate during vehicle
rollovers, in rear impacts, or in many
side impacts.
Seat-mounted side impact airbags are
designed to inflate in moderate to
severe side crashes depending on the
location of the impact. Seat-mounted
side impact airbags are not designed
to inflate in frontal impacts, near
frontal impacts, rollovers, or rear
impacts. A seat-mounted side impact
airbag is designed to inflate on the
side of the vehicle that is struck.
Roof-rail airbags are designed to
inflate in moderate to severe side
crashes depending on the location of
the impact. In addition, these roof-rail
airbags are designed to inflate during
a rollover or in a severe frontal
impact. Roof-rail airbags are not
designed to inflate in rear impacts.
Both roof-rail airbags will inflate wheneither side of the vehicle is struck,
if the sensing system predicts that the
vehicle is about to roll over on its
side, or in a severe frontal impact.
In any particular crash, no one can
say whether an airbag should have
inflated simply because of the vehicle
damage or repair costs.
What Makes an Airbag
Inflate?
In a deployment event, the sensing
system sends an electrical signal
triggering a release of gas from the
inflator. Gas from the inflator fills the
airbag causing the bag to break out of
the cover. The inflator, the airbag, and
related hardware are all part of the
airbag module.
For airbag locations, see
Where Are the
Airbags? 056.
How Does an Airbag
Restrain?
In moderate to severe frontal or near
frontal collisions, even belted
occupants can contact the steering
wheel or the instrument panel. In moderate to severe side collisions,
even belted occupants can contact the
inside of the vehicle.
Airbags supplement the protection
provided by seat belts by distributing
the force of the impact more evenly
over the occupant's body.
Rollover capable roof-rail airbags are
designed to help contain the head and
chest of occupants in the outboard
seating positions in the first and
second rows. The rollover capable
roof-rail airbags are designed to help
reduce the risk of full or partial
ejection in rollover events, although
no system can prevent all such
ejections.
But airbags would not help in many
types of collisions, primarily because
the occupant's motion is not toward
those airbags. See
When Should an
Airbag Inflate? 057.
Airbags should never be regarded as
anything more than a supplement to
seat belts.
Page 98 of 435
Cadillac CT5 Owner Manual (GMNA-Localizing-U.S./Canada-14584312) -
2021 - CRC - 11/24/20
INSTRUMENTS AND CONTROLS 97
.Driver Assistance
.Audio
.Phone
.Navigation
.Options
.Simplify
Performance
If equipped, press the thumbwheel to
enter the Performance menu. Scroll
through the available items.
Friction Bubble :A four quadrant
visual display, indicative of the four
corners of the car, with a “bubble”
showing where the most inertia is
being exerted on the vehicle.
Performance Timer : Press the
thumbwheel to enter the setup menu.
Use the thumbwheel to scroll to select
the desired speed segment, then press
the thumbwheel to enter the
submenu. Use the thumbwheel to
confirm the speed segment selection
or to reset the best time for that
segment. On the next acceleration, the
performance timer will record the
time. Pressing the thumbwheel while the timer is running will cancel the
timer if done before reaching the end
of the segment.
Lap Timer :
Press the thumbwheel
when Lap Timer is displayed to start,
stop, or reset the lap timer. Press the
thumbwheel while the Lap Timer page
is active to start the timer. If the lap
timer is active, pressing the
thumbwheel will stop the current lap
timer and start a new lap. Pressing the
thumbwheel within 10 seconds after
completing the last lap (Stop Lap
Timer option is displayed), the Lap
Timer will stop. Press the thumbwheel
after the lap timer is stopped to reset
the timer, or to view the lap history.
A maximum of 16 laps will be stored.
Launch Control : If equipped, the
Launch Control display allows the
driver to adjust the parameters of the
Launch Control System. See Track
Events and Competitive Driving (V-Series
Only) 0213.
Audio
In the Audio menu, use the
thumbwheel to scroll through audio
presets.
Phone
In the Phone menu, if there is no
active phone call, view recent calls,
or scroll through contacts. If there is
an active call, mute the phone or
switch to handset operation.
Navigation
If there is an active route, press the
thumbwheel to cancel or resume route
guidance, or turn the voice prompts
on or off.
Options
Use the thumbwheel to scroll through
items in the Options menu.
Display Themes
Press the thumbwheel to enter the
Display menu. There are three
instrument cluster display
configurations to choose from. Sport,
Tour, and Track (if equipped). The
style of the cluster will change
depending on the theme selected.
Default is linked to Driver Mode.
Other display themes can be set
If in My Mode then those displays
plus HUD (if equipped) can be set.
Page 99 of 435
Cadillac CT5 Owner Manual (GMNA-Localizing-U.S./Canada-14584312) -
2021 - CRC - 11/24/20
98 INSTRUMENTS AND CONTROLS
.Sport: Displays Coolant
Temperature, Fuel Gauge, Fuel
Range, Compass, Drive Mode
Indicator, Odometer, Speed,
Tachometer, Electronic
Transmission Range, Current Gear,
Speed Limit, Info Area, and
Interaction Area, and Cruise Control
(if engaged).
.Tour: Displays Fuel Gauge, Fuel
Range, Compass, Drive Mode
Indicator, Odometer, Speed,
Tachometer, Electronic
Transmission Range, Current Gear,
Peak Performance, Speed Limit, Info
Area, and Interaction Area, and
Cruise Control (if engaged).
.Track: Displays Coolant
Temperature, Fuel Gauge, Drive
Mode Indicator, Speed, Tachometer,
Electronic Transmission Range,
Current Gear, Info Area, and
Interactive Area.
Preset info tiles shown on each layout:
Sport : Time and Temperature, Oil
Temperature, Tire Status, Oil Pressure
Track : Oil Pressure, Transmission
Fluid Temperature, Tire Pressure and
Tire Temperature, Oil Temperature Tour :
Time and Temperature
Speed Warning
The Speed Warning display allows the
driver to set a speed that they do not
want to exceed. To set the Speed
Warning, press the thumbwheel when
Speed Warning is displayed, or press
the thumbwheel on the main view to
set the speed value. Scroll to adjust
the value. Press the thumbwheel to set
the speed. Once the speed is set, this
feature can be turned off by pressing
the thumbwheel while viewing this
page. If the selected speed limit is
exceeded, a pop-up warning is
displayed with a chime.
Speed Sign
Shows sign information, which comes
from a roadway database in the
onboard navigation, if equipped.
Units
Press the thumbwheel while Units is
displayed to enter the Units menu.
Choose US or metric units by pressing
the thumbwheel while the desired
item is highlighted. A selected mark
will be displayed next to the
selected item. Tachometer
If equipped, the Tachometer allows
the driver to choose between the
traditional tachometer (linear gage) or
the numerical tachometer (shift lights
with numerical Tachometer RPM)
when Track theme is selected.
Tire Pressure
If the tire pressure readings need to be
recalibrated at any time, this option
initiates the Tire Pressure Relearn
function. The selection of relearn
opens a pop-up when the thumbwheel
is pressed for five seconds.
Head-Up Display (HUD) Rotation
Press the thumbwheel while Adjust
Rotation is highlighted to enter Adjust
Mode. Scroll to adjust the angle of the
HUD display. Press the thumbwheel to
confirm and save the setting.
Remote Relearn
If equipped, this feature allows for the
vehicle to relearn remote keys.
See "Programming with Recognized
Remote Keys" under
Remote Keyless
Entry (RKE) System Operation 07.
Page 100 of 435
Cadillac CT5 Owner Manual (GMNA-Localizing-U.S./Canada-14584312) -
2021 - CRC - 11/24/20
INSTRUMENTS AND CONTROLS 99
Fuel Range
Fuel Range displays the approximate
distance the vehicle can be driven
without refueling. LOW will be
displayed when the vehicle is low on
fuel. The fuel range estimate is based
on an average of the vehicle's fuel
economy over recent driving history
and the amount of fuel remaining in
the fuel tank.
Software Info
Press the thumbwheel while Software
Info is highlighted to display open
source software information.
Reset To Defaults
Allows the driver to reset to default
settings.
Simplify
Press the thumbwheel to enter the
Simplify menu. Simplify Mode allows
certain features of the instrument
cluster to be hidden. These features
include info tiles and interactive areas.
Using the thumbwheel, except to
acknowledge an alert, will exit
Simplify Mode.The selected features will stay hidden
even after starting and restarting the
vehicle, unless Simplify Mode is
manually canceled.
Speedometer
The speedometer shows the vehicle's
speed in either kilometers per hour
(km/h) or miles per hour (mph).
Odometer
The odometer shows how far the
vehicle has been driven, in either
kilometers or miles.
Trip Odometer
The trip odometer shows how far the
vehicle has been driven since the trip
odometer was last reset.
The trip odometer is accessed and
reset through the Driver Information
Center (DIC). See
Driver Information
Center (DIC) (Base Level) 0113 or
Driver Information Center (DIC)
(Uplevel) 0116.
Tachometer
The tachometer displays the engine
speed in revolutions per minute (rpm).
For vehicles with the Stop/Start
system, when the ignition is on, the
tachometer indicates the vehicle
status. When pointing to AUTO STOP
(Base Level) or the cluster displays
AUTO STOP text (Uplevel), the engine
is off but the vehicle is on and can
move. The engine could auto start at
any time. When the indicator points
to OFF, the vehicle is off.
When the engine is on, the
tachometer will indicate the engine’s
revolutions per minute (rpm). The
tachometer may vary by several
hundred rpm, during Auto Stop mode,
when the engine is shutting off and
restarting.
Page 105 of 435
Cadillac CT5 Owner Manual (GMNA-Localizing-U.S./Canada-14584312) -
2021 - CRC - 11/24/20
104 INSTRUMENTS AND CONTROLS
require service. The light should come
on to show that it is working when
the ignition is in Service Mode. See
Ignition Positions0224.
Malfunctions are often indicated by
the system before any problem is
noticeable. Being aware of the light
and seeking service promptly when it
comes on may prevent damage.
Caution
If the vehicle is driven continually
with this light on, the emission
control system may not work as
well, the fuel economy may be
lower, and the vehicle may not run
smoothly. This could lead to costly
repairs that might not be covered
by the vehicle warranty.
Caution
Modifications to the engine,
transmission, exhaust, intake,
or fuel system, or the use of
replacement tires that do not meet
the original tire specifications, can
cause this light to come on. This
could lead to costly repairs not
covered by the vehicle warranty.
This could also affect the vehicle’s
ability to pass an Emissions
Inspection/Maintenance test. See
Accessories and Modifications 0310.
If the light is f lashing : A
malfunction has been detected that
could damage the emission control
system and increase vehicle
emissions. Diagnosis and service may
be required.
To help prevent damage, reduce
vehicle speed and avoid hard
accelerations and uphill grades.
If towing a trailer, reduce the amount
of cargo being hauled as soon as
possible. If the light continues to flash, find a
safe place to park. Turn the vehicle off
and wait at least 10 seconds before
restarting the engine. If the light is
still flashing, follow the previous
guidelines and see your dealer for
service as soon as possible.
If the light is on steady :
A
malfunction has been detected.
Diagnosis and service may be
required.
Check the following:
.If fuel has been added to the vehicle
using the capless fuel funnel
adapter, make sure that it has been
removed. See “Filling the Tank with
a Portable Gas Can ”under Filling the
Tank 0298. The diagnostic system
can detect if the adapter has been
left installed in the vehicle, allowing
fuel to evaporate into the
atmosphere. A few driving trips with
the adapter removed may turn off
the light.
.Poor fuel quality can cause
inefficient engine operation and
poor driveability, which may go
away once the engine is warmed up.
If this occurs, change the fuel