jump cable CADILLAC CT5 2021 Owner's Manual
[x] Cancel search | Manufacturer: CADILLAC, Model Year: 2021, Model line: CT5, Model: CADILLAC CT5 2021Pages: 435, PDF Size: 8.9 MB
Page 332 of 435

Cadillac CT5 Owner Manual (GMNA-Localizing-U.S./Canada-14584312) -
2021 - CRC - 11/23/20
VEHICLE CARE 331
Warning (Continued)
more information go to
www.P65Warnings.ca.gov/
passenger-vehicle.
See California Proposition 65 Warning
0 309 and the back cover.
Vehicle Storage
{Warning
Batteries have acid that can burn
you and gas that can explode. You
can be badly hurt if you are not
careful. See Jump Starting - North
America 0368 for tips on working
around a battery without
getting hurt.
Infrequent Usage: Remove the black,
negative (−) cable from the battery to
keep the battery from running down.
Extended Storage: Remove the black,
negative (−) cable from the battery or
use a battery trickle charger.
All-Wheel Drive
If the vehicle is equipped with
All-Wheel-Drive (AWD), this is an
additional system that needs
lubrication.
Transfer Case
Under normal driving conditions,
transfer case fluid does not require
maintenance unless there is a fluid
leak or unusual noise. If required,
have the transfer case serviced by
your dealer.
Park Brake and P (Park)
Mechanism Check
{Warning
When you are doing this check, the
vehicle could begin to move. You or
others could be injured and
property could be damaged. Make
sure there is room in front of the
vehicle in case it begins to roll. Be
ready to apply the regular brake at
once should the vehicle begin
to move. Park on a fairly steep hill, with the
vehicle facing downhill. Keeping your
foot on the regular brake, set the
parking brake.
.To check the parking brake's
holding ability: With the engine
running and the transmission in
N (Neutral), slowly remove foot
pressure from the regular brake
pedal. Do this until the vehicle is
held by the parking brake only.
.To check the P (Park) mechanism's
holding ability: With the engine
running, shift to P (Park). Then
release the parking brake followed
by the regular brake.
Contact your dealer if service is
required.
Wiper Blade Replacement
Windshield wiper blades should be
inspected for wear or cracking.
It is a good idea to clean or replace
the wiper blade assembly on a regular
basis or when worn. For proper
windshield wiper blade length and
type, see Maintenance Replacement
Parts 0393.
Page 369 of 435

Cadillac CT5 Owner Manual (GMNA-Localizing-U.S./Canada-14584312) -
2021 - CRC - 11/23/20
368 VEHICLE CARE
10. Press the on/off button (5) to turnthe tire sealant and compressor
kit off.
Be careful while handling the
compressor as it could be warm
after usage.
11. Unplug the power plug (9) from the accessory power outlet in the
vehicle.
12. Turn the air only hose (10) counterclockwise to remove it from
the tire valve stem.
13. Replace the tire valve stem cap.
14. Return the air only hose (10) and power plug (9) back to their
original storage location.
15. Return the equipment to its original storage location in the
vehicle.
The tire sealant and compressor kit
has accessory adapters located in a
compartment on the bottom of its
housing that can be used to inflate air
mattresses, balls, etc.Storing the Tire Sealant
and Compressor Kit
The tire sealant and compressor kit is
in a bag in the trunk. 1. Open the trunk. See Trunk018.
2. Lift the load floor.
3. Remove the tire sealant and compressor kit bag.
4. Remove the tire sealant and compressor kit from the bag.
To store the tire sealant and
compressor kit, reverse the steps.
Jump Starting
Jump Starting - North
America
For more information about the
vehicle battery, see Battery - North
America 0330.
If the battery has run down, try to use
another vehicle and some jumper
cables to start your vehicle. Be sure to
use the following steps to do it safely.
{Warning
WARNING: Battery posts,
terminals, and related accessories
contain lead and lead compounds,
chemicals known to the State of
California to cause cancer and birth
defects or other reproductive harm.
Batteries also contain other
chemicals known to the State of
California to cause cancer. WASH
HANDS AFTER HANDLING. For
more information go to
www.P65Warnings.ca.gov/
passenger-vehicle.
Page 371 of 435

Cadillac CT5 Owner Manual (GMNA-Localizing-U.S./Canada-14584312) -
2021 - CRC - 11/23/20
370 VEHICLE CARE
Caution (Continued)
by the vehicle warranty. Whenever
possible, turn off or unplug all
accessories on either vehicle when
jump starting.
4. Turn the ignition off. Turn off all lights and accessories in both
vehicles, except the hazard warning
flashers if needed.
{Warning
An electric fan can start up even
when the engine is not running and
can injure you. Keep hands,
clothing, and tools away from any
underhood electric fan.
{Warning
Using a match near a battery can
cause battery gas to explode. People
have been hurt doing this, and
some have been blinded. Use a
flashlight if you need more light.
(Continued)
Warning (Continued)
Battery fluid contains acid that can
burn you. Do not get it on you.
If you accidentally get it in your
eyes or on your skin, flush the place
with water and get medical help
immediately.
{Warning
Fans or other moving engine parts
can injure you badly. Keep your
hands away from moving parts
once the engine is running.
5. Connect one end of the red positive (+) cable to the remote
positive (+) terminal on the
discharged battery.
6. Connect the other end of the red positive (+) cable to the positive (+)
terminal of the good battery.
7. Connect one end of the black negative (–) cable to the
negative (–) terminal of the good
battery. Do not let the other end touch
anything until the next step. The
other end of the negative (–) cable
does not go to the dead battery.
It goes to a heavy, unpainted metal
engine part.
8. Connect the other end of the black negative (–) cable to the
negative (–) grounding point for the
discharged battery.
9. Start the engine in the vehicle with the good battery and run the
engine at idle speed for at least
four minutes.
10. Try to start the vehicle that had the dead battery. If it will not start
after a few tries, it probably needs
service.
Caution
If the jumper cables are connected
or removed in the wrong order,
electrical shorting may occur and
damage the vehicle. The repairs
would not be covered by the vehicle
warranty. Always connect and
remove the jumper cables in the
(Continued)
Page 372 of 435

Cadillac CT5 Owner Manual (GMNA-Localizing-U.S./Canada-14584312) -
2021 - CRC - 11/23/20
VEHICLE CARE 371
Caution (Continued)
correct order, making sure that the
cables do not touch each other or
other metal.
Jumper Cable Removal
Reverse the sequence exactly when
removing the jumper cables.
After starting the disabled vehicle and
removing the jumper cables, allow it
to idle for several minutes.
Towing the Vehicle
Caution
Incorrectly towing a disabled
vehicle may cause damage. The
damage would not be covered by
the vehicle warranty. Do not lash or
hook to suspension components.
Use the proper straps around the
tires to secure the vehicle. Do not
drag a locked wheel/tire. Use tire
skates or dollies under any locked
wheel/tire while loading the vehicle. (Continued)
Caution (Continued)
Do not use a sling type lift to tow
the vehicle. This could damage the
vehicle.
GM recommends a flatbed tow truck
to transport a disabled vehicle. Use
ramps to help reduce approach angles,
if necessary. A towed vehicle should
have its drive wheels off the ground.
Contact Roadside Service or a
professional towing service if the
disabled vehicle must be towed. See
Roadside Service 0405.
Tow Eye
Caution
Improper use of the tow eye can
damage the vehicle. If equipped, use
the tow eye to load a disabled
vehicle onto a flatbed tow truck
from a flat road surface, or to move
the vehicle a short distance. Use
caution and low speeds. The
transmission must be
in (N) Neutral when moving the
vehicle. If the vehicle is equipped with a tow
eye, only use the tow eye to pull the
vehicle onto a flatbed car carrier from
a flat road surface. Do not use the tow
eye to pull the vehicle from snow,
mud, or sand.
Front Tow Eye
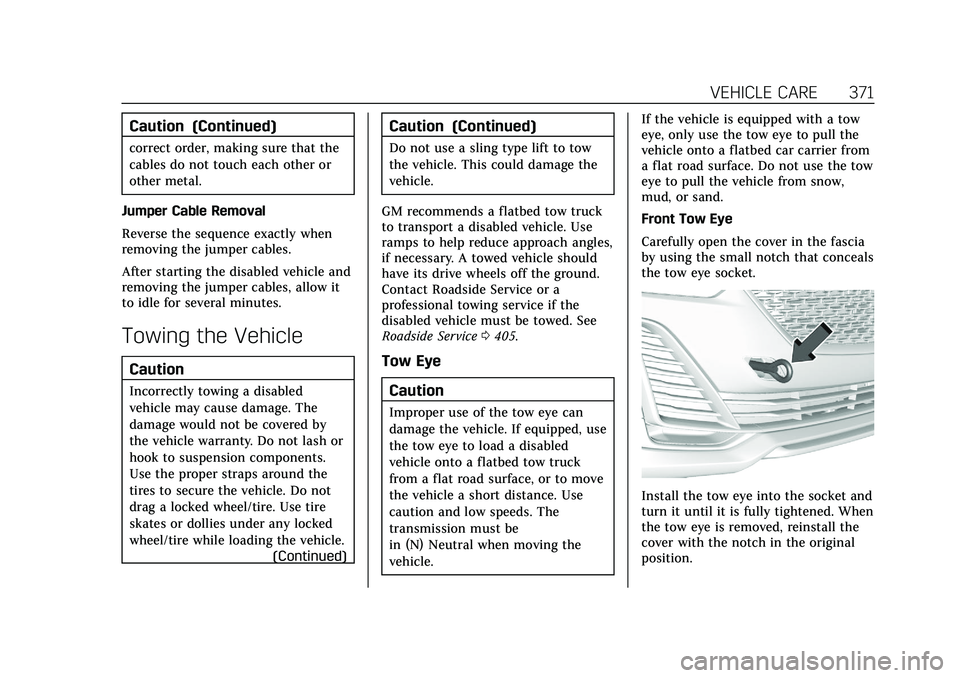
Carefully open the cover in the fascia
by using the small notch that conceals
the tow eye socket.
Install the tow eye into the socket and
turn it until it is fully tightened. When
the tow eye is removed, reinstall the
cover with the notch in the original
position.