ECO mode CADILLAC CT6 2017 1.G User Guide
[x] Cancel search | Manufacturer: CADILLAC, Model Year: 2017, Model line: CT6, Model: CADILLAC CT6 2017 1.GPages: 337, PDF Size: 3.89 MB
Page 129 of 337
Cadillac CT6 Owner Manual (GMNA-Localizing-MidEast-10293390) - 2017 -
CRC - 6/21/16
128 INSTRUMENTS AND CONTROLS
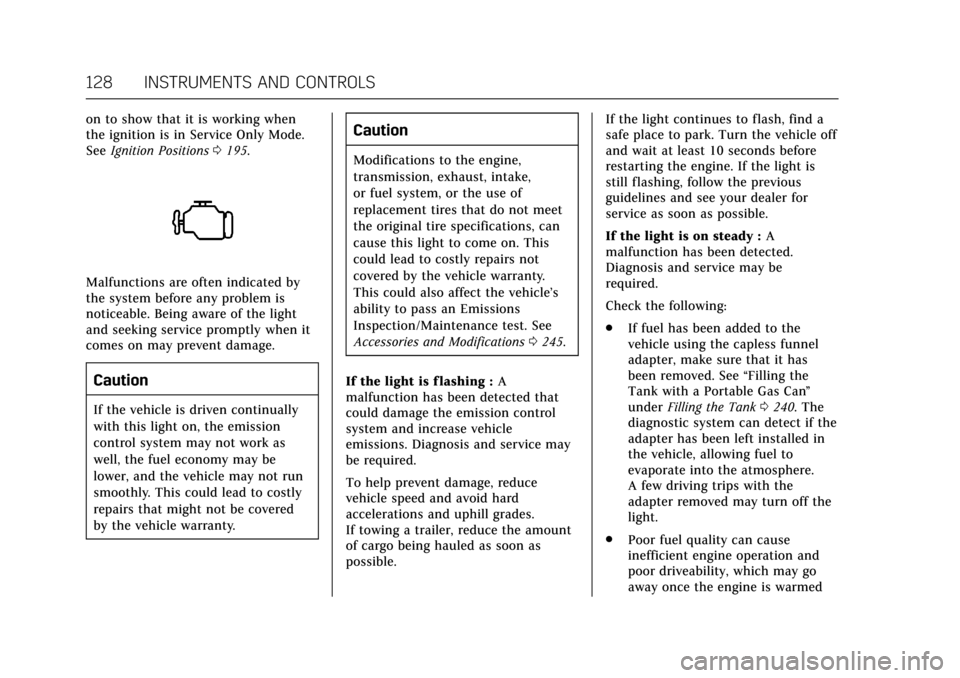
on to show that it is working when
the ignition is in Service Only Mode.
SeeIgnition Positions 0195.
Malfunctions are often indicated by
the system before any problem is
noticeable. Being aware of the light
and seeking service promptly when it
comes on may prevent damage.
Caution
If the vehicle is driven continually
with this light on, the emission
control system may not work as
well, the fuel economy may be
lower, and the vehicle may not run
smoothly. This could lead to costly
repairs that might not be covered
by the vehicle warranty.
Caution
Modifications to the engine,
transmission, exhaust, intake,
or fuel system, or the use of
replacement tires that do not meet
the original tire specifications, can
cause this light to come on. This
could lead to costly repairs not
covered by the vehicle warranty.
This could also affect the vehicle’s
ability to pass an Emissions
Inspection/Maintenance test. See
Accessories and Modifications 0245.
If the light is f lashing : A
malfunction has been detected that
could damage the emission control
system and increase vehicle
emissions. Diagnosis and service may
be required.
To help prevent damage, reduce
vehicle speed and avoid hard
accelerations and uphill grades.
If towing a trailer, reduce the amount
of cargo being hauled as soon as
possible. If the light continues to flash, find a
safe place to park. Turn the vehicle off
and wait at least 10 seconds before
restarting the engine. If the light is
still flashing, follow the previous
guidelines and see your dealer for
service as soon as possible.
If the light is on steady :
A
malfunction has been detected.
Diagnosis and service may be
required.
Check the following:
. If fuel has been added to the
vehicle using the capless funnel
adapter, make sure that it has
been removed. See “Filling the
Tank with a Portable Gas Can ”
under Filling the Tank 0240. The
diagnostic system can detect if the
adapter has been left installed in
the vehicle, allowing fuel to
evaporate into the atmosphere.
A few driving trips with the
adapter removed may turn off the
light.
. Poor fuel quality can cause
inefficient engine operation and
poor driveability, which may go
away once the engine is warmed
Page 135 of 337
Cadillac CT6 Owner Manual (GMNA-Localizing-MidEast-10293390) - 2017 -
CRC - 6/21/16
134 INSTRUMENTS AND CONTROLS
If the light comes on and stays on, it
means that oil is not flowing through
the engine properly. The vehicle could
be low on oil and might have some
other system problem. See your dealer.
Low Fuel Warning Light
This light is near the fuel gauge and
comes on briefly when the ignition is
turned on as a check to show it is
working. For vehicles with a
reconfigurable cluster, this light is in
the display area and may not come on
when the ignition is turned on.
It also comes on when the fuel tank is
low on fuel. The light turns off when
fuel is added. If it does not, have the
vehicle serviced.
Auto Stop Mode (Uplevel
Cluster)
This light comes on when the engine
is in an Auto Stop.
SeeStarting the Engine 0196.
Security Light
On some vehicles the immobilizer
light should come on briefly as the
engine is started. If it does not come
on, have the vehicle serviced by your
dealer. If the system is working
normally, the indicator light turns off. For vehicles with the reconfigurable
cluster, this light may not come on
when the engine is started.
If the light stays on and the engine
does not start, there could be a
problem with the theft-deterrent
system. See
Immobilizer
Operation 044.
High-Beam On Light
This light comes on when the
high-beam headlamps are in use.
See Headlamp High/Low-Beam
Changer 0164.
Page 143 of 337
Cadillac CT6 Owner Manual (GMNA-Localizing-MidEast-10293390) - 2017 -
CRC - 6/21/16
142 INSTRUMENTS AND CONTROLS
vehicle that may be noticed. At the
point that features are disabled, this
message displays. Turn off
unnecessary accessories to allow the
battery to recharge.
LOW BATTERY
This message is displayed when the
battery voltage is low. See
Battery0263.
SERVICE BATTERY CHARGING
SYSTEM
This message is displayed when there
is a fault in the battery charging
system. Take the vehicle to your
dealer for service.
TRANSPORT MODE ON
This message is displayed when the
vehicle is in transport mode. Some
features can be disabled while in this
mode, including Remote Keyless
Entry (RKE), remote start, and the
vehicle alarm system. Take the vehicle
to your dealer for service to turn
transport mode off.
Brake System Messages
BRAKE FLUID LOW
This message is displayed when the
brake fluid level is low. See Brake
Fluid 0262.
BRAKES OVERHEATED
This message is displayed when the
brakes are becoming overheated. This
may be seen when driving on hills.
Shift to a lower gear.
STEP ON BRAKE TO RELEASE
PARK BRAKE
This message is displayed if you
attempt to release the Electric Parking
Brake without the brake pedal applied.
See Electric Parking Brake 0205.
RELEASE PARKING BRAKE
This message is displayed if the
Electric Parking Brake is on while the
vehicle is in motion. See Electric
Parking Brake 0205.
SERVICE BRAKE ASSIST
This message may be displayed when
there is a problem with the brake
boost assist system. The brake boost assist motor may be heard and brake
pedal pulsation may be felt. This is
normal under these conditions. Take
the vehicle to your dealer for service.
SERVICE PARKING BRAKE
This message is displayed when there
is a problem with the parking brake.
Take the vehicle to your dealer for
service.
Cruise Control Messages
ADAPTIVE CRUISE SET TO XXX
This message displays when the
Adaptive Cruise Control (ACC) speed is
set. See
Adaptive Cruise Control 0213.
ADAPTIVE CRUISE TEMPORARILY
UNAVAILABLE
This message displays when
attempting to activate Adaptive Cruise
Control (ACC) when it is temporarily
unavailable. The ACC system does not
need service.
Page 153 of 337
Cadillac CT6 Owner Manual (GMNA-Localizing-MidEast-10293390) - 2017 -
CRC - 6/21/16
152 INSTRUMENTS AND CONTROLS
Vehicle Personalization
Use the audio system controls to
access the personalization menus for
customizing vehicle features.
The following are all possible
personalization features. Depending
on the vehicle, some may not be
available.
Infotainment System Audio System
Controls
To access the personalization menu:1. Touch SETTINGS on the Home Page of the infotainment system
display.
2. Touch the desired feature to display a list of available options.
3. Touch to select the desired feature setting.
4. Touch
0Back to exit or move
backward in a menu.
Personalization Menus
The following list of menu items may
be available:
. Time and Date .
Language (Language)
. Valet Mode
. Radio
. Vehicle
. Bluetooth
. Apple CarPlay
. Android Auto
. Voice
. TouchPad
. Display
. Rear Camera
. Return to Factory Settings
. Software Information
Each menu is detailed in the following
information.
Time and Date
Manually set the time and date. See
Clock 0111.
Language (Language)
Select Language, then select from the
available language(s). The selected language will display on
the system, and voice recognition will
reflect the selected language.
Valet Mode
(If Equipped)
This will lock the infotainment system
and steering wheel controls. It may
also limit access to vehicle storage
locations (if equipped).
To enable valet mode:
1. Enter a four-digit code on the keypad.
2. Select Enter to go to the confirmation screen.
3. Re-enter the four-digit code.
Touch LOCK or UNLOCK to lock or
unlock the system. Touch Back to go
back to the previous menu.
The four-digit code can be texted to a
paired phone if forgotten by pressing
the option button on the Valet Mode
lock screen.
Radio
Select and the following may display:
. Manage Favorites
. Number of Favorites Shown
Page 185 of 337
Cadillac CT6 Owner Manual (GMNA-Localizing-MidEast-10293390) - 2017 -
CRC - 6/21/16
184 DRIVING AND OPERATING
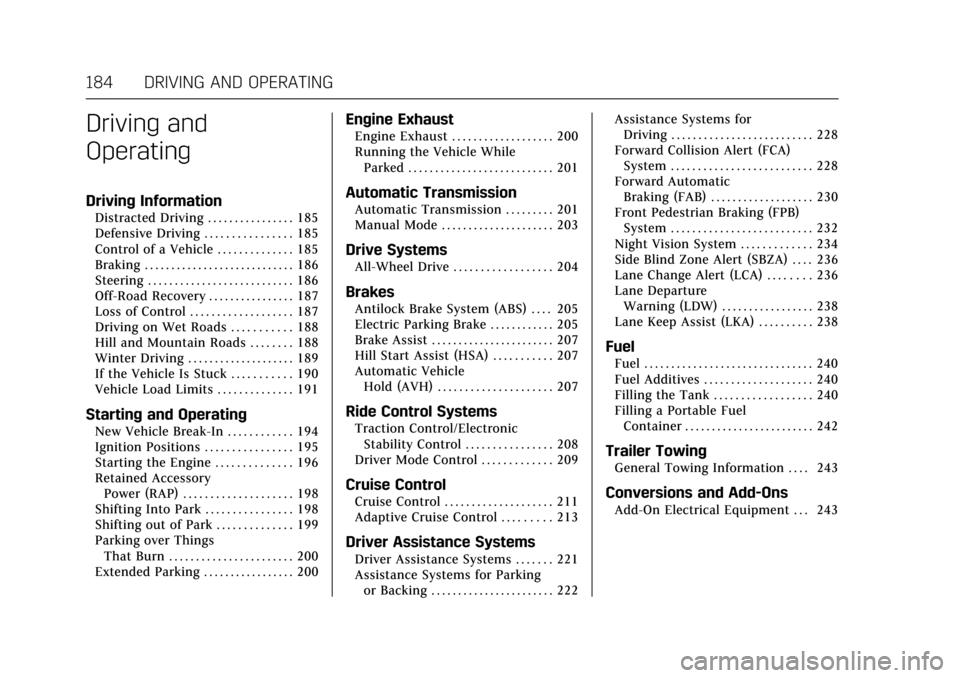
Driving and
Operating
Driving Information
Distracted Driving . . . . . . . . . . . . . . . . 185
Defensive Driving . . . . . . . . . . . . . . . . 185
Control of a Vehicle . . . . . . . . . . . . . . 185
Braking . . . . . . . . . . . . . . . . . . . . . . . . . . . . 186
Steering . . . . . . . . . . . . . . . . . . . . . . . . . . . 186
Off-Road Recovery . . . . . . . . . . . . . . . . 187
Loss of Control . . . . . . . . . . . . . . . . . . . 187
Driving on Wet Roads . . . . . . . . . . . 188
Hill and Mountain Roads . . . . . . . . 188
Winter Driving . . . . . . . . . . . . . . . . . . . . 189
If the Vehicle Is Stuck . . . . . . . . . . . 190
Vehicle Load Limits . . . . . . . . . . . . . . 191
Starting and Operating
New Vehicle Break-In . . . . . . . . . . . . 194
Ignition Positions . . . . . . . . . . . . . . . . 195
Starting the Engine . . . . . . . . . . . . . . 196
Retained AccessoryPower (RAP) . . . . . . . . . . . . . . . . . . . . 198
Shifting Into Park . . . . . . . . . . . . . . . . 198
Shifting out of Park . . . . . . . . . . . . . . 199
Parking over Things That Burn . . . . . . . . . . . . . . . . . . . . . . . 200
Extended Parking . . . . . . . . . . . . . . . . . 200
Engine Exhaust
Engine Exhaust . . . . . . . . . . . . . . . . . . . 200
Running the Vehicle While Parked . . . . . . . . . . . . . . . . . . . . . . . . . . . 201
Automatic Transmission
Automatic Transmission . . . . . . . . . 201
Manual Mode . . . . . . . . . . . . . . . . . . . . . 203
Drive Systems
All-Wheel Drive . . . . . . . . . . . . . . . . . . 204
Brakes
Antilock Brake System (ABS) . . . . 205
Electric Parking Brake . . . . . . . . . . . . 205
Brake Assist . . . . . . . . . . . . . . . . . . . . . . . 207
Hill Start Assist (HSA) . . . . . . . . . . . 207
Automatic VehicleHold (AVH) . . . . . . . . . . . . . . . . . . . . . 207
Ride Control Systems
Traction Control/ElectronicStability Control . . . . . . . . . . . . . . . . 208
Driver Mode Control . . . . . . . . . . . . . 209
Cruise Control
Cruise Control . . . . . . . . . . . . . . . . . . . . 211
Adaptive Cruise Control . . . . . . . . . 213
Driver Assistance Systems
Driver Assistance Systems . . . . . . . 221
Assistance Systems for Parking or Backing . . . . . . . . . . . . . . . . . . . . . . . 222 Assistance Systems for
Driving . . . . . . . . . . . . . . . . . . . . . . . . . . 228
Forward Collision Alert (FCA) System . . . . . . . . . . . . . . . . . . . . . . . . . . 228
Forward Automatic
Braking (FAB) . . . . . . . . . . . . . . . . . . . 230
Front Pedestrian Braking (FPB) System . . . . . . . . . . . . . . . . . . . . . . . . . . 232
Night Vision System . . . . . . . . . . . . . 234
Side Blind Zone Alert (SBZA) . . . . 236
Lane Change Alert (LCA) . . . . . . . . 236
Lane Departure Warning (LDW) . . . . . . . . . . . . . . . . . 238
Lane Keep Assist (LKA) . . . . . . . . . . 238
Fuel
Fuel . . . . . . . . . . . . . . . . . . . . . . . . . . . . . . . 240
Fuel Additives . . . . . . . . . . . . . . . . . . . . 240
Filling the Tank . . . . . . . . . . . . . . . . . . 240
Filling a Portable Fuel Container . . . . . . . . . . . . . . . . . . . . . . . . 242
Trailer Towing
General Towing Information . . . . 243
Conversions and Add-Ons
Add-On Electrical Equipment . . . 243
Page 195 of 337
Cadillac CT6 Owner Manual (GMNA-Localizing-MidEast-10293390) - 2017 -
CRC - 6/21/16
194 DRIVING AND OPERATING
{Warning
Things inside the vehicle can
strike and injure people in a
sudden stop or turn, or in a
crash.
.Put things in the cargo
area of the vehicle. In the
cargo area, put them as far
forward as possible. Try to
spread the weight evenly.
.Never stack heavier things,
like suitcases, inside the
vehicle so that some of
them are above the tops of
the seats.
.Do not leave an unsecured
child restraint in the
vehicle.
.Secure loose items in the
vehicle.
.Do not leave a seat folded
down unless needed.
Starting and Operating
New Vehicle Break-In
Follow these recommended guidelines
during the first 2 400 km (1,500 mi) of
driving this vehicle. Parts have a
break-in period and performance will
be better in the long run.
For the first 2 400 km (1,500 mi):
. Avoid full throttle starts and
abrupt stops.
. Do not exceed 4000 engine rpm.
. Avoid driving at any one constant
speed, fast or slow.
. Avoid downshifting to brake or
slow the vehicle when the engine
speed will exceed 4000 rpm.
. Do not let the engine labor. Never
lug the engine in high gear at low
speeds.
. Do not participate in track events,
sport driving schools, or similar
activities during this break-in
period. .
Check engine oil with every
refueling and add if necessary. Oil
and fuel consumption may be
higher than normal during the
first 2 400 km (1,500 mi).
. To break in new tires, drive at
moderate speeds and avoid hard
cornering for the first
300 km (200 mi). New tires do not
have maximum traction and may
tend to slip.
. New brake linings also need a
break–in period. Avoid making
hard stops during the first
300 km (200 mi). This is
recommended every time brake
linings are replaced.
Page 197 of 337
Cadillac CT6 Owner Manual (GMNA-Localizing-MidEast-10293390) - 2017 -
CRC - 6/21/16
196 DRIVING AND OPERATING
If the vehicle cannot be pulled over,
and must be shut off while driving,
press and hold ENGINE START/STOP
for longer than two seconds, or press
twice in five seconds.
ACC/ACCESSORY (Amber Indicator
Light) :This mode allows you to use
some electrical accessories when the
engine is off.
With the ignition off, pressing the
button one time without the brake
pedal applied will place the ignition
system in ACC/ACCESSORY.
The ignition will switch from ACC/
ACCESSORY to OFF after five minutes
to prevent battery rundown.
ON/RUN/START (Green Indicator
Light) : This mode is for driving and
starting. With the ignition off, and the
brake pedal applied, pressing the
button once will place the ignition
system in ON/RUN/START. Once
engine cranking begins, release the
button. Engine cranking will continue
until the engine starts. See Starting the
Engine 0196. The ignition will then
remain in ON/RUN. Service Only Mode
This power mode is available for
service and diagnostics, and to verify
the proper operation of the
malfunction indicator lamp as may be
required for emission inspection
purposes. With the vehicle off, and the
brake pedal not applied, pressing and
holding the button for more than
five seconds will place the vehicle in
Service Only Mode. The instruments
and audio systems will operate as they
do in ON/RUN, but the vehicle will
not be able to be driven. The engine
will not start in Service Only Mode.
Press the button again to turn the
vehicle off.
Starting the Engine
Move the shift lever to P (Park) or
N (Neutral). To restart the engine
when the vehicle is already moving,
use N (Neutral) only.
Caution
Do not try to shift to P (Park) if the
vehicle is moving. If you do, you
could damage the transmission.
Shift to P (Park) only when the
vehicle is stopped.
Caution
If you add electrical parts or
accessories, you could change the
way the engine operates. Any
resulting damage would not be
covered by the vehicle warranty. See
Add-On Electrical Equipment
0243.
Starting Procedure 1. With the Keyless Access system, the Remote Keyless Entry (RKE)
transmitter must be in the
vehicle. Press ENGINE START/
STOP with the brake pedal
applied. When the engine begins
cranking, let go of the button.
Page 198 of 337
Cadillac CT6 Owner Manual (GMNA-Localizing-MidEast-10293390) - 2017 -
CRC - 6/21/16
DRIVING AND OPERATING 197
The idle speed will go down as
the engine gets warm. Do not
race the engine immediately
after starting it.
If the RKE transmitter is not in
the vehicle, if there is
interference, or if the RKE
battery is low, a Driver
Information Center (DIC)
message will display. SeeKey and
Lock Messages 0145 and Remote
Keyless Entry (RKE) System
Operation 029.
Caution
Cranking the engine for long
periods of time, by returning the
ignition to the START position
immediately after cranking has
ended, can overheat and damage
the cranking motor, and drain the
battery. Wait at least 15 seconds
between each try, to let the
cranking motor cool down.
2. If the engine does not start after five to 10 seconds, especially in
very cold weather (below −18 °Cor 0 °F), it could be flooded with
too much gasoline. Try pushing
the accelerator pedal all the way
to the floor and holding it there
as you press ENGINE START/
STOP. Wait at least 15 seconds
between each try, to allow the
cranking motor to cool down.
When the engine starts, release
the accelerator. If the vehicle
starts briefly but then stops
again, do the same thing. This
clears the extra gasoline from the
engine. Do not race the engine
immediately after starting it.
Operate the engine and
transmission gently until the oil
warms up and lubricates all
moving parts.
Stop/Start System
{Warning
Exiting the vehicle without first
shifting into P (Park) may cause the
vehicle to move. You or others may
be injured. Because the vehicle has
the auto engine stop/start feature,
(Continued)
Warning (Continued)
the vehicle's engine might seem to
be shut off; however, once the brake
pedal is released, the engine will
start up again.
Shift to P (Park) and turn the
ignition to LOCK/OFF, before exiting
the vehicle.
The vehicle has a fuel saving stop/
start system to shut off the engine
and help conserve fuel.
Auto Engine Stop/Start
When the brakes are applied and the
vehicle is at a complete stop, the
engine may turn off. When stopped,
the tachometer may point to AUTO
STOP, or the Auto Stop light may
come on in the instrument cluster. See
Tachometer 0121 and Auto Stop Mode
(Uplevel Cluster) 0134. When the
brake pedal is released or the
accelerator pedal is pressed, the
engine may restart.
Page 204 of 337
Cadillac CT6 Owner Manual (GMNA-Localizing-MidEast-10293390) - 2017 -
CRC - 6/21/16
DRIVING AND OPERATING 203
D :This position is for normal driving.
It provides the best fuel economy.
If you need more power for passing,
and you are:
. Going less than 55 km/h (35 mph),
push the accelerator pedal about
halfway down.
. Going about 55 km/h (35 mph) or
more, push the accelerator all the
way down.
The transmission will shift down
to a lower gear and have more
power.
Downshifting the transmission in
slippery road conditions could result
in skidding. See “Skidding”underLoss
of Control 0187.
M : This mode can be entered by
moving the shift lever from D (Drive)
to M (Manual Mode). M (Manual
Mode) allows the driver to select gears
appropriate for current driving
conditions. M (Manual Mode) can be
exited by returning the shift lever to
D (Drive). See Manual Mode0203.Caution
Spinning the tires or holding the
vehicle in one place on a hill using
only the accelerator pedal may
damage the transmission. The
repair will not be covered by the
vehicle warranty. If you are stuck,
do not spin the tires. When
stopping on a hill, use the brakes to
hold the vehicle in place.
While in Sport Mode, the vehicle
monitors driving behavior and
automatically enables performance
shift features when spirited driving is
detected. These features maintain
lower transmission gears to increase
available engine braking and improve
acceleration response. The vehicle will
exit these features and return to
normal operation after a short period
when no spirited driving is detected.
See Driver Mode Control 0209.
Manual Mode
Tap Shift
Caution
Driving with the engine at a high
rpm without upshifting while using
Tap Shift, could damage the vehicle.
Always upshift when necessary
while using Tap Shift.
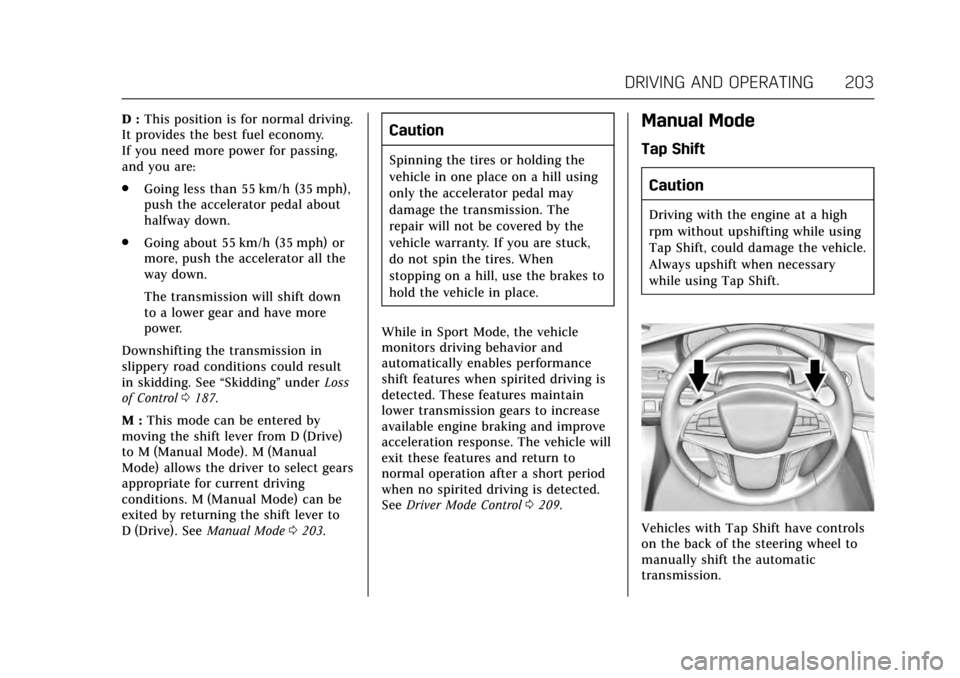
Vehicles with Tap Shift have controls
on the back of the steering wheel to
manually shift the automatic
transmission.
Page 205 of 337
Cadillac CT6 Owner Manual (GMNA-Localizing-MidEast-10293390) - 2017 -
CRC - 6/21/16
204 DRIVING AND OPERATING
To enter Permanent Tap Shift Mode:1. Move the shift lever from D (Drive) to M (Manual Mode).
While in Tap Shift Mode, the M
of the PRNDM section of the
instrument cluster will become
highlighted, and the current gear
is indicated.
2. Tap the left control toward the driver to downshift, and the right
control toward the driver to
upshift. To shift to the lowest
available gear, press and hold the
left control.
3. To exit, move the shift lever back to D (Drive).
With the shift lever in D (Drive) and
not in Permanent Tap Shift Mode, the
Tap Shift controls will activate a
temporary manual Tap Shift mode,
allowing the transmission to be
manually shifted. The vehicle exits
Temporary Tap Shift Mode after the
accelerator pedal is steady for
six seconds. Temporary Tap Shift
Mode holds a gear longer without
exiting when coasting, to provide
powertrain braking. The Temporary Tap Shift Mode can also be
deactivated by holding the right
upshift control briefly.
While using Tap Shift, the vehicle will
have firmer, quicker shifting. You can
use this for sport driving or when
climbing or descending hills, to stay in
gear longer, or to downshift for more
power or engine braking.
The transmission will only allow you
to shift into gears appropriate for the
vehicle speed and engine revolutions
per minute (rpm). The transmission
will not downshift if the engine rpm is
too high in the next lower gear,
or upshift to the next higher gear
when the maximum engine rpm is
reached.
If shifting is prevented for any reason,
a SHIFT DENIED message will be
displayed in the instrument cluster.
See
Transmission Messages 0151.
When accelerating the vehicle from a
stop in snowy and icy conditions, it is
suggested to shift into second gear.
A higher gear allows the vehicle to
gain more traction on slippery
surfaces.Drive Systems
All-Wheel Drive
Vehicles with this feature always send
engine power to all four wheels. It is
fully automatic, and adjusts itself as
needed for road conditions.