lock CADILLAC CTS 2004 1.G Owners Manual
[x] Cancel search | Manufacturer: CADILLAC, Model Year: 2004, Model line: CTS, Model: CADILLAC CTS 2004 1.GPages: 454, PDF Size: 2.87 MB
Page 1 of 454
Seats and Restraint Systems........................... 1-1
Front Seats
............................................... 1-2
Rear Seats
............................................... 1-7
Safety Belts
.............................................. 1-9
Child Restraints
.......................................1-29
Airbag Systems
........................................1-48
Restraint System Check
............................1-59
Features and Controls..................................... 2-1
Keys
........................................................ 2-3
Doors and Locks
....................................... 2-8
Windows
.................................................2-14
Theft-Deterrent Systems
............................2-18
Starting and Operating Your Vehicle
...........2-21
Mirrors
....................................................2-41
OnStar
®System
......................................2-45
HomeLink®Transmitter
.............................2-46
Storage Areas
.........................................2-50
Sunroof
..................................................2-52
Vehicle Personalization
.............................2-53
Instrument Panel............................................. 3-1
Instrument Panel Overview
.......................... 3-4
Climate Controls
......................................3-29
Warning Lights, Gages, and Indicators
........3-37
Message Center
.......................................3-53Driver Information Center (DIC)
..................3-60
Audio System(s)
.....................................3-107
Driving Your Vehicle....................................... 4-1
Your Driving, the Road, and Your Vehicle
........ 4-2
Towing
...................................................4-32
Service and Appearance Care.......................... 5-1
Service
..................................................... 5-3
Fuel
......................................................... 5-5
Checking Things Under the Hood
...............5-10
Rear Axle
...............................................5-51
Bulb Replacement
....................................5-52
Windshield Wiper Blade Replacement
.........5-56
Tires
......................................................5-58
Appearance Care
.....................................5-92
Vehicle Identi�cation
.................................5-99
Electrical System
....................................5-100
Capacities and Speci�cations
...................5-111
Maintenance Schedule..................................... 6-1
Maintenance Schedule
................................ 6-2
Customer Assistance and Information.............. 7-1
Customer Assistance and Information
........... 7-2
Reporting Safety Defects
...........................7-10
Index.................................................................1
2004 Cadillac CTS/CTS-VOwner ManualM
Page 8 of 454
Front Seats
Manual Passenger Seat
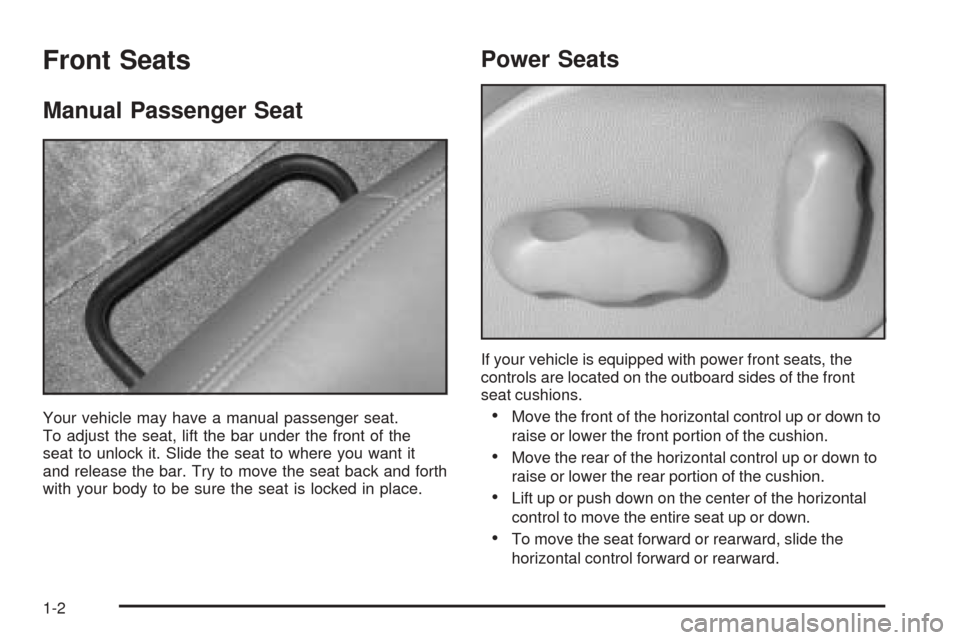
Your vehicle may have a manual passenger seat.
To adjust the seat, lift the bar under the front of the
seat to unlock it. Slide the seat to where you want it
and release the bar. Try to move the seat back and forth
with your body to be sure the seat is locked in place.
Power Seats
If your vehicle is equipped with power front seats, the
controls are located on the outboard sides of the front
seat cushions.
Move the front of the horizontal control up or down to
raise or lower the front portion of the cushion.
Move the rear of the horizontal control up or down to
raise or lower the rear portion of the cushion.
Lift up or push down on the center of the horizontal
control to move the entire seat up or down.
To move the seat forward or rearward, slide the
horizontal control forward or rearward.
1-2
Page 10 of 454
Reclining Seatbacks
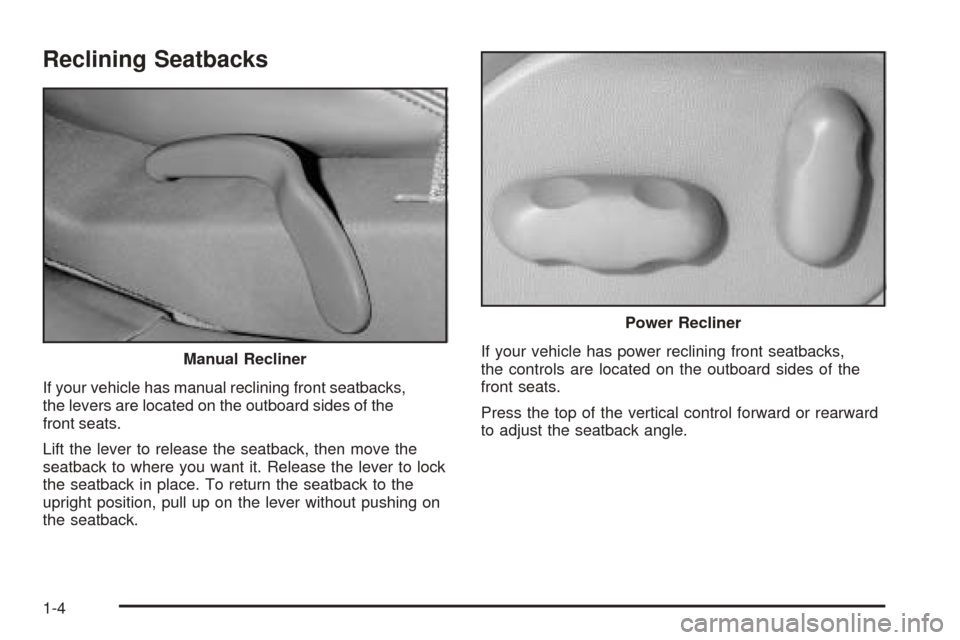
If your vehicle has manual reclining front seatbacks,
the levers are located on the outboard sides of the
front seats.
Lift the lever to release the seatback, then move the
seatback to where you want it. Release the lever to lock
the seatback in place. To return the seatback to the
upright position, pull up on the lever without pushing on
the seatback.If your vehicle has power reclining front seatbacks,
the controls are located on the outboard sides of the
front seats.
Press the top of the vertical control forward or rearward
to adjust the seatback angle. Manual Recliner
Power Recliner
1-4
Page 13 of 454

Rear Seats
Split Folding Rear Seat
Your vehicle may have a split folding rear seat. A split
folding rear seat allows you to carry long cargo by
folding down part or all of the rear seat. Before you can
fold the rear seatback, you need to unlatch the center
seatbelt buckle.
Use the following steps to lower one or both of the
rear seatbacks:
1. Insert a tool with a
small tip into the slot
as shown to unlatch
the seatbelt buckle.
Then move the belt to
the side so it is not
in your way.2. There is a tab located
on the outboard sides
of the seatback.
Pull forward on the tab
to unlock the seatback.
3. Fold the seatback down. This will allow you direct
access to the trunk.
4. Repeat Steps 2 and 3 to fold down the
other seatback.
1-7
Page 14 of 454

{CAUTION:
If the seatback is not locked, it could move
forward in a sudden stop or crash. That could
cause injury to the person sitting there. Always
press rearward on the seatback to be sure
it is locked.
{CAUTION:
A safety belt that is improperly routed, not
properly attached, or twisted will not provide
the protection needed in a crash. The person
wearing the belt could be seriously injured.
After raising the rear seatback, always check
to be sure that the safety belts are properly
routed and attached, and are not twisted.To return the seatback to the upright position,
do the following:
1. Lift the seatback up and push it back into place.
2. Reconnect the center
safety belt latch plate to
the buckle as shown.
3. Make sure the seatback is locked into place by
pushing and pulling on it.
4. Repeat Steps 1 and 3 for the other seatback.
When the seatback is not in use, it should be kept in
the upright, locked position.
1-8
Page 21 of 454
Driver Position
This part describes the driver’s restraint system.
Lap-Shoulder Belt
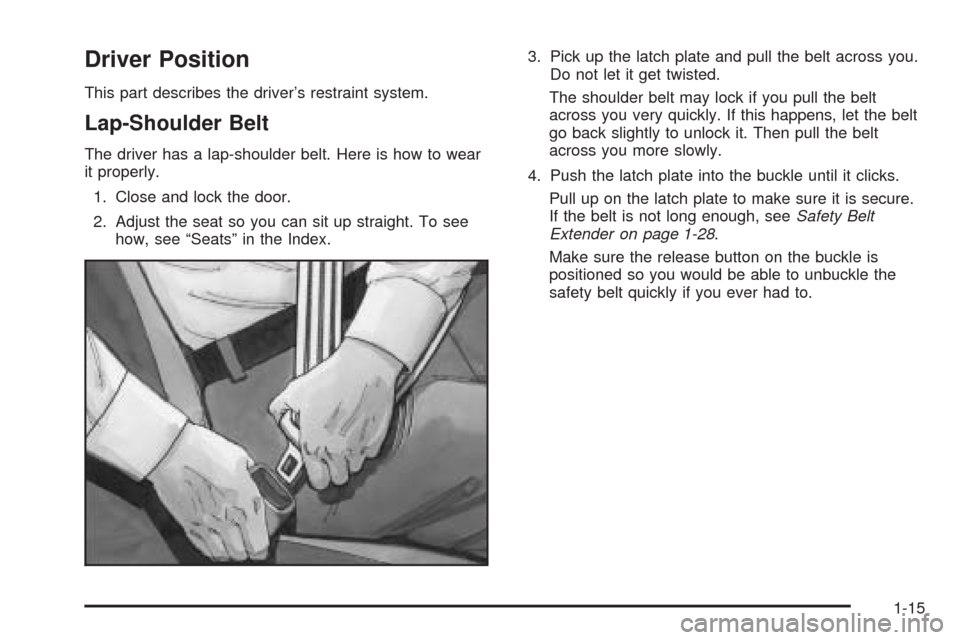
The driver has a lap-shoulder belt. Here is how to wear
it properly.
1. Close and lock the door.
2. Adjust the seat so you can sit up straight. To see
how, see “Seats” in the Index.3. Pick up the latch plate and pull the belt across you.
Do not let it get twisted.
The shoulder belt may lock if you pull the belt
across you very quickly. If this happens, let the belt
go back slightly to unlock it. Then pull the belt
across you more slowly.
4. Push the latch plate into the buckle until it clicks.
Pull up on the latch plate to make sure it is secure.
If the belt is not long enough, seeSafety Belt
Extender on page 1-28.
Make sure the release button on the buckle is
positioned so you would be able to unbuckle the
safety belt quickly if you ever had to.
1-15
Page 22 of 454

5. To make the lap part tight, pull down on the buckle
end of the belt as you pull up on the shoulder belt.The lap part of the belt should be worn low and snug on
the hips, just touching the thighs. In a crash, this
applies force to the strong pelvic bones. And you would
be less likely to slide under the lap belt. If you slid
under it, the belt would apply force at your abdomen.
This could cause serious or even fatal injuries. The
shoulder belt should go over the shoulder and across
the chest. These parts of the body are best able to take
belt restraining forces.
The safety belt locks if there is a sudden stop or crash,
or if you pull the belt very quickly out of the retractor.
1-16
Page 29 of 454
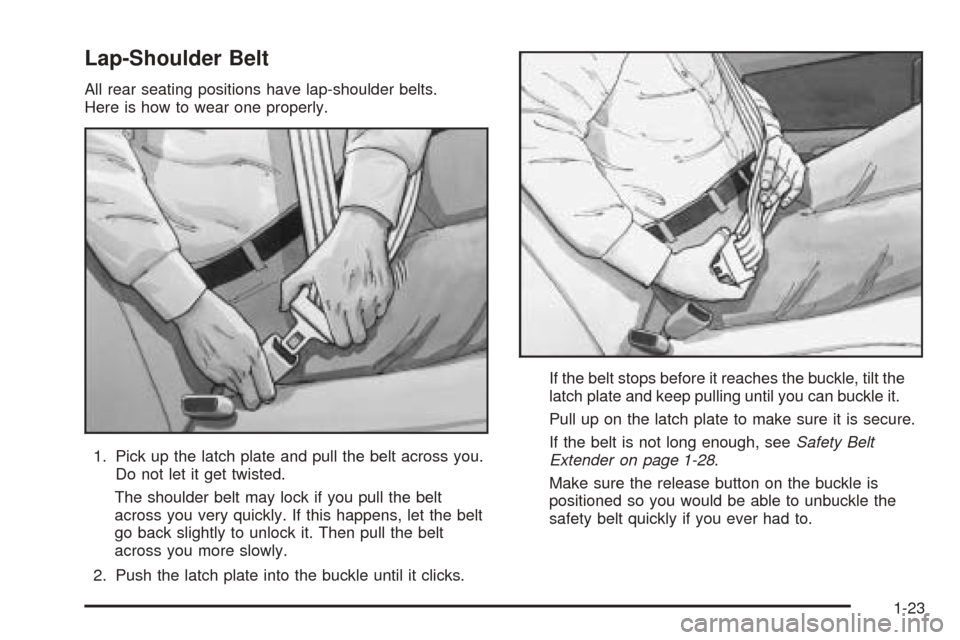
Lap-Shoulder Belt
All rear seating positions have lap-shoulder belts.
Here is how to wear one properly.
1. Pick up the latch plate and pull the belt across you.
Do not let it get twisted.
The shoulder belt may lock if you pull the belt
across you very quickly. If this happens, let the belt
go back slightly to unlock it. Then pull the belt
across you more slowly.
2. Push the latch plate into the buckle until it clicks.If the belt stops before it reaches the buckle, tilt the
latch plate and keep pulling until you can buckle it.
Pull up on the latch plate to make sure it is secure.
If the belt is not long enough, seeSafety Belt
Extender on page 1-28.
Make sure the release button on the buckle is
positioned so you would be able to unbuckle the
safety belt quickly if you ever had to.
1-23
Page 31 of 454
The safety belt locks if there is a sudden stop or a
crash, or if you pull the belt very quickly out of
the retractor.
{CAUTION:
You can be seriously hurt if your shoulder belt
is too loose. In a crash, you would move
forward too much, which could increase injury.
The shoulder belt should �t against your body.
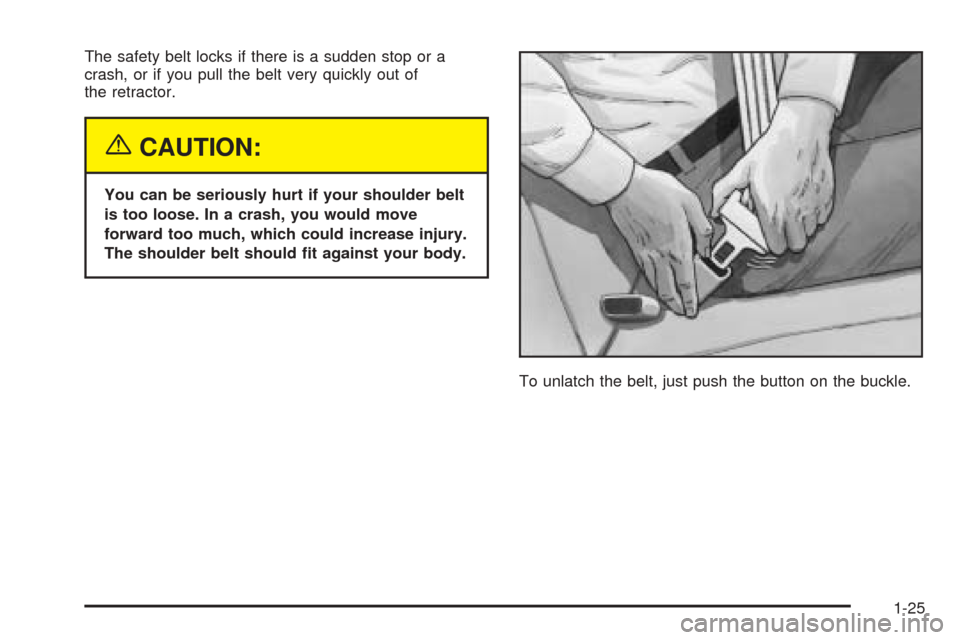
To unlatch the belt, just push the button on the buckle.
1-25
Page 59 of 454
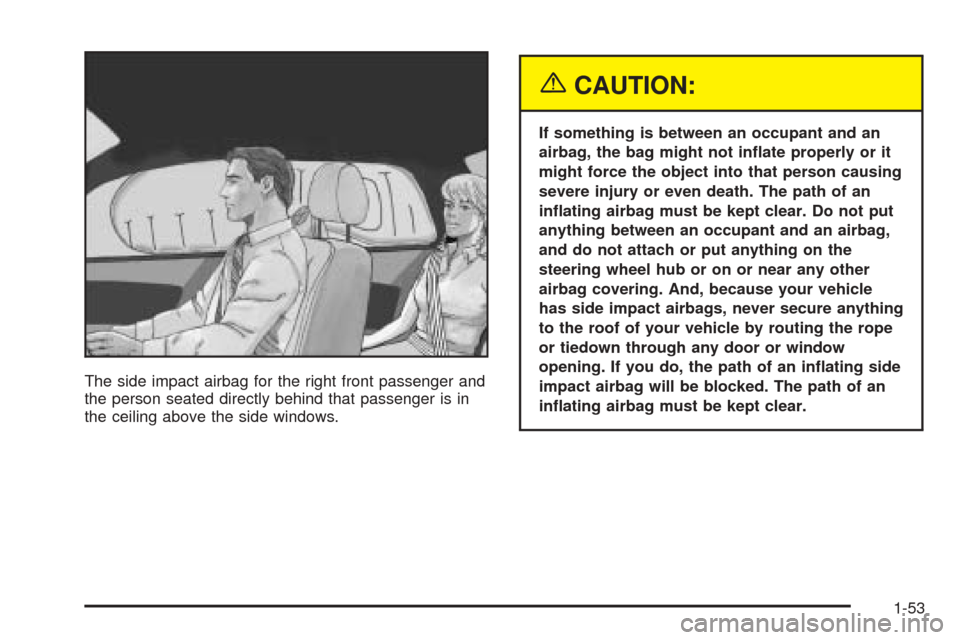
The side impact airbag for the right front passenger and
the person seated directly behind that passenger is in
the ceiling above the side windows.
{CAUTION:
If something is between an occupant and an
airbag, the bag might not in�ate properly or it
might force the object into that person causing
severe injury or even death. The path of an
in�ating airbag must be kept clear. Do not put
anything between an occupant and an airbag,
and do not attach or put anything on the
steering wheel hub or on or near any other
airbag covering. And, because your vehicle
has side impact airbags, never secure anything
to the roof of your vehicle by routing the rope
or tiedown through any door or window
opening. If you do, the path of an in�ating side
impact airbag will be blocked. The path of an
in�ating airbag must be kept clear.
1-53