low beam CADILLAC CTS 2005 1.G Owners Manual
[x] Cancel search | Manufacturer: CADILLAC, Model Year: 2005, Model line: CTS, Model: CADILLAC CTS 2005 1.GPages: 432, PDF Size: 2.52 MB
Page 127 of 432

Instrument Panel Overview...............................3-4
Hazard Warning Flashers................................3-6
Other Warning Devices...................................3-6
Horn.............................................................3-6
Tilt Wheel.....................................................3-6
Recon�gurable Steering Wheel
Controls (SWC) (CTS).................................3-7
Turn Signal/Multifunction Lever.........................3-8
Turn and Lane-Change Signals........................3-9
Headlamp High/Low-Beam Changer..................3-9
Flash-to-Pass...............................................3-10
Windshield Wipers........................................3-10
Windshield Washer.......................................3-11
Headlamp Washer........................................3-12
Cruise Control (CTS).....................................3-12
Cruise Control (CTS-V)..................................3-16
Headlamps..................................................3-19
Wiper Activated Headlamps............................3-20
Headlamps on Reminder................................3-21
Daytime Running Lamps (DRL).......................3-21
Fog Lamps..................................................3-23
Exterior Lighting Battery Saver........................3-23
Instrument Panel Brightness...........................3-24
Entry Lighting...............................................3-24
Parade Dimming...........................................3-24
Reading Lamps............................................3-25Accessory Power Outlets...............................3-25
Ashtrays and Cigarette Lighter........................3-26
Climate Controls............................................3-27
Dual Climate Control System..........................3-27
Outlet Adjustment.........................................3-31
Passenger Compartment Air Filter...................3-32
Steering Wheel Climate Controls (CTS)............3-33
Warning Lights, Gages, and Indicators............3-34
Instrument Panel Cluster................................3-35
Speedometer and Odometer...........................3-37
Trip Odometers............................................3-37
Tachometer.................................................3-37
Engine Speed Limiter....................................3-38
Safety Belt Reminder Light.............................3-38
Airbag Readiness Light..................................3-38
Passenger Airbag Status Indicator...................3-39
Charging System Light..................................3-41
Brake System Warning Light..........................3-41
Anti-Lock Brake System Warning Light.............3-42
Traction Control System (TCS)
Warning Light...........................................3-43
Engine Coolant Temperature Warning
Light (CTS)..............................................3-43
Engine Coolant Temperature Gage..................3-44
Tire Pressure Light (CTS-V)...........................3-44
Section 3 Instrument Panel
3-1
Page 134 of 432

If your vehicle is equipped with the Navigation system,
do the following:
1. Press the MAIN button located to the lower left of
the display.
2. Press the multi-function button next to the Setup
prompt at the right of the display.
3. Press the multi-function button next to Prog SWC
located at the right of the screen.
4. Turn the TUNE/SEL knob to scroll through the
available functions.
5. Once the function desired is highlighted, press and
hold the multi-function button next to the control you
wish to program (1, 2, 3 or 4). The buttons are
located at the right of the display.
When a control is successfully programmed, the
function you selected will appear next to the number
of the control at the right of the display.
6. Press the multi-function button next to the Back
prompt to exit each menu. If you desire to program
another control, repeat the procedure.
Each function can only be used once. When you
program a control with a function, that function is
removed from the list of functions available. It will return
to the list if you remove it from the SWC it is
programmed to by programming another function to
that control.Turn Signal/Multifunction Lever
The lever on the left side of the steering column
includes the following:
GTurn and Lane-Change Signals. SeeTurn and
Lane-Change Signals on page 3-9.
OHeadlamps. SeeHeadlamps on page 3-19.
3Headlamp High/Low Beam-Changer. See
Headlamp High/Low-Beam Changer on page 3-9. CTS
CTS-V
3-8
Page 135 of 432

Flash-To-Pass Feature. SeeFlash-to-Pass on
page 3-10.
-Fog Lamps. SeeFog Lamps on page 3-23.
ICruise Control. SeeCruise Control (CTS) on
page 3-12orCruise Control (CTS-V) on page 3-16.
Turn and Lane-Change Signals
To signal a turn, move the lever all the way up or down.
The lever returns automatically when the turn is
complete.
An arrow on the instrument
panel cluster will �ash in
the direction of the
turn or lane change.
Raise or lower the lever until the arrow starts to �ash to
signal a lane change. Hold it there until the lane
change is complete. The lever returns to its original
position when it’s released.Arrows that �ash rapidly when signaling for a turn or
lane change may be caused by a burned-out signal bulb.
Other driver’s won’t see the signal.
Replace burned-out bulbs to help avoid possible
accidents. Check the fuse and for burned-out bulbs if
the arrow fails to work when signaling a turn. SeeFuses
and Circuit Breakers on page 5-96for more information.
Turn Signal On Chime
If the turn signal is left on for about 1 mile (1.6 km), a
warning chime will sound and the Turn Signal On
message will appear on the Driver Information Center
(DIC) display. See “Turn Signal On” underDIC Warnings
and Messages on page 3-65for more information.
Headlamp High/Low-Beam Changer
Push forward on the turn signal/multifunction lever
to change the headlamps from low to high beam. Pull
the lever back and then release it to change from high to
low beam.
This light on the
instrument panel cluster
will be on, indicating
high-beam usage.
3-9
Page 136 of 432

Flash-to-Pass
This feature allows you to use the high-beam
headlamps to signal the driver in front of you that you
want to pass.
Pull and hold the turn signal/multifunction lever toward
you to use this feature. When you do, the following
will occur:
If the headlamps are off, in low-beam or in Daytime
Running Lamps (DRL) mode, the high-beam
headlamps will turn on. They’ll stay on as long as
you hold the lever there. Release the lever to
turn them off.
If the headlamps are in high-beam mode, they will
switch to low beam. To return to high-beam, push
the lever away from you.
Windshield Wipers
The lever on the right side of the steering column
operates the windshield wipers.
7(Mist):Pull the lever down and release it for a
single wiping cycle. The lever will return to its original
position. For more cycles, hold the lever down before
releasing it.
9(Off):Put the lever in this position to turn off
the wipers.
&(Delay):Put the lever in this position to set a delay
between wipes. Turn the delay adjustment band to
set the length of the delay.
3-10
Page 147 of 432

Headlamps on Reminder
A warning chime will sound if the exterior lamp control
is left on in either the headlamp or parking lamp position
and the driver’s door is opened with the ignition off.
SeeLights On Reminder on page 3-49for additional
information.
Daytime Running Lamps (DRL)
Daytime Running Lamps (DRL) can make it easier for
others to see the front of your vehicle during the
day. DRL can be helpful in many different driving
conditions, but they can be especially helpful in the short
periods after dawn and before sunset. Fully functional
daytime running lamps are required on all vehicles
�rst sold in Canada.
The DRL system will make the turn signal lamps come
on when the following conditions are met:
It is still daylight and the ignition is in ON
or START,
the exterior lamp control is in off or AUTO with the
headlamps off, and
an automatic transmission is not in PARK (P) or the
parking brake is not set on a manual transmission.When DRL are on, only your front turn signal lamps will
be on. No other exterior lamps will be on when the
DRL are being used. Your instrument panel won’t be lit
up either.
When the exterior lamp control is in AUTO and it’s dark
enough outside, the DRL will turn off and the low-beam
headlamps will turn on. When it’s bright enough
outside, the low-beam headlamps will go off, and the
DRL will turn back on. If you start your vehicle in a dark
garage, the automatic headlamp system will come on
immediately. Once you leave the garage, it will take
about one minute for the automatic headlamp system to
change to DRL if it is light outside. During that delay,
your instrument panel cluster may not be as bright
as usual. Make sure your instrument panel brightness
lever is in the full bright position. SeeInstrument
Panel Brightness on page 3-24.
3-21
Page 148 of 432

If it’s dark enough outside and the exterior lamp control
is off, a Headlamps Suggested message will appear
on the Driver’s Information Center (DIC) display.
This message informs the driver that turning on the
exterior lamps is recommended even though the DRL
are still illuminated. Turning the exterior lamp control to
AUTO or to the low-beam headlamp position will
turn off the DRL and cancel the Headlamps Suggested
message. If the parking lamps or the fog lamps were
turned on instead, the DRL will still turn off and the
Headlamps Suggested message will be displayed. You
can turn it off by pressing the OK button if you have
the Navigation audio system or the CLR button if
you have the Base audio system.
To operate your vehicle with the DRL off, turn the
exterior lamp control off. Then turn on the fog lamps or
parking lamps, and the DRL will turn off. The
Headlamps Suggested message will appear on the DIC
display. This will work regardless of gear position
and whether or not the parking brake is set.
As with any vehicle, you should turn on the regular
headlamp system when you need it.Light Sensor
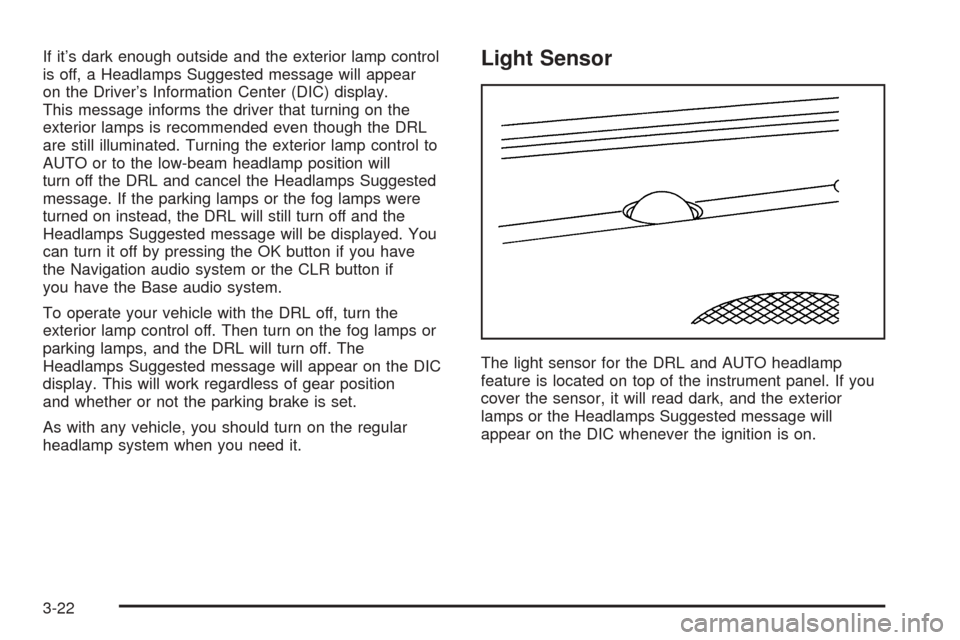
The light sensor for the DRL and AUTO headlamp
feature is located on top of the instrument panel. If you
cover the sensor, it will read dark, and the exterior
lamps or the Headlamps Suggested message will
appear on the DIC whenever the ignition is on.
3-22
Page 149 of 432

Fog Lamps
Use the fog lamps for better vision in foggy or
misty conditions.
The fog lamp control is located on the turn
signal/multifunction lever.
-:The band with/or next to this symbol is used to
turn the fog lamps on and off.
The parking lamps must be on for the fog lamps
to work.
To operate the fog lamps on the CTS:
To turn the fog lamps on, turn the fog lamp band on
the lever up to the dot and release it. The band will
return to its original position.
To turn the fog lamps off, turn the for lamp band up
to the dot and release it. The band will return to its
original position, and the fog lamps will turn off.
If you turn on the high-beam headlamps, the
fog lamps will also turn off. They’ll turn back on
again when you switch back to low-beam
headlamps.To operate the fog lamps on the CTS-V:
To turn the fog lamps on, turn the band on the lever
up to the fog lamp symbol and release it. The band
will return to its original position.
To turn the fog lamps off, turn the band up to the
fog lamp symbol and release it. The band will
return to its original position, and the fog lamps will
turn off. If you turn on the high-beam headlamps,
the fog lamps will also turn off. They’ll turn back on
again when you switch back to low-beam
headlamps.
Exterior Lighting Battery Saver
If the parking lamps or headlamps have been left on,
the exterior lamps will turn off about 10 minutes after the
ignition is turned to OFF. This protects against draining
the battery in case you have accidentally left the
headlamps or parking lamps on. The battery saver does
not work if the headlamps are turned on after the
ignition is turned to OFF.
If you need to leave the lamps on for more than
10 minutes, use the exterior lamp control to turn the
lamps back on.
3-23
Page 176 of 432

Cruise Control Light
This light comes on
whenever you set your
cruise control.
The light will go out when the cruise control is turned
off. SeeCruise Control (CTS) on page 3-12or
Cruise Control (CTS-V) on page 3-16for more
information.
Highbeam On Light
This light comes on
whenever the high-beam
headlamps are on.
SeeHeadlamp High/Low-Beam Changer on page 3-9
for more information.
Fuel Gage
The fuel gage shows
approximately how much
fuel is in the tank. It
works only when the
ignition is in ON.
If the fuel supply gets low, the Fuel Level Low message
will appear on the DIC and a single chime will sound.
SeeDIC Warnings and Messages on page 3-65
for more information.
3-50
Page 252 of 432

Driving at Night
Night driving is more dangerous than day driving.
One reason is that some drivers are likely to be
impaired — by alcohol or drugs, with night vision
problems, or by fatigue.
Here are some tips on night driving.
Drive defensively.
Do not drink and drive.
Since you cannot see as well, you may need to
slow down and keep more space between you
and other vehicles.
Slow down, especially on higher speed roads. Your
headlamps can light up only so much road ahead.
In remote areas, watch for animals.
If you are tired, pull off the road in a safe place
and rest.
No one can see as well at night as in the daytime.
But as we get older these differences increase.
A 50-year-old driver may require at least twice as much
light to see the same thing at night as a 20-year-old.
What you do in the daytime can also affect your
night vision. For example, if you spend the day in bright
sunshine you are wise to wear sunglasses. Your
eyes will have less trouble adjusting to night. But if you
are driving, do not wear sunglasses at night. They
may cut down on glare from headlamps, but they also
make a lot of things invisible.
You can be temporarily blinded by approaching
headlamps. It can take a second or two, or even several
seconds, for your eyes to re-adjust to the dark. When
you are faced with severe glare, as from a driver
who does not lower the high beams, or a vehicle with
misaimed headlamps, slow down a little. Avoid
staring directly into the approaching headlamps.
4-18
Page 329 of 432

Bulb Replacement
For the proper type of replacement bulbs, see
Replacement Bulbs on page 5-52.
For any bulb changing procedure not listed in this
section, contact your dealer.
High Intensity Discharge (HID)
Lighting
{CAUTION:
The low beam high intensity discharge lighting
system operates at a very high voltage. If you
try to service any of the system components,
you could be seriously injured. Have your
dealer or a quali�ed technician service them.Your vehicle may have HID headlamps. After your
vehicle’s HID headlamp bulb has been replaced,
you may notice that the beam is a slightly different
shade than it was originally. This is normal.
Halogen Bulbs
{CAUTION:
Halogen bulbs have pressurized gas inside
and can burst if you drop or scratch the bulb.
You or others could be injured. Be sure to
read and follow the instructions on the bulb
package.
5-49