clock CADILLAC CTS 2009 2.G Owners Manual
[x] Cancel search | Manufacturer: CADILLAC, Model Year: 2009, Model line: CTS, Model: CADILLAC CTS 2009 2.GPages: 490, PDF Size: 2.68 MB
Page 149 of 490
Instrument Panel Overview...............................3-4
Hazard Warning Flashers................................3-6
Horn .............................................................3-6
Tilt and Telescopic Steering Wheel...................3-6
Power Tilt Wheel and Telescopic Steering
Column......................................................3-7
Turn Signal/Multifunction Lever.........................3-7
Turn and Lane-Change Signals........................3-8
Headlamp High/Low-Beam Changer..................3-8
Flash-to-Pass.................................................3-9
Windshield Wipers..........................................3-9
Rainsense™ Wipers......................................3-10
Windshield Washer.......................................3-12
Headlamp Washer........................................3-13
Cruise Control..............................................3-14
Headlamps..................................................3-17
Wiper Activated Headlamps............................3-17
Headlamps on Reminder................................3-17
Daytime Running Lamps (DRL).......................3-18
Adaptive Forward Lighting System...................3-19
Fog Lamps ..................................................3-19
Exterior Lighting Battery Saver........................3-20
Instrument Panel Brightness...........................3-20
Entry Lighting...............................................3-20
Parade Dimming...........................................3-20
Reading Lamps............................................3-21
Electric Power Management...........................3-21Battery Run-Down Protection..........................3-22
Accessory Power Outlet(s).............................3-22
Ashtray(s) and Cigarette Lighter......................3-23
Analog Clock...............................................3-23
Climate Controls............................................3-24
Dual Climate Control System..........................3-24
Outlet Adjustment.........................................3-29
Passenger Compartment Air Filter...................3-29
Warning Lights, Gages, and Indicators............3-30
Instrument Panel Cluster................................3-31
Speedometer and Odometer...........................3-33
Trip Odometers............................................3-33
Tachometer.................................................3-34
Engine Speed Limiter....................................3-34
Safety Belt Reminders...................................3-35
Airbag Readiness Light..................................3-36
Passenger Airbag Status Indicator...................3-37
Charging System Light..................................3-38
Up-Shift Light...............................................3-38
Brake System Warning Light..........................3-39
Antilock Brake System (ABS) Warning Light.....3-40
StabiliTrak
®/Traction Control System (TCS)
Warning Light...........................................3-41
Engine Coolant Temperature Warning Light......3-41
Engine Coolant Temperature Gage..................3-42
Tire Pressure Light.......................................3-42
Section 3 Instrument Panel
3-1
Page 153 of 490
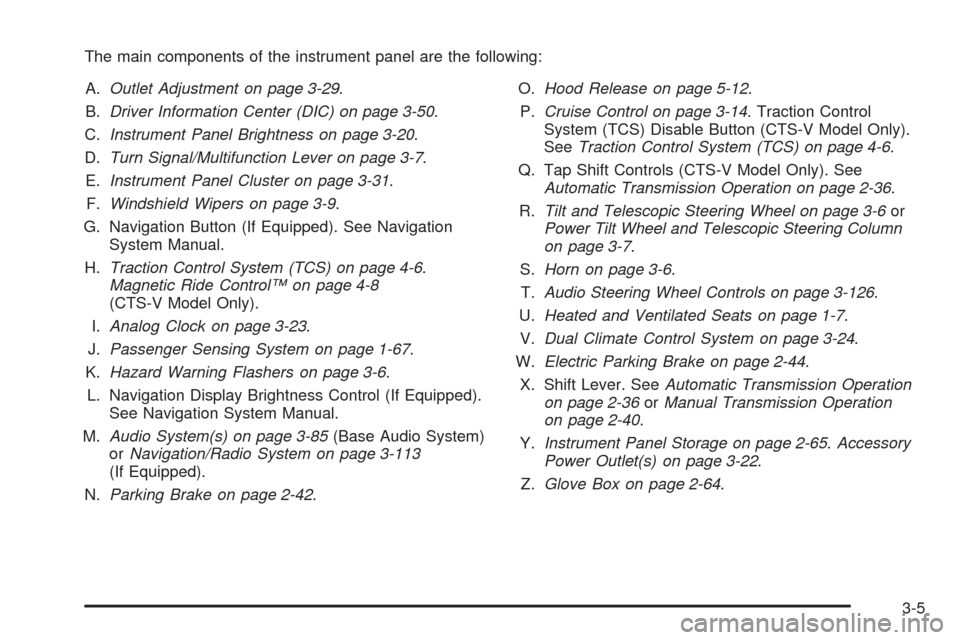
The main components of the instrument panel are the following:
A.Outlet Adjustment on page 3-29.
B.Driver Information Center (DIC) on page 3-50.
C.Instrument Panel Brightness on page 3-20.
D.Turn Signal/Multifunction Lever on page 3-7.
E.Instrument Panel Cluster on page 3-31.
F.Windshield Wipers on page 3-9.
G. Navigation Button (If Equipped). See Navigation
System Manual.
H.Traction Control System (TCS) on page 4-6.
Magnetic Ride Control™ on page 4-8
(CTS-V Model Only).
I.Analog Clock on page 3-23.
J.Passenger Sensing System on page 1-67.
K.Hazard Warning Flashers on page 3-6.
L. Navigation Display Brightness Control (If Equipped).
See Navigation System Manual.
M.Audio System(s) on page 3-85(Base Audio System)
orNavigation/Radio System on page 3-113
(If Equipped).
N.Parking Brake on page 2-42.O.Hood Release on page 5-12.
P.Cruise Control on page 3-14. Traction Control
System (TCS) Disable Button (CTS-V Model Only).
SeeTraction Control System (TCS) on page 4-6.
Q. Tap Shift Controls (CTS-V Model Only). See
Automatic Transmission Operation on page 2-36.
R.Tilt and Telescopic Steering Wheel on page 3-6or
Power Tilt Wheel and Telescopic Steering Column
on page 3-7.
S.Horn on page 3-6.
T.Audio Steering Wheel Controls on page 3-126.
U.Heated and Ventilated Seats on page 1-7.
V.Dual Climate Control System on page 3-24.
W.Electric Parking Brake on page 2-44.
X. Shift Lever. SeeAutomatic Transmission Operation
on page 2-36orManual Transmission Operation
on page 2-40.
Y.Instrument Panel Storage on page 2-65.Accessory
Power Outlet(s) on page 3-22.
Z.Glove Box on page 2-64.
3-5
Page 168 of 490
Exterior Lighting Battery Saver
The exterior lamps turn off about 10 minutes after the
ignition is turned to LOCK/OFF, if the parking lamps
or headlamps have been left on. This protects against
draining the battery. The battery saver does not work
if the headlamps are turned on after the ignition is turned
to LOCK/OFF.
To keep the lamps on for more than 10 minutes, turn
the lamps back on with the exterior lamp control.
Instrument Panel Brightness
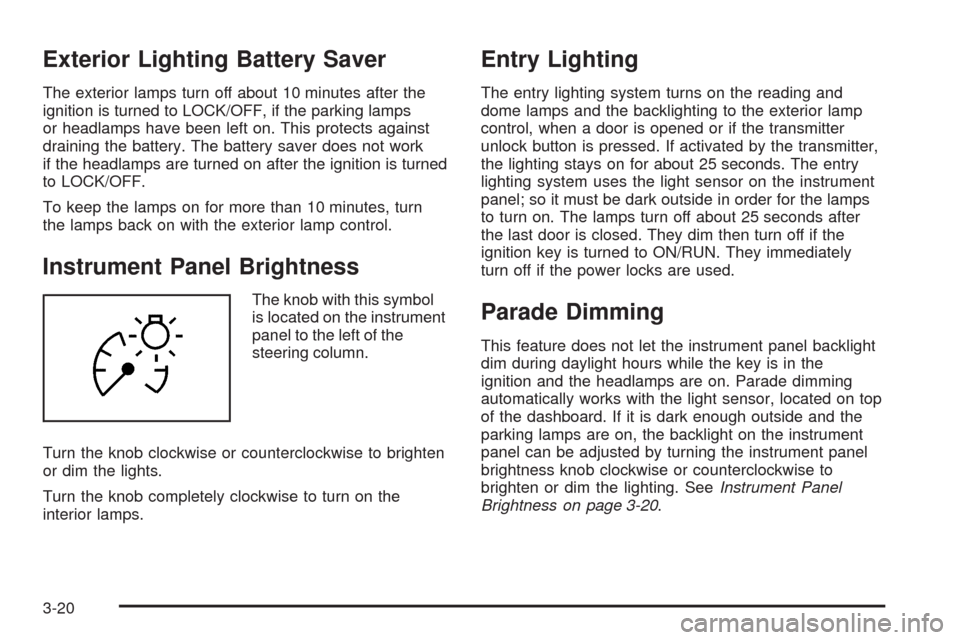
The knob with this symbol
is located on the instrument
panel to the left of the
steering column.
Turn the knob clockwise or counterclockwise to brighten
or dim the lights.
Turn the knob completely clockwise to turn on the
interior lamps.
Entry Lighting
The entry lighting system turns on the reading and
dome lamps and the backlighting to the exterior lamp
control, when a door is opened or if the transmitter
unlock button is pressed. If activated by the transmitter,
the lighting stays on for about 25 seconds. The entry
lighting system uses the light sensor on the instrument
panel; so it must be dark outside in order for the lamps
to turn on. The lamps turn off about 25 seconds after
the last door is closed. They dim then turn off if the
ignition key is turned to ON/RUN. They immediately
turn off if the power locks are used.
Parade Dimming
This feature does not let the instrument panel backlight
dim during daylight hours while the key is in the
ignition and the headlamps are on. Parade dimming
automatically works with the light sensor, located on top
of the dashboard. If it is dark enough outside and the
parking lamps are on, the backlight on the instrument
panel can be adjusted by turning the instrument panel
brightness knob clockwise or counterclockwise to
brighten or dim the lighting. SeeInstrument Panel
Brightness on page 3-20.
3-20
Page 171 of 490
Ashtray(s) and Cigarette Lighter
The vehicle may have two removable ashtrays and
cigarette lighters. One ashtray can be placed into the
instrument panel storage compartment and the other
into the center console rear compartment. To use
the lighter, push it in all the way and let go. When it is
ready, it will pop back out by itself.
To empty the ashtrays, hold on to the edges of the bin
and pull straight out. To reinstall, push the tray back
into place.
Notice:Holding a cigarette lighter in while it is
heating does not let the lighter back away from the
heating element when it is hot. Damage from
overheating can occur to the lighter or heating
element, or a fuse could be blown. Do not hold a
cigarette lighter in while it is heating.
Notice:If papers, pins, or other �ammable items
are put in the ashtray, hot cigarettes or other
smoking materials could ignite them and possibly
damage the vehicle. Never put �ammable items
in the ashtray.
Analog Clock
The analog clock is located on the instrument panel
above the radio. The clock is not connected with
any other vehicle system and runs by itself. To adjust
the clock:
1. Locate the adjustment buttons directly below the
clock face.
2. Push and hold the right adjustment button to move
the clock hands forward or the left adjustment
button to make the clock hands go backward.
Holding either button down will cause the clock to
advance faster. Release the button before the
desired time is reached.
3. Push and release either button to adjust the time by
one minute increments until the desired time is
reached.
3-23
Page 235 of 490
The radio with DVD Audio, HDD, and USB utilizes
Gracenote®technology to provide Song, Artist, Album,
and Genre information for many CD audio discs
and is capable of playing DVD-A and DTS encoded
discs, (DTS and DTS Digital Surround are registered
trademarks of Digital Theater Systems, Inc.).
Manufactured under license from Dolby Laboratories.
Dolby and the double-D symbol are trademarks of Dolby
Laboratories.
Radio Data System (RDS)
The audio system has a Radio Data System (RDS)
feature. RDS is available for use only on FM stations
that broadcast RDS information. This system relies upon
receiving speci�c information from these stations and
only works when the information is available. While the
radio is tuned to an FM-RDS station, the station name
or call letters display. In rare cases, a radio station
can broadcast incorrect information that causes the radio
features to work improperly. If this happens, contact
the radio station.
Playing the Radio
VOLP(Volume/Power):The power knob is part of
the VOL knob and is located above the radio, at the left
side of the clock. Press to turn the system on and off.
Turn the VOL knob clockwise or counterclockwise
to increase or decrease the volume.
Speed Compensated Volume (SCV):A Radio with
SCV automatically adjusts the sound to compensate
for road and wind noise as the vehicle speeds up
or slows down, so that the volume is consistent while
driving. That way, the volume level should sound about
the same while driving. To activate SCV:
1. Set the radio volume to the desired level.
2. Press the CONFIG button to display the radio
setup menu.
3. Press the pushbutton under the AUTO VOL
(automatic volume) label on the radio display.
4. Press the pushbutton under the desired Speed
Compensated Volume setting (OFF, Low, Med,
or High) to select the level of radio volume
compensation. The display times out after
approximately 10 seconds. Each higher setting
allows for more radio volume compensation at
faster vehicle speeds.
3-87
Page 237 of 490
Turn the MENU/SELECT knob clockwise or
counterclockwise to scroll through the list. Press this
knob to select the desired item. The selected item
displays a speaker symbol to indicate it is the current
active source.
Finding a XM™ Station
m
:Press to switch to XM mode. Turn the TUNE/TONE
knob to select from a list of available XM stations.
Turn the TUNE/TONE knob until the desired station is
highlighted. Press the TUNE/TONE knob to select
the highlighted station. The highlighted station will
also automatically be selected if the TUNE/TONE is
released and no longer turned.
Storing a Radio Station as a Favorite
Drivers are encouraged to set up their radio station
favorites while the vehicle is stopped. Tune to favorite
stations using the presets, favorites button, and
steering wheel controls, if the vehicle has this feature.
SeeDefensive Driving on page 4-2.
FAV (Favorites):A maximum of 36 stations can be
programmed as favorites using the six pushbuttons
positioned below the radio station frequency labels on
the display and by using the radio favorites page button
(FAV button). Press the FAV button to go through up
to six pages of favorites, each having six favorite
stations available per page. Each page of favorites can
contain any combination of AM, FM, or XM stations.To store a station as a favorite, perform the
following steps:
1. Tune to the desired radio station.
2. Press the FAV button to display the page where the
station is to be stored.
3. Press and hold one of the six pushbuttons until a
beep sounds. When that pushbutton is pressed and
released, the radio recalls the station that was set.
4. Repeat the steps for each pushbutton radio station
to be stored as a favorite.
The number of favorites pages can be setup using the
CONFIG button. To setup the number of favorites
pages, perform the following steps:
1. Press the CONFIG button to display the radio
setup menu.
2. Press the pushbutton located below the FAV label.
3. Select the desired number of favorites pages by
pressing the pushbutton located below the
displayed page numbers.
4. Press the FAV button, or let the menu time out, to
return to the original main radio screen showing the
radio station frequency labels and to begin the
process of programming favorites for the chosen
number of pages.
3-89
Page 238 of 490
Setting the Tone
(Bass/Midrange/Treble)
BASS/MID/TREB (Bass, Midrange, or Treble):To
adjust bass, midrange, or treble, press the TUNE/TONE
knob until the tone control labels display. Continue
pressing to highlight the desired label, or press the
pushbutton positioned under the desired label. Turn the
TUNE/TONE knob clockwise or counterclockwise to
adjust the highlighted setting. The highlighted setting
can also be adjusted by pressing either SEEK arrow,
\FWD, orsREV button until the desired levels are
obtained. If a station’s frequency is weak or has static,
decrease the treble.
To quickly adjust bass, midrange, or treble to the middle
position, press the pushbutton positioned under the
BASS, MID, or TREB label for more than two seconds.
A beep may sound and the level adjusts to the
middle position.
To quickly adjust all tone and speaker controls to the
middle position, press the TUNE/TONE knob for
more than two seconds.
Adjusting the Speakers (Balance/Fade)
BAL/FADE (Balance/Fade):To adjust balance or
fade, press the TUNE/TONE knob until the speaker
control labels display. Continue pressing to highlight the
desired label, or press the pushbutton positioned
under the desired label. Turn the TUNE/TONE knob
clockwise or counterclockwise to adjust the highlighted
setting. The highlighted setting can be adjusted by
pressing either SEEK arrow,
\FWD, orsREV
buttons until the desired levels are obtained.
To quickly adjust balance or fade to the middle position,
press the pushbutton positioned under the BAL or
FADE label for more than two seconds. A beep may
sound and the level adjusts to the middle position.
To quickly adjust all speaker and tone controls to the
middle position, press the TUNE/TONE knob for
more than two seconds.
3-90
Page 254 of 490
Using the Auxiliary Input Jack
The radio system has an auxiliary input jack. It is in the
center console bin. This is not an audio output; do
not plug the headphone set into the front auxiliary
input jack. An external audio device such as an iPod,
laptop computer, MP3 player, etc. can be connected to
the auxiliary input jack for use as another source for
audio listening.
Set up any auxiliary device while the vehicle is stopped.
SeeDefensive Driving on page 4-2for more information
on driver distraction.
To use a portable audio player, connect a 3.5 mm
(1/8 inch) cable to the radio’s front auxiliary input jack.
The radio automatically detects the device and “Aux
Input Device” displays. The device begins playing over
the vehicle speakers. If an auxiliary device has
already been connected, press the radio’s AUX or
CD/AUX button.
VOL/
O(Volume/Power):Turn clockwise or
counterclockwise to increase or decrease the volume of
the portable player. Use the portable device to make
additional volume adjustments.
FM/AM:Press to listen to the radio when a portable
audio device is playing. The portable audio device
continues playing, until it is stopped.CD or CD/AUX (CD/Auxiliary):Press to play a CD
when a portable audio device is playing. Press again to
start playing audio from the connected portable audio
player. If a portable audio player is not connected,
“No Aux Device” displays.
Using the Radio Controls to Connect
and Control an iPod
An iPod can be controlled by using the radio buttons
and knobs and display the song information on the
radio’s display. To connect and control the iPod using
the radio controls, the vehicle must have a USB port. If it
does, it is located in the center console bin. You will
also need a special iPod connection cable that can be
purchased with the vehicle or may be available after,
from your dealer/retailer. See your dealer/retailer
for more information.
This feature supports the following iPod models:
Fifth generation or later iPod
First or Second generation or later iPod Nano*
* For proper operation, make sure the iPod has the
latest �rmware from Apple
®. The iPod �rmware
can be updated using the latest iTunes application.
See apple.com/itunes.
3-106
Page 286 of 490
Steering Tips
It is important to take curves at a reasonable speed.
Traction in a curve depends on the condition of the tires
and the road surface, the angle at which the curve is
banked, and your speed. While in a curve, speed is the
one factor you can control.
If you need to reduce speed, do it before you enter the
curve, while the front wheels are straight ahead.
Try to adjust the speed so you can drive through the
curve. Maintain a reasonable, steady speed. Wait to
accelerate until you are out of the curve, and then
accelerate gently into the straightaway.
Steering in Emergencies
There are times when steering can be more effective
than braking. For example, you come over a hill and �nd
a truck stopped in your lane, or a car suddenly pulls out
from nowhere, or a child darts out from between parked
cars and stops right in front of you. You can avoid these
problems by braking — if you can stop in time. But
sometimes you cannot; there is not room. That is the time
for evasive action — steering around the problem.
Your vehicle can perform very well in emergencies like
these. First apply the brakes. SeeBraking on page 4-4.
It is better to remove as much speed as you can from a
possible collision. Then steer around the problem, to the
left or right depending on the space available.An emergency like this requires close attention and a
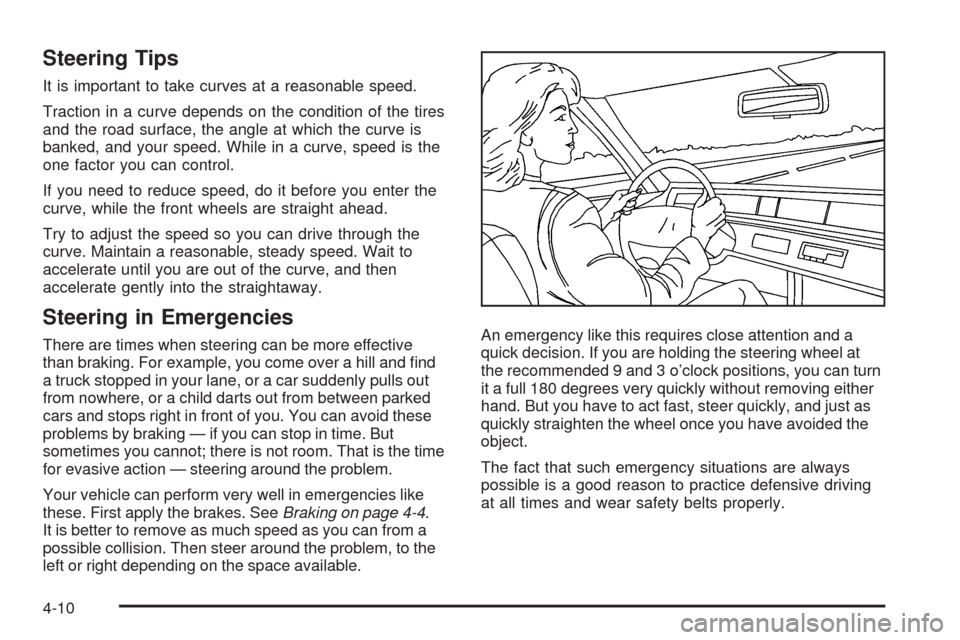
quick decision. If you are holding the steering wheel at
the recommended 9 and 3 o’clock positions, you can turn
it a full 180 degrees very quickly without removing either
hand. But you have to act fast, steer quickly, and just as
quickly straighten the wheel once you have avoided the
object.
The fact that such emergency situations are always
possible is a good reason to practice defensive driving
at all times and wear safety belts properly.
4-10
Page 319 of 490
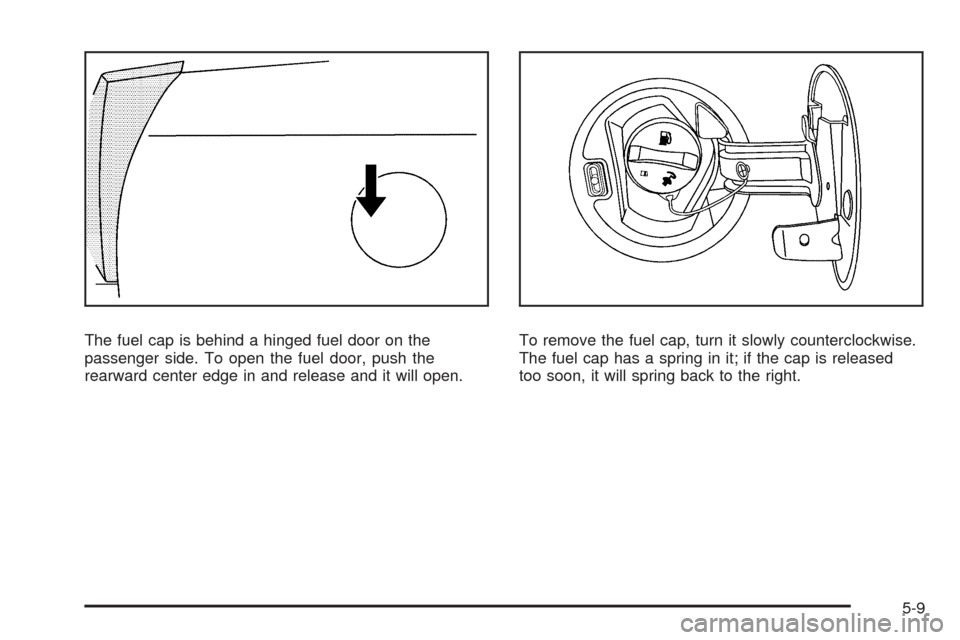
The fuel cap is behind a hinged fuel door on the
passenger side. To open the fuel door, push the
rearward center edge in and release and it will open.To remove the fuel cap, turn it slowly counterclockwise.
The fuel cap has a spring in it; if the cap is released
too soon, it will spring back to the right.
5-9