headlamp CADILLAC CTS 2011 2.G Owners Manual
[x] Cancel search | Manufacturer: CADILLAC, Model Year: 2011, Model line: CTS, Model: CADILLAC CTS 2011 2.GPages: 496, PDF Size: 7.71 MB
Page 2 of 496

Black plate (2,1)Cadillac CTS/CTS-V Owner Manual - 2011
2011 Cadillac CTS/CTS-V Owner ManualM
Driving and Operating. . . . . . . . 9-1
Driving Information . . . . . . . . . . . . . 9-2
Starting and Operating . . . . . . . 9-16
Engine Exhaust . . . . . . . . . . . . . . 9-24
Automatic Transmission . . . . . . 9-26
Manual Transmission . . . . . . . . . 9-30
Drive Systems . . . . . . . . . . . . . . . . 9-32
Brakes . . . . . . . . . . . . . . . . . . . . . . . 9-32
Ride Control Systems . . . . . . . . 9-37
Cruise Control . . . . . . . . . . . . . . . . 9-40
Object Detection Systems . . . . 9-42
Fuel . . . . . . . . . . . . . . . . . . . . . . . . . . 9-47
Towing . . . . . . . . . . . . . . . . . . . . . . . 9-52
Conversions and Add-Ons . . . 9-58 Vehicle Care
. . . . . . . . . . . . . . . . . 10-1
General Information . . . . . . . . . . 10-3
Vehicle Checks . . . . . . . . . . . . . . . 10-4
Headlamp Aiming . . . . . . . . . . . 10-35
Bulb Replacement . . . . . . . . . . 10-38
Electrical System . . . . . . . . . . . . 10-40
Wheels and Tires . . . . . . . . . . . 10-66
Jump Starting . . . . . . . . . . . . . . 10-112
Towing . . . . . . . . . . . . . . . . . . . . . 10-117
Appearance Care . . . . . . . . . . 10-120
Service and Maintenance . . . 11-1
General Information . . . . . . . . . . 11-1
Scheduled Maintenance . . . . . . 11-3
Recommended Fluids,
Lubricants, and Parts . . . . . . . 11-7
Maintenance Records . . . . . . . 11-11 Technical Data
. . . . . . . . . . . . . . . 12-1
Vehicle Identification . . . . . . . . . 12-1
Vehicle Data . . . . . . . . . . . . . . . . . . 12-2
Customer Information . . . . . . . 13-1
Customer Information . . . . . . . . 13-1
Reporting Safety Defects . . . . 13-15
Vehicle Data Recording and
Privacy . . . . . . . . . . . . . . . . . . . . 13-17
Index . . . . . . . . . . . . . . . . . . . . . i-1
Page 5 of 496
Black plate (5,1)Cadillac CTS/CTS-V Owner Manual - 2011
Introduction v
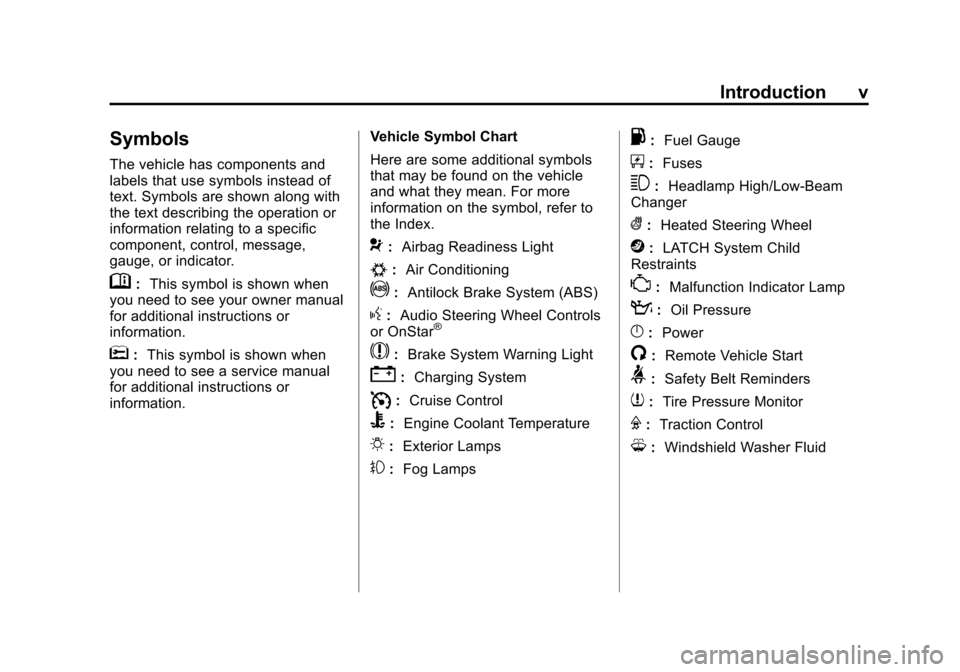
Symbols
The vehicle has components and
labels that use symbols instead of
text. Symbols are shown along with
the text describing the operation or
information relating to a specific
component, control, message,
gauge, or indicator.
M:This symbol is shown when
you need to see your owner manual
for additional instructions or
information.
*: This symbol is shown when
you need to see a service manual
for additional instructions or
information. Vehicle Symbol Chart
Here are some additional symbols
that may be found on the vehicle
and what they mean. For more
information on the symbol, refer to
the Index.
9:
Airbag Readiness Light
#:Air Conditioning
!:Antilock Brake System (ABS)
g:Audio Steering Wheel Controls
or OnStar®
$: Brake System Warning Light
":Charging System
I:Cruise Control
B: Engine Coolant Temperature
O:Exterior Lamps
#:Fog Lamps
.: Fuel Gauge
+:Fuses
3: Headlamp High/Low-Beam
Changer
(: Heated Steering Wheel
j:LATCH System Child
Restraints
*: Malfunction Indicator Lamp
::Oil Pressure
}:Power
/:Remote Vehicle Start
>:Safety Belt Reminders
7:Tire Pressure Monitor
F:Traction Control
M:Windshield Washer Fluid
Page 17 of 496
Black plate (11,1)Cadillac CTS/CTS-V Owner Manual - 2011
In Brief 1-11
To adjust each mirrors:
1. Press
}or|to select the
driver or passenger side mirror.
2. Press one of the four arrows to move the mirror.
3. Adjust each outside mirror so that a little of the vehicle and the
area behind it can be seen.
4. Press either
}or|again to
deselect the mirror.
See Power Mirrors on page 2‑27.
Interior
The vehicle has an automatic
dimming inside rearview mirror.
Automatic dimming reduces the
glare of headlamps from behind
you. The dimming feature comes on
and the indicator light illuminates
each time the vehicle is started.
SeeAutomatic Dimming Rearview
Mirror on page 2‑28.
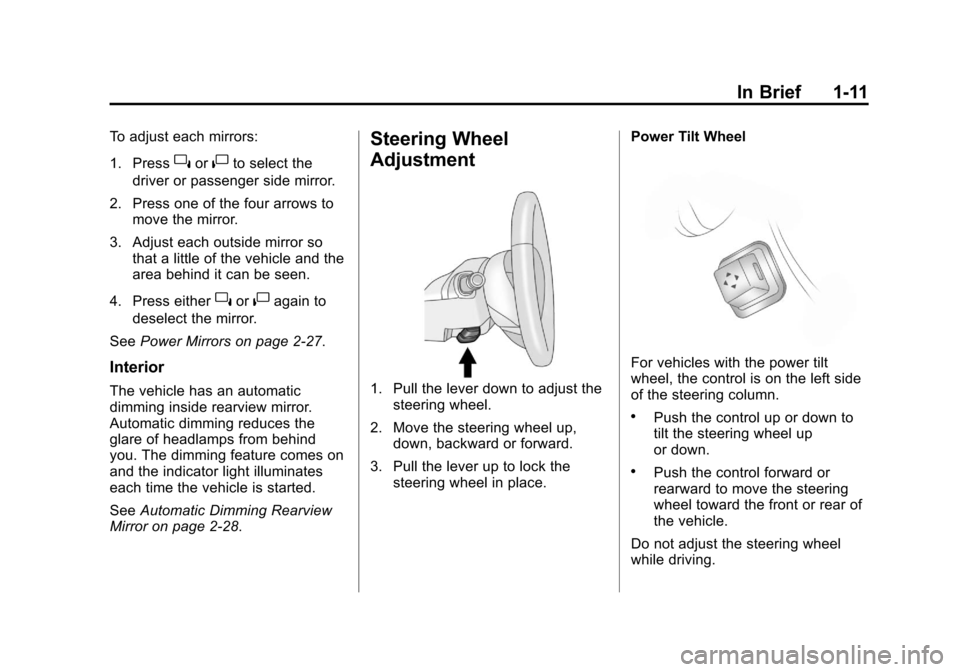
Steering Wheel
Adjustment
1. Pull the lever down to adjust the steering wheel.
2. Move the steering wheel up, down, backward or forward.
3. Pull the lever up to lock the steering wheel in place. Power Tilt Wheel
For vehicles with the power tilt
wheel, the control is on the left side
of the steering column.
.Push the control up or down to
tilt the steering wheel up
or down.
.Push the control forward or
rearward to move the steering
wheel toward the front or rear of
the vehicle.
Do not adjust the steering wheel
while driving.
Page 18 of 496
Black plate (12,1)Cadillac CTS/CTS-V Owner Manual - 2011
1-12 In Brief
Interior Lighting
Reading Lamps
The reading lamps are located on
the overhead console. These lamps
come on automatically when any
door is opened.
For manual operation, press the
button next to each lamp to turn it
on or off.
If the reading lamps are left on, they
automatically shut off 10 minutes
after the ignition has been
turned off.
For more information, see:
.Reading Lamps on page 6‑5.
.Instrument Panel Illumination
Control on page 6‑5.
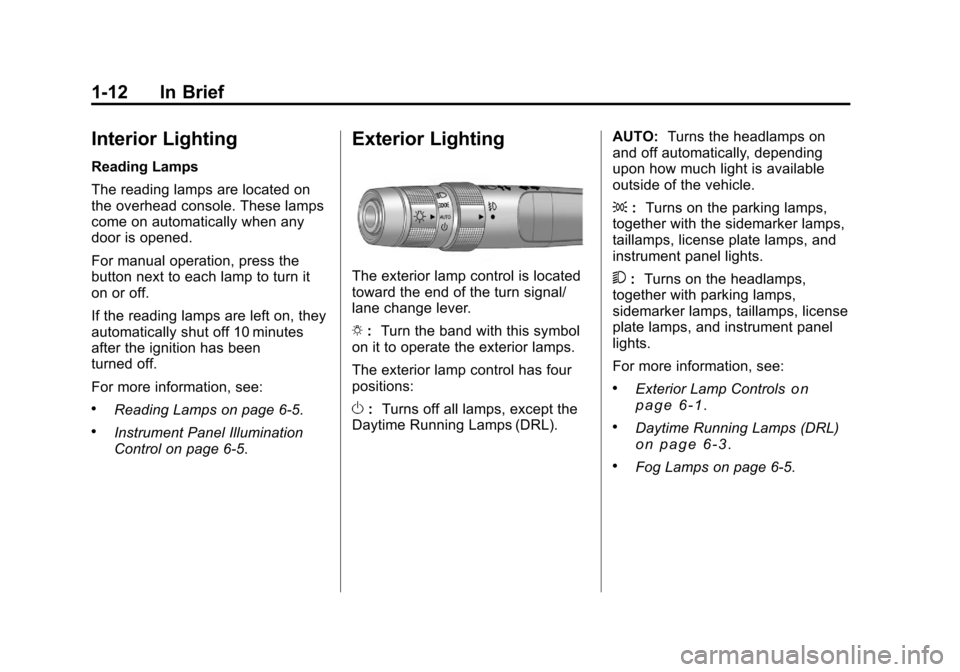
Exterior Lighting
The exterior lamp control is located
toward the end of the turn signal/
lane change lever.
O:Turn the band with this symbol
on it to operate the exterior lamps.
The exterior lamp control has four
positions:
O :Turns off all lamps, except the
Daytime Running Lamps (DRL). AUTO:
Turns the headlamps on
and off automatically, depending
upon how much light is available
outside of the vehicle.
; :Turns on the parking lamps,
together with the sidemarker lamps,
taillamps, license plate lamps, and
instrument panel lights.
5 :Turns on the headlamps,
together with parking lamps,
sidemarker lamps, taillamps, license
plate lamps, and instrument panel
lights.
For more information, see:
.Exterior Lamp Controlson
page 6‑1.
.Daytime Running Lamps (DRL)on page 6‑3.
.Fog Lamps on page 6‑5.
Page 55 of 496
Black plate (23,1)Cadillac CTS/CTS-V Owner Manual - 2011
Keys, Doors and Windows 2-23
To open the liftgate, press the
touchpad on the handle on the
outside of the liftgate and lift. To
close the liftgate, use the pull cup.
With the power liftgate disabled, the
liftgate electric latch will still power
latch once contact is made with the
striker. Always close the liftgate
before driving.
If the RKE button is pressed while
power operation is disabled, the turn
signals will flash and the liftgate will
not move.
The liftgate has an electric latch.
If the battery is disconnected or has
low voltage, the liftgate will not
open. The liftgate will resume
operation when the battery is
reconnected and charged.Vehicle Security
This vehicle has theft-deterrent
features; however, they do not make
it impossible to steal.
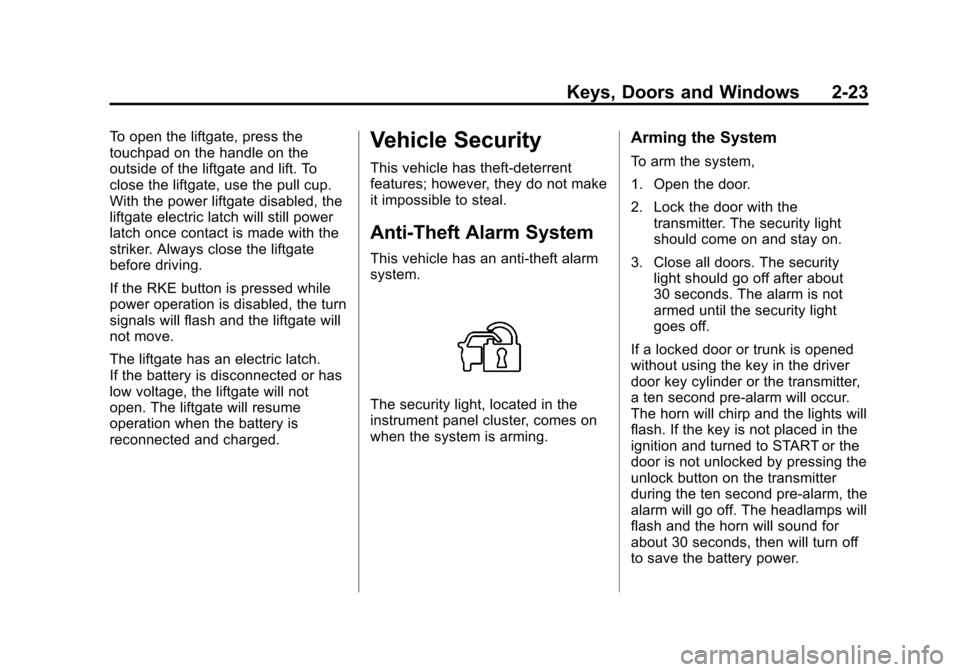
Anti-Theft Alarm System
This vehicle has an anti-theft alarm
system.
The security light, located in the
instrument panel cluster, comes on
when the system is arming.
Arming the System
To arm the system,
1. Open the door.
2. Lock the door with thetransmitter. The security light
should come on and stay on.
3. Close all doors. The security light should go off after about
30 seconds. The alarm is not
armed until the security light
goes off.
If a locked door or trunk is opened
without using the key in the driver
door key cylinder or the transmitter,
a ten second pre-alarm will occur.
The horn will chirp and the lights will
flash. If the key is not placed in the
ignition and turned to START or the
door is not unlocked by pressing the
unlock button on the transmitter
during the ten second pre-alarm, the
alarm will go off. The headlamps will
flash and the horn will sound for
about 30 seconds, then will turn off
to save the battery power.
Page 60 of 496

Black plate (28,1)Cadillac CTS/CTS-V Owner Manual - 2011
2-28 Keys, Doors and Windows
Interior Mirrors
Automatic Dimming
Rearview Mirror
The vehicle has an automatic
dimming inside rearview mirror.
Automatic dimming reduces the
glare of headlamps from behind
you. The dimming feature comes on
and the indicator light illuminates
each time the vehicle is started.
O(On/Off):Press to turn the
dimming feature on or off.
If the vehicle has a rear vision
camera (RVC), see Rear Vision
Camera (RVC)
on page 9‑44for
more information. Vehicles with OnStar
®will have
controls located at the bottom of the
mirror. See your dealer for more
information on the system and how
to subscribe to OnStar. See the
OnStar Owner's Guide for more
information about the services
OnStar provides.
Cleaning the Mirror
Do not spray glass cleaner directly
on the mirror. Use a soft towel
dampened with water.
Windows
{WARNING
Leaving children, helpless adults,
or pets in a vehicle with the
windows closed is dangerous.
They can be overcome by the
extreme heat and suffer
permanent injuries or even death
from heat stroke. Never leave a
child, a helpless adult, or a pet
alone in a vehicle, especially with
the windows closed in warm or
hot weather.
Page 141 of 496
Black plate (1,1)Cadillac CTS/CTS-V Owner Manual - 2011
Instruments and Controls 5-1
Instruments and
Controls
Controls
Steering Wheel Adjustment . . . 5-2
Steering Wheel Controls(Audio) . . . . . . . . . . . . . . . . . . . . . . 5-3
Heated Steering Wheel . . . . . . . 5-4
Horn . . . . . . . . . . . . . . . . . . . . . . . . . . 5-4
Windshield Wiper/Washer . . . . . 5-4
Rear Window Wiper/ Washer . . . . . . . . . . . . . . . . . . . . . . 5-6
Headlamp Washer . . . . . . . . . . . . 5-7
Compass . . . . . . . . . . . . . . . . . . . . . 5-7
Clock . . . . . . . . . . . . . . . . . . . . . . . . . 5-8
Power Outlets . . . . . . . . . . . . . . . . . 5-9
Cigarette Lighter . . . . . . . . . . . . . . 5-9
Ashtrays . . . . . . . . . . . . . . . . . . . . . 5-10
Warning Lights, Gauges, and
Indicators
Warning Lights, Gauges, and Indicators . . . . . . . . . . . . . . . . . . 5-10
Instrument Cluster . . . . . . . . . . . 5-11
Speedometer . . . . . . . . . . . . . . . . 5-13
Odometer . . . . . . . . . . . . . . . . . . . . 5-13
Trip Odometer . . . . . . . . . . . . . . . 5-13 Tachometer . . . . . . . . . . . . . . . . . . 5-13
Fuel Gauge . . . . . . . . . . . . . . . . . . 5-13
Boost Gauge . . . . . . . . . . . . . . . . 5-14
Engine Speed Limiter . . . . . . . . 5-15
Engine Oil Pressure
Gauge . . . . . . . . . . . . . . . . . . . . . . 5-15
Engine Coolant Temperature Gauge . . . . . . . . . . . . . . . . . . . . . . 5-16
Safety Belt Reminders . . . . . . . 5-17
Airbag Readiness Light . . . . . . 5-17
Passenger Airbag Status Indicator . . . . . . . . . . . . . . . . . . . . 5-18
Charging System Light . . . . . . 5-19
Malfunction Indicator Lamp . . . . . . . . . . . . . 5-19
Brake System Warning Light . . . . . . . . . . . . . . . . . . . . . . . 5-22
Antilock Brake System (ABS) Warning Light . . . . . . . . . . . . . . 5-23
Up-Shift Light . . . . . . . . . . . . . . . . 5-24
Traction Control System (TCS)/StabiliTrak
®Light . . . . 5-24
Engine Coolant Temperature Warning Light . . . . . . . . . . . . . . 5-25
Tire Pressure Light . . . . . . . . . . 5-25
Engine Oil Pressure Light . . . . 5-26
Security Light . . . . . . . . . . . . . . . . 5-26
High-Beam on Light . . . . . . . . . 5-26 Fog Lamp Light . . . . . . . . . . . . . . 5-27
Lamps on Reminder . . . . . . . . . 5-27
Cruise Control Light . . . . . . . . . 5-27
Information Displays
Driver Information
Center (DIC) . . . . . . . . . . . . . . . 5-27
Vehicle Messages
Vehicle Messages . . . . . . . . . . . 5-31
Battery Voltage and ChargingMessages . . . . . . . . . . . . . . . . . . 5-31
Brake System Messages . . . . 5-32
Compass Messages . . . . . . . . . 5-34
Cruise Control Messages . . . . 5-34
Door Ajar Messages . . . . . . . . . 5-34
Engine Cooling System Messages . . . . . . . . . . . . . . . . . . 5-35
Engine Oil Messages . . . . . . . . 5-35
Engine Power Messages . . . . 5-36
Fuel System Messages . . . . . . 5-36
Key and Lock Messages . . . . . 5-36
Lamp Messages . . . . . . . . . . . . . 5-39
Object Detection System Messages . . . . . . . . . . . . . . . . . . 5-39
Ride Control System Messages . . . . . . . . . . . . . . . . . . 5-40
Airbag System Messages . . . . 5-42
Page 145 of 496
Black plate (5,1)Cadillac CTS/CTS-V Owner Manual - 2011
Instruments and Controls 5-5
6(Adjustable Interval Wiper
Band): Turn the band up for more
frequent wipes or down for less
frequent wipes.
1 : Slow wipes.
2 : Fast wipes.
If the windshield wipers are in use
for about six seconds while you are
driving, the exterior lamps come on
automatically if the exterior lamp
control is in AUTO. See “Wiper
Activated Headlamps” for more
information.
Clear snow and ice from the wiper
blades before using them. If frozen
to the windshield, carefully loosen or
thaw them. Damaged wiper blades
should be replaced. For more
information, see Wiper Blade
Replacement on page 10‑34.
Heavy snow or ice can overload the
wiper motor. A circuit breaker will
stop the motor until it cools down. Wiper Arm Assembly Protection
When using an automatic car wash,
move the windshield wiper lever to
the OFF position. This disables the
windshield wipers and/or rear
wipers, if equipped.
Windshield Washer
{WARNING
In freezing weather, do not use
your washer until the windshield
is warmed. Otherwise the washer
fluid can form ice on the
windshield, blocking your vision.
Sedan/Coupe Model
K(Washer Fluid): Press the
button with this symbol, on the end
of the windshield washer lever, to
wash the windshield. The washer
fluid sprays onto the windshield and
the wipers run for a few cycles to
clear the windshield. Press and hold
Kfor more wash cycles. Wagon Model
Pull the lever to spray washer fluid
on the windshield. The spray
continues until the lever is released.
The wipers will run a few times.
Washer Fluid Low Add Fluid
displays on the Driver Information
Center (DIC) when the washer fluid
is low. See
Driver Information
Center (DIC) on page 5‑27.
See Washer Fluid
on page 10‑26for
information on filling the windshield
washer fluid reservoir.
If the headlamps are on while the
windshield is being washed, the
headlamp washers, if the vehicle
has them, will also turn on. See
“Headlamp Washer” following for
more information.
Page 146 of 496
Black plate (6,1)Cadillac CTS/CTS-V Owner Manual - 2011
5-6 Instruments and Controls
Wiper Activated Headlamps
This feature activates the
headlamps and parking lamps after
the windshield wipers have been in
use for about six seconds. For this
feature to work, the exterior lamp
control must be in AUTO.
The wiper-activated headlamps
immediately turn off when the
ignition is turned to LOCK/OFF,
or the windshield wiper control is
turned off.
Rear Window Wiper/
Washer
For vehicles with a rear window
wiper/washer, the controls are on
the end of the windshield wiper
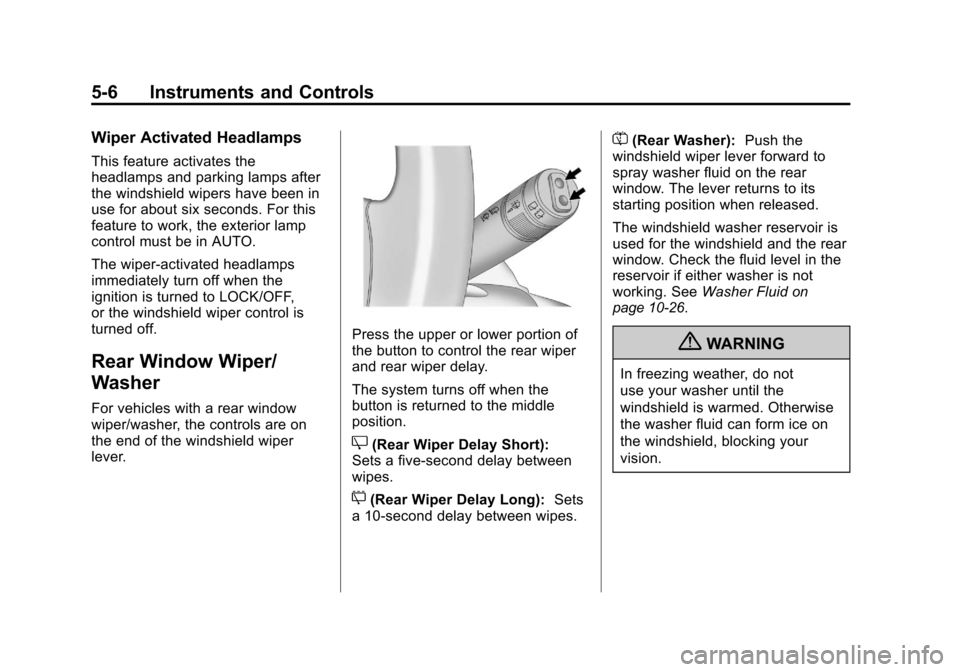
lever.
Press the upper or lower portion of
the button to control the rear wiper
and rear wiper delay.
The system turns off when the
button is returned to the middle
position.
Z(Rear Wiper Delay Short):
Sets a five‐second delay between
wipes.
5(Rear Wiper Delay Long): Sets
a 10‐second delay between wipes.
=(Rear Washer): Push the
windshield wiper lever forward to
spray washer fluid on the rear
window. The lever returns to its
starting position when released.
The windshield washer reservoir is
used for the windshield and the rear
window. Check the fluid level in the
reservoir if either washer is not
working. See Washer Fluid
on
page 10‑26.
{WARNING
In freezing weather, do not
use your washer until the
windshield is warmed. Otherwise
the washer fluid can form ice on
the windshield, blocking your
vision.
Page 147 of 496
Black plate (7,1)Cadillac CTS/CTS-V Owner Manual - 2011
Instruments and Controls 5-7
Headlamp Washer
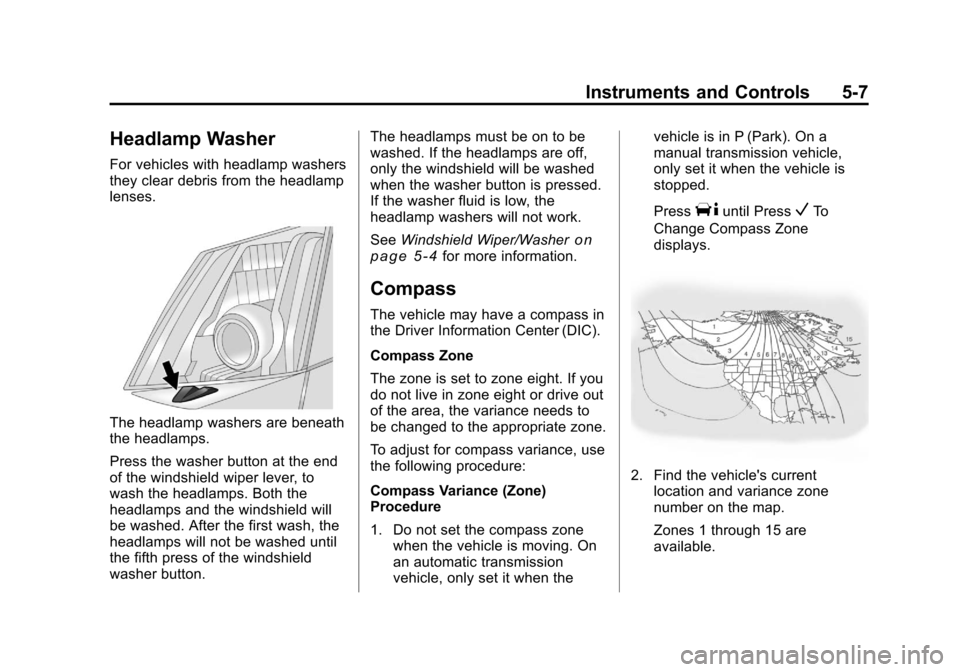
For vehicles with headlamp washers
they clear debris from the headlamp
lenses.
The headlamp washers are beneath
the headlamps.
Press the washer button at the end
of the windshield wiper lever, to
wash the headlamps. Both the
headlamps and the windshield will
be washed. After the first wash, the
headlamps will not be washed until
the fifth press of the windshield
washer button.The headlamps must be on to be
washed. If the headlamps are off,
only the windshield will be washed
when the washer button is pressed.
If the washer fluid is low, the
headlamp washers will not work.
See
Windshield Wiper/Washer
on
page 5‑4for more information.
Compass
The vehicle may have a compass in
the Driver Information Center (DIC).
Compass Zone
The zone is set to zone eight. If you
do not live in zone eight or drive out
of the area, the variance needs to
be changed to the appropriate zone.
To adjust for compass variance, use
the following procedure:
Compass Variance (Zone)
Procedure
1. Do not set the compass zone when the vehicle is moving. On
an automatic transmission
vehicle, only set it when the vehicle is in P (Park). On a
manual transmission vehicle,
only set it when the vehicle is
stopped.
Press
Tuntil PressVTo
Change Compass Zone
displays.
2. Find the vehicle's current location and variance zone
number on the map.
Zones 1 through 15 are
available.