navigation system CADILLAC CTS 2013 2.G Infotainment Manual
[x] Cancel search | Manufacturer: CADILLAC, Model Year: 2013, Model line: CTS, Model: CADILLAC CTS 2013 2.GPages: 70, PDF Size: 0.65 MB
Page 31 of 70
Black plate (31,1)Cadillac CTS/CTS-V Navigation System - 2013 - crc - 8/21/12
Infotainment System 31
iPod connection cable is needed
that came with the vehicle, from
your dealer. See your dealer for
more information.
This feature supports the following
iPod models:
.Fifth generation or later iPod
.First or Second generation or
later iPod Nano*
*For proper operation, make sure
the iPod has the latest firmware
from Apple
®. The iPod firmware can
be updated using the latest iTunes
application. See www.apple.com/
itunes.
To connect and control the iPod,
connect one end of the specially
iPod connection cable that came
with the vehicle to the iPod’s dock
connector. Connect the other end to
both the USB port and the auxiliary
input jack. The USB port and the
auxiliary input jack are located in
the center console bin. The iPod music displays on the radio’s
display and begins playing through
the vehicle's radio system.
A standard iPod USB cable, like the
one that came with the iPod, cannot
be used to connect an iPod to the
vehicle. The iPod connection cable
that was purchased with the vehicle
or that was made available from
your dealer must be used in order
for this feature to work.
Use the radioqMENUrSELECT
knob to bring up the iPod Menu and
select Songs, Artists, Albums,
Playlists and Audio Books to play
from the iPod.
The iPod charges while it is
connected to the vehicle and if the
vehicle is turned to ACC/
ACCESSORY or ON/RUN. It can
also be left connected to the vehicle
while the vehicle is turned off or
removed. With the vehicle turned
off, the iPod automatically powers
off and will not charge or draw
power from the vehicle's battery. If an older iPod model is used that
is not supported or does not have
the special iPod connection cable,
the iPod can still be used in the
vehicle by connecting it to the
Auxiliary Input Jack using a
standard 3.5 mm (1/8 in) stereo
cable. See
“Using the Auxiliary Input
Jack” earlier for more information.
Gracenote Database
When a CDDA is recorded from a
CD to the HDD, the music
information (Album name, Artist
name, Song name and Genre) is
retrieved from the Gracenote
database, stored in the radio. The
database information uses the
information of Gracenote Music
Recognition Service. See the
owner's manual for more information
on the Gracenote Database.
Gracenote Music Recognition
Service, Music recognition
technology, and related data are
provided by Gracenote
®. Gracenote
Page 32 of 70
Black plate (32,1)Cadillac CTS/CTS-V Navigation System - 2013 - crc - 8/21/12
32 Infotainment System
is the industry standard in music
recognition technology and related
content delivery. For more
information, visit
www.gracenote.com.
Updating the Gracenote Database
1. Turn the ignition on.
2. Press
Oto turn the system on.
3. Insert the update disc part way into the slot, label side up. The
player pulls it in.
4. Update Confirmation screen displays along with the version
information. Press the Update
screen button.
5. The system reboots and starts updating the database.
A progress bar displays.
6. The disc automatically ejects after the update is completed.
The system reboots.
Navigation
Using the Navigation
System
This section presents basic
information needed to operate the
navigation system.
Use the navigation control buttons
located on the infotainment system
along with the available
touch-screen buttons on the
navigation screen to operate the
system. See Overview on page 4 for
more information.
Once the vehicle is moving, various
functions are disabled to reduce
driver distractions.
Navigation Control Buttons
The following control buttons are
located on the navigation system:
VOL/
O(Volume/Power):
1. Press to turn the system on and off. 2. Turn this knob to increase or
decrease the volume. The
volume works for the features
that are currently being used;
audio, OnStar
®(if equipped)
changes the volume for the
phone, voice guidance, and
speech recognition changes the
volume of voice prompts.
NAV
n m(Navigation Screen Up/
Down): Press to make the screen
go up and down. In the up position,
all touch-screen buttons can be
viewed or used. In the down
position, a portion of the screen will
be shown that displays the current
audio source and temperature.
!(Dimming Change Button):
The dimming change button on the
navigation faceplate is used to
toggle between these dimming
modes.
NAV (Navigation): Press to view
your vehicle's current position on
the map screen. Each press of this
key cycles through Full Map and the
tab that displays the current audio
Page 33 of 70
Black plate (33,1)Cadillac CTS/CTS-V Navigation System - 2013 - crc - 8/21/12
Infotainment System 33
source (AM, FM, XM (if equipped),
CD, etc.). Full Map displays the
screen in full map view. Selecting
the audio tab splits the screen
between the map screen and the
current audio source screen menu.
SeeConfigure Menu on page 51 for
more information.
qMENUrSELECT: Turn the
MENU knob to highlight a feature.
Press this knob to select the
highlighted feature.
CONFIG (Configure): Press to
adjust features for sound, radio,
navigation, display, and clock. See
Configure Menu on page 51 for
more information.
RPT (Navigation Repeat): Press
to repeat the last voice guidance
prompt. See Destination on
page 40.
DEST (Destination): Press to
access the Route screen to plan a
destination. If route guidance is
active, press this key to access the
Route screen. See Destination on
page 40 for more information. DEL (Delete):
Press to delete XM
categories (if equipped) and
information from the hard drive. See
Hard Drive Device (HDD) on
page 24 for more information.
INFO (Information): Press for
Speech Help. See Speech
Recognition on page 62 for more
information on Speech Help.
Touch-Screen Buttons
Touch-screen buttons are located on
the screen. Screen buttons are
highlighted when a feature is
available. There are also some
toggle screen buttons that highlight
when active and grey-out when
inactive.
Alpha-Numeric Keyboard
Letters of the alphabet, symbols,
punctuation, and numbers, when
available, display on the navigation
screen as an alpha or numeric
keyboard. The alpha keyboard
displays when the system requires
entry of a name. All characters are touch-screen
buttons. Press a character to
select it.
À-Ý (Accent Alphabet):
Select
letters with accent symbols.
A-Z (Alphabet): Select letters from
the alphabet.
0-9 (Numbers): Select numbers.
Sym (Symbols): Select symbols.
Space: Select to enter a space
between characters or the words of
a name.
q(Backspace): Select if an
incorrect character has been
selected.
To make name selections easier,
the system only highlights the
characters that can follow the last
one entered. For example, if a Z is
entered, a T may not be available
for selection.
If a name does not display after
entry, it may need to be entered
differently since the map database
may not contain that information.
Page 34 of 70
Black plate (34,1)Cadillac CTS/CTS-V Navigation System - 2013 - crc - 8/21/12
34 Infotainment System
Maps
This section includes basic
information needed to know about
the map database.
Map Coverage
The maps are stored on the HDD
(Hard Drive). It includes the
48 contiguous United States,
Alaska, Hawaii, portions of Canada,
Puerto Rico, and the US Virgin
Islands.
See“City List” later in this section to
view a detailed explanation of map
coverage and detailed city lists in
each region.
Installing the DVD Map Disc
Your dealer installed the map
database information on the HDD.
After receiving an updated map
disc, it needs to be copied to the
HDD. Read the following steps
completely before operating this
feature.
1. Turn the ignition on. 2. Press
Oto turn the system on.
3. Insert the update disc partway into the slot, label side up. The
player pulls it in.
4. Update Confirmation screen displays with version
information, then press Update.
5. Enter the Authentication Code, then press Enter.
6. If correct code is entered, the system reboots and starts
updating, the status bar
displays.
7. The disc is automatically ejected after the map database update
is completed. The system
reboots.
If the application update file is
included in the disc, the application
update is also done. There is a
slight pause between map update
and application data. The system
may restart multiple times. Make
sure audio has returned for at least
30 to 60 seconds before ejecting
the disc. The disc is not automatically
ejected, pressYafter the
application update is completed.
Ejecting the DVD Map Disc
When the map disc has finished
copying to the HDD, press the
Y
button.
Handling the DVD Map Disc
When handling the DVD map disc,
be careful of the following:
.Handle the disc very carefully to
avoid contamination or flaws.
Signals may not read out
properly if the disc gets
contaminated or flawed.
.If the disc gets soiled, use a soft
cloth to gently wipe it out from
the center of the disc to the
outside. Do not use
photographic record cleaner,
solvents, or other cleaners.
Page 35 of 70
Black plate (35,1)Cadillac CTS/CTS-V Navigation System - 2013 - crc - 8/21/12
Infotainment System 35
.Do not use the disc to rest on
while writing or drawing using
any writing utensil or attach a
seal to any of the sides or
the disc.
.Do not keep the disc in direct
sunlight, high temperatures,
or humidity.
.After using the disc, place it
back into the original case.
Map Adjustments
The scale of view on the map can
be adjusted. Also, the map moves
automatically based on the direction
the vehicle is being travelled.
Map Scales
V/U(Zoom In/Zoom Out):Press
the zoom in or out screen buttons or
the scale on the bar to change the
level of map detail. The scale
appears on the screen once the
zoom in or zoom out screen buttons
are selected. The system adjusts
the map accordingly. The scale of a map can range from 50 m (1/32 of a
mile) to 550 km (350 mi). To change
from English or metric, see
“DIC
Operation and Displays” in the
Index of your vehicle's owner
manual.
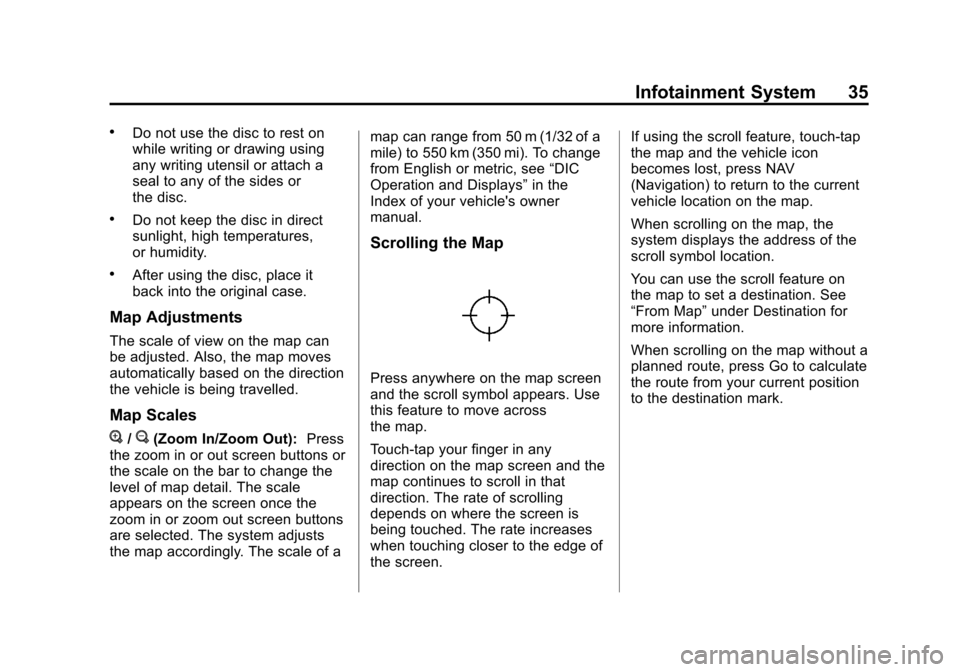
Scrolling the Map
Press anywhere on the map screen
and the scroll symbol appears. Use
this feature to move across
the map.
Touch-tap your finger in any
direction on the map screen and the
map continues to scroll in that
direction. The rate of scrolling
depends on where the screen is
being touched. The rate increases
when touching closer to the edge of
the screen. If using the scroll feature, touch-tap
the map and the vehicle icon
becomes lost, press NAV
(Navigation) to return to the current
vehicle location on the map.
When scrolling on the map, the
system displays the address of the
scroll symbol location.
You can use the scroll feature on
the map to set a destination. See
“From Map”
under Destination for
more information.
When scrolling on the map without a
planned route, press Go to calculate
the route from your current position
to the destination mark.
Page 36 of 70
Black plate (36,1)Cadillac CTS/CTS-V Navigation System - 2013 - crc - 8/21/12
36 Infotainment System
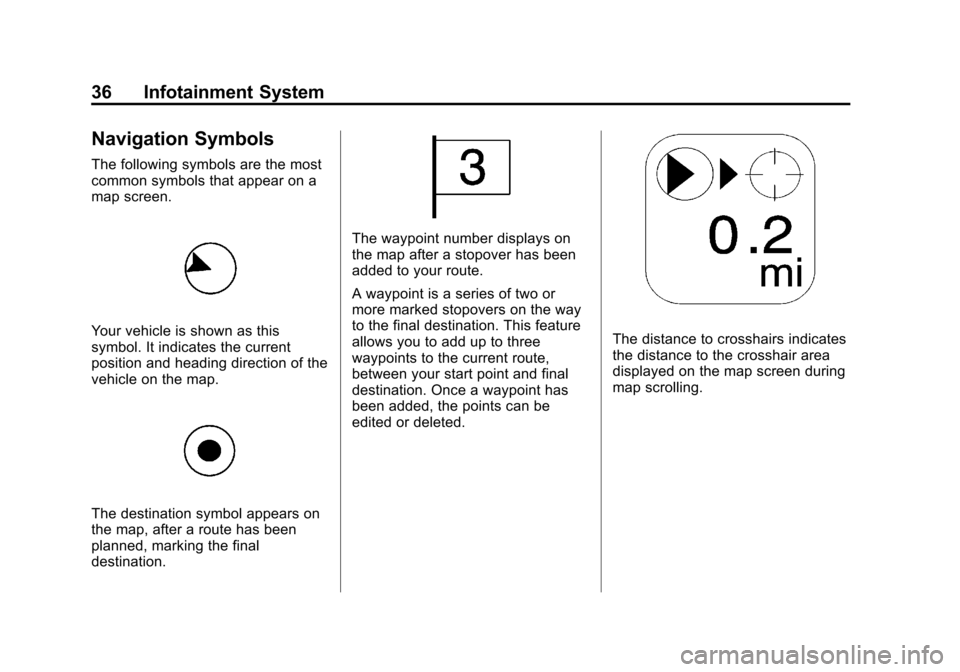
Navigation Symbols
The following symbols are the most
common symbols that appear on a
map screen.
Your vehicle is shown as this
symbol. It indicates the current
position and heading direction of the
vehicle on the map.
The destination symbol appears on
the map, after a route has been
planned, marking the final
destination.
The waypoint number displays on
the map after a stopover has been
added to your route.
A waypoint is a series of two or
more marked stopovers on the way
to the final destination. This feature
allows you to add up to three
waypoints to the current route,
between your start point and final
destination. Once a waypoint has
been added, the points can be
edited or deleted.
The distance to crosshairs indicates
the distance to the crosshair area
displayed on the map screen during
map scrolling.
Page 37 of 70
Black plate (37,1)Cadillac CTS/CTS-V Navigation System - 2013 - crc - 8/21/12
Infotainment System 37
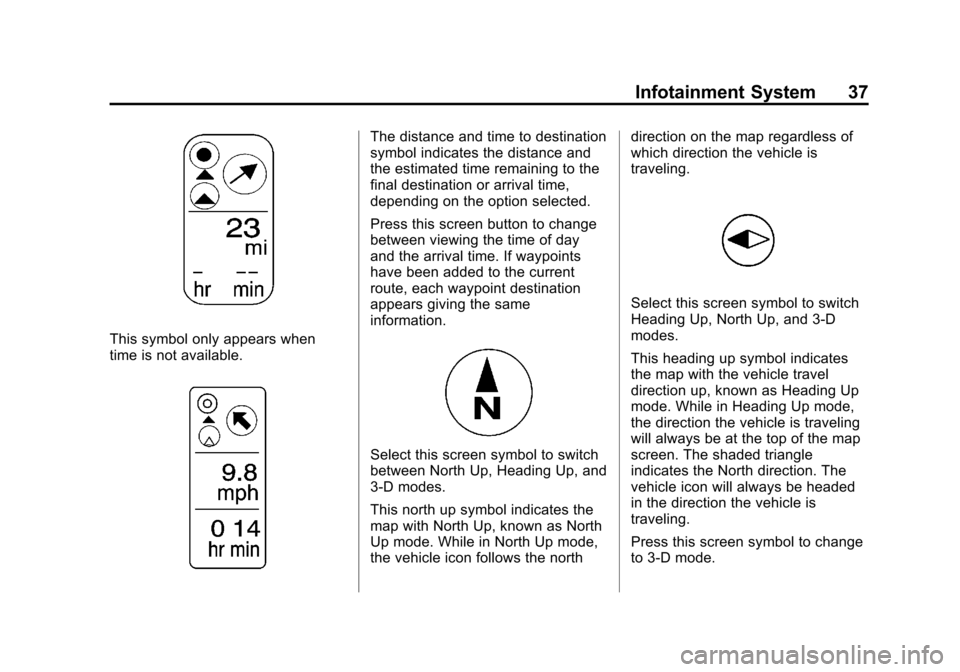
This symbol only appears when
time is not available.
The distance and time to destination
symbol indicates the distance and
the estimated time remaining to the
final destination or arrival time,
depending on the option selected.
Press this screen button to change
between viewing the time of day
and the arrival time. If waypoints
have been added to the current
route, each waypoint destination
appears giving the same
information.
Select this screen symbol to switch
between North Up, Heading Up, and
3‐D modes.
This north up symbol indicates the
map with North Up, known as North
Up mode. While in North Up mode,
the vehicle icon follows the northdirection on the map regardless of
which direction the vehicle is
traveling.
Select this screen symbol to switch
Heading Up, North Up, and 3‐D
modes.
This heading up symbol indicates
the map with the vehicle travel
direction up, known as Heading Up
mode. While in Heading Up mode,
the direction the vehicle is traveling
will always be at the top of the map
screen. The shaded triangle
indicates the North direction. The
vehicle icon will always be headed
in the direction the vehicle is
traveling.
Press this screen symbol to change
to 3‐D mode.
Page 38 of 70
Black plate (38,1)Cadillac CTS/CTS-V Navigation System - 2013 - crc - 8/21/12
38 Infotainment System
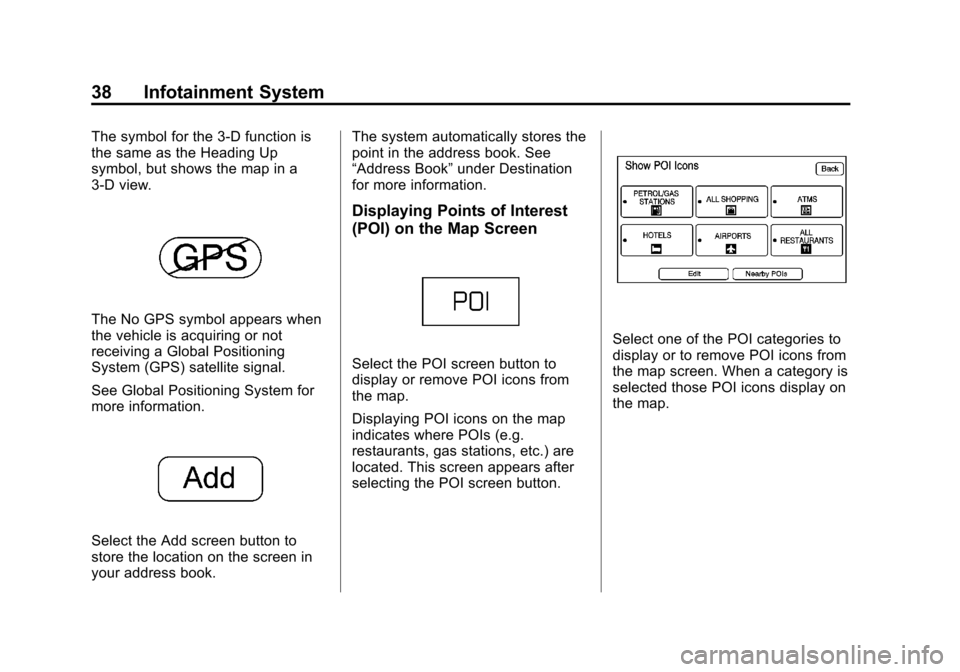
The symbol for the 3-D function is
the same as the Heading Up
symbol, but shows the map in a
3-D view.
The No GPS symbol appears when
the vehicle is acquiring or not
receiving a Global Positioning
System (GPS) satellite signal.
See Global Positioning System for
more information.
Select the Add screen button to
store the location on the screen in
your address book.The system automatically stores the
point in the address book. See
“Address Book”
under Destination
for more information.
Displaying Points of Interest
(POI) on the Map Screen
Select the POI screen button to
display or remove POI icons from
the map.
Displaying POI icons on the map
indicates where POIs (e.g.
restaurants, gas stations, etc.) are
located. This screen appears after
selecting the POI screen button.
Select one of the POI categories to
display or to remove POI icons from
the map screen. When a category is
selected those POI icons display on
the map.
Page 39 of 70
Black plate (39,1)Cadillac CTS/CTS-V Navigation System - 2013 - crc - 8/21/12
Infotainment System 39
Edit:Press to change one of the
current POI categories. Press the
Edit screen button, select the POI
category to be changed, then select
the new category.
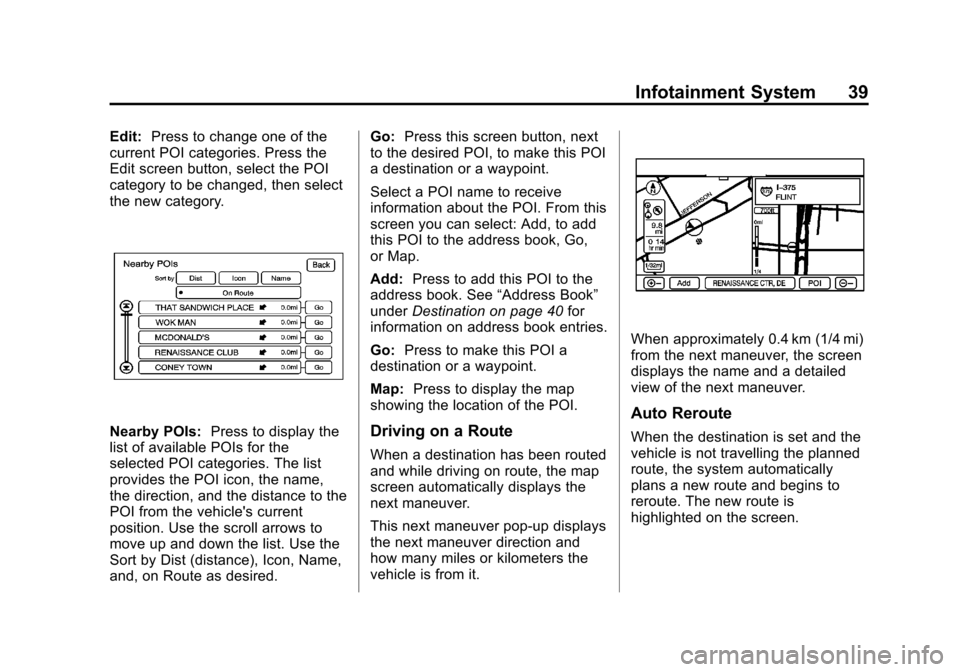
Nearby POIs: Press to display the
list of available POIs for the
selected POI categories. The list
provides the POI icon, the name,
the direction, and the distance to the
POI from the vehicle's current
position. Use the scroll arrows to
move up and down the list. Use the
Sort by Dist (distance), Icon, Name,
and, on Route as desired. Go:
Press this screen button, next
to the desired POI, to make this POI
a destination or a waypoint.
Select a POI name to receive
information about the POI. From this
screen you can select: Add, to add
this POI to the address book, Go,
or Map.
Add: Press to add this POI to the
address book. See “Address Book”
under Destination on page 40 for
information on address book entries.
Go: Press to make this POI a
destination or a waypoint.
Map: Press to display the map
showing the location of the POI.Driving on a Route
When a destination has been routed
and while driving on route, the map
screen automatically displays the
next maneuver.
This next maneuver pop-up displays
the next maneuver direction and
how many miles or kilometers the
vehicle is from it.
When approximately 0.4 km (1/4 mi)
from the next maneuver, the screen
displays the name and a detailed
view of the next maneuver.
Auto Reroute
When the destination is set and the
vehicle is not travelling the planned
route, the system automatically
plans a new route and begins to
reroute. The new route is
highlighted on the screen.
Page 40 of 70
Black plate (40,1)Cadillac CTS/CTS-V Navigation System - 2013 - crc - 8/21/12
40 Infotainment System
Destination
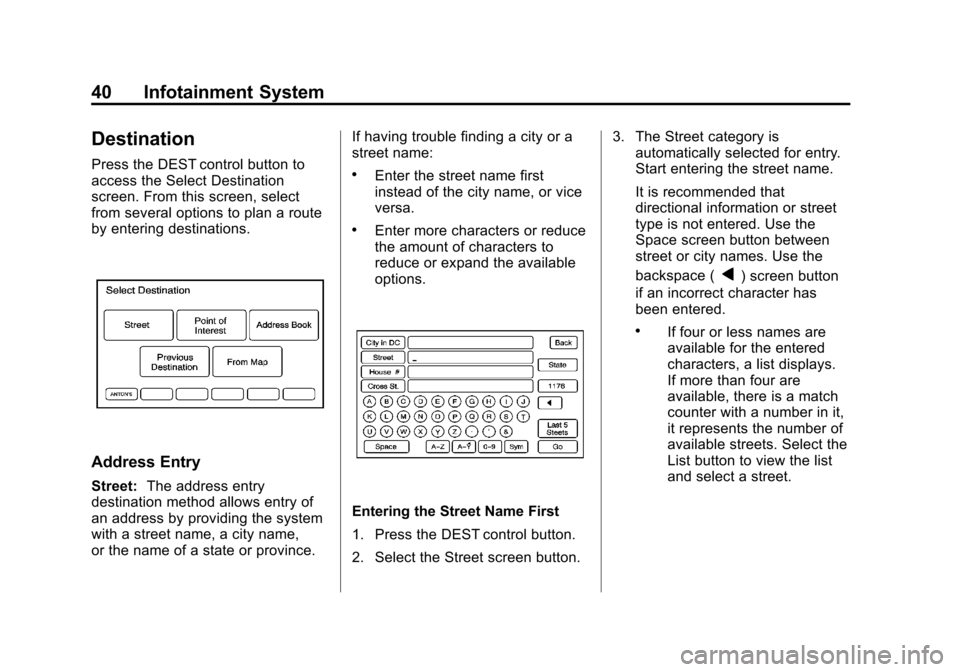
Press the DEST control button to
access the Select Destination
screen. From this screen, select
from several options to plan a route
by entering destinations.
Address Entry
Street:The address entry
destination method allows entry of
an address by providing the system
with a street name, a city name,
or the name of a state or province. If having trouble finding a city or a
street name:
.Enter the street name first
instead of the city name, or vice
versa.
.Enter more characters or reduce
the amount of characters to
reduce or expand the available
options.
Entering the Street Name First
1. Press the DEST control button.
2. Select the Street screen button.3. The Street category is
automatically selected for entry.
Start entering the street name.
It is recommended that
directional information or street
type is not entered. Use the
Space screen button between
street or city names. Use the
backspace (
q) screen button
if an incorrect character has
been entered.
.If four or less names are
available for the entered
characters, a list displays.
If more than four are
available, there is a match
counter with a number in it,
it represents the number of
available streets. Select the
List button to view the list
and select a street.