ECO mode CADILLAC CTS 2013 2.G Owner's Manual
[x] Cancel search | Manufacturer: CADILLAC, Model Year: 2013, Model line: CTS, Model: CADILLAC CTS 2013 2.GPages: 478, PDF Size: 7.7 MB
Page 167 of 478

Black plate (45,1)Cadillac CTS/CTS-V Owner Manual - 2013 - crc2 - 8/22/12
Instruments and Controls 5-45
SPORT MODE
This message displays when the
vehicle is in sport mode. The
transmission gear position will also
be displayed when DSC is in use.
SeeManual Mode on page 9‑26 for
more information.
TRANSMISSION HOT IDLE
ENGINE
This message displays when the
transmission fluid in the vehicle is
too hot. Stop the vehicle and allow it
to idle until the transmission cools
down or until this message is
removed.
Vehicle Speed Messages
ICE POSSIBLE DRIVE
WITH CARE
This message displays when the
outside temperature is cold enough
to create icy road conditions. Adjust
your driving accordingly.
SPEED LIMITED TO
XXX KM/H (MPH)
This message displays when the
vehicle speed is limited to 128 km/h
(80 mph) because the vehicle
detects a problem in the speed
variable assist steering or magnetic
ride control systems. Have the
vehicle serviced by your dealer.
Washer Fluid Messages
WASHER FLUID LOW ADD
FLUID
This message displays when the
vehicle is low on windshield washer
fluid. Refill the windshield washer
fluid reservoir as soon as possible.
See Washer Fluid on page 10‑23 for
more information.
Vehicle
Personalization
Vehicle customization allows certain
features to be programmed for one
preferred setting.
Only the customization options
available will be displayed on
the DIC.
The default settings were preset
when the vehicle left the factory, but
may have been changed.
The customization preferences are
automatically recalled.
To change customization
preferences, use the following
procedure.
Entering the Feature
Settings Menu
1. Turn the ignition on.
To avoid excessive drain on the
battery, it is recommended that
the headlamps are turned off.
Page 172 of 478

Black plate (50,1)Cadillac CTS/CTS-V Owner Manual - 2013 - crc2 - 8/22/12
5-50 Instruments and Controls
vehicle exit. When the ignition is
turned off and all doors become
closed, the vehicle will determine
how many keyless access
transmitters remain in the vehicle
interior. If at least one keyless
access transmitter has been
removed from the interior of the
vehicle, the doors will lock after
several seconds.
For example, if there are two
keyless access transmitters in the
vehicle and one is removed, the
other will be locked in. The keyless
access transmitter locked in the
vehicle can still be used to start the
vehicle or unlock the doors,
if needed. A person approaching the
outside of the locked vehicle without
an authorized keyless access
transmitter, however, will not be able
to open the door, even with a
transmitter in the vehicle. See the
keyless access information for
Remote Keyless Entry (RKE)
System Operation (Key Access) on
page 2‑4orRemote Keyless Entry (RKE) System Operation (Keyless
Access) on page 2‑6
for more
information.
You may temporarily disable the
keyless locking feature by pressing
the door unlock switch for
three seconds on an open door. To
enable keyless locking, transition
the power mode from off.
To select whether the horn sounds
or the lights flash when the vehicle
is locked, see “Remote Door Lock”
earlier in this section.
Press the customization button until
Keyless Locking appears on the
DIC display. Press the set/reset
button once to access the settings
for this feature. Then press the
menu up/down button to scroll
through the following settings.
Off (default): The keyless locking
feature will be disabled.
On: The keyless locking feature will
be enabled. The doors will automatically lock
several seconds after you turn the
ignition off, remove a keyless
access transmitter from the interior
of the vehicle, and close all of the
doors.
No Change:
No change will be
made to this feature. The current
setting will remain.
To select a setting, press the set/
reset button while the desired
setting is displayed on the DIC.
Keyless Unlock
If the vehicle has the keyless
access system, this feature allows
you to select which doors will
automatically unlock when you
approach the vehicle with the
keyless access transmitter and
open the driver door. See the
keyless access information for
Remote Keyless Entry (RKE)
System Operation (Key Access) on
page 2‑4 orRemote Keyless Entry
(RKE) System Operation (Keyless
Access) on page 2‑6 for more
information.
Page 175 of 478

Black plate (53,1)Cadillac CTS/CTS-V Owner Manual - 2013 - crc2 - 8/22/12
Instruments and Controls 5-53
Exiting the Feature
Settings Menu
The feature settings menu will be
exited when any of the following
occurs:
.The vehicle is no longer in
ON/RUN.
.The trip/fuel or vehicle
information DIC buttons are
pressed.
.The end of the feature settings
menu is reached and exited.
.A 40-second time period has
elapsed with no selection made.
Universal Remote
System
SeeRadio Frequency Statement on
page 13‑20 for information
regarding Part 15 of the Federal
Communications Commission (FCC)
rules and Industry Canada
Standards RSS-GEN/210/220/310.
Universal Remote System
Programming
If the vehicle has this feature, you
will see these buttons with one
indicator light next to them in the
overhead console.
This system provides a way to
replace up to three remote control
transmitters used to activate devices such as garage door
openers, security systems, and
home automation devices.
Do not use the Universal Remote
system with any garage door opener
that does not have the stop and
reverse feature. This includes any
garage door opener model
manufactured before April 1,1982.
Read the instructions completely
before attempting to program the
Universal Remote system. Because
of the steps involved, it may be
helpful to have another person
available to assist with programming
the Universal Remote system.
Keep the original hand-held
transmitter for use in other vehicles
as well as for future Universal
Remote system programming. It is
also recommended that upon the
sale of the vehicle, the programmed
Universal Remote system buttons
be erased for security purposes.
See
“Erasing Universal Remote
System Buttons” later in this
section.
Page 185 of 478

Black plate (7,1)Cadillac CTS/CTS-V Owner Manual - 2013 - crc2 - 8/22/12
Lighting 6-7
Lighting Features
Entry Lighting
The headlamps, taillamps, license
plate lamps, back‐up lamps, dome
lamps, and most of the interior lights
turn on briefly when the Remote
Keyless Entry (RKE)
Kis pressed,
or when the door handle is pulled on
a keyless access vehicle. See
Ignition Positions (Keyless Access)
on page 9‑15 orIgnition Positions
(Key Access) on page 9‑17. After
about 30 seconds the exterior lamps
turn off, then the dome and
remaining interior lights dim to off.
Entry lighting can be disabled
manually by changing the ignition
out of the OFF position, or by
pressing the Remote Keyless Entry
(RKE)
Qbutton.
This feature can be changed. See
Vehicle Personalization on
page 5‑45.
Exit Lighting
The headlamps, taillamps, parking
lamps, back-up lamps, and license
plate lamps come on at night, or in
areas with limited lighting, when the
key is removed from the ignition.
The dome lamps also come on
when the key is removed from the
ignition. The exterior lights and
dome lamps remain on after the
door is closed for a set amount of
time, then automatically turn off.
For vehicles with keyless access,
the exterior lamps and dome lamps
automatically turn on when a door is
opened after the ignition is turned
off. See Ignition Positions (Keyless
Access) on page 9‑15 orIgnition
Positions (Key Access) on
page 9‑17.
The exterior lamps turn off
immediately by turning the exterior
lamps control off.
This feature can be changed. See
Vehicle Personalization on
page 5‑45.
Parade Dimming
This feature does not let the
instrument panel display screens
dim during daylight hours while the
ignition is in the ACC/ACCESSORY
or ON/RUN position and the parking
lamps or headlamps are on. Parade
dimming automatically works with
the light sensor on top of the
dashboard. If it is dark enough
outside and the parking lamps or
headlamps are on, the instrument
panel display screens can be
adjusted by turning the instrument
panel brightness knob clockwise or
counterclockwise to brighten or dim
the lighting. See Instrument Panel
Illumination Control on page 6‑6.
The instrument panel control
backlighting can still be adjusted
while in parade mode.
Page 194 of 478
Black plate (6,1)Cadillac CTS/CTS-V Owner Manual - 2013 - crc2 - 8/22/12
7-6 Infotainment System
Digital Signal
Processing (DSP)
If the radio has this feature, it has
either a Bose®sound system or a
Bose®5.1 Cabin Surround®sound
system. DSP is used to provide a
choice of different listening
experiences.
To choose a DSP setting:
1. Press the TUNE/TONE knob to
display the tone/speaker and
DSP tabs.
2. Press the softkey under the DSP tab.
3. Press the softkey below the Back tab to return to the original
tone/speaker display, or wait for
the display to time out.
The DSP settings available are:
.Normal : Select for normal
mode; this provides the best
sound quality for all seating
positions.
.Driver : Select to adjust the
audio for the driver to receive
the best possible sound quality.
.Rear : Select to adjust the audio
for the rear seat passengers to
receive the best possible sound
quality.
.Centerpoint®: Select to enable
Bose®Centerpoint signal
processing circuitry. Centerpoint
creates a Bose
®surround sound
listening experience from stereo
CDs, MP3s, and satellite radio.
As a result, vehicle owners enjoy
a surround sound listening
experience from many audio
sources. Simply turn it on, and it
operates automatically.
This feature is not available in
AM/FM radio mode. If the vehicle is equipped with
the Bose 5.1 Cabin Surround
sound system, the radio can
support the playback of 5.1
surround sound DVD-A discs or
DTS 5.1 surround sound CD
discs. When a 5.1 surround
sound formatted disc is playing,
DSP options available are:
‐
5.1 Surround + Normal: Best
for all seating positions.
‐ 5.1 Surround + Rear: Best for
the rear seating positions.
System Settings
CONFIG: Press to adjust the
number of favorites pages, auto
volume, and HDD (if available)
settings. The FAV, AUTO VOL, and
HDD (if available) tabs display. The
display will time out after
approximately 10 seconds.
Page 208 of 478
Black plate (20,1)Cadillac CTS/CTS-V Owner Manual - 2013 - crc2 - 8/22/12
7-20 Infotainment System
Care of the CD/DVD Player
Do not add a label to a disc; it could
get caught in the CD/DVD player.
If a label is needed, label the top of
the recorded disc with a
marking pen.
The use of disc lens cleaners for
discs is not advised, due to the risk
of contaminating the lens of the disc
optics with lubricants internal to the
CD/DVD player mechanism.
Notice:If a label is added to a
disc, or more than one disc is
inserted into the slot at a time,
or an attempt is made to play
scratched or damaged discs, the
CD/DVD player could be
damaged. While using the CD/
DVD player, use only discs in
good condition without any label,
load one dosc at a time, and keep
the CD/DVD player and the
loading slot free of foreign
materials, liquids, and debris.Control Buttons
The knobs and buttons used to
control the CD/DVD player are:
CD/AUX (CD/Auxiliary): Press to
switch between CD/DVD, auxiliary
input, and USB devices.
¨SEEK or©SEEK: Press to
select tracks.
TUNE/TONE: Turn and then press
to select tracks.
MENU/SELECT: Turn and then
press to select.
r/j(Play/Pause): Press to pause
and restart CD or DVD playback.
sREV (Fast Reverse): In CD or
MP3 playback mode, press and
hold to reverse playback quickly
within a track. Sound is heard at a
reduced volume. When released,
normal playback resumes and the
elapsed time of the track displays.
In DVD-Audio playback mode, press
once to change playback to a speed
of 2X. Each successive press changes playback to a speed of 4X,
10X, or 21X. Press
r/jto resume
normal playback.
\FWD (Fast Forward): In CD or
MP3 playback mode, press and
hold to advance playback quickly
within a track. Sound is heard at a
reduced volume. When released,
normal playback resumes and the
elapsed time of the track displays.
In DVD-Audio playback mode, press
once to change playback to a speed
of 2X. Each successive press
changes playback to a speed of 4X,
10X, or 21X. Press
r/jto resume
normal playback.
Z(Eject): Press to eject the disc.
Inserting a Disc
With the printed side facing up,
insert a disc into the audio CD/DVD
slot until it is drawn in. The disc
track number and a Shuffle tab
display and playback begins.
Page 213 of 478
Black plate (25,1)Cadillac CTS/CTS-V Owner Manual - 2013 - crc2 - 8/22/12
Infotainment System 7-25
Empty Directory or Folder
If a root directory or a folder exists
somewhere in the file structure that
contains empty folders and no
compressed files in them, the player
advances to the next folder in the
file structure that contains
compressed audio files.
No Folder
When the CD contains only
compressed files, the files are under
the root folder. The next and
previous folder functions do not
display on a CD that was recorded
without folders or playlists. The
radio displays F1 DISC for the root
directory.
When the CD contains only playlists
and compressed audio files, but no
folders, all files are under the root
folder. The folder down and the
folder up buttons search playlists
(Px) first and then go to the root
folder. The radio displays F1 DISC
for the root directory.Order of Play
Tracks recorded to the CD-R or
CD-RW play in the following order:
.Play begins from the first track in
the first folder and continues
sequentially through all tracks in
each folder. When the last track
of the last folder has played,
play continues from the first
track of the first playlist.
.Play begins from the first track in
the first playlist and continues
sequentially through all tracks in
each playlist. When the last
track of the last playlist has
played, play continues from the
first track of the first folder.
Playlists can be changed by
pressing the next and previous
folder button.
When play enters a new folder, the
display does not automatically show
the new folder name unless the
folder mode has been chosen as
the default display. The new track
name displays. File System and Naming
The song name contained in the ID3
tag displays. If the song name is not
in the ID3 tag, the radio displays the
file name without the extension.
Track names longer than 32
characters are shortened. Parts of
words on the last page of text and
the extension of the file name are
not displayed.
The HDD Radio will display file
names with the extension.
Preprogrammed Playlists
Preprogrammed playlists created
using WinAmp™, MusicMatch™,
or Real Jukebox™
software can be
accessed, however they cannot be
edited using the radio. These
playlists are special folders
containing compressed audio song
files. Playlists must have a file
extension of PLS or M3U.
Playlists can be selected using the
previous and next folder buttons.
Tracks can be changed by pressing
the seek buttons or turning the
Page 219 of 478
Black plate (31,1)Cadillac CTS/CTS-V Owner Manual - 2013 - crc2 - 8/22/12
Infotainment System 7-31
.AudioBook
3. Press the MENU/SELECT knob to select the desired option.
Quick Jump
To scroll up or down the list of
Artists, Albums, or Song Titles,
press and hold the softkey under
the FWD or REV tab.
To jump to the beginning, middle,
or last section of the list:
.Press the first softkey under the
display to go to the beginning
section of the list.
.Press the second softkey under
the display to go to the middle
section of the list.
.Press the third softkey under the
display to go to the last section
of the list.
Shuffle Songs
Select this option from the HDD
Menu to randomly play back HDD
content. Playlist
Select this option from the HDD
Menu to display all six favorite
playlists, then select one of the six
playlists to display a list of songs
that have been added to that
favorite playlist. Select a song from
the list to begin playback of that
song and to put the HDD into the
Playlist mode. See
“Saving HDD
Favorites” later in this section for
more information.
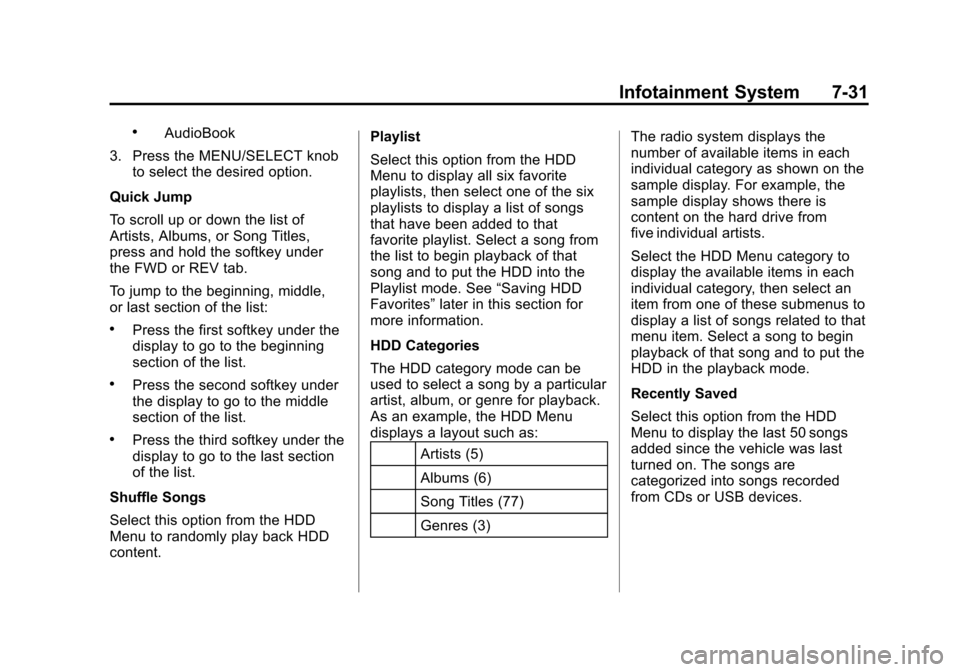
HDD Categories
The HDD category mode can be
used to select a song by a particular
artist, album, or genre for playback.
As an example, the HDD Menu
displays a layout such as:
Artists (5)
Albums (6)
Song Titles (77)
Genres (3) The radio system displays the
number of available items in each
individual category as shown on the
sample display. For example, the
sample display shows there is
content on the hard drive from
five individual artists.
Select the HDD Menu category to
display the available items in each
individual category, then select an
item from one of these submenus to
display a list of songs related to that
menu item. Select a song to begin
playback of that song and to put the
HDD in the playback mode.
Recently Saved
Select this option from the HDD
Menu to display the last 50 songs
added since the vehicle was last
turned on. The songs are
categorized into songs recorded
from CDs or USB devices.
Page 220 of 478
Black plate (32,1)Cadillac CTS/CTS-V Owner Manual - 2013 - crc2 - 8/22/12
7-32 Infotainment System
AudioBook
The radio is able to play back
AudioBook content downloaded
from www.audible.com. This content
can be transferred into the HDD by
either burning it to a CD or copying
it to a USB storage device and then
recording it to the HDD.
The audible.com
®playback requires
activation of the vehicle as a player
for downloaded content. The radio
system activates the audible.com
system when information is found
on either a CD inserted into the CD/
DVD player or a USB storage
device that is connected. The
Vehicle Identification Number (VIN)
is required in order to activate the
vehicle. Saving HDD Favorites
Press the FAV button to change
between favorite modes during HDD
playback. The following favorite
modes are supported:
.Playlists
.Artists
.Albums
.Genres
Page 224 of 478
Black plate (36,1)Cadillac CTS/CTS-V Owner Manual - 2013 - crc2 - 8/22/12
7-36 Infotainment System
The iPod's battery charges while it
is connected to the vehicle and if
the ignition is turned to ACC/
ACCESSORY or ON/RUN. It can
also be left connected to the vehicle
after the vehicle is turned off. With
the vehicle turned off, the iPod will
automatically be powered off and
will not charge or draw power from
the vehicle's battery.
A standard iPod USB cable, like the
one that came with the iPod, cannot
be used to connect an iPod to the
vehicle. The special iPod
connection cable that came
equipped with the vehicle or that
was made available from your
dealer must be used to command
and control an iPod.
Use a standard 3.5 mm (1/8 in)
stereo cable to connect an older
iPod model that is not supported,
or if the special iPod connection
cable is missing. Command and
control of the iPod using the
infotainment control buttons and
knobs is not supported when only a
3.5 mm (1/8 in) stereo cable is used.Commanding and Controlling
an iPod
An iPod can be controlled by using
the radio buttons and knobs; the
song information shows on the
infotainment system's display. To
connect and control the iPod using
the radio controls, use the special
iPod connection cable that came as
standard equipment with the vehicle
as part of the USB option. The
special iPod connection cable can
also be purchased or made
available from your dealer. See your
dealer for more information.
Use the MENU/SELECT knob to
bring up the iPod Menu and select
Songs, Artists, Albums, Playlists,
and Audio Books to play from
the iPod.
Disconnecting an iPod
To properly dismount the iPod USB
device before disconnecting from
the vehicle, press the softkey under
the EJECT tab on the infotainment
display screen during iPod
playback.Phone
Bluetooth
For vehicles equipped with
Bluetooth capability, the system can
interact with many cell phones,
allowing:
.Placement and receipt of calls in
a hands-free mode.
.Sharing of the cell phone’s
address book or contact list with
the vehicle.
To minimize driver distraction,
before driving, and with the vehicle
parked:
.Become familiar with the
features of the cell phone.
Organize the phone book and
contact lists clearly and delete
duplicate or rarely used entries.
If possible, program speed dial
or other shortcuts.
.Review the controls and
operation of the infotainment
system.