mirror CADILLAC CTS 2019 Convenience & Personalization Guide
[x] Cancel search | Manufacturer: CADILLAC, Model Year: 2019, Model line: CTS, Model: CADILLAC CTS 2019Pages: 20, PDF Size: 2.83 MB
Page 2 of 20
2
Review this quick reference guide for an overview of some important feat\
ures in your Cadillac CTS. Some optional equipment described in this guide (denoted by ♦) may not be included in your vehicle. More information can be found in your Owner's Manual and at my.cadillac.com.
Certain restrictions, precautions and safety procedures apply to your vehicle. Please read your Owner’s Manual for complete instructions.
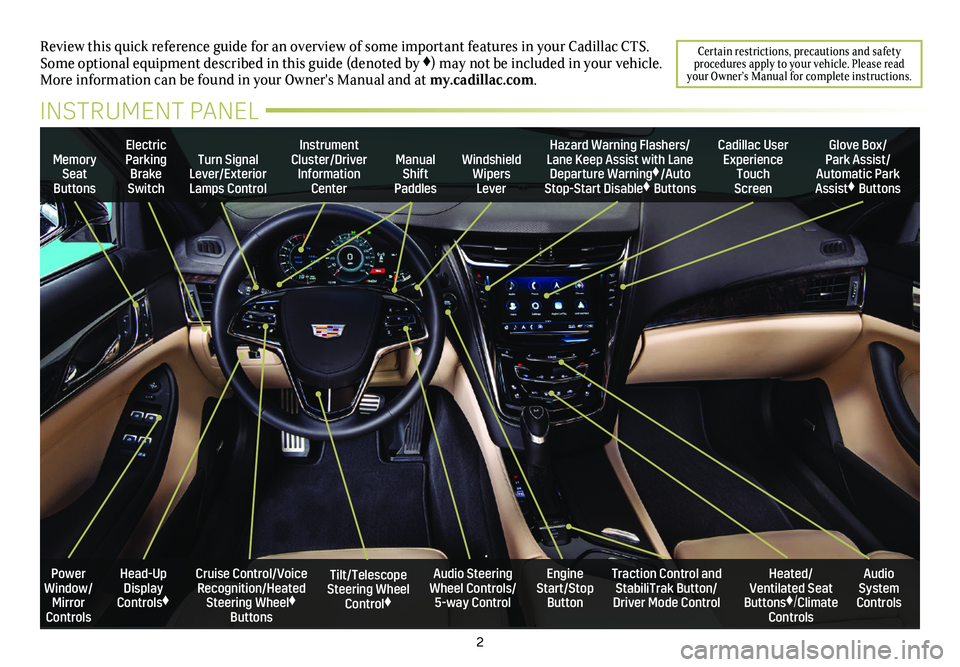
INSTRUMENT PANEL
Memory Seat Buttons
Turn Signal Lever/Exterior Lamps Control
Manual Shift Paddles
Instrument Cluster/Driver Information Center
Electric Parking Brake Switch
Hazard Warning Flashers/Lane Keep Assist with Lane Departure Warning♦/Auto Stop-Start Disable♦ Buttons
Windshield Wipers Lever
Cadillac User Experience Touch Screen
Glove Box/ Park Assist/Automatic Park Assist♦ Buttons
Cruise Control/Voice Recognition/Heated Steering Wheel♦ Buttons
Audio Steering Wheel Controls/ 5-way Control
Tilt/Telescope Steering Wheel Control♦
Engine Start/Stop Button
Power Window/Mirror Controls
Heated/ Ventilated Seat Buttons♦/Climate Controls
Audio System Controls
Traction Control and StabiliTrak Button/Driver Mode Control
Head-Up Display Controls♦
Page 13 of 20
TEEN DRIVERSURROUND VISION♦
Teen Driver allows multiple keys to be registered for beginning
drivers. When active, the system automatically activates certain safety systems, allows setting of some features, and limits the use of others. An in-vehicle Report Card records vehicle data about driving behavior. When the vehicle is started with a registered key, a Driver Information Center message displays that Teen Driver is active.
To create a Personal Identification Number, register a key, change Teen Driver settings, or access the Report Card, go to Settings > Vehicle > Teen Driver.
See your Cadillac User Experience Manual.
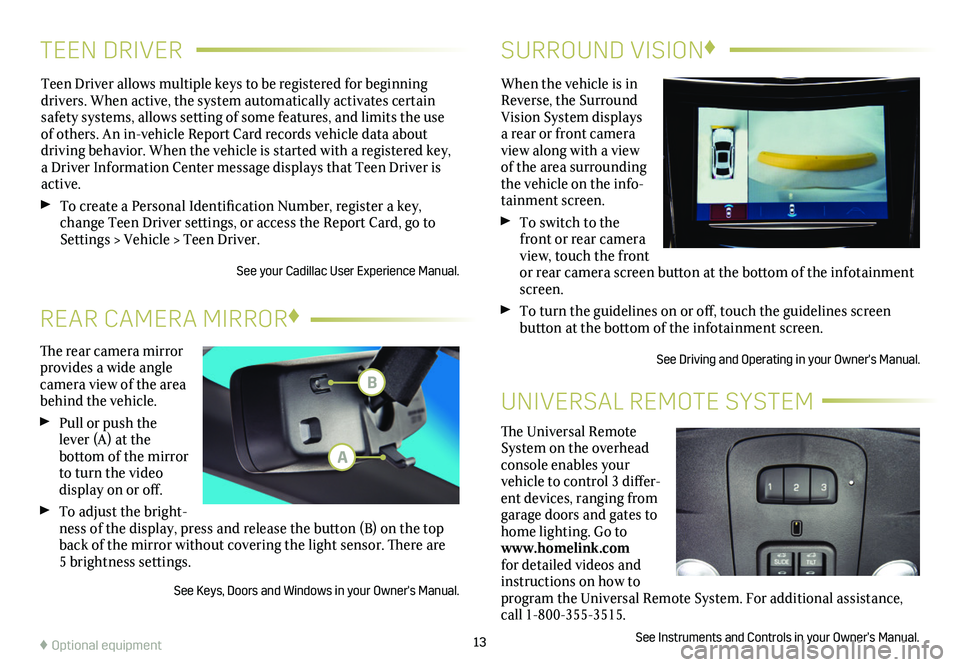
When the vehicle is in Reverse, the Surround Vision System displays a rear or front camera view along with a view of the area surrounding the vehicle on the info-tainment screen.
To switch to the front or rear camera view, touch the front or rear camera screen
button at the bottom of the infotainment screen.
To turn the guidelines on or off, touch the guidelines screen
button at the bottom of the infotainment screen.
See Driving and Operating in your Owner's Manual.
13
The rear camera mirror provides a wide angle camera view of the area behind the vehicle.
Pull or push the lever (A) at the
bottom of the
mirror to turn the video
display on or off.
To adjust the bright-ness of the display, press and release the button (B) on the top back of the mirror without covering the light sensor. There are 5 brightness
settings.
See Keys, Doors and Windows in your Owner's Manual.
REAR CAMERA MIRROR♦
♦ Optional equipment
The Universal Remote System on the overhead console enables your vehicle to control 3 differ-ent devices, ranging from garage doors and gates to home lighting. Go to www.homelink.com for detailed videos and instructions on how to program the Universal Remote System. For additional assistance, call 1-800-355-3515.
See Instruments and Controls in your Owner’s Manual.
UNIVERSAL REMOTE SYSTEM
B
A
Page 14 of 20
14
MEMORY SEATSULTRAVIEW SUNROOF♦
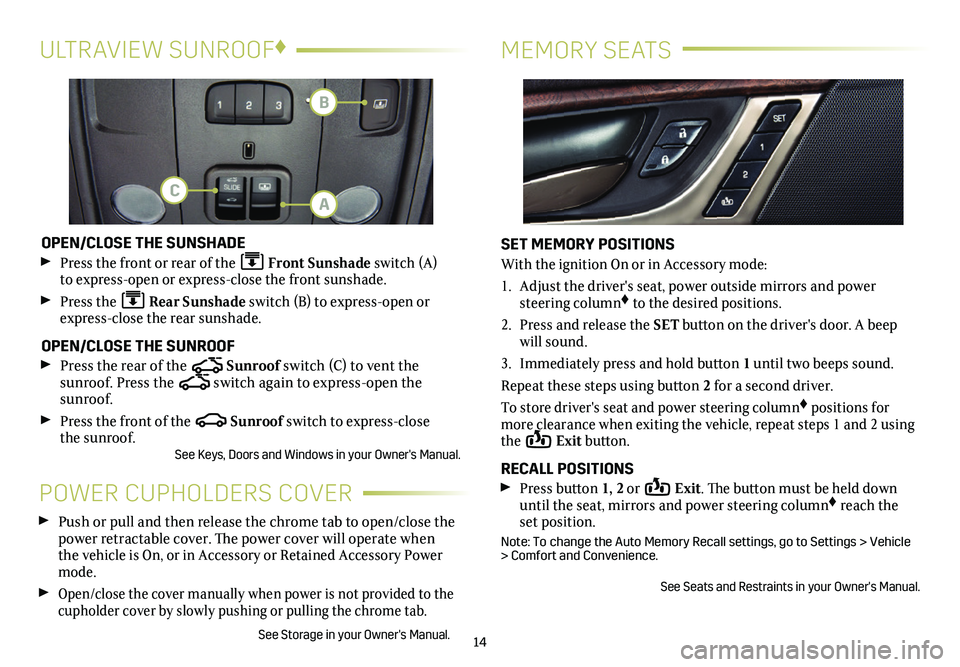
OPEN/CLOSE THE SUNSHADE
Press the front or rear of the Front Sunshade switch (A) to express-open or express-close the front sunshade.
Press the Rear Sunshade switch (B) to express-open or express-close the rear sunshade.
OPEN/CLOSE THE SUNROOF
Press the rear of the Sunroof switch (C) to vent the
sunroof. Press the switch again to express-open the sunroof.
Press the front of the Sunroof switch to express-close the sunroof.See Keys, Doors and Windows in your Owner's Manual.
POWER CUPHOLDERS COVER
Push or pull and then release the chrome tab to open/close the power retractable cover. The power cover will operate when the vehicle is On, or in Accessory or Retained Accessory Power mode.
Open/close the cover manually when power is not provided to the cupholder cover by slowly pushing or pulling the chrome tab.
See Storage in your Owner's Manual.
SET MEMORY POSITIONS
With the ignition On or in Accessory mode:
1. Adjust the driver's seat, power outside mirrors and power steering column♦ to the desired positions.
2. Press and release the SET button on the driver's door. A beep will sound.
3. Immediately press and hold button 1 until two beeps sound.
Repeat these steps using button 2 for a second driver.
To store driver's seat and power steering column♦ positions for more clearance when exiting the vehicle, repeat steps 1 and 2 using the Exit button.
RECALL POSITIONS Press button 1, 2 or Exit. The button must be held down until the seat, mirrors and power steering column♦ reach the set position.
Note: To change the Auto Memory Recall settings, go to Settings > Vehicle > Comfort and Convenience.
See Seats and Restraints in your Owner's Manual.
A
B
C
Page 15 of 20
15
EXTERIOR LIGHTINGWINDSHIELD WIPERS
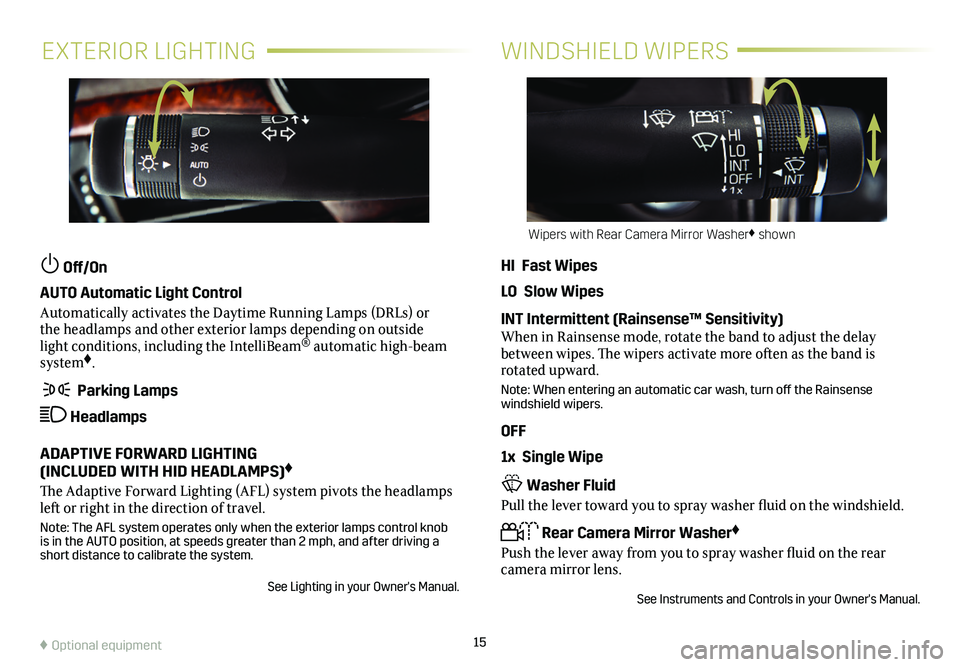
Off/On
AUTO Automatic Light Control
Automatically activates the Daytime Running Lamps (DRLs) or the headlamps and other exterior lamps depending on outside light conditions, including the IntelliBeam® automatic high-beam system♦.
Parking Lamps
Headlamps
ADAPTIVE FORWARD LIGHTING (INCLUDED WITH HID HEADLAMPS)♦
The Adaptive Forward Lighting (AFL) system pivots the headlamps left or right in the direction of travel.
Note: The AFL system operates only when the exterior lamps control knob is in the AUTO position, at speeds greater than 2 mph, and after driving\
a short distance to calibrate the system.
See Lighting in your Owner's Manual.
HI Fast Wipes
LO Slow Wipes
INT Intermittent (Rainsense™ Sensitivity)When in Rainsense mode, rotate the band to adjust the delay between wipes. The wipers activate more often as the band is rotated upward.
Note: When entering an automatic car wash, turn off the Rainsense windshield wipers.
OFF
1x Single Wipe
Washer Fluid
Pull the lever toward you to spray washer fluid on the windshield.
Rear Camera Mirror Washer♦
Push the lever away from you to spray washer fluid on the rear camera mirror lens.
See Instruments and Controls in your Owner's Manual.
Wipers with Rear Camera Mirror Washer♦ shown
♦ Optional equipment
Page 17 of 20
17
DRIVER ASSISTANCE SYSTEMS♦
When the vehicle is on, the automatic heated seats and automatic heated steering wheel or automatic ventilated seats will be activat-ed based on the vehicle’s interior temperature. Turn off the heated or ventilated seats using the seat controls. Turn off the heated steering wheel using the steering wheel control.
To turn the features on or off, go to Settings > Vehicle > Climate and Air Quality.
See Seats and Restraints in your Owner's Manual.
AUTO HEATED SEATS/STEERING
WHEEL♦ AND VENTILATED SEATS♦
REAR CROSS TRAFFIC ALERT♦
With the vehicle in Reverse, the system warns of cross traffic
coming in either direction by displaying a red alert on the infotain-ment screen and the left or right side of the Safety Alert Seat pulses or beeps sound (if selected).
To turn the system on or off, press the Park Assist button on the right side of the infotainment screen. This will also turn the Park Assist and Rear Automatic Braking
systems on/off.
LANE CHANGE ALERT WITH SIDE BLIND ZONE ALERT♦
While driving, the system displays a warning symbol on the left or right side mirror when a vehicle is detected in that side blind zone area or rapidly approaching that area. The warning symbol flashes if a turn signal is activated when a vehicle has been detected on the same side.
To turn the
system on or off, go to Settings > Vehicle > Collision/Detection Systems > Lane Change Alert.
See Driving and Operating in your Owner's Manual.
ADAPTIVE REMOTE START
STARTING THE VEHICLE
1. Press and release the Lock button on the Remote Keyless Entry transmitter.
2. Immediately press and hold the Remote Start button until the turn signal lamps flash.
When the vehicle starts, the doors remain locked, and the park-ing lamps will light and remain on while the vehicle is running. The engine will continue running for 15 minutes. Repeat these steps for a 15-minute time extension. Remote start can be extended only once.
3. Before driving, simultaneously press the brake pedal and the ENGINE START/STOP button to turn on the ignition.
CANCELING A REMOTE START
Press and hold the Remote Start button until the parking lamps turn off.
CLIMATE CONTROL OPERATION
During a remote start, the automatic climate control system will operate at the same setting as when the vehicle was last turned off.
HEATED/VENTILATED SEAT OPERATION
Select the Remote Start Auto Heat Seats or Remote Start Auto Cool Seats option in the Settings menu to have the heated seats or ventilated seats turn on during a remote start. The temperature performance of an unoccupied seat may be reduced. The heated/ventilated seats turn off when the ignition is turned on.
See Keys, Doors and Windows in your Owner's Manual.
♦ Optional equipment