change time CADILLAC CTS 2019 User Guide
[x] Cancel search | Manufacturer: CADILLAC, Model Year: 2019, Model line: CTS, Model: CADILLAC CTS 2019Pages: 401, PDF Size: 6.85 MB
Page 152 of 401

Cadillac CTS/CTS-V Owner Manual (GMNA-Localizing-U.S./Canada/Mexico-
12460273) - 2019 - CRC - 5/8/18
INSTRUMENTS AND CONTROLS 151
Make sure the hand-held transmitter
has a new battery for quicker and
more accurate transmission of the
radio-frequency signal.
Programming the Universal
Remote System
For questions or programming help,
see www.homelink.com/gm or call
1-800-355-3515. For calls placed
outside the U.S.A, Canada, or Puerto
Rico, international rates will apply and
may differ based on landline or mobile
phone.
Programming involves time-sensitive
actions, and may time out causing the
procedure to be repeated.
To program up to three devices:1. Hold the end of the hand-held transmitter about 3 to 8 cm (1 to
3 in) away from the Universal
Remote system buttons with the
indicator light in view. The
hand-held transmitter was
supplied by the manufacturer of
the garage door opener receiver. 2. At the same time, press and hold
both the hand-held transmitter
button and one of the three
Universal Remote system
buttons to be used to operate the
garage door. Do not release either
button until the indicator light
changes from a slow to a rapid
flash. Then release both buttons.
Some garage door openers may
require substitution of Step 2
with the procedure under “Radio
Signals for Some Gate Operators”
later in this section.
3. Press and hold the newly programmed Universal Remote
system button for five seconds
while watching the indicator
light and garage door activation.
.If the indicator light stays on
continuously or the garage
door moves when the button
is pressed, then programming
is complete. There is no need
to complete Steps 4–6.
. If the indicator light does not
come on or the garage door
does not move, a second button press may be
required. For a second time,
press and hold the newly
programmed button for
five seconds. If the light stays
on or the garage door moves,
programming is complete.
. If the indicator light blinks
rapidly for two seconds, then
changes to a solid light and
the garage door does not
move, continue with
programming Steps 4–6.
Learn or Smart Button
4. After completing Steps 1–3, locate the Learn or Smart button
inside the garage on the garage
door opener receiver. The name
and color of the button may vary
by manufacturer.
Page 155 of 401
Cadillac CTS/CTS-V Owner Manual (GMNA-Localizing-U.S./Canada/Mexico-
12460273) - 2019 - CRC - 5/8/18
154 LIGHTING
Lighting
Exterior Lighting
Exterior Lamp Controls . . . . . . . . . . 154
Exterior Lamps Off Reminder . . . 156
Headlamp High/Low-BeamChanger . . . . . . . . . . . . . . . . . . . . . . . . . . 156
Flash-to-Pass . . . . . . . . . . . . . . . . . . . . . 156
Daytime Running Lamps (DRL) . . . . . . . . . . . . . . . . . . . . 156
Automatic Headlamp System . . . 157
Adaptive Forward Lighting (AFL) . . . . . . . . . . . . . . . . . . 157
Hazard Warning Flashers . . . . . . . . 158
Turn and Lane-Change Signals . . . . . . . . . . . . . . . . . . . . . . . . . . . 158
Interior Lighting
Instrument Panel IlluminationControl . . . . . . . . . . . . . . . . . . . . . . . . . . 159
Courtesy Lamps . . . . . . . . . . . . . . . . . . 159
Dome Lamps . . . . . . . . . . . . . . . . . . . . . 159
Reading Lamps . . . . . . . . . . . . . . . . . . . 159
Lighting Features
Entry Lighting . . . . . . . . . . . . . . . . . . . . 160
Exit Lighting . . . . . . . . . . . . . . . . . . . . . . 160
Battery Load Management . . . . . . 160
Battery Power Protection . . . . . . . . 161
Exterior Lighting Battery Saver . . . . . . . . . . . . . . . . . . . . . . . . . . . . . 161Exterior Lighting
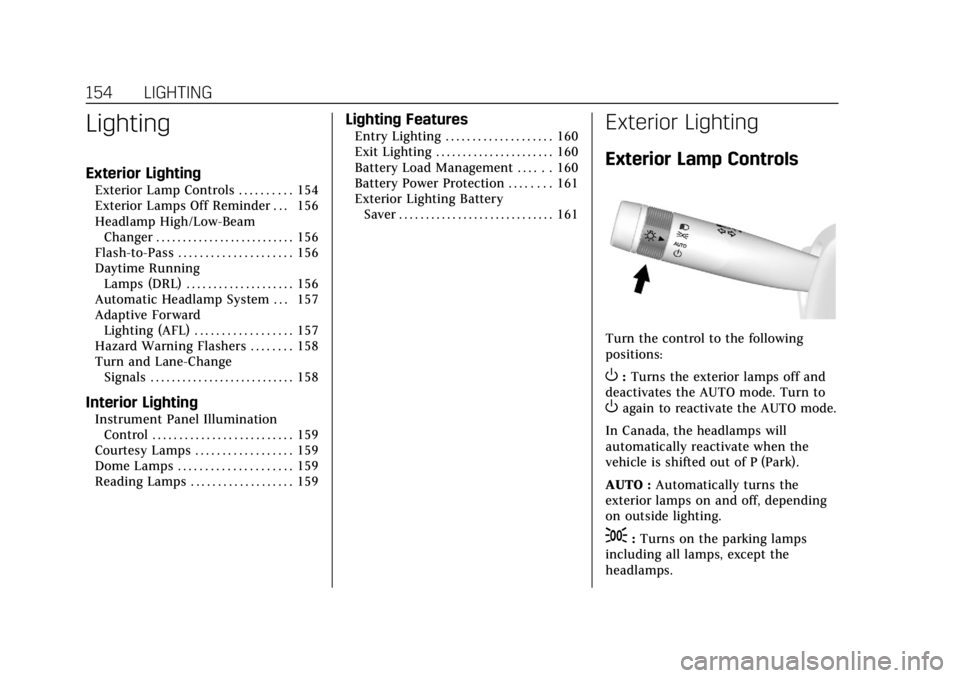
Exterior Lamp Controls
Turn the control to the following
positions:
O:Turns the exterior lamps off and
deactivates the AUTO mode. Turn to
Oagain to reactivate the AUTO mode.
In Canada, the headlamps will
automatically reactivate when the
vehicle is shifted out of P (Park).
AUTO : Automatically turns the
exterior lamps on and off, depending
on outside lighting.
;: Turns on the parking lamps
including all lamps, except the
headlamps.
Page 156 of 401
Cadillac CTS/CTS-V Owner Manual (GMNA-Localizing-U.S./Canada/Mexico-
12460273) - 2019 - CRC - 5/8/18
LIGHTING 155
2:Turns on the headlamps together
with the parking lamps and
instrument panel lights.
IntelliBeam System
If equipped, this system turns the
vehicle's high-beam headlamps on and
off according to surrounding traffic
conditions.
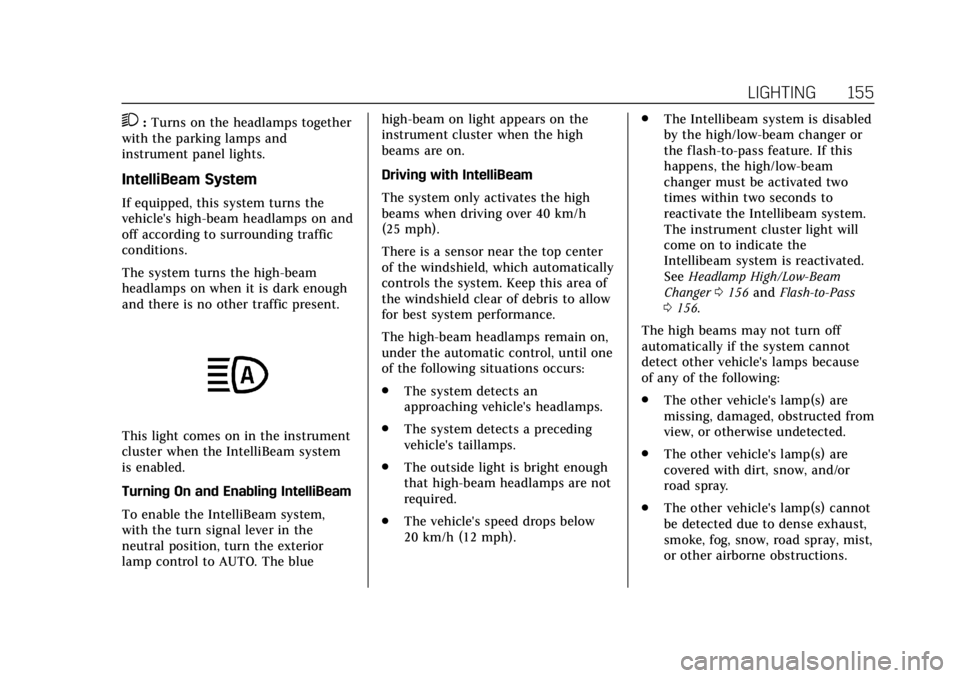
The system turns the high-beam
headlamps on when it is dark enough
and there is no other traffic present.
This light comes on in the instrument
cluster when the IntelliBeam system
is enabled.
Turning On and Enabling IntelliBeam
To enable the IntelliBeam system,
with the turn signal lever in the
neutral position, turn the exterior
lamp control to AUTO. The blue high-beam on light appears on the
instrument cluster when the high
beams are on.
Driving with IntelliBeam
The system only activates the high
beams when driving over 40 km/h
(25 mph).
There is a sensor near the top center
of the windshield, which automatically
controls the system. Keep this area of
the windshield clear of debris to allow
for best system performance.
The high-beam headlamps remain on,
under the automatic control, until one
of the following situations occurs:
.
The system detects an
approaching vehicle's headlamps.
. The system detects a preceding
vehicle's taillamps.
. The outside light is bright enough
that high-beam headlamps are not
required.
. The vehicle's speed drops below
20 km/h (12 mph). .
The Intellibeam system is disabled
by the high/low-beam changer or
the flash-to-pass feature. If this
happens, the high/low-beam
changer must be activated two
times within two seconds to
reactivate the Intellibeam system.
The instrument cluster light will
come on to indicate the
Intellibeam system is reactivated.
See Headlamp High/Low-Beam
Changer 0156 and Flash-to-Pass
0 156.
The high beams may not turn off
automatically if the system cannot
detect other vehicle's lamps because
of any of the following:
. The other vehicle's lamp(s) are
missing, damaged, obstructed from
view, or otherwise undetected.
. The other vehicle's lamp(s) are
covered with dirt, snow, and/or
road spray.
. The other vehicle's lamp(s) cannot
be detected due to dense exhaust,
smoke, fog, snow, road spray, mist,
or other airborne obstructions.
Page 157 of 401
Cadillac CTS/CTS-V Owner Manual (GMNA-Localizing-U.S./Canada/Mexico-
12460273) - 2019 - CRC - 5/8/18
156 LIGHTING
.Your vehicle's windshield is dirty,
cracked, or obstructed by
something that blocks the view of
the light sensor.
. Your vehicle is loaded such that
the front end points upward,
causing the light sensor to aim
high and not detect headlamps
and taillamps.
. Driving on winding or hilly roads.
The automatic high-beam headlamps
may need to be disabled if any of the
above conditions exist.
Exterior Lamps Off
Reminder
A warning chime will sound if the
exterior lamp control is left on in
either the headlamp or parking lamp
position and the driver door is opened
with the ignition off.
Headlamp High/Low-Beam
Changer
Push the turn signal lever away from
you and release, to turn the high
beams on. To return to low beams,
push the lever again or pull it toward
you and release.
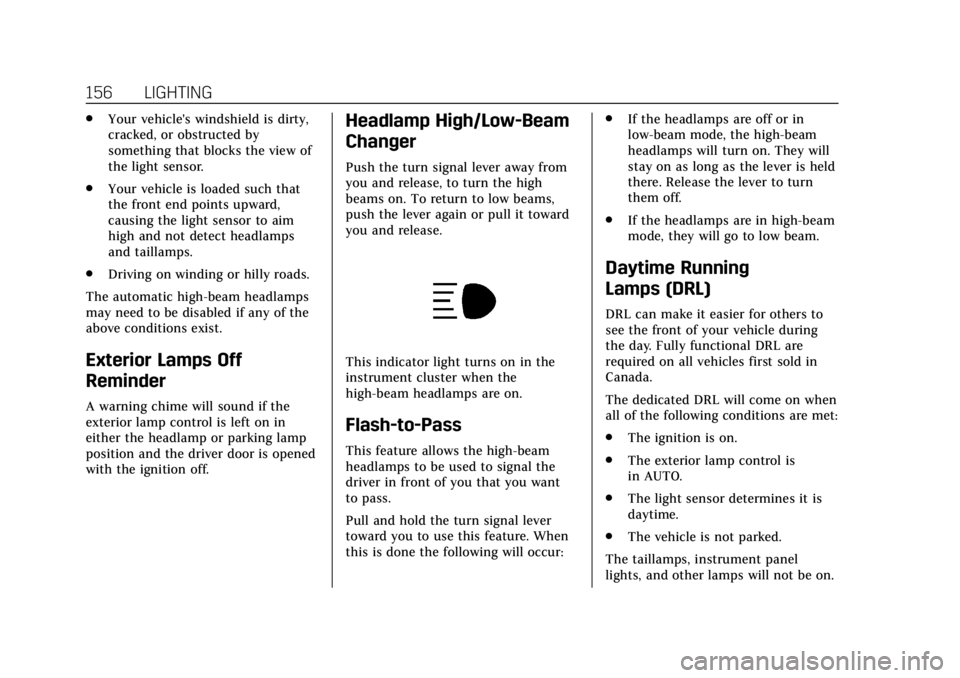
This indicator light turns on in the
instrument cluster when the
high-beam headlamps are on.
Flash-to-Pass
This feature allows the high-beam
headlamps to be used to signal the
driver in front of you that you want
to pass.
Pull and hold the turn signal lever
toward you to use this feature. When
this is done the following will occur: .
If the headlamps are off or in
low-beam mode, the high-beam
headlamps will turn on. They will
stay on as long as the lever is held
there. Release the lever to turn
them off.
. If the headlamps are in high-beam
mode, they will go to low beam.
Daytime Running
Lamps (DRL)
DRL can make it easier for others to
see the front of your vehicle during
the day. Fully functional DRL are
required on all vehicles first sold in
Canada.
The dedicated DRL will come on when
all of the following conditions are met:
.The ignition is on.
. The exterior lamp control is
in AUTO.
. The light sensor determines it is
daytime.
. The vehicle is not parked.
The taillamps, instrument panel
lights, and other lamps will not be on.
Page 159 of 401

Cadillac CTS/CTS-V Owner Manual (GMNA-Localizing-U.S./Canada/Mexico-
12460273) - 2019 - CRC - 5/8/18
158 LIGHTING
starting the vehicle; driving a short
distance is required to calibrate the
AFL. SeeExterior Lamp Controls 0154.
Hazard Warning Flashers
|:Press and hold this button for
one second to make the front and rear
turn signal lamps flash on and off.
Release the button for at least
one second and press again to turn
the flashers off.
The hazard warning flashers turn on
automatically if the airbags deploy.
Turn and Lane-Change
Signals
Move the lever all the way up or down
to signal a turn.
An arrow on the instrument cluster
flashes in the direction of the turn or
lane change. Raise or lower the lever until the
arrow starts to flash to signal a lane
change. Hold it there until the lane
change is completed. If the lever is
briefly pressed and released, the turn
signal flashes three times.
The turn and lane-change signal can
be turned off manually by moving the
lever back to its original position.
If after signaling a turn or lane
change, the arrow flashes rapidly or
does not come on, a signal bulb might
be burned out.
Replace any burned out bulbs. If a
bulb is not burned out, check the fuse.
See
Fuses and Circuit Breakers 0291.
Page 161 of 401
Cadillac CTS/CTS-V Owner Manual (GMNA-Localizing-U.S./Canada/Mexico-
12460273) - 2019 - CRC - 5/8/18
160 LIGHTING
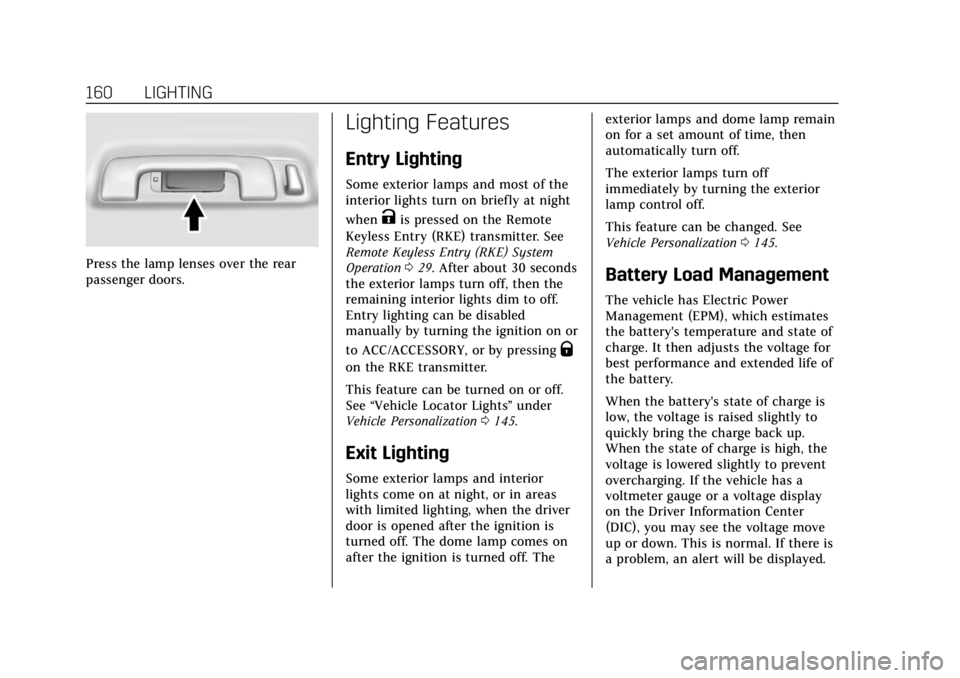
Press the lamp lenses over the rear
passenger doors.
Lighting Features
Entry Lighting
Some exterior lamps and most of the
interior lights turn on briefly at night
when
Kis pressed on the Remote
Keyless Entry (RKE) transmitter. See
Remote Keyless Entry (RKE) System
Operation 029. After about 30 seconds
the exterior lamps turn off, then the
remaining interior lights dim to off.
Entry lighting can be disabled
manually by turning the ignition on or
to ACC/ACCESSORY, or by pressing
Q
on the RKE transmitter.
This feature can be turned on or off.
See “Vehicle Locator Lights” under
Vehicle Personalization 0145.
Exit Lighting
Some exterior lamps and interior
lights come on at night, or in areas
with limited lighting, when the driver
door is opened after the ignition is
turned off. The dome lamp comes on
after the ignition is turned off. The exterior lamps and dome lamp remain
on for a set amount of time, then
automatically turn off.
The exterior lamps turn off
immediately by turning the exterior
lamp control off.
This feature can be changed. See
Vehicle Personalization
0145.
Battery Load Management
The vehicle has Electric Power
Management (EPM), which estimates
the battery's temperature and state of
charge. It then adjusts the voltage for
best performance and extended life of
the battery.
When the battery's state of charge is
low, the voltage is raised slightly to
quickly bring the charge back up.
When the state of charge is high, the
voltage is lowered slightly to prevent
overcharging. If the vehicle has a
voltmeter gauge or a voltage display
on the Driver Information Center
(DIC), you may see the voltage move
up or down. This is normal. If there is
a problem, an alert will be displayed.
Page 164 of 401
Cadillac CTS/CTS-V Owner Manual (GMNA-Localizing-U.S./Canada/Mexico-
12460273) - 2019 - CRC - 5/8/18
INFOTAINMENT SYSTEM 163
.Notify other drivers of your
vehicle of the above rules and
require them to comply.
. General Motors does not accept
any responsibility or liability in
connection with use that is not
permitted.
. Law enforcement authorities may
have the right to seize video
recordings and use them as
evidence of criminal/driving
offenses against you or third
parties.
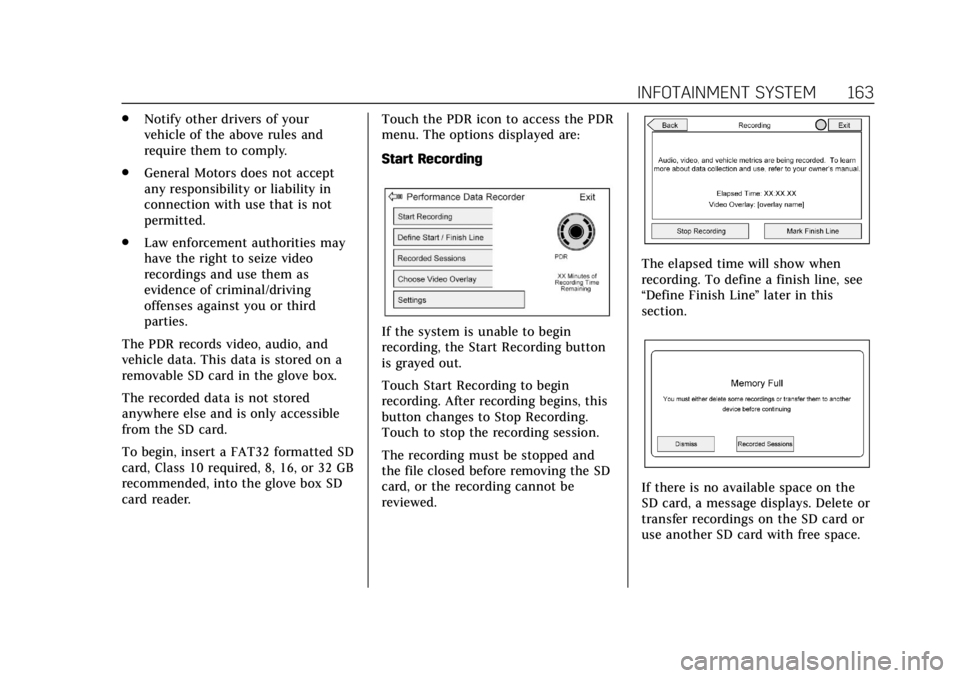
The PDR records video, audio, and
vehicle data. This data is stored on a
removable SD card in the glove box.
The recorded data is not stored
anywhere else and is only accessible
from the SD card.
To begin, insert a FAT32 formatted SD
card, Class 10 required, 8, 16, or 32 GB
recommended, into the glove box SD
card reader. Touch the PDR icon to access the PDR
menu. The options displayed are:
Start Recording
If the system is unable to begin
recording, the Start Recording button
is grayed out.
Touch Start Recording to begin
recording. After recording begins, this
button changes to Stop Recording.
Touch to stop the recording session.
The recording must be stopped and
the file closed before removing the SD
card, or the recording cannot be
reviewed.
The elapsed time will show when
recording. To define a finish line, see
“Define Finish Line
”later in this
section.
If there is no available space on the
SD card, a message displays. Delete or
transfer recordings on the SD card or
use another SD card with free space.
Page 165 of 401
Cadillac CTS/CTS-V Owner Manual (GMNA-Localizing-U.S./Canada/Mexico-
12460273) - 2019 - CRC - 5/8/18
164 INFOTAINMENT SYSTEM
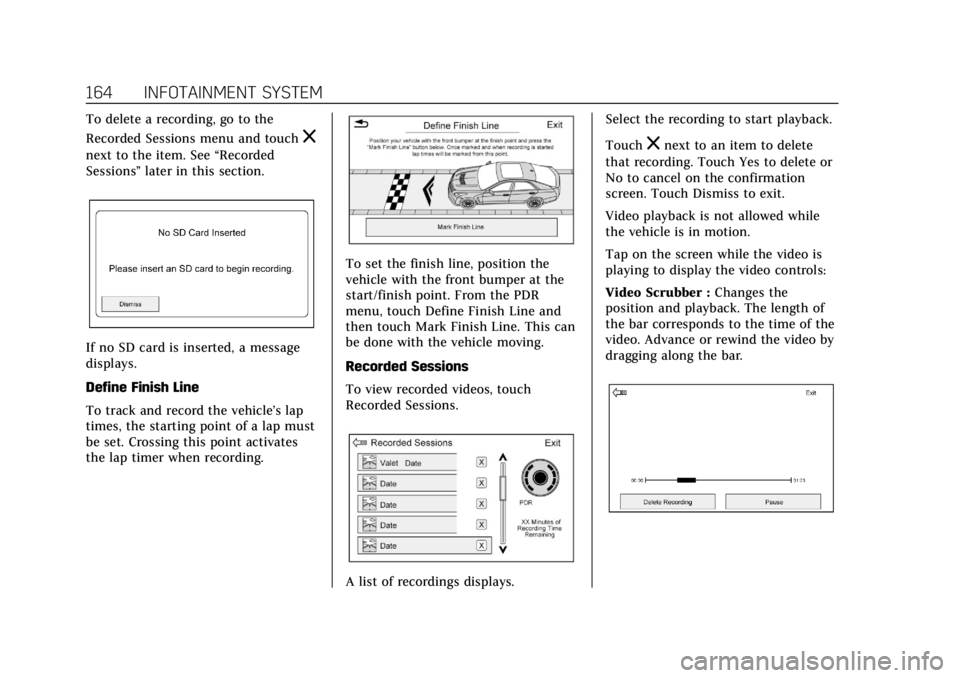
To delete a recording, go to the
Recorded Sessions menu and touch
z
next to the item. See“Recorded
Sessions” later in this section.
If no SD card is inserted, a message
displays.
Define Finish Line
To track and record the vehicle’s lap
times, the starting point of a lap must
be set. Crossing this point activates
the lap timer when recording.
To set the finish line, position the
vehicle with the front bumper at the
start/finish point. From the PDR
menu, touch Define Finish Line and
then touch Mark Finish Line. This can
be done with the vehicle moving.
Recorded Sessions
To view recorded videos, touch
Recorded Sessions.
A list of recordings displays. Select the recording to start playback.
Touch
znext to an item to delete
that recording. Touch Yes to delete or
No to cancel on the confirmation
screen. Touch Dismiss to exit.
Video playback is not allowed while
the vehicle is in motion.
Tap on the screen while the video is
playing to display the video controls:
Video Scrubber : Changes the
position and playback. The length of
the bar corresponds to the time of the
video. Advance or rewind the video by
dragging along the bar.
Page 171 of 401

Cadillac CTS/CTS-V Owner Manual (GMNA-Localizing-U.S./Canada/Mexico-
12460273) - 2019 - CRC - 5/8/18
170 CLIMATE CONTROLS
Automatic Operation
The system automatically controls the
fan speed, air delivery, air
conditioning, and recirculation in
order to heat or cool the vehicle to the
desired temperature.
When AUTO is lit, all four functions
operate automatically. Each function
can also be manually set and the
selected setting is displayed.
Functions not manually set will
continue to be automatically
controlled, even if the AUTO indicator
is not lit.
For automatic operation:1. Touch or press AUTO on the display or the center stack.
2. Set the temperature. Allow the system time to stabilize. Then
adjust the temperature as needed
for best comfort.
To improve fuel efficiency and to cool
the vehicle faster, recirculation may be
automatically selected in warm
weather. The recirculation light will not come on. Press@to select
recirculation; press it again to select
outside air.
English units can be changed to
metric units through the instrument
cluster. See “Cluster Options Menu ”
under Instrument Cluster 0119.
On/Off : Touch On/Off on the display
or press OFF on the center stack to
turn the fan on or off. When OFF is
selected, the system will prevent
outside air from entering the vehicle.
If on is selected, or any other button
is pressed, the climate control system
will turn on and return to delivering
airf low as set. The temperature
control and air delivery mode can still
be adjusted.
w/x: The temperature can be
adjusted separately for the driver and
the passenger. Press or touch
worx
on the center stack or display to
increase or decrease the temperature.
Press and hold to rapidly increase or
decrease the temperature.
Sync : Touch Sync on the display to
link all climate zone settings to the
driver settings. Adjust the driver side temperature control to change the
linked temperature. When the
passenger settings are adjusted, Sync
is no longer active and the
temperatures are unlinked.
Rear :
If equipped, touch Rear on the
front climate control display to open
the rear climate control display. The
rear climate control settings can now
be adjusted from the front
passenger area.
Manual Operation
9 y/z 9: Press9 yorz 9on the center stack or touch the
display, to increase or decrease the fan
speed. Press and hold the buttons or
the display control to adjust speed
more quickly. Pressing either button
cancels automatic fan control and the
fan can be controlled manually. Press
or touch AUTO on the center stack or
the display to return to automatic
operation.
Air Delivery Mode Control : When
the climate information is displayed,
touch the desired air delivery mode on
the display to change the direction of
the airf low. The selected air delivery
Page 183 of 401
Cadillac CTS/CTS-V Owner Manual (GMNA-Localizing-U.S./Canada/Mexico-
12460273) - 2019 - CRC - 5/16/18
182 DRIVING AND OPERATING
Axle Fluid
Axles must have 805 km (500 mi)
before being used in track driving.
The front, if equipped with AWD, and
rear axle fluid temperatures may be
higher than when driving in severe
conditions. Drain and refill with new
fluid after the first racing or
competitive driving event, and then
after every 24 hours of racing or
competitive driving. SeeRecommended
Fluids and Lubricants 0354.
Caution
During a first time track or racing
event, high axle temperatures can
occur. Damage could be caused to
the axle and would not be covered
by the vehicle warranty. Do not
drive as long or as fast the first
time the vehicle is driven on the
track or raced.
Engine Oil
Caution
If the vehicle is used for track
events and competitive driving, the
engine may use more oil than it
would with normal use. Low oil
levels can damage the engine.
Check the oil level often and
maintain the proper level. See
Engine Oil 0268.
2.0L (LTG) Engine
This is not available with a track
package option and is not
recommended for track use.
3.6L Non-Turbo (LGX) Engine
. With Oil Cooler: Confirm the oil
level is at the upper mark that
shows the proper operating range
on the engine oil dipstick.
. Without Oil Cooler: Do not use for
track events and competitive
driving. 3.6L Twin Turbo (LF3) Engine
The LF3 3.6L twin turbo engine comes
standard with a 7 qt sump, integrated
oil cooler, and other powertrain and
powertrain cooling components in
preparation for track use.
6.2L Supercharged (LT4) Engine
Keep the oil level at or near the upper
mark on the engine oil dipstick, which
shows the proper operating range.
Use 15W-50 full synthetic engine oil
for track use. After track use, change
the oil back to 0W-40 dexos2 for
street use. If 0W-40 dexos2 oil is not
available, 5W-30 dexos1 full synthetic
engine oil may be used for street use.
If 5W-30 dexos1 is used, it must be
changed to 15W-50 full synthetic
engine oil for track use. See
Capacities
and Specifications 0359.
Fuel
Use premium unleaded gasoline with
a posted octane rating of 93 at a track
event. Unleaded gasoline with a
posted octane rating of 91 may be
used, but performance will be
degraded.