turn signal CADILLAC CTS V 2004 1.G User Guide
[x] Cancel search | Manufacturer: CADILLAC, Model Year: 2004, Model line: CTS V, Model: CADILLAC CTS V 2004 1.GPages: 454, PDF Size: 2.87 MB
Page 143 of 454
Headlamp Washers
Your vehicle may have headlamp washers. The
headlamp washers clear the headlamp lenses so that
you can get the maximum visibility and brightness from
your headlamps.
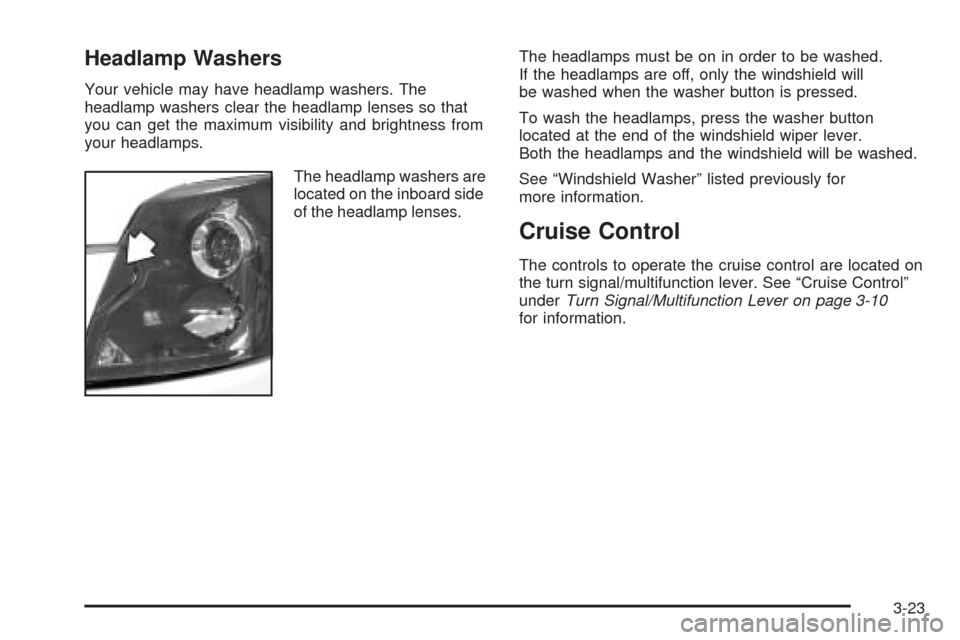
The headlamp washers are
located on the inboard side
of the headlamp lenses.The headlamps must be on in order to be washed.
If the headlamps are off, only the windshield will
be washed when the washer button is pressed.
To wash the headlamps, press the washer button
located at the end of the windshield wiper lever.
Both the headlamps and the windshield will be washed.
See “Windshield Washer” listed previously for
more information.
Cruise Control
The controls to operate the cruise control are located on
the turn signal/multifunction lever. See “Cruise Control”
underTurn Signal/Multifunction Lever on page 3-10
for information.
3-23
Page 144 of 454

Exterior Lamps
Headlamps
SeeTurn Signal/Multifunction Lever on page 3-10for
more information on the headlamps.
Daytime Running Lamps
Daytime Running Lamps (DRL) can make it easier for
others to see the front of your vehicle during the
day. DRL can be helpful in many different driving
conditions, but they can be especially helpful in the short
periods after dawn and before sunset. Fully functional
daytime running lamps are required on all vehicles
�rst sold in Canada.
The DRL system will make the turn signal lamps come
on when the following conditions are met:
It is still daylight and the ignition is in ON or START,
the exterior lamp control is in OFF or AUTO with the
headlamps off, and
an automatic transmission is not in PARK (P) or the
parking brake is not set on a manual transmission.When DRL are on, only your front turn signal lamps will
be on. No other exterior lamps will be on when the
DRL are being used. Your instrument panel won’t be lit
up either.
When the exterior lamp control is in AUTO and it’s dark
enough outside, the DRL will turn off and the low-beam
headlamps will turn on. When it’s bright enough
outside, the low-beam headlamps will go off, and the
DRL will turn back on. If you start your vehicle in a dark
garage, the automatic headlamp system will come on
immediately. Once you leave the garage, it will take
about one minute for the automatic headlamp system to
change to DRL if it is light outside. During that delay,
your instrument panel cluster may not be as bright
as usual. Make sure your instrument panel brightness
lever is in the full bright position. See “Instrument Panel
Brightness” underInterior Lamps on page 3-26.
3-24
Page 171 of 454

Security Light
For information
regarding this light,
seeTheft-Deterrent
System on page 2-18.
Fog Lamp Light
This light will come on
when the fog lamps
are in use.
The light will go out when the fog lamps are turned off.
See “Fog Lamps” underTurn Signal/Multifunction
Lever on page 3-10for more information.
Lights On Reminder
This light comes on whenever the parking lamps are on.
See “Headlamps On Reminder” underTurn Signal/
Multifunction Lever on page 3-10for more information.
CTSCTS-V
3-51
Page 172 of 454

Cruise Control Light
This light comes on
whenever you set your
cruise control.
The light will go out when the cruise control is
turned off. SeeCruise Control on page 3-23for
more information.
Highbeam On Light
This light comes on
whenever the high-beam
headlamps are on.
See “Headlamp High/Low-Beam Changer” under
Turn Signal/Multifunction Lever on page 3-10for
more information.
Fuel Gage
The fuel gage shows
approximately how much
fuel is in the tank. It works
only when the ignition
is in ON.
If the fuel supply gets low, the Fuel Level Low message
will appear on the DIC and a single chime will sound.
SeeDIC Warnings and Messages on page 3-70
for more information.
CTS shown,
CTS-Vsimilar
3-52
Page 187 of 454

The DIC main menu for the Base audio system consists
of the following menu items:
eBASS - MID - TREBLE
eEQ
DSP (Bose Radio)
AVC (Bose Radio)
H/A
AUTOSTORE
CAT
TA
RDS MSG
AF
SEEK LOCAL/DISTANT
9(English/Metric Units)
TCS
8(Clock)
8/4(Clock/Information Display)
SETUP
DIC Main Menu Item Descriptions
(Base Audio System)
The following descriptions are for the Base audio
system. For information pertaining to the Navigation
audio system, see “Audio System” in the Index of
the CTS Entertainment and Navigation System
Supplement supplied with your vehicle.
eBASS - MID (Midrange) - TREBLE:This menu
item allows you to adjust the levels for the bass,
midrange, treble, balance, and fader features of the
audio system. For more information, seeAudio
System(s) on page 3-107.
eEQ (Equalizer):This menu item allows you to
choose among �ve preset equalizations for the audio
system. See “Equalizer” underAudio System(s) on
page 3-107for more information.
DSP (Digital Signal Processing):This menu item
allows you to select the DSP type that you want on the
audio system. You may choose Normal, Talk, Spacious,
Rear Seat or Driver Seat. Press the TUNE/SEL knob to
scroll through these choices. Once the desired choice is
displayed, turn the knob to set your DSP choice and
continue scrolling through the main menu.
See “DSP” underAudio System(s) on page 3-107for
more information.
3-67
Page 188 of 454
AVC (Automatic Volume Compensation):This menu
item allows you to turn the AVC feature on and off.
Press the TUNE/SEL knob once to turn AVC on and off.
When AVC is on, an X will be in the box next to AVC
on the menu. The X disappears when AVC is off.
See “AVC” underAudio System(s) on page 3-107for
more information.
H/A (Home/Away Preset Stations):This menu item
allows you to switch back and forth between your home
and away preset radio stations. Press the TUNE/SEL
knob to switch between home and away.
See “Home and Away Preset Stations” underAudio
System(s) on page 3-107for more information.
AUTOSTORE:This menu item allows you to
automatically store radio stations with the strongest
signals as presets. SeeAudio System(s) on page 3-107
for more information.
CAT (Category):This menu item allows you to select
radio stations based on preset categories. To turn
the CAT feature on, press the TUNE/SEL knob once.
When CAT is on, an X will be in the box next to CAT
on the menu. The X disappears when CAT is off.
SeeAudio System(s) on page 3-107for
more information.TA (Traffic Announcement):This menu item allows
you to turn the TA feature on and off. To turn the
TA feature on, press the TUNE/SEL knob once. When
TA is on, an X will be in the box next to TA on the
menu. The X disappears when TA is off.
See “RDS Messages” underAudio System(s) on
page 3-107for more information.
RDS (Radio Data System) MSG (Message):This
menu item allows you to view an RDS radio station
message broadcast by a radio station. To view
the message, press the TUNE/SEL knob once. The
message will appear on the screen.
See “RDS Messages” underAudio System(s) on
page 3-107for more information.
AF (Alternate Frequency):This menu item allows you
to turn the AF feature on and off. To turn on AF,
press the TUNE/SEL knob once. When AF is on, an X
will be in the box next to AF on the menu. The X
disappears when AF is off.
See “Using RDS” underAudio System(s) on page 3-107
for more information.
3-68
Page 189 of 454

SEEK LOCAL/DISTANT:This feature instructs the
audio system to seek only local radio stations with the
strongest signal or to seek all radio stations with a strong
signal in a large area. Use LOCAL when you are in
urban areas where there are several strong radio station
signals and you want to limit the number of stations to
those with the strongest signals only. Use DISTANT
when you are in rural areas where there are fewer radio
station signals available.
To switch between LOCAL and DISTANT, press the
TUNE/SEL knob. Your choice will be set when you press
BACK and return to the main menu.
9(English/Metric Units):Use this menu item to
adjust the measurement units.
You can choose between ENGLISH UNITS and
METRIC UNITS. To switch between the two, press the
TUNE/SEL knob. Once your choice is displayed,
turn the knob to set your choice and continue scrolling
through the main menu.
The measurement units that you choose will be re�ected
on all the vehicle system displays, not just the DIC
information. For example, the climate control panel will
display degrees Celsius if you choose METRIC UNITS.TCS (Traction Control System):You can enable or
disable the traction control system using this menu item.
Press the TUNE/SEL knob to switch between on
and off.
You can also turn the traction control system off using the
traction control button located in the glove box, or by
programming one of the steering wheel controls
(1, 2, 3 or 4) or audio system softkeys to enable/disable
the TCS. SeeRecon�gurable Steering Wheel Controls
(SWC) (CTS) on page 3-8and “Con�gurable Radio
Display Keys” underAudio System(s) on page 3-107for
more information.
When you disable the traction control system, the
Traction Suspended message will appear on the DIC and
the traction control system warning light on the instrument
panel cluster will come on. SeeDIC Warnings and
Messages on page 3-70andTraction Control System
(TCS) Warning Light on page 3-45for more information.
8(Clock):Use this menu item to set the time on
the clock.
SeeSetting the Time on page 3-108for
more information.
3-69
Page 208 of 454
Turn Signal On
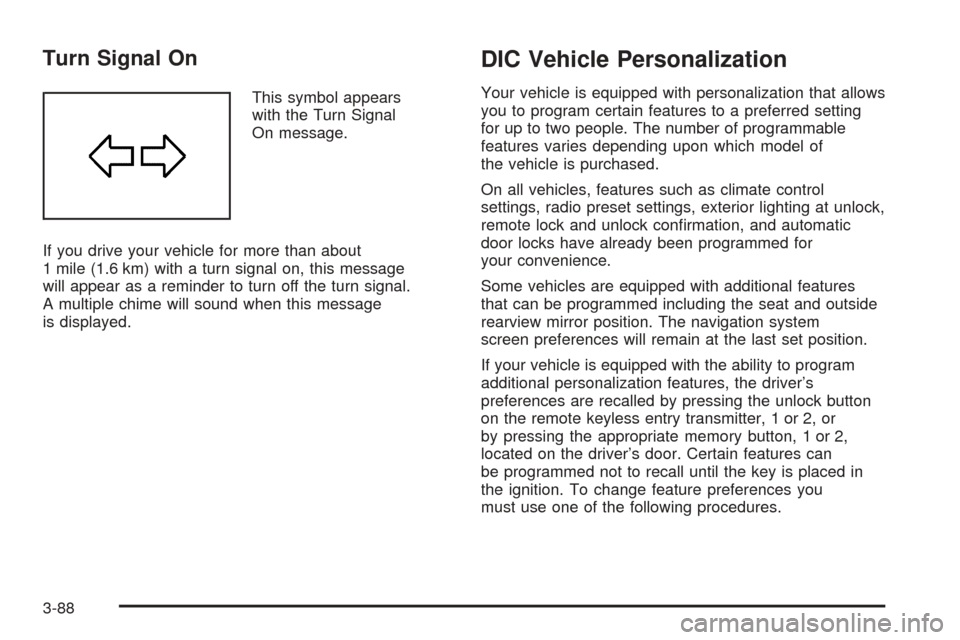
This symbol appears
with the Turn Signal
On message.
If you drive your vehicle for more than about
1 mile (1.6 km) with a turn signal on, this message
will appear as a reminder to turn off the turn signal.
A multiple chime will sound when this message
is displayed.
DIC Vehicle Personalization
Your vehicle is equipped with personalization that allows
you to program certain features to a preferred setting
for up to two people. The number of programmable
features varies depending upon which model of
the vehicle is purchased.
On all vehicles, features such as climate control
settings, radio preset settings, exterior lighting at unlock,
remote lock and unlock con�rmation, and automatic
door locks have already been programmed for
your convenience.
Some vehicles are equipped with additional features
that can be programmed including the seat and outside
rearview mirror position. The navigation system
screen preferences will remain at the last set position.
If your vehicle is equipped with the ability to program
additional personalization features, the driver’s
preferences are recalled by pressing the unlock button
on the remote keyless entry transmitter, 1 or 2, or
by pressing the appropriate memory button, 1 or 2,
located on the driver’s door. Certain features can
be programmed not to recall until the key is placed in
the ignition. To change feature preferences you
must use one of the following procedures.
3-88
Page 230 of 454
3. Press the TUNE/SEL knob to turn AVC on or off.
An X will appear in the box when AVC is selected on.
4. Press the CLR button to exit the display. To return
to the original display, repeatedly press the CLR
button or wait for the display to time out.
SOURCE:Press this button to select a source, either
radio or CD. The CD must be loaded to select the
source and to play. CD will appear on the display if a
CD is loaded. If a CD is not loaded the display will
not change from the radio source.
Finding a Station
BAND:Press this button to select FM1, FM2, AM, or
XM1 or XM2 (if equipped).
QSEEKR:Press the up or the down arrow to go to
the next or to the previous station and stay there.
SEEK will appear on the display. The sound will mute
while seeking.
The radio will only seek stations with a strong signal
that are in the selected band.
QSCANR:Press the SCAN button to enter scan
mode. SCAN will appear on the display. Press the
up arrow to scan to the next station. The radio will go to
a station, play for 5 seconds, then go on to the next
station. Press this button again to stop scanning.To scan preset stations, press and hold SCAN for more
than two seconds until you hear a beep and PSCAN
appears on the display. The radio will go to the
�rst preset station stored on your pushbuttons, play for
5 seconds, then go on to the next preset station.
Press SCAN again to stop scanning presets.
The radio will only scan stations with a strong signal
that are in the selected band.
LOCAL/DISTANT Selection:With this feature you can
set the radio to search for local stations or stations that
are further away for a larger selection. To set this feature
to LOCAL or DISTANT, perform the following steps:
1. Press the TUNE/SEL knob to enter the main menu.
2. Turn the TUNE/SEL knob until SEEK LOCAL or
SEEK DISTANT appears on the display.
3. Press the TUNE/SEL knob to select either LOCAL
or DISTANT.
4. Press the CLR button to exit the display. To return
to the original display, repeatedly press the CLR
button or wait for the display to time out.
To search for stations, press the SEEK up or down
arrows. If the system is set to LOCAL, SEEK will appear
in the display and seek to stations with strong signals
only. If the system is set to DISTANT, D-SEEK will
appear in the display and seek to stations with weak and
strong signals.
3-110
Page 231 of 454
Setting Preset Stations
Up to 30 stations (six FM1, six FM2, and six AM,
six XM1 and six XM2 (if equipped)), can be programmed
on the six numbered pushbuttons, by performing the
following steps:
1. Turn the radio on.
2. Press BAND to select FM1, FM2, or AM, or
XM1 or XM2.
3. Tune in the desired station.
4. Press and hold one of the six numbered pushbuttons
for two seconds until you hear a beep. The set preset
station number will appear on the display above the
pushbutton that it is set to. Whenever that numbered
pushbutton is pressed for less than two seconds, the
station that was set will return.
5. Repeat the steps for each pushbutton.
To set the preset stations with an equalization
setting, DSP setting, or a PTY setting, see each
of these features later in this section. When a preset
station is selected, once one of these additional
settings is selected, the preset station will remember
each setting and it will remain active, until the
setting is selected off for that preset station.AUTOSTORE PRESETS:To set the preset stations
automatically, perform the following steps:
1. Turn the radio on.
2. Press BAND to select FM1, FM2, or AM.
3. Press the TUNE/SEL knob to enter the main menu.
4. Turn the TUNE/SEL knob until AUTOSTORE
PRESETS appears on the display.
5. Press the TUNE/SEL knob to select. AUTOSTORE
will appear on the display. The radio will
automatically search the band and select and store
the six radio stations with the strongest signal.
The stations will be stored by signal strength, not
sequential order. The set preset station number will
appear on the display above the pushbutton that
it is set to. Whenever that numbered pushbutton is
pressed for less than two seconds, the station
that was set will return.
6. Press the CLR button to exit the display. To return
to the original display, repeatedly press the CLR
button or wait for the display to time out.
When battery power is removed and later applied,
you will not have to reset your radio presets.
3-111