ignition CADILLAC CTS V 2004 1.G Owners Manual
[x] Cancel search | Manufacturer: CADILLAC, Model Year: 2004, Model line: CTS V, Model: CADILLAC CTS V 2004 1.GPages: 454, PDF Size: 2.87 MB
Page 9 of 454

Power Lumbar
Your vehicle may have this feature. The driver’s and
passenger’s seatback lumbar support can be adjusted
by moving a control located on the outboard side of
the seat cushions.
To increase or decrease support, hold the control
forward or rearward. Keep in mind that as your seating
position changes, as it may during long trips, so
should the position of your lumbar support. Adjust the
seat as needed.
Heated Seats
If your vehicle is equipped
with heated front seats, the
buttons are located on
the climate control panel.There is one button for the driver and one for the front
passenger. Each button has three settings, LO, HI and
off. The active setting appears on the climate control
panel display. The LO setting warms the seatback and
cushion until the seat approximates normal body
temperature. The HI setting has a slightly higher
temperature.
To turn on the heated seats, press the button once.
The seat will heat to the HI setting. Press the button
again to switch to the LO setting. Pressing the button a
third time turns the system off.
The heated seats can only be used when the ignition is
turned on. When the vehicle is turned off, the heated
seats automatically turn off. If you wish to have the
heated seats on once the vehicle is restarted, press the
button again.
1-3
Page 64 of 454
Servicing Your
Airbag-Equipped Vehicle
Airbags affect how your vehicle should be serviced.
There are parts of the airbag system in several places
around your vehicle. Your dealer and the service manual
have information about servicing your vehicle and the
airbag system. To purchase a service manual, see
Service Publications Ordering Information on page 7-11.
{CAUTION:
For up to 10 seconds after the ignition key is
turned off and the battery is disconnected, an
airbag can still in�ate during improper service.
You can be injured if you are to close to an
airbag when it in�ates. Avoid wires wrapped
with yellow tape, yellow coverings or yellow
connectors. They are probably part of the
airbag systems. Be sure to follow proper
service procedures, and make sure the person
performing work for you is quali�ed to do so.
The airbag system does not need regular maintenance.
Adding Equipment to Your
Airbag-Equipped Vehicle
Q:If I add a luggage carrier or sunroof to the roof
of my vehicle, will it keep the roof-mounted side
impact airbags from working properly?
A:As long as the luggage carrier or sunroof is
properly installed so that the vehicle’s basic
structure is not changed, it is not likely to keep the
roof-mounted side impact airbags from working
properly in a crash.
1-58
Page 67 of 454
Keys...............................................................2-3
Remote Keyless Entry System.........................2-4
Remote Keyless Entry System Operation...........2-5
Doors and Locks.............................................2-8
Door Locks....................................................2-8
Central Door Unlocking System........................2-9
Power Door Locks..........................................2-9
Delayed Locking.............................................2-9
Programmable Automatic Door Locks..............2-10
Rear Door Security Locks..............................2-10
Lockout Protection........................................2-11
Leaving Your Vehicle....................................2-11
Trunk..........................................................2-12
Windows........................................................2-14
Power Windows............................................2-15
Sun Visors...................................................2-17
Theft-Deterrent Systems..................................2-18
Theft-Deterrent System..................................2-18
Immobilizer..................................................2-19
Immobilizer Operation....................................2-20
Starting and Operating Your Vehicle................2-21
New Vehicle Break-In....................................2-21
Ignition Positions..........................................2-22Starting Your Engine.....................................2-24
Engine Coolant Heater..................................2-25
Automatic Transmission Operation...................2-26
Manual Transmission Operation......................2-33
Parking Brake..............................................2-35
Shifting Into Park (P)
(Automatic Transmission)............................2-36
Shifting Out of Park (P)
(Automatic Transmission)............................2-38
Parking Your Vehicle
(Manual Transmission)...............................2-38
Parking Over Things That Burn.......................2-39
Engine Exhaust............................................2-39
Running Your Engine While You Are Parked.......2-40
Mirrors...........................................................2-41
Automatic Dimming Rearview Mirror
with OnStar
®............................................2-41
Automatic Dimming Rearview Mirror
with OnStar
®and Compass........................2-41
Outside Power Mirrors...................................2-43
Outside Curb View Assist Mirror.....................2-44
Outside Convex Mirror...................................2-44
Outside Heated Mirrors..................................2-45
Section 2 Features and Controls
2-1
Page 69 of 454
Keys
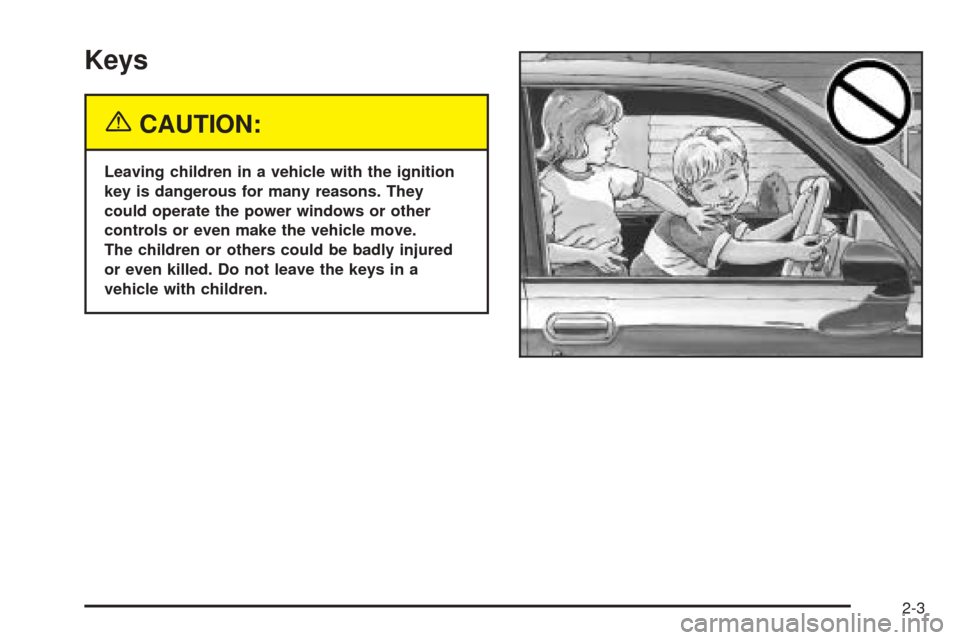
{CAUTION:
Leaving children in a vehicle with the ignition
key is dangerous for many reasons. They
could operate the power windows or other
controls or even make the vehicle move.
The children or others could be badly injured
or even killed. Do not leave the keys in a
vehicle with children.
2-3
Page 72 of 454

W(Unlock):Press this symbol on the remote keyless
entry transmitter to unlock the driver’s door. This
also disarms the theft-deterrent system. Press the
button again to unlock the rest of the doors.
You can program your vehicle so that the exterior lamps
will �ash when you unlock the doors with the remote
keyless entry transmitter. SeeDIC Vehicle
Personalization on page 3-88for more information on
programming this feature.
If your vehicle is programmed for remote con�rmation,
the doors must be closed for this feature to work. If
a door is open, remote con�rmation will be canceled.
L(Panic Alarm):The remote keyless entry transmitter
comes equipped with an instant panic alarm. Press
the horn symbol when the ignition is turned off. The horn
will sound and the exterior lamps will �ash for up to
30 seconds. To stop the instant panic alarm, press the
symbol again or turn the ignition to ON.
V(Trunk):Press this button to open the trunk.
The remote keyless entry transmitter can be used to
recall the memory settings for up to two drivers.
For more information, seeDIC Vehicle Personalization
on page 3-88andMemory Seat and Mirrors on
page 2-53.
Matching Transmitter(s) to
Your Vehicle
Each remote keyless entry transmitter is coded to
prevent another transmitter from unlocking your vehicle.
If a transmitter is lost or stolen, a replacement can
be purchased through your dealer. Remember to bring
any remaining transmitters with you when you go to
your dealer. When the dealer matches the replacement
transmitter to your vehicle, any remaining transmitters
must also be matched. Once your dealer has coded the
new transmitter, the lost transmitter will not unlock
your vehicle. Each vehicle can have a maximum of four
transmitters matched to it.
Battery Replacement
Under normal use, the battery in your remote keyless
entry transmitter should last about four years.
You can tell the battery is weak if the transmitter won’t
work at the normal range in any location. If you have
to get close to your vehicle before the transmitter works,
it’s probably time to change the battery.
Notice:When replacing the battery, use care not
to touch any of the circuitry. Static from your
body transferred to these surfaces may damage
the transmitter.
2-6
Page 75 of 454

Central Door Unlocking System
Your vehicle has a central door unlocking feature. When
unlocking the driver’s door, you can unlock the other
doors by holding the key in the turned position for a few
seconds or by quickly turning the key twice in the
lock cylinder.
Power Door Locks
The power door lock
switches are located
on the front doors.
Press the bottom part of the power door lock switch to
lock or the top of the switch to unlock all the doors
at once.
The rear doors do not have power door lock switches.
You must use the manual levers to lock and unlock
the rear doors when riding in the rear seat.
Delayed Locking
With this feature, you can delay the actual locking of
the doors.
When the power door lock switch or the lock button on
the remote keyless entry transmitter is pressed when
the key is not in the ignition and the driver’s door
is opened, a chime will sound three times indicating that
delayed locking is active.
When all the doors are closed, the doors will lock
automatically after �ve seconds. If a door is reopened
before �ve seconds have elapsed, the �ve second timer
will reset itself once all the doors are closed again.
You can press the door lock switch or the lock button
on the remote keyless entry transmitter again to override
this feature and lock the doors immediately.
You can turn this feature off using the Driver Information
Center (DIC). When delayed locking is off, the doors
will lock immediately when you press the power
door lock switch or the lock button on the remote keyless
entry transmitter. SeeDIC Vehicle Personalization on
page 3-88for more information.
2-9
Page 76 of 454
Programmable Automatic
Door Locks
If your vehicle has an automatic transmission, your
vehicle is programmed so that when the doors
are closed, the ignition is on and the shift lever is
moved out of PARK (P), all the doors will lock. The
doors will unlock every time you stop the vehicle and
move the shift lever back into PARK (P).
If your vehicle has a manual transmission, the vehicle is
programmed so that the doors will lock automatically
after the vehicle speed reaches 5 mph (8 km). The doors
will not automatically unlock until the ignition is turned
off and the key is removed from the ignition switch.
If someone needs to exit the vehicle once the doors are
locked, have that person use the manual lever or
power door lock switch. When the door is closed again,
it will not lock automatically. Use the manual lever or
the power door lock switch to lock the door.
The power door locks can be programmed through
prompts displayed on the Driver Information
Center (DIC). These prompts allow you to choose
various lock and unlock settings. For more information
on programming, seeDIC Vehicle Personalization
on page 3-88.
Rear Door Security Locks
Your vehicle is equipped with rear door security locks
that prevent passengers from opening the rear doors on
your vehicle from the inside.
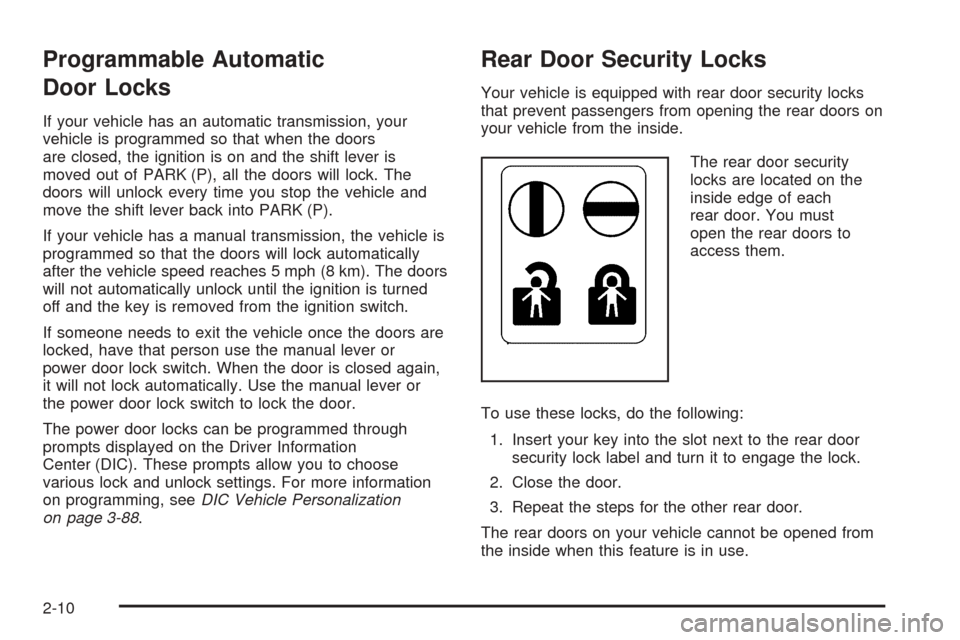
The rear door security
locks are located on the
inside edge of each
rear door. You must
open the rear doors to
access them.
To use these locks, do the following:
1. Insert your key into the slot next to the rear door
security lock label and turn it to engage the lock.
2. Close the door.
3. Repeat the steps for the other rear door.
The rear doors on your vehicle cannot be opened from
the inside when this feature is in use.
2-10
Page 77 of 454

When you want to open a rear door when the security
lock is on, do the following:
1. Unlock the door using the remote keyless entry
transmitter, the front door power lock switch or
by lifting the rear door manual lock.
2. Then open the door from the outside.
To cancel the rear door security lock, do the following:
1. Unlock the door and open it from the outside.
2. Insert your key into the slot next to the rear
door security lock label and turn it to disengage
the lock.
3. Repeat the steps for the other lock.
The rear door locks will now work normally.Lockout Protection
If you press the power door lock switch when the key is
in the ignition and any door is open, all the doors will
lock and only the driver’s door will unlock. If you
close the doors, you can lock them using the remote
keyless entry transmitter. Be sure to remove the
key from the ignition when locking your vehicle.
The anti-lockout feature can be overridden by pressing
the lock button on the remote keyless entry transmitter
or by pressing the power lock switch a second time.
Leaving Your Vehicle
If you are leaving your vehicle, open the door, lock the
vehicle from the inside; then get out and close the door.
2-11
Page 81 of 454
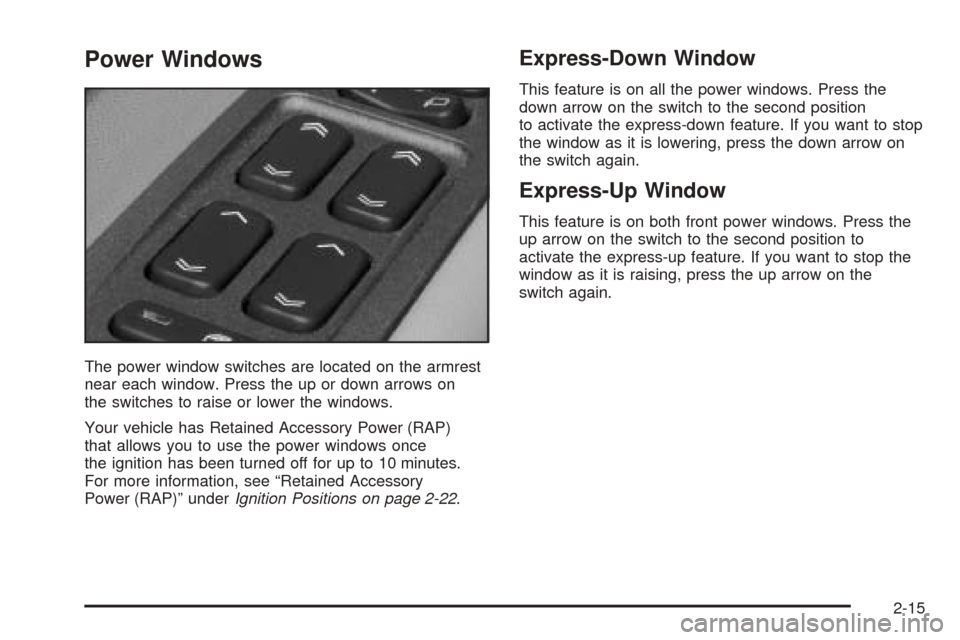
Power Windows
The power window switches are located on the armrest
near each window. Press the up or down arrows on
the switches to raise or lower the windows.
Your vehicle has Retained Accessory Power (RAP)
that allows you to use the power windows once
the ignition has been turned off for up to 10 minutes.
For more information, see “Retained Accessory
Power (RAP)” underIgnition Positions on page 2-22.
Express-Down Window
This feature is on all the power windows. Press the
down arrow on the switch to the second position
to activate the express-down feature. If you want to stop
the window as it is lowering, press the down arrow on
the switch again.
Express-Up Window
This feature is on both front power windows. Press the
up arrow on the switch to the second position to
activate the express-up feature. If you want to stop the
window as it is raising, press the up arrow on the
switch again.
2-15
Page 82 of 454

Programming the Power Windows
If the battery on your vehicle has been recharged,
disconnected or is not working, you will need to
reprogram each front power window for the express-up
feature to work. Before reprogramming, you will need
to replace or recharge your vehicle’s battery.
To program each front window, follow these steps:
1. With the ignition in ACCESSORY, ON or when
Retained Accessory Power (RAP) is active, close
all doors.
2. Press and hold the down arrow on the power
window switch until the window has fully opened.
3. Press the up arrow on the power window switch
until the window is fully closed.
4. Continue holding the up arrow on the switch for
approximately two seconds after the window is
completely closed.
The window is now reprogrammed. Repeat the process
for the other front window.
Anti-Pinch Feature
If a hand, an arm or another object is above the middle
of the window and is in the path of the window when
the express-up feature is active, the window will stop
at the obstruction and express-open to a factory
preset position.
{CAUTION:
Pressing and holding the power window
control will turn off the anti-pinch feature.
If this happens, a power window will not stop
if something gets in the way. You or others
could be injured, and your window could be
damaged. Be careful not to press and hold the
power window control.
2-16