audio CADILLAC CTS V 2006 1.G Owner's Manual
[x] Cancel search | Manufacturer: CADILLAC, Model Year: 2006, Model line: CTS V, Model: CADILLAC CTS V 2006 1.GPages: 442, PDF Size: 2.57 MB
Page 221 of 442
6. Press the TUNE/SEL knob to set the adjustment.
7. Press the CLR button to exit the display. To
return to the original display, repeatedly press
the CLR button or wait for the display to time out.
EQ0 will not appear on the display when in this mode.
Using DSP
Available only with the premium Bose®audio system, this
feature is used to provide a choice of �ve different
listening experiences: DSP normal, talk, spacious, rear
seat, and driver seat. DSP can be used while listening to
the radio or the CD player. The radio keeps separate
DSP settings for each band, preset, and source. To
select a DSP choice, perform the following steps:
1. Press the TUNE/SEL knob to enter the main menu.
2. Turn the TUNE/SEL knob until one of the
�ve settings appears on the display.
3. Press the TUNE/SEL knob to select a DSP setting.
4. Press the CLR button to exit the display. To
return to the original display, repeatedly press
the CLR button or wait for the display to time out.DSP NORMAL:This setting provides the best overall
audio performance for all passengers. DSP NORMAL
will not appear on the display when in this mode.
TALK:This setting should be used when listening to
non-musical material such as news, talk shows,
sports broadcasts, and books on tape. Talk makes
spoken words sound very clear.
SPACIOUS:This setting is used to make the listening
space seem larger.
REAR SEAT:This setting adjusts the audio to give the
rear seat passenger(s) the best possible sound
quality. Sound quality for the front seat passengers may
be different when this setting is used.
DRIVER SEAT:This setting adjusts the audio to give
the driver the best possible sound quality. Sound quality
for the front and rear seat passenger(s) may be
different when this setting is used.
3-91
Page 224 of 442
XM™ Radio Messages
Radio Display
MessageCondition Action Required
XL (Explicit Language
Channels)XL on the radio display,
after the channel name,
indicates content with
explicit language.These channels, or any others, can be blocked at a
customer’s request, by calling 1-800-852-XMXM (9696).
Updating Updating
encryption codeThe encryption code in the receiver is being updated, and
no action is required. This process should take no longer
than 30 seconds.
No Signl Loss of signal The system is functioning correctly, but the vehicle is in a
location that is blocking the XM™ signal. When the vehicle
is moved into an open area, the signal should return.
Loading Acquiring channel audio
(after 4 second delay)The audio system is acquiring and processing audio and
text data. No action is needed. This message should
disappear shortly.
Off Air Channel not in service This channel is not currently in service. Tune in to another
channel.
CH Unavl Channel no longer
availableThis previously assigned channel is no longer assigned.
Tune to another station. If this station was one of the
presets, choose another station for that preset button.
No Info Artist Name/Feature
not availableNo artist information is available at this time on this channel.
The system is working properly.
3-94
Page 226 of 442
Using the Single CD Player
Insert a CD partway into the slot, label side up. The
player will pull it in. If the ignition and the radio are on the
CD will begin playing. A CD may be loaded with the radio
off but it will not start playing until the radio is on.
If the ignition or radio is turned off with a CD in the
player, it will stay in the player. When the ignition
or radio is turned on, the CD will start to play where it
stopped, if it was the last selected audio source.
When the CD is inserted, CD will appear on the display.
As each new track starts to play, the track number
will appear on the display.
The CD player can play the smaller 3 inch (8 cm) single
CDs with an adapter ring. Full-size CDs and the
smaller CDs are loaded in the same manner.
If playing a CD-R, the sound quality may be reduced due
to CD-R quality, the method of recording, the quality of
the music that has been recorded, and the way the CD-R
has been handled. There may be an increase in skipping,
difficulty in �nding tracks, and/or difficulty in loading and
ejecting. If these problems occur, check the bottom
surface of the CD. If the surface of the CD is damaged,
such as cracked, broken, or scratched, the CD will not
play properly. If the surface of the CD is soiled, seeCare
of Your CDs on page 3-103for more information.If there is no apparent damage, try a known good CD.
Do not add any label to a CD, it could get caught in the
CD player. If a CD is recorded on a personal computer
and a description label is needed, try labeling the top of
the recorded CD with a marking pen instead.
Notice:If you add any label to a CD, insert more
than one CD into the slot at a time, or attempt
to play scratched or damaged CDs, you could
damage the CD player. When using the CD player,
use only CDs in good condition without any
label, load one CD at a time, and keep the CD player
and the loading slot free of foreign materials,
liquids, and debris.
If an error appears on the display, see “CD Messages”
later in this section.
When a CD is inserted the CD functions will appear on
the display above the �rm keys, in place of the preset
stations (if programmed).
F1 PREV (Previous):Press this �rm key to go to the
previous track. Press and hold this �rm key to
reverse quickly within a track. Release the �rm key to
play the passage. The elapsed time of the track
will appear on the display.
F2 NEXT:Press this �rm key to go to the next track.
Press and hold this �rm key to advance quickly within a
track. Release the �rm key to play the passage. The
elapsed time of the track will appear on the display.
3-96
Page 232 of 442

Audio Steering Wheel
Controls (CTS)
Some audio functions can
be adjusted at the steering
wheel. They include the
following:
Volume:Turn this knob to increase or to decrease
the volume.
e(Band/Source):Press this button to switch
between FM1, FM2, AM, or XM1 or XM2 (if equipped),
radio, or CD.
For vehicles with the six-disc CD changer radio: If none of
the audio sources are loaded, and this button is pressed,
NO SOURCE LOADED will appear on the display.
g(Mute/Voice Recognition):Press this button to
silence the system. Press this button again or turn the
VOL knob to turn the sound on.
If your vehicle has the navigation system, press
this button to initiate voice recognition. See “Voice
Recognition” in the Navigation System manual for
more information.
SeeRecon�gurable
Steering Wheel Controls
(SWC) (CTS) on page 3-7
for more information on
this feature.
Radio Reception
You may experience frequency interference and static
during normal radio reception if items such as cellphone
chargers, vehicle convenience accessories, and
external electronic devices are plugged into the
accessory power outlet. If there is interference or static,
unplug the item from the accessory power outlet.
3-102
Page 244 of 442

You can turn the system
off by pressing the TC
(traction control) button
located in the glove box.
If you press the TC button once, the traction control
system will turn off and the traction control system
warning light will come on. Press the TC button again
to turn the system back on. If you press and hold
the TC button for �ve seconds, the StabiliTrak
®system
will turn off. Press the TC button again to turn
StabiliTrak
®back on. For more information, see
StabiliTrak®System on page 4-12.
You can program your steering wheel controls and/or
the buttons on the Base audio system to turn the
TCSonoroff.SeeRecon�gurable Steering Wheel
Controls (SWC) (CTS) on page 3-7and/or “Con�gurable
Radio Display Keys” underRadio with CD on page 3-85
for programming instructions.
Adding non-GM accessories can affect your vehicle’s
performance. SeeAccessories and Modi�cations
on page 5-3for more information.
Traction Control System (TCS)
(CTS-V)
Your vehicle has a Traction Control System (TCS) that
limits wheel spin. This is especially useful in slippery
road conditions. The system operates only if it senses
that one or both of the rear wheels are spinning or
beginning to lose traction. When this happens,
the system brakes the spinning wheel(s) and/or
reduces engine power to limit wheel spin.
You may feel or hear the system working, but this
is normal.
This warning light will
come on to let you know
if there’s a problem
with your traction
control system.
SeeTraction Control System (TCS) Warning Light on
page 3-39. When this warning light is on, the system will
not limit wheel spin. Adjust your driving accordingly.
4-10
Page 294 of 442

Engine Oil Life System
When to Change Engine Oil
Your vehicle has a computer system that lets you know
when to change the engine oil and �lter. This is based
on engine revolutions and engine temperature, and not
on mileage. Based on driving conditions, the mileage
at which an oil change will be indicated can vary
considerably. For the oil life system to work properly,
you must reset the system every time the oil is changed.
When the system has calculated that oil life has been
diminished, it will indicate that an oil change is necessary.
A change engine oil message in the Driver Information
Center (DIC) will come on. Change your oil as soon
as possible within the next 600 miles (1 000 km). It is
possible that, if you are driving under the best conditions,
the oil life system may not indicate that an oil change
is necessary for over a year. However, your engine oil
and �lter must be changed at least once a year and
at this time the system must be reset. Your dealer has
GM-trained service people who will perform this work
using genuine GM parts and reset the system. It is also
important to check your oil regularly and keep it at the
proper level.
If the system is ever reset accidentally, you must
change your oil at 3,000 miles (5 000 km) since your
last oil change. Remember to reset the oil life system
whenever the oil is changed.
How to Reset the Engine Oil Life
System and the Oil Life Indicator
The Engine Oil Life System calculates when to change
your engine oil and �lter based on vehicle use. Anytime
your oil is changed, reset the system so it can calculate
when the next oil change is required. If a situation occurs
where you change your oil prior to a change engine oil
message in the DIC being turned on, reset the system.
After the oil has been changed, the change engine
oil message and the oil life indicator must be reset.
To reset the message and indicator, use one of
the following procedures:
Base Audio System
Press the CLR button located to the right of the DIC
display to acknowledge the change engine oil message.
This will clear the message from the display and reset it.
To reset the oil life indicator, use the following steps:
1. Press the up or down arrow on the INFO button
located to the right of the DIC display to access
the DIC menu.
2. Once XXX% ENGINE OIL LIFE menu item is
highlighted, press and hold the CLR button.
The percentage will return to 100, and the oil life
indicator will be reset. Repeat the steps if the
percentage does not return to 100.
3. Turn the key to OFF.
5-20
Page 297 of 442
Automatic Transmission Fluid
It is not necessary to check the transmission �uid level.
A transmission �uid leak is the only reason for �uid
loss. If a leak occurs, take your vehicle to your
GM dealer service department and have it repaired as
soon as possible.
Change the �uid and �lter at the intervals listed in
Additional Required Services on page 6-6, and be sure
to use the transmission �uid listed inRecommended
Fluids and Lubricants on page 6-13.
Notice:Use of the incorrect automatic transmission
�uid may damage your vehicle, and the damages
may not be covered by your warranty. Always
use the automatic transmission �uid listed in
Recommended Fluids and Lubricants on page 6-13.
How to Reset the Change Transmission
Fluid Message and the Transmission
Fluid Indicator
After the transmission �uid has been changed, the
Change Trans Fluid message and the transmission
�uid life indicator must be reset. To reset the message
and indicator, use one of the following procedures:
Base Audio System
Press the CLR (Clear) button located to the right of
the DIC display to acknowledge the CHANGE TRANS
FLUID message. This will clear the message from
the display and reset it.
To reset the transmission �uid life indicator, use the
following steps:
1. Press the up or down arrow on the INFO button
located to the right of the DIC display to access
the DIC menu.
2. Once the XXX% TRANS FLUID LIFE menu item
is highlighted, press and hold the CLR button.
The percentage will return to 100, and the
transmission �uid life indicator will be reset.
3. Repeat the steps if the percentage does not
return to 100.
Navigation System
If your vehicle has a navigation system, see your
navigation system supplement for instructions on how
to acknowledge the Change Trans Fluid message
and reset the transmission �uid life indicator.
5-23
Page 342 of 442
Tire Pressure Monitor System
The Tire Pressure Monitor System (TPMS) uses radio
and sensor technology to check tire pressure levels.
If your vehicle has this feature, sensors are mounted on
the tire and wheel assembly. The TPMS sensors
transmit tire pressure readings to a receiver located in
the vehicle once every 60 seconds while the vehicle
is being driven, and once every 60 minutes if the vehicle
is stationary for more than 15 minutes.
If your vehicle has the base audio system, the Driver
Information Center (DIC) displays TPMS warnings and
messages on the radio’s display screen. SeeSystem
Controls on page 3-53andDIC Warnings and Messages
on page 3-61for additional information and details about
the DIC operation and displays. If your vehicle has the
Navigation system, TPMS warnings and messages are
displayed on the message center screen, located inside
the tachometer. SeeMessage Center (CTS-V) on
page 3-47for information about the message center
operation and displays.
If a low tire pressure condition is detected, the TPMS
will display the Check Tire Pressure message on
the DIC or message center and, at the same time,
illuminate the low tire pressure warning symbol on
the instrument panel cluster.Each tire, including the spare (if provided), should be
checked monthly when cold and in�ated to the in�ation
pressure recommended by the vehicle manufacturer
on the vehicle placard or tire in�ation pressure label.
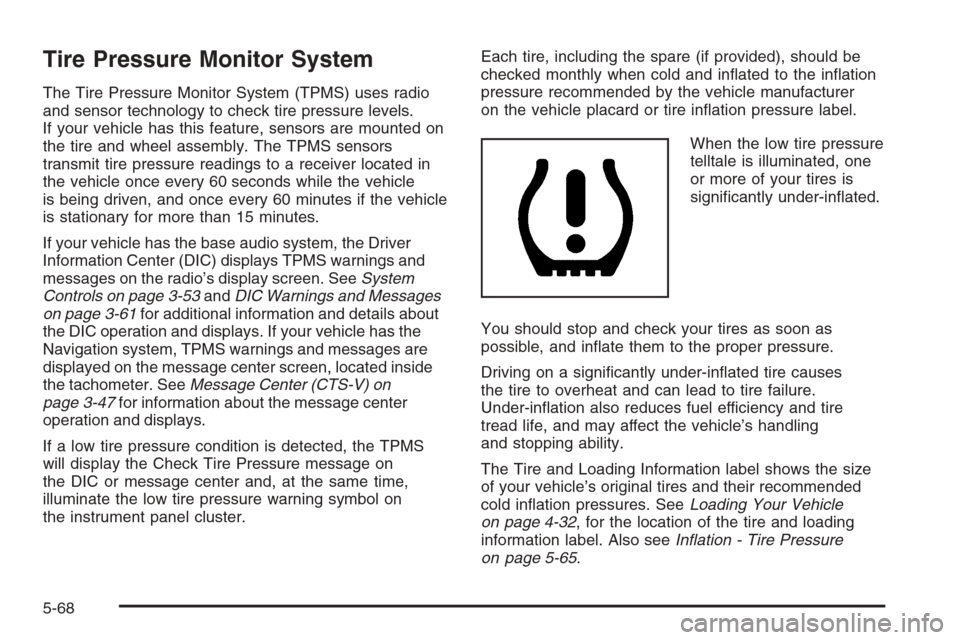
When the low tire pressure
telltale is illuminated, one
or more of your tires is
signi�cantly under-in�ated.
You should stop and check your tires as soon as
possible, and in�ate them to the proper pressure.
Driving on a signi�cantly under-in�ated tire causes
the tire to overheat and can lead to tire failure.
Under-in�ation also reduces fuel efficiency and tire
tread life, and may affect the vehicle’s handling
and stopping ability.
The Tire and Loading Information label shows the size
of your vehicle’s original tires and their recommended
cold in�ation pressures. SeeLoading Your Vehicle
on page 4-32, for the location of the tire and loading
information label. Also seeIn�ation - Tire Pressure
on page 5-65.
5-68
Page 385 of 442

Rear Underseat Fuse Block
(Driver’s Side)
The driver’s side rear fuse block is located under
the rear seat on the driver’s side of the vehicle. The
rear seat cushion must be removed to access the rear
fuse block. See “Removing the Rear Seat Cushion”
listed previously.
To access the fuse block, push in the two tabs located at
each end of the fuse block cover. Then lift the cover off.
Fuses Usage
SPARE Not Used
SPARE Not Used
AUDIO Radio, OnStar Module
SPARE Not Used
REAR DR MOD Rear Door Modules
Fuses Usage
SPARE Not Used
DRIVER
DR MODDriver’s Door Module
BASTaillamps, Center High-Mounted
Stoplamp, Flasher Module,
ABS Module, Trailer Lamps
HDLP
LEVELINGHeadlamp Leveling System
Chassis Sensors (Export Only)
SPARE Not Used
CCP CCP (Climate Control Panel)
IGN 3Heated Seat Modules, Air Inlet
Motor, Shifter Assembly
SPARE Not Used
SPARE Not Used
FUSE PULLER Fuse Puller
L FRT HTD
SEAT MODDriver’s Heated Seat Module
MEM/ADAPT
SEATDriver’s Power Seat Switch
Memory Seat Module
TRUNK
DR RELEASETrunk Release Motor
5-111
Page 386 of 442
Fuses Usage
REVERSE
LAMPISRVM (Inside Rearview Mirror),
License Plate Lamp Assembly
SPARE Not Used
POSITION
LAMPTaillamp Assemblies,
Front Position Lamp Assemblies
J Cases Usage
AMP Audio Ampli�er
PUSHER FAN Pusher Fan (Export Only)
Relays Usage
BAS RELAY
MINIBrake Apply Sensor
PUSHER FAN Pusher Fan (Export Only)
L POSITION
RELAY MICRODriver’s Side Position Lamp
TRKDRREL
SOL RELAY
MICROTrunk Release Motor
Relays Usage
REV LAMP
RELAY MICROISRVM (Inside Rearview Mirror),
License Plate Lamp Assembly
R POSITION
RELAY MICROPassenger’s Side Position Lamp
IGN 3 RELAY
MICROHeated Seat Modules, Air Inlet
Motor, Shifter Assembly
STANDING
LAMP
RLY MICROControl for Position Lamp Relays
Circuit
Breakers Usage
SEAT C/BPower Seat Switches,
Memory Seat Module
Misc. Usage
JOINT
CONNECTORJoint Connector
5-112