brake light CADILLAC CTS V 2006 1.G Owners Manual
[x] Cancel search | Manufacturer: CADILLAC, Model Year: 2006, Model line: CTS V, Model: CADILLAC CTS V 2006 1.GPages: 442, PDF Size: 2.57 MB
Page 109 of 442
Parking Brake
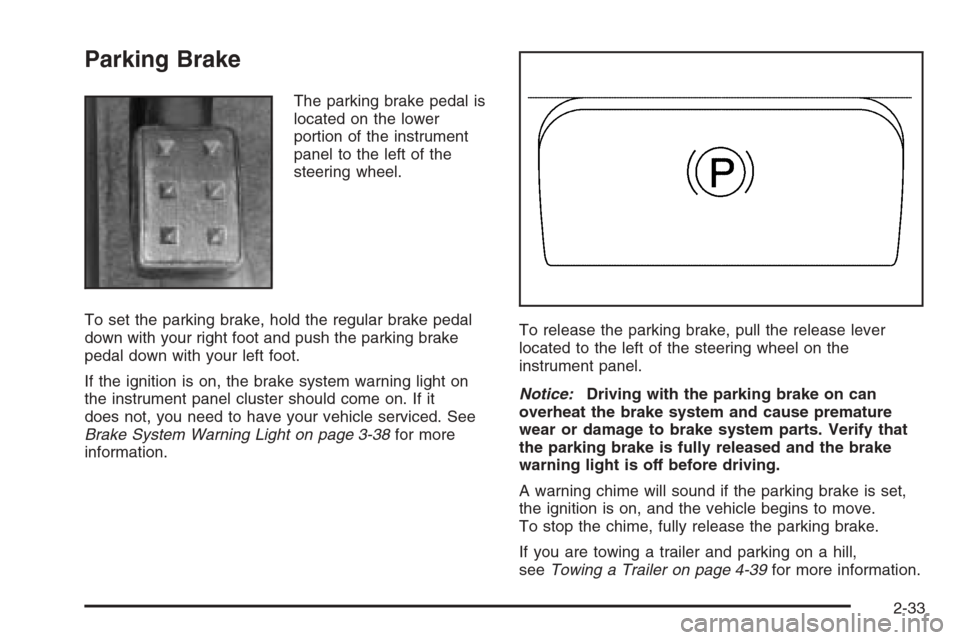
The parking brake pedal is
located on the lower
portion of the instrument
panel to the left of the
steering wheel.
To set the parking brake, hold the regular brake pedal
down with your right foot and push the parking brake
pedal down with your left foot.
If the ignition is on, the brake system warning light on
the instrument panel cluster should come on. If it
does not, you need to have your vehicle serviced. See
Brake System Warning Light on page 3-38for more
information.To release the parking brake, pull the release lever
located to the left of the steering wheel on the
instrument panel.
Notice:Driving with the parking brake on can
overheat the brake system and cause premature
wear or damage to brake system parts. Verify that
the parking brake is fully released and the brake
warning light is off before driving.
A warning chime will sound if the parking brake is set,
the ignition is on, and the vehicle begins to move.
To stop the chime, fully release the parking brake.
If you are towing a trailer and parking on a hill,
seeTowing a Trailer on page 4-39for more information.
2-33
Page 131 of 442
Instrument Panel Overview...............................3-4
Hazard Warning Flashers................................3-6
Other Warning Devices...................................3-6
Horn .............................................................3-6
Tilt Wheel.....................................................3-6
Recon�gurable Steering Wheel
Controls (SWC) (CTS).................................3-7
Turn Signal/Multifunction Lever.........................3-9
Turn and Lane-Change Signals........................3-9
Headlamp High/Low-Beam Changer.................3-10
Flash-to-Pass...............................................3-10
Windshield Wipers........................................3-11
Windshield Washer.......................................3-12
Headlamp Washer........................................3-12
Cruise Control..............................................3-13
Headlamps..................................................3-16
Wiper Activated Headlamps............................3-17
Headlamps on Reminder................................3-17
Daytime Running Lamps (DRL).......................3-17
Fog Lamps ..................................................3-19
Exterior Lighting Battery Saver........................3-20
Instrument Panel Brightness...........................3-20
Entry Lighting...............................................3-21
Parade Dimming...........................................3-21
Reading Lamps............................................3-21Accessory Power Outlet(s).............................3-21
Ashtray(s) and Cigarette Lighter......................3-22
Climate Controls............................................3-23
Dual Climate Control System..........................3-23
Outlet Adjustment.........................................3-28
Passenger Compartment Air Filter...................3-29
Steering Wheel Climate Controls (CTS)............3-30
Warning Lights, Gages, and Indicators............3-30
Instrument Panel Cluster................................3-31
Speedometer and Odometer...........................3-33
Trip Odometers............................................3-33
Tachometer.................................................3-33
Engine Speed Limiter....................................3-33
Safety Belt Reminder Light.............................3-34
Airbag Readiness Light..................................3-34
Passenger Airbag Status Indicator...................3-35
Charging System Light..................................3-37
Brake System Warning Light..........................3-38
Anti-Lock Brake System Warning Light.............3-39
Traction Control System (TCS) Warning Light......3-39
Engine Coolant Temperature
Warning Light (CTS)..................................3-40
Engine Coolant Temperature Gage..................3-40
Tire Pressure Light (CTS-V Only)....................3-41
Section 3 Instrument Panel
3-1
Page 144 of 442
Setting Cruise Control
{CAUTION:
If you leave your cruise control on when you
are not using cruise, you might hit a button
and go into cruise when you do not want to.
You could be startled and even lose control.
Keep the cruise control switch off until you
want to use cruise control.
1. Move the cruise control switch to on.
2. Get up to the desired speed.
3. Press in the set button at the end of the lever and
release it.
4. Take your foot off the accelerator pedal.
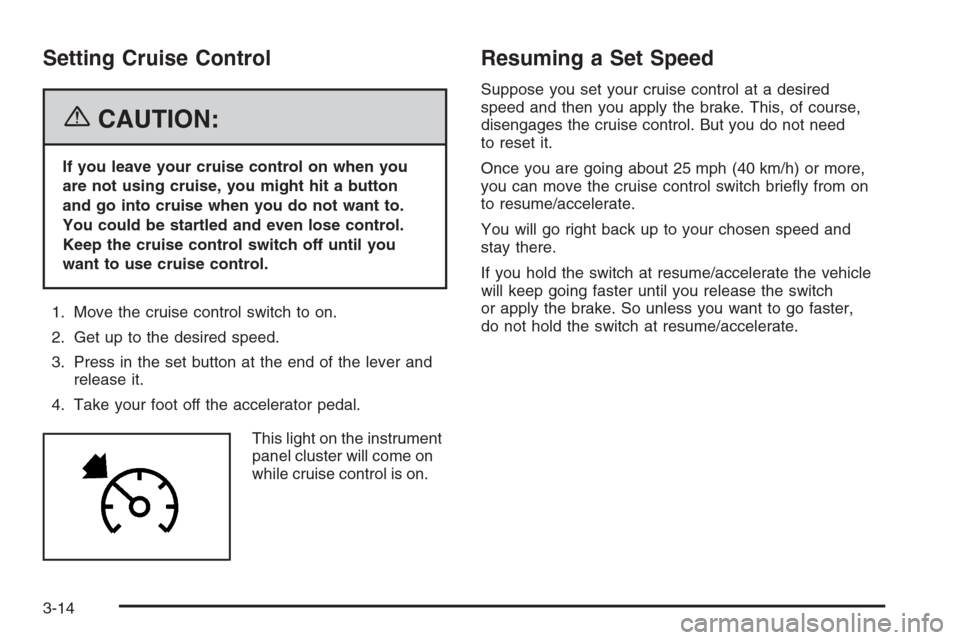
This light on the instrument
panel cluster will come on
while cruise control is on.
Resuming a Set Speed
Suppose you set your cruise control at a desired
speed and then you apply the brake. This, of course,
disengages the cruise control. But you do not need
to reset it.
Once you are going about 25 mph (40 km/h) or more,
you can move the cruise control switch brie�y from on
to resume/accelerate.
You will go right back up to your chosen speed and
stay there.
If you hold the switch at resume/accelerate the vehicle
will keep going faster until you release the switch
or apply the brake. So unless you want to go faster,
do not hold the switch at resume/accelerate.
3-14
Page 146 of 442

Using Cruise Control on Hills
How well your cruise control will work on hills depends
upon your speed, load, and the steepness of the hills.
When going up steep hills, you may have to step on the
accelerator pedal to maintain your speed. When going
downhill, you may have to brake or shift to a lower gear
to keep the speed reduced. Applying the brake or shifting
into a lower gear will take you out of cruise control.
If you need to apply the brake or shift to a lower gear
due to the grade of the downhill slope, you may not
want to use the cruise control feature.
Ending Cruise Control
To end a cruise control session, step lightly on the
brake pedal. If your vehicle has a manual transmission,
lightly tapping the clutch pedal will also end a cruise
control session.
Stepping on the brake or clutch pedal will only end the
current cruise control session. Move the cruise
control switch to off to completely turn off the system.
Erasing Speed Memory
When you turn off the cruise control or the ignition, the
cruise control set speed memory is erased.
Headlamps
The exterior lamp control is located in the middle of the
turn signal/multifunction lever. SeeTurn Signal/
Multifunction Lever on page 3-9.
O(Exterior Lamp Control):Turn the control with this
symbol on it to operate the exterior lamps.
The exterior lamp control has the following
four positions:
9(Off):Turning the control to this position turns off
all lamps except the Daytime Running Lamps (DRL).
;(Parking Lamps):Turning the control to this
position turns on the parking lamps together with the
following:
Sidemarker Lamps
Taillamps
License Plate Lamps
Instrument Panel Lights
5(Headlamps):Turning the control to this position
turns on the headlamps, together with the previously
listed lamps and lights.
AUTO (Automatic):Turning the control to this position
puts the headlamps in automatic mode. AUTO mode
will turn the exterior lamps on and off depending
upon how much light is available outside of the vehicle.
3-16
Page 148 of 442
When the exterior lamp control is in AUTO and it is dark
enough outside, the DRL will turn off and the low-beam
headlamps will turn on. When it is bright enough
outside, the low-beam headlamps will go off, and the
DRL will turn back on. If you start your vehicle in a dark
garage, the automatic headlamp system will come on
immediately. Once you leave the garage, it will take
about one minute for the automatic headlamp system to
change to DRL if it is light outside. During that delay,
your instrument panel cluster may not be as bright
as usual. Make sure your instrument panel brightness
lever is in the full bright position. SeeInstrument
Panel Brightness on page 3-20.
If it is dark enough outside and the exterior lamp control is
off, a Headlamps Suggested message will appear on the
Driver’s Information Center (DIC) display. This message
informs the driver that turning on the exterior lamps is
recommended even though the DRL are still on.Turning the exterior lamp control to AUTO or to the
low-beam headlamp position will turn off the DRL and
cancel the Headlamps Suggested message.
If the parking lamps or the fog lamps were turned on
instead, the DRL will still turn off and the Headlamps
Suggested message will be displayed. You can turn it off
by pressing the OK button if you have the Navigation
audio system or the CLR (Clear) button if you have the
base audio system.
To drive your vehicle with the DRL off, turn the exterior
lamp control off. Then turn on the fog lamps or
parking lamps, and the DRL will turn off. The Headlamps
Suggested message will appear on the DIC display.
This will work regardless of gear position and whether or
not the parking brake is set.
As with any vehicle, you should turn on the regular
headlamp system when you need it.
3-18
Page 168 of 442

Brake System Warning Light
Your vehicle’s hydraulic brake system is divided into
two parts. If one part is not working, the other part can
still work and stop you. For good braking, though,
you need both parts working well.
If the warning light comes on, there is a brake problem.
Have your brake system inspected right away.
This light should come on brie�y when you turn the
ignition key to ON. If it does not come on then, have it
�xed so it will be ready to warn you if there is a problem.When the ignition is on, the brake system warning light
will also come on when you set your parking brake.
The light will stay on if your parking brake does
not release fully. If it stays on after your parking brake is
fully released, it means you have a brake problem.
If the light comes on while you are driving, pull off the
road and stop carefully. You may notice that the pedal
is harder to push, or the pedal may go closer to the
�oor. It may take longer to stop. If the light is still
on, have the vehicle towed for service. SeeTowing
Your Vehicle on page 4-37.
{CAUTION:
Your brake system may not be working
properly if the brake system warning light is
on. Driving with the brake system warning
light on can lead to an accident. If the light
is still on after you have pulled off the road
and stopped carefully, have the vehicle towed
for service. United StatesCanada
3-38
Page 169 of 442

Anti-Lock Brake System
Warning Light
With the Anti-Lock Brake
System (ABS), the light will
come on when your
engine is started and stay
on for several seconds.
This is normal.
If the ABS warning light comes on and stays on, there
may be a problem with the anti-lock portion of the brake
system. If the brake system warning light is not on,
you still have brakes, but you do not have anti-lock
brakes. SeeBrake System Warning Light on page 3-38
for more information.
If the light stays on, turn the ignition to OFF. If the light
comes on when you are driving, stop as soon as possible
and turn the ignition off. Then start the engine again to
reset the system. If the light still stays on, or comes on
again while you are driving, your vehicle needs service. If
the regular brake system warning light is not on, you still
have brakes, but you do not have anti-lock brakes. If the
regular brake system warning light is also on, you do not
have anti-lock brakes and there is a problem with your
regular brakes. SeeBrake System Warning Light on
page 3-38for more information.The ABS warning light should come on brie�y when you
turn the ignition key to ON. If the light does not come
on then, have it �xed so it will be ready to warn you
if there is a problem.
Traction Control System (TCS)
Warning Light
If the TC (traction control)
warning light comes on
and stays on, there may be
a problem with the
traction control system.
The TC warning light will come on brie�y when you turn
the ignition to ON. If it does not come on then, have it
�xed so it will be ready to warn you if there is a problem.
The light will also come on if you turn the traction
control system off using the TC on/off button located in
the glove box for the CTS and on the steering wheel
for the CTS-V.
3-39
Page 193 of 442
Change Engine Oil
This message indicates that the life of the engine oil
has expired and it should be changed and that
your vehicle is due for service. See your GM dealer.
SeeEngine Oil on page 5-16andScheduled
Maintenance on page 6-4for more information.
When you reset the Change Engine Oil message by
clearing it from the display, you still must reset the
engine oil life system separately. For more information
on resetting the engine oil life system, seeEngine
Oil Life System on page 5-20. If you clear this message
from the display, it will not re-appear.
Change Trans (Transmission) Fluid
(Automatic Transmission)
This message indicates that the life of the transmission
�uid has expired and it should be changed. See
Scheduled Maintenance on page 6-4and
Recommended Fluids and Lubricants on page 6-13for
the proper �uid and change intervals.
When you reset the Change Trans Fluid message by
clearing it from the display, you still must reset the
transmission �uid life monitor separately. For more
information on resetting the transmission �uid life
monitor, seeAutomatic Transmission Fluid on
page 5-23.
Check Brake Fluid
This message will display if the ignition is in ON to
inform the driver that the brake �uid level is low.
Have the brake system serviced by your GM dealer as
soon as possible. SeeBrake System Warning Light
on page 3-38andBrakes on page 5-38for more
information.
Check Coolant Level
Notice:If your engine catches �re because you
keep driving with no coolant, your vehicle can
be badly damaged. The costly repairs would not be
covered by your warranty. SeeOverheated Engine
Protection Operating Mode on page 5-30for
information on driving to a safe place in an
emergency.
This message will appear when there is a low level of
engine coolant. Have the cooling system serviced
by your GM dealer as soon as possible. SeeEngine
Coolant on page 5-26for more information.
Check Gas Cap
When this message appears on the display, the gas cap
has not been fully tightened. You should recheck the
gas cap to ensure that it is on and tightened properly.
See “If the Light Is On Steady” underMalfunction
Indicator Lamp on page 3-41for more information.
3-63
Page 196 of 442
This message will also appear when the windshield
wipers have been on for more than six seconds and the
exterior lamp control is off or in the parking lamp position.
Ice Possible
This message appears when the outside temperature is
cold enough to create icy road conditions.
Left Rear Door Ajar
When this message appears on the display, it means
that the driver’s side rear door was not closed
completely. You should make sure that the door is
closed completely.
Oil Pressure Low – Stop Engine
Notice:If you drive your vehicle while the engine
oil pressure is low, severe engine damage may
occur. If a low oil pressure warning appears on the
instrument panel cluster and/or DIC, stop the
vehicle as soon as possible. Do not drive the vehicle
until the cause of the low oil pressure is corrected.
SeeEngine Oil on page 5-16for more information.
Passenger Door Ajar
When this message appears on the display, it means
that the passenger’s side front door was not closed
completely. You should make sure that the door
is closed completely.
Right Rear Door Ajar
When this message appears on the display, it means
that the passenger’s side rear door was not closed
completely. You should check to make sure that
the door is closed completely.
Service AC (Air Conditioning) System
This message appears when the electronic sensors that
control the air conditioning and heating systems are
no longer working. Have the climate control system
serviced by your GM dealer if you notice a drop
in heating and air conditioning efficiency.
Service Air Bag
There is a problem with the airbag system when this
message appears. Have your vehicle serviced by your
GM dealer immediately. SeeAirbag Readiness Light
on page 3-34for more information.
Service Brake Assist
This message will display when a problem with the
panic brake assist system has been detected. Have your
vehicle serviced by your GM dealer.
3-66
Page 200 of 442
DIC Vehicle Personalization
If your vehicle has the Navigation system, see the
Navigation system manual for instructions on operating
the DIC for your vehicle.
Your vehicle has personalization that allows you to
program certain features to a preferred setting for up to
two people. The number of programmable features
varies depending upon which model of the vehicle is
purchased.
On all vehicles, features such as climate control
settings, radio preset settings, exterior lighting at unlock,
remote lock and unlock con�rmation, and automatic
door locks have already been programmed for
your convenience.
Some vehicles have additional features that can be
programmed including the seat and outside rearview
mirror position.
If your vehicle has the ability to program additional
personalization features, the driver’s preferences are
recalled by pressing the unlock button on the Remote
Keyless Entry (RKE) transmitter, 1 or 2, or by pressing
the appropriate memory button, 1 or 2, located on
the driver’s door. Certain features can be programmed
not to recall until the key is placed in the ignition.
To change feature preferences, see “Entering the
Personalization Menu” following.
Entering the Personalization Menu
To enter the feature programming mode, use the
following procedure:
1. Turn the ignition to ON, but do not start the engine.
Make sure an automatic transmission is in PARK (P)
or a manual transmission has the parking brake set.
To avoid excessive drain on the battery, it is
recommended that the headlamps are turned off.
2. If your vehicle has memory settings, press the
appropriate memory button, 1 or 2, located on
the driver’s door armrest. The DIC display will show
either Driver 1 or 2 depending on which button
was selected.
3. Press the PWR/VOL knob to turn the radio on.
4. Press the TUNE/SEL knob once to access the main
menu of the DIC.
5. Turn the TUNE/SEL knob until SETUP is highlighted.
6. Press the TUNE/SEL knob once to access the
SETUP menu.
7. Turn the TUNE/SEL knob until the feature you want
to change is highlighted, then press the TUNE/SEL
knob to turn the feature on or off. If the feature
is turned on, a check mark will appear next to the
feature name.
If none of the personalization items are turned on,
turn on the personalization menu by pressing
the TUNE/SEL knob. The list of features will then
appear, and you can repeat Step 6.
3-70