display CADILLAC CTS V 2007 1.G User Guide
[x] Cancel search | Manufacturer: CADILLAC, Model Year: 2007, Model line: CTS V, Model: CADILLAC CTS V 2007 1.GPages: 518, PDF Size: 2.77 MB
Page 180 of 518

Headlamps
The exterior lamp control is located in the middle
of the turn signal/multifunction lever. SeeTurn
Signal/Multifunction Lever on page 171.
O(Exterior Lamp Control):Turn the control
with this symbol on it to operate the exterior lamps.
The exterior lamp control has the following
four positions:
9(Off):Turning the control to this position
turns off all lamps except the Daytime Running
Lamps (DRL).
;(Parking Lamps):Turning the control to this
position turns on the parking lamps together
with the following:
Sidemarker Lamps
Taillamps
License Plate Lamps
Instrument Panel Lights
5(Headlamps):Turning the control to this
position turns on the headlamps, together with the
previously listed lamps and lights.
AUTO (Automatic):Turning the control to this
position puts the headlamps in automatic
mode. AUTO mode will turn the exterior lamps
on and off depending upon how much light
is available outside of the vehicle.
Wiper Activated Headlamps
This feature activates the headlamps and parking
lamps after the windshield wipers have been in
use for about six seconds. For this feature to work,
the exterior lamp control must be in AUTO.
When the exterior lamp control is off or in the
parking lamp position and the windshield wiper
control is in any position except off, the Headlamps
Suggested message will appear on the DIC
display. See “Headlamps Suggested Message”
underDIC Warnings and Messages on page 232
for more information.
When the ignition is turned to OFF, the
wiper-activated headlamps will immediately turn
off. They will also turn off if the windshield
wiper control is turned off.
180
Page 182 of 518

If it is dark enough outside and the exterior lamp
control is off, a Headlamps Suggested message
will appear on the Driver’s Information Center
(DIC) display. This message informs the driver that
turning on the exterior lamps is recommended
even though the DRL are still on. Turning the
exterior lamp control to AUTO or to the low-beam
headlamp position will turn off the DRL and
cancel the Headlamps Suggested message.
If the parking lamps or the fog lamps were turned
on instead, the DRL will still turn off and the
Headlamps Suggested message will be displayed.
You can turn it off by pressing the OK button if
you have the Navigation audio system or the
CLR (Clear) button if you have the base audio
system.
To drive your vehicle with the DRL off, turn the
exterior lamp control off. Then turn on the fog lamps
or parking lamps, and the DRL will turn off.
The Headlamps Suggested message will appear on
the DIC display. This will work regardless of gear
position and whether or not the parking brake is set.
As with any vehicle, you should turn on the
regular headlamp system when you need it.Light Sensor
The light sensor for the DRL and AUTO headlamp
feature is located on top of the instrument panel.
If you cover the sensor, it will prevent it from
sensing light, and the exterior lamps or the
Headlamps Suggested message will appear on
the DIC whenever the ignition is on.
182
Page 185 of 518

Parade Dimming
This feature prohibits dimming of the instrument
panel displays and backlighting during daylight
hours when the key is in the ignition and the
headlamps are on. This feature operates with the
light sensor and is fully automatic. When the light
sensor reads darkness outside and the parking
lamps are active, the instrument panel displays can
be adjusted by sliding the instrument panel
brightness lever toward the symbol to brighten or
away from the symbol to dim the lighting.
Reading Lamps
The reading lamps are located on the overhead
console. These lamps come on automatically when
any door is opened.
For manual operation, press the button next to
each lamp to turn it on or off.
If the reading lamps are left on, they automatically
shut off 10 minutes after the ignition has been
turned off.
Electric Power Management
The vehicle has Electric Power Management
(EPM) that estimates the battery’s temperature and
state of charge. It then adjusts the voltage for
best performance and extended life of the battery.
When the battery’s state of charge is low, the
voltage is raised slightly to quickly put the charge
back in. When the state of charge is high, the
voltage is lowered slightly to prevent overcharging.
If the vehicle has a voltmeter gage or voltage
display on the Driver Information Center (DIC), you
may see the voltage move up or down. This is
normal. If there is a problem, an alert will be
displayed.
The battery can be discharged at idle if the
electrical loads are very high. This is true for all
vehicles. This is because the generator (alternator)
may not be spinning fast enough at idle to
produce all the power that is needed for very high
electrical loads.
185
Page 186 of 518

A high electrical load occurs when several of the
following loads are on: headlamps, high beams,
fog lamps, rear window defogger, climate
control fan at high speed, heated seats, engine
cooling fans, trailer loads, and loads plugged into
accessory power outlets.
EPM works to prevent excessive discharge of the
battery. It does this by balancing the generator’s
output and the vehicle’s electrical needs. It
can increase engine idle speed to generate more
power, whenever needed. It can temporarily
reduce the power demands of some accessories.
Normally, these actions occur in steps or levels,
without being noticeable. In rare cases at the
highest levels of corrective action, this action may
be noticeable to the driver. If so, a Driver
Information Center (DIC) message might be
displayed, such as Battery Saver Active or Service
Battery Charging System. If this message is
displayed, it is recommended that the driver
reduce the electrical loads as much as possible.
SeeDIC Warnings and Messages on page 232.Battery Run-Down Protection
Your vehicle has a feature to help prevent the
battery from being drained, in case the underhood
lamp, vanity mirror lamps, cargo lamps, reading
lamps, console, or glove box lamps are
accidentally left on, or something is left plugged
into the accessory power outlet or cigarette lighter.
If any of the accessory lamps are left on, they
will automatically time-out after about 20 minutes.
To reset the battery protection, all of the above
lamps must be turned off or the ignition must be in
the Acc. position.
Accessory Power Outlet(s)
Accessory power outlets can be used to connect
auxiliary electrical equipment, such as a cellular
telephone or CB radio.
186
Page 189 of 518

Climate Controls
Dual Climate Control System
With this system you can control the heating,
cooling, and ventilation for the vehicle.
Automatic Operation
AUTO (Automatic):When this button is pressed
and the temperature is set, the system will
automatically control the inside temperature, the air
delivery mode, the air conditioning compressor, and
the fan speed. AUTO will appear on the display.
1. Press the AUTO button.
2. Adjust the temperature to a comfortable
setting between 70°F (21°C) and 80°F (27°C).Choosing the coldest or warmest temperature
setting will not cause the system to heat or cool
any faster. If you set the system at the warmest
temperature setting, the system will remain in
manual mode at that temperature and it will not
go into automatic mode.
In cold weather, the system will start at
reduced fan speeds to avoid blowing cold air
into your vehicle until warmer air is available.
The system will start out blowing air at
the �oor but may change modes automatically
as the vehicle warms up to maintain the
chosen temperature setting. The length of time
needed for warm up will depend on the
outside temperature and the length of time
that has elapsed since your vehicle was
last driven.
3. Wait for the system to regulate. This may take
from 10 to 30 minutes. Then adjust the
temperature, if necessary.
You can switch from English to metric units through
the Driver Information Center (DIC). If you have the
Base audio system, seeDIC Main Menu on
page 228. If you have the Navigation system, see
“Setup Menu” in the Index of the Navigation System
Owner Manual.
Uplevel Version Shown, Base Similar
189
Page 193 of 518

Defogging and Defrosting
Fog on the inside of windows is a result of high
humidity (moisture) condensing on the cool window
glass. This can be minimized if the climate
control system is used properly. There are
two modes to clear fog from your windshield.
Use the defog mode to clear the windows of fog
or moisture and warm the passengers. Use
the defrost mode to remove fog or frost from the
windshield more quickly.
yNz(Mode):Press this button until defog
appears on the display.
-(Defog):This mode directs the air between the
windshield, �oor outlets and side windows.
When this mode is selected, the system turns off
recirculation and runs the air-conditioning
compressor unless the outside temperature is at
or below freezing. If recirculation mode is selected
while in defog mode, it will be cancelled after
10 minutes.
If there is fog on the side windows, turn the
thumbwheel on the outboard outlets to the side
window defog position. SeeOutlet Adjustment on
page 194for more information.
0(Defrost):Pressing defrost directs most of the
air to the windshield, with some air directed to
the side windows. In this mode, the system
will automatically turn off recirculation and run the
air-conditioning compressor, unless the outside
temperature is at or below freezing.
This mode may also cause the fan speed and air
temperature to increase.
If there is fogging on the side windows, turn the
thumbwheel on the outboard outlets to the
side window defog position. SeeOutlet Adjustment
on page 194for more information. Do not drive
the vehicle until all the windows are clear.
Rear Window Defogger
The rear window defogger uses a warming grid to
remove fog or frost from the rear window.
The rear window defogger will only work when the
ignition is in ON.
=(Rear Window Defogger):Press this button
to turn the rear window defogger on or off.
Be sure to clear as much snow from the rear
window as possible.
193
Page 200 of 518

Speedometer and Odometer
The speedometer lets you see your speed in
either miles per hour (mph) or kilometers
per hour (km/h). The odometer shows how far
your vehicle has been driven, in either miles
(used in the United States) or kilometers (used in
Canada).
If your vehicle has to have a new odometer
installed, the new one may read the correct
mileage. This is because your vehicle’s computer
has stored the mileage in memory.
While the Driver Shift Control (DSC) feature is
active, the odometer will change to show the gear
range. SeeAutomatic Transmission Operation
on page 122for more information.
Trip Odometers
The trip odometer can record the number of miles
or kilometers traveled for up to two trips.
The trip odometer is part of the Driver Information
Center (DIC), for more information seeStatus
of Vehicle Systems on page 223.
For vehicles that have the navigation system,
see your Navigation System manual for more
information.
Tachometer
The tachometer displays the engine speed in
revolutions per minute (rpm).
Notice:If you operate the engine with the
tachometer in the shaded warning area, your
vehicle could be damaged, and the damages
would not be covered by your warranty. Do not
operate the engine with the tachometer in
the shaded warning area.
200
Page 202 of 518

If the airbag readiness light stays on after you
start the vehicle or comes on while you are driving,
your airbag system may not work properly.
Have your vehicle serviced right away.
{CAUTION:
If the airbag readiness light stays on after
you start your vehicle, it means the airbag
system may not be working properly. The
airbags in your vehicle may not in�ate in
a crash, or they could even in�ate without
a crash. To help avoid injury to yourself
or others, have your vehicle serviced right
away if the airbag readiness light stays on
after you start your vehicle.
If there is a problem with the airbag system in
your vehicle, the Service Air Bag message
will appear on the Driver Information Center (DIC)
display. SeeDIC Warnings and Messages on
page 232for more information.
Passenger Airbag Status Indicator
Your rearview mirror has a passenger airbag
status indicator.
When the ignition key is turned to ON or START,
the passenger airbag status indicator will light
ON and OFF, or the symbol for on and off,
for several seconds as a system check.
United States
Canada
202
Page 215 of 518

Here are a few concerns some owners have had
about the fuel gage. All of these situations are
normal and do not indicate that anything is wrong
with the fuel gage:
At the gas station the gas pump shuts off
before the gage reads full.
The gage may change when you turn, stop
quickly or accelerate quickly.
It takes a little more or less fuel to �ll the tank
than the gage indicated. For example, the gage
may have indicated that the tank was half full,
but it actually took a little more or less than half
the tank’s capacity to �ll the tank.
Message Center
Message Center (CTS-V)
Your vehicle may have a message center that can
display information relating to powertrain �uids, tire
pressures, vehicle dynamics, speedometer and
odometer information, and transmission status.
It also displays warning messages. There are
two different areas where message center
information will be displayed. One display is inside
of the tachometer and the other is inside of the
speedometer.These are the controls
for the message center.
They are located on
the left spoke of
the steering wheel.
The outboard switch (A and B) controls the display
of information inside of the tachometer. The
upper button (C) on the inboard switch controls
the display of information inside of the
speedometer. The lower button (D) on the inboard
switch turns the traction control on or off. See
Traction Control System (TCS) (CTS) on page 293
orTraction Control System (TCS) (CTS-V) on
page 295for more information.
215
Page 216 of 518

Speedometer Display
This display will show information relating to
vehicle speed, odometer, and transmission status.
The information displayed can be changed by
pressing (C). Pressing this button cycles the
displayed information as follows: digital
speedometer only, odometer only, speedometer
and odometer, or blank display.
When the transmission is shifted into
REVERSE (R), an R will appear in the
upper right corner.
During slow speed maneuvers, the engine’s
computer may command the transmission to
engage the Skip Shift feature. For more
information seeManual Transmission Operation
on page 126.
Tachometer Display
Press (B) to cycle through the following displays:
coolant temperature, oil pressure, oil temperature,
transmission temperature, tire pressure, and
lateral acceleration. Press (A) to cycle through the
displays in reverse order. If you press (A), for
about one second, the display will become blank.
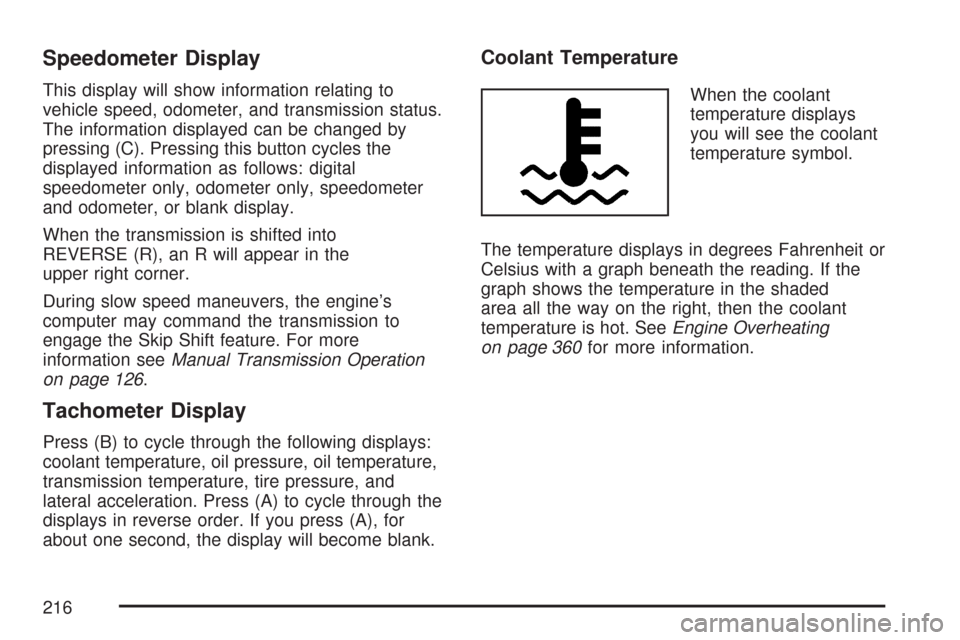
Coolant Temperature
When the coolant
temperature displays
you will see the coolant
temperature symbol.
The temperature displays in degrees Fahrenheit or
Celsius with a graph beneath the reading. If the
graph shows the temperature in the shaded
area all the way on the right, then the coolant
temperature is hot. SeeEngine Overheating
on page 360for more information.
216