steering CADILLAC DEVILLE 1994 7.G Owner's Manual
[x] Cancel search | Manufacturer: CADILLAC, Model Year: 1994, Model line: DEVILLE, Model: CADILLAC DEVILLE 1994 7.GPages: 399, PDF Size: 20.97 MB
Page 224 of 399
Downloaded from www.Manualslib.com manuals search engine Following Distance
--
>-
Stay at least twice as far behind the vehicle ahead as you would when
driving your vehicle without
a trailer. This can help you avoid situations
that require heavy braking and sudden turns.
Passing
You’ll need more passing distance up ahead when you’re towing a trailer.
And, because you’re a good deal longer, you’ll need to go much farther
beyond the passed vehicle before you can return to your lane.
Bucking Up
Hold the bottom of the steering wheel with one hand. Then, to move the
trailer
to the left, just move that hand to the left. To move the trailer to
the right, move your hand to the right. Always back up slowly and,
if
possible, have someone guide you.
Making Turns
When you’re turning with a trailer, make wider turns than normal. Do
this so your trailer won’t strike soft shoulders, curbs, road signs, trees, or
other objects. Avoid jerky or sudden maneuvers. Signal
well in advance.
Turn Signals When Towing a Trailer
When you tow a trailer, your vehicle has to have a different turn signal
flasher and extra wiring. The green arrows on your instrument panel
will
flash whenever you signal a turn or lane change. Properly hooked up, the
trailer lights will also flash, telling other drivers you’re about to turn,
change lanes or stop.
When towing a trailer, the green arrows on your instrument panel
will
flash for turns even if the bulbs on the trailer are burned out. Thus, you
may think drivers behind you are seeing your signal when they are not.
It’s important to check occasionally to be sure the trailer bulbs are still
working. -
21 1
Page 237 of 399

Downloaded from www.Manualslib.com manuals search engine When the towing service arrives, let the tow operator know that this
manual contains detailed towing instructions and illustrations. The
operator may want to see them.
A CAUTION:
To he@ avoid injury to you or others:
When your vehicle is being towed, have the ignition key off. The steering
wheel should be clamped in
a straight-ahead position, with a clamping
device designed for towing service.
Do not use the vehicle’s steering
column lock for this. The transaxle-should be
in Neutral and the parking
brake released.
224
Page 249 of 399

Downloaded from www.Manualslib.com manuals search engine IFA TIRE GOES FLAT
It’s unusual for a tire to “blow out” while you’re driving, especially if you
maintain your tires properly. If air goes out of a tire, it’s much more likely
to leak out slowly. But
if you should ever have a “blowout,” here are a
few tips about what to expect and what to do:
If a front tire fails, the flat tire will create a drag that pulls
the vehicle
toward that side. Take your foot
off the accelerator pedal and grip the
steering wheel firmly. Steer to maintain lane position, then gently brake
to a stop well out of the traffic lane.
A rear blowout, particularly on a curve, acts much like a skid and may
require the same correction you’d use
in a skid. In any rear blowout,
remove your foot from the accelerator pedal. Get
the vehicle under
control by steering the way you want the vehicle to go. It may be
very
bumpy and noisy, but you can still steer. Gently brake to a stop, well off
the road if possible.
If a tire goes flat, the next section shows how to use your jacking
equipment to change a flat tire safely.
ro
t-
236
Page 260 of 399
Downloaded from www.Manualslib.com manuals search engine - IF YOU’RE STUCK: IN SAND, MUD, ICE OR
SNOW
- What you don’t want to do when your vehicle is stuck is to spin your
wheels.
The method known as “rocking” can help you get out when
you’re stuck, but you must use caution.
-
.---
NOTICE:
Spinning your wheels can destroy parts of your vehicle as well
as the tires. If you spin the wheels too fast while shifting your
transaxle back and forth, you can destroy your transaxle.
Rocking your vehicle to get
it out:
First, turn your steering wheel left and right. That will clear the area
around your front wheels. Then shift back and forth between
“R’
(Reverse) and a forward gear, spinning the wheels as little as possible.
Release
the accelerator pedal while you shift, and press lightly on the
accelerator pedal when the transaxle
is in gear. If that doesn’t get you out
after a few tries, you may need to be towed out. If you do need to be
towed out, see “Towing Your Cadillac”
in the Index.
247
Page 271 of 399

Downloaded from www.Manualslib.com manuals search engine . A CAUTION:
An electric fan under the hood can start up and injure you even
when the engine is not running. Keep hands, clothing and tools
away from any underhood electric fan.
A CAUTION:
Things that burn can get on hot engine parts and start a fire.
These include liquids like gasoline, oil, coolant, brake fluid,
windshiefd washer and other fluids, and plastic
or rubber, You
or others could be burned, Be careful not to drop or spill things
that
will burn onto a hot engine.
Fluid Usage Label
Use the fluid usage label to identify the correct fluid you want to check.
GREEN: Engine Coolant
ORANGE: Power Steering Fluid
YELLOW Engine Oil
RED: Transmission Fluid
WHITE: Brake Fluid
BLUE: Washer Fluid
.-
258
Page 287 of 399
Downloaded from www.Manualslib.com manuals search engine How To Check Power Steering Fluid
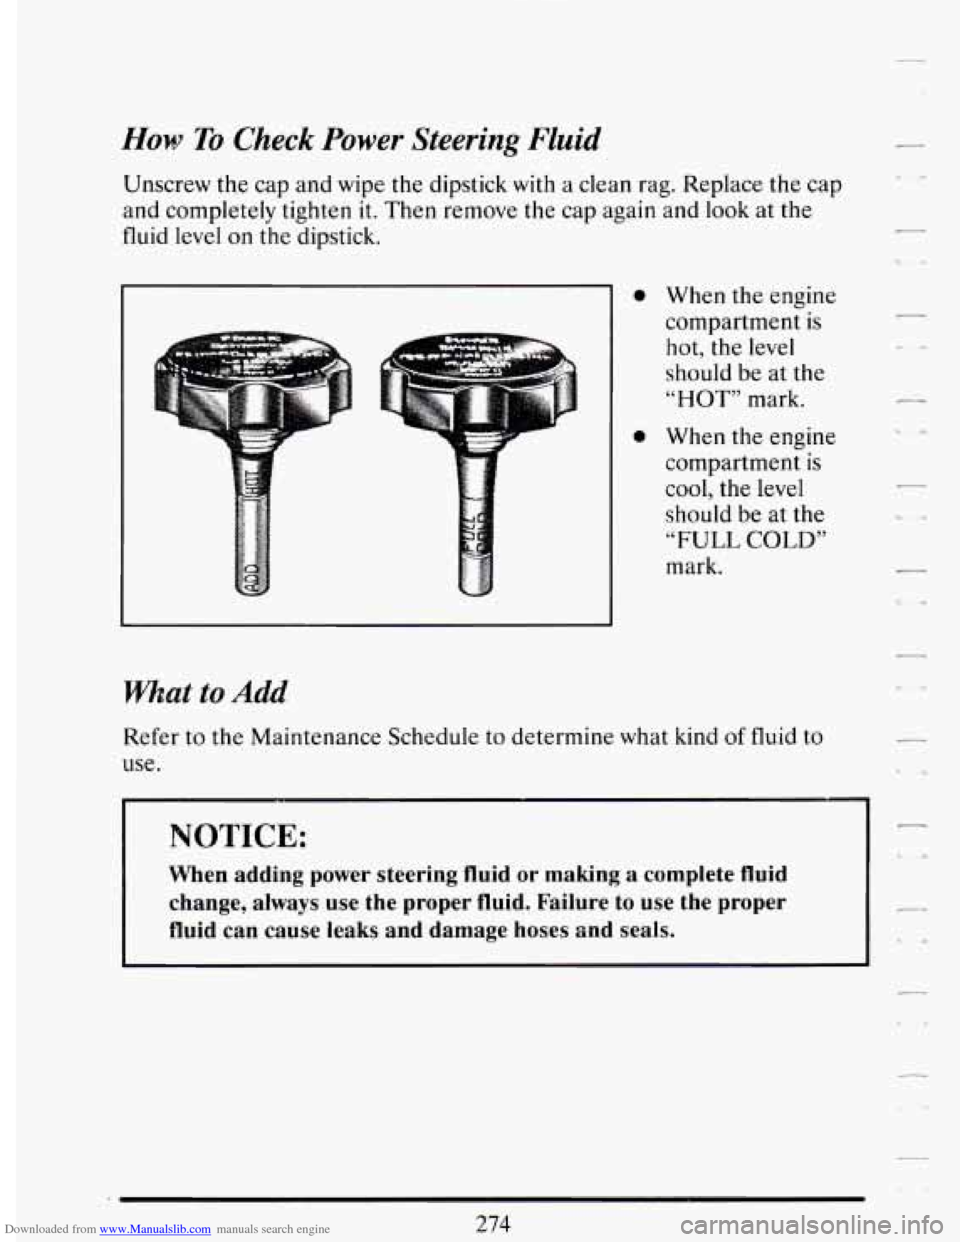
Unscrew the cap and wipe the dipstick with a clean rag. Replace the cap
and completely tighten
it. Then remove the cap again and look at the
fluid level
on the dipstick.
What to Add
0 When the engine
compartment
is
hot, the level
should be at the
“HOT” mark.
0 When the engine
compartment
is
cool, the level
should be at the
“FULL COLD”
mark.
Refer to
the Maintenance Schedule to determine what kind of fluid to
use.
NOTICE:
When adding power steering fluid or making a complete fluid
change, always use the proper fluid. Failure
to use the proper
fluid can cause leaks and damage hoses and seals.
274
r
Y
Page 328 of 399
![CADILLAC DEVILLE 1994 7.G Owners Manual Downloaded from www.Manualslib.com manuals search engine r I
r i
r‘ I
!- I
r
? ! i
!- i
I
r‘ L
DlSTR SIR PCM (IGN) INJ INJ IGN 1
]mmmmmmri
~mnmmmml
PCM (BAT) RTD BATT A/C COMP HD CADILLAC DEVILLE 1994 7.G Owners Manual Downloaded from www.Manualslib.com manuals search engine r I
r i
r‘ I
!- I
r
? ! i
!- i
I
r‘ L
DlSTR SIR PCM (IGN) INJ INJ IGN 1
]mmmmmmri
~mnmmmml
PCM (BAT) RTD BATT A/C COMP HD](/img/23/7981/w960_7981-327.png)
Downloaded from www.Manualslib.com manuals search engine r I
r i
r‘ I
!- I
r
? ! i
!- i
I
r‘ L
DlSTR SIR PCM (IGN) INJ INJ IGN 1
]mmmmmmri
~mnmmmml
PCM (BAT) RTD BATT A/C COMP HDLPS STOP LP TURN/HAZ
DRL
L HDLP LO
R HDLP LO L HDLP HI R HDLP HI IGN 3 COOL FAN TRANS
I FUSE CENTER IDENTIFICATION
ENGINE COMPARTMENT FUSE BLOCK
DISTR 20A TURN/HAZ 20A
SIR 20A - IGNITION CONTROL MODULE - HAZARD FLASHER
- DIAGNOSTIC/ENERGY RESERVE
- DUAL POLE ARMING SENSOR - DAYTIME RUNNING LIGHTS (CANADA)
- TURN FLASHER RELAY - TURN FLASHER MODULE
MODULE (DERM) DRL 10A (CANADA)
PCM IGN) 10A DRL 10A (CANADA)
- PASS-Key@ DECODER MODULE HTD W/S 1OA
INJ 1OA - HEATED WINDSHIELD CONTROL MODULE
INJ 1OA - LEFT REAR STRUT
IGN 1 10A
- P6WERTRAIN CONTROL MODULE (PCM) - LEFT AND RIGHT LO BEAM HEADLAMP
- 1,4,6, AND 7 FUEL INJECTORS LR STRUT 1OA
- 2,3,5, AND 8 FUEL INJECTORS RR STRUT 10A
- A/C REFRIGERANT PRESSURE SWITCH - TRANSAXLE RANGE SWITCH - STOP/BTSI/CRUISE BRAKE SWITCH - INSTRUMENT PANEL CLUSTER - KEYLESS ENTRY MODULE - DIAGNOSTIC/ENERGY RESERVE MODULE
- RIGHT REAR STRUT LF STRUT 1OA
RF STRUT 1OA
L HDLP LO 1OA
R HDLP LO 10A
L HDLP HI 1OA
R HDLP HI 1OA
IGN 3 10A
- LEFT FRONT STRUT
- RIGHT FRONT STRUT
- LEFT LO BEAM HEADLAMP
- RIGHT LO BEAM HEADLAMP
- LEFT HI BEAM HEADLAMP
- RIGHT HI BEAM HEADLAMP
- REAR DEFOGGER RELAY - ELECTRONIC LEVEL CONTROL (ELC) - HEATED WINDSHIELD - HEATER AND A/C PROGRAMMER - CRUISE CONTROL
LFR2RING
LIGHTS
-
- TURN/HAZARD SWITCH ASSY - CHIME MODULE - HEADLIGHT SWITCH - TWILIGHT SENTINEUDRL MODULE
- FUELPUMP - OIL PRESSURE SWITCH - POWERTRAIN CONTROL MODULE (PCM)
FUEL PUMP 20A
PCM BAT) 10A
RTD (BAT) 20A
A/C COMP 1OA
- POWERTRAIN CONTROL MODULE (PCM)
HDLPS 30A
- P6WERTRAIN CONTROL MODULE pCM) COOLING FAN 1OA - ROAD SENSING SUSPENSION (RSS) MODULE - EXTENDED TRAVEL BRAKE SWITCH
- A/C COMPRESSOR CLUTCH - COOLING FAN RELAYS 1,2, AND 3.
- HEADLIGHT DIMMER SWITCH - HEADLIGHT RELAY “D” (ENGINE COMP MICRO - OVERSPEED ALERT MODULE (EXPORT)
- DRL HEADLIGHT RELAY “E (WITH DAYTIME - POWER STEERING PRESSURE SWITCH - EXHAUST GAS RECIRCULATION (EGR) VALVE
- POWERS C13 - TRANSAXLE SHIFT SOLENOIDS A & B - EVAPORATIVE EMISSION CONTROL SOLENOID
- STOP/BTSI/CRUISE SWITCH - POWERTRAIN CONTROL MODULE (PCM)
- STOPLIGHT SWITCH CAPACITOR - TORQUE CONVERTER CLUTCH SOLENOID - TCC BRAKE SWITCH
- FRONT AND REAR HEATED OXYGEN SENSOR TRANS/ECS 1 OA
RELAY CENTER)
RUNNING LIGHTS)
STOP LP 20A
315
Page 336 of 399
Downloaded from www.Manualslib.com manuals search engine Rubber bushings are used at the lower control arm pivots. The upper end
of the strut is isolated by a rubber mount which contains a bearing to
allow for wheel turning. The Speed Sensing Suspension automatically
controls the damping rate
of the struts.
The lower end
of the steering knuckle pivots on a ball joint riveted to the
control arm. The ball joint
is connected ,to the steering knuckle with a
castellated nut and cotter pin.
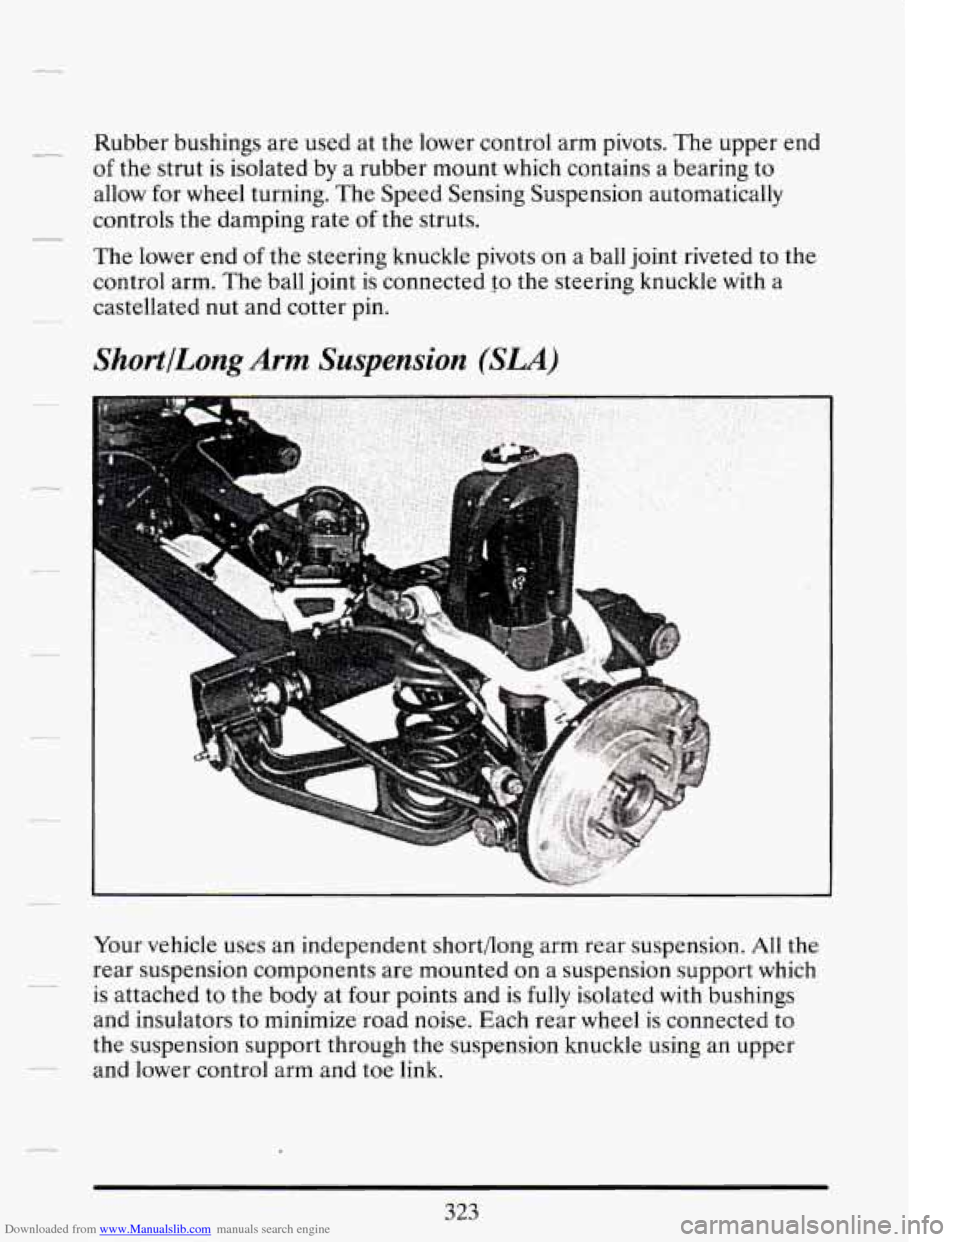
ShortlLong Arm Suspension (SLA)
Your vehicle uses an independent short/long arm rear suspension. All the
rear suspension components are mounted
on a suspension support which
is attached to the body at four points and is
fully isolated with bushings
and insulators to minimize road noise. Each rear wheel is connected to
the suspension support through the suspension knuckle using
an upper
and lower control arm and
toe link. --
Page 337 of 399

Downloaded from www.Manualslib.com manuals search engine The control arms and toe link are attached to the suspension support on
the inboard side, and to a suspension knuckle on the outboard side. The
hub and bearing assembly is mounted to the knuckle and
is a single,
non-serviceable unit which eliminates the need for wheel bearing
adjustment. The load leveling
(ELC) shock absorbers are attached to the
lower control arm, with
the upper end of the shock attached to the
suspension support. The springs are held in position between the lower
control arms and a pocket in the suspension support.
The suspension system also incorporates a
new damping system known as
Speed Sensing Suspension. This system controls the damping forces
in
the shock absorbers and struts, in response to various road and driving
conditions. The systems are capable of making these damping changes
extremely fast.
A computer receives inputs from vertical acceleration sensors, wheel to
body position sensors, vehicle speed sensor,
lift and dive signals. This
computer evaluates the input from these sensors, to control the damping
of each
of the struts and shocks independently to provide varied levels of
suspension control.
The system also has
the capability of providing Speed Sensitive Steering
control. This system changes your steering effort based on your vehicle
speed.
c-
Page 338 of 399
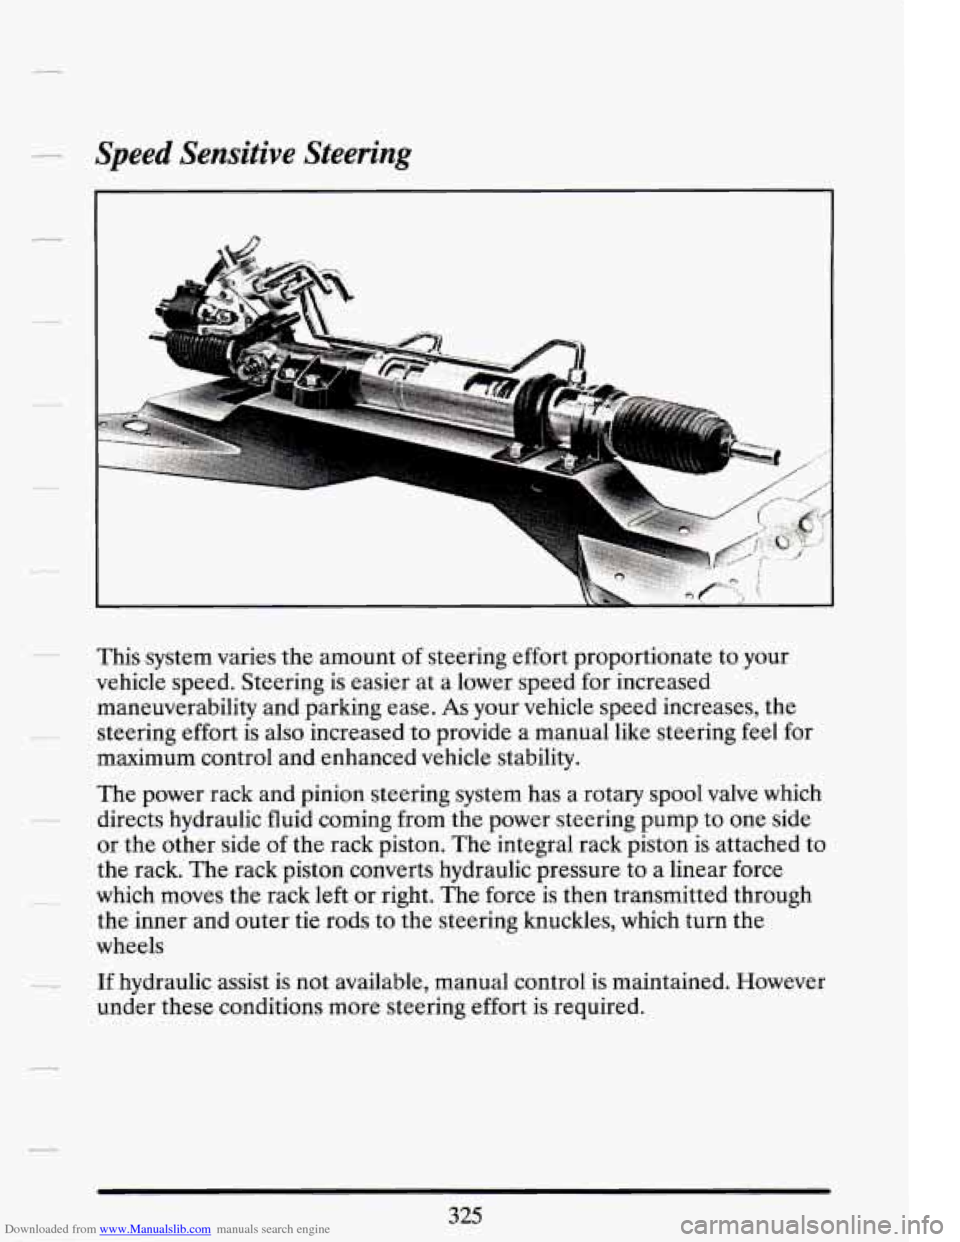
Downloaded from www.Manualslib.com manuals search engine Speed Sensitive Steering
This system varies the amount of steering effort proportionate to your
vehicle speed. Steering is easier at a lower speed for increased
maneuverability and parking ease.
As your vehicle speed increases, the
steering effort is also increased to provide a manual
like steering feel for
maximum control and enhanced vehicle stability.
The power rack and pinion steering system has a rotary spool valve which
directs hydraulic fluid coming from the power steering pump to one side
or the other side
of the rack piston. The integral rack piston is attached to
the rack. The rack piston converts hydraulic pressure to a linear force
which moves the rack left or right. The force is
then transmitted through
the inner and outer tie rods to the steering knuckles, which turn the
wheels
If hydraulic assist is not available, manual control is maintained. However
under these conditions more steering effort
is required.