stop start CADILLAC DEVILLE 1995 7.G User Guide
[x] Cancel search | Manufacturer: CADILLAC, Model Year: 1995, Model line: DEVILLE, Model: CADILLAC DEVILLE 1995 7.GPages: 403, PDF Size: 20.69 MB
Page 185 of 403
Downloaded from www.Manualslib.com manuals search engine Your Cassette Tape Player
Your cassette tape player works best with tapes that are 30 to 45 minutes
long on each side.
%pes Longer than that are so thin that they may not
work well in this player.
If you look at the tape. or on its label or box, it should say whether its bias,
ŌĆ£equalization,ŌĆØ
is 70 rnicrosoconds (70 p) or 120 microseconds (120 It,:).
Chrome and metal tapes are 70 p, sec and standard iron tapes are 120 11
sec. Your tape player will adjust automatically for either type of cassette
tape.
To Play a Cassette Tape
2. Insert the cassette through the tape door. (The TAPE indicator in the
display
will light.)
If you hear nothing or I~ear just a garbled sound, the cassette may not be
in squarely. Press the EJCT button to remove the tape and start over. The
tape equalization is automatically sensed and set. Inserting the cassette
also activates DOLBYŌĆÖ? noise reduction.
3. Once the tape is playing, use the upper and lower knobs to adjust the
volume and balance, just as
you do for the radio. Press thc upper knob
to change tape direction. The arrow in the display shows which
direction
the tape is being played.
FWD: Press this button to go fonvard rapidly to another part of the tape.
REV: Press this button to reverse the tape.
PREV: Press this button to go back to the beginning of the track. Pressing
this button
when in the pause period between tracks will take it back to
the start of the track preceding the pause.
NEXT Press this button to advance to the next selection.
ST/PL Press this button and the tape will stop without ejecting it and the
radio will start to play. Press it again and the tape will start to play again.
EJCE Press this button to remove the tape.
c.
3
L-
u
Page 188 of 403

Downloaded from www.Manualslib.com manuals search engine Your Cassette Tape Player
c
Your cassette tape player works best with tapes that are 30 to 15 minutes
long
on cach side. Thpes longer than that are so thin that they may not
work
well in this player.
If vou look at the tape, or on its label or box. it should say whether its bias,
bŌĆÖ~qualization,ŌĆØ is
70 microseconds (70 p.) or 120 microseconds ( 120 p).
Chrome and metal tapes arc 70 It ssc and standard iron tapes are 120 p.
sec. Your tapc player will adjust automatically for either type of cassette
kIPC.
To Play a Cassette Tape
2. Insert thc cassetle through the tape door. (Thc TAPE indicator in the
display
will light.)
If vou hcar nothing or 11c;lr just a garbled sound, the cassette may not
beh squarely. PI-& the
EJCT button to removc the tape and start
over. Thc tape equalization is automaticallv sensed and set. Inserting
the cassette also activates
DOLBY,?, noise ;*eduction.
3. Use the upper and lower knobs to adjust the volume and balance, once
the tape
is playing, just as you do for the radio. Press the upper knob
to change tape direction. The arrow in the display shows which
dircction the tape is being
played.
FWD and REV: Press the FWD button to go fonvard rapidly to another
part
of the tape. Press the REV button to rcverse the tape.
ST/PL: Press this button in either SEEK, SCAN, FWD or REV to stop
tape movement and switch
to radio without ejecting the tape. (In ST/PL
the radio may be tuned by the tuner knob only.)
EJCT Press this button to remove the tape. EJCT is operational even
when
the ignition or the radio is off.
3- 19
Page 190 of 403
Downloaded from www.Manualslib.com manuals search engine LI
PREY Press this button to go back to the beginning of the track. Pressing
this button
when in the pause period between tracks will take it back to
the start of the track preceding the pause.
NEXT: Press this button to advance to the next track.
ST/PL: Press this button and the tape or CD will stop without ejecting and
the radio will start to play. Press it again and the tape or CD will start to
play again.
EJCT Press this button to remove the CD or tapc. If you nave both a
CD and tape in the player, then the other playback media will start to
play. Press
it again and the other media will eject.
COILIP: Pressing COMP makes soft and loud passages more equal in
volume. For example, classical and jazz music have vety quiet and very
loud passages in the same tune. The COMP display will light as long as
COMP is on.
TAPE and CD Operation
With both a tape and a CD inserted, both the TP and CD indicators in the
display will be lit and either the TP or CD (LED) wjll also be lit,
depending on which has the current priority.
TP-CD: Press the lower knob to switch between tape and CD.
3-21
Page 207 of 403

Downloaded from www.Manualslib.com manuals search engine So here are some tips for passing:
0
0
e
e
0
e
0
"Drive ahead." Look down the road, to the sides, and to crossroads for
situations that might affect your passing patterns. If you have any
doubt whatsoever about
making a successful pass, wait for a better
time.
Watch for traffic signs, pavement markings, and lines.
if yo^ can see a
sign up ahead that might indicate a turn or an intersection, delay your
pass.
A broken center line usually indicates it's all right to pass
(providing the road ahead is clear). Never cross a solid line on your
side
of the lane or a double solid line, even if the road seems empty of
approaching traffic.
Do not get too close to the vehicle you want to pass while you're
awaiting an opportunity. For one thing, following too closely reduces
your area
of vision, especiallv if you're following a larger vehicle. Also,
you won't have adequate space if the vehicle ahead suddenly slows or
stops. Keep back
a reasonable distance.
When
it looks like a chance to pass is coming up, start to accelerate
but stay
in the right lane and don't get too close. Time your move so
you will be increasing specd as the time comes to move into the other
lane.
If the way is clear to pass, you will have a "running start" that
more than makes up
for the distance you would lose by dropping back.
And
if something happens to cause you to cancel your pass. you need
only
slow down and drop back again and wait for another opportunity
If other cars are lined up
to pass a slow vehicle, wait your turn. But
take care that someone
isn't trying c to pass you as you pull out to pass
the slow vehicle. Remember to glance over your shoulder ;ind check
the blind spot.
Check your mirrors. glancc
OVC~ your shoulder. ;~nd start your lcft 1;tnc
change signal bcfortj moving out of thc right 12111~ to pass. Whcn you
are far enough ahead of the passul vehicle to see its front in your
inside mirror, activate your right lane change signal and move back
into the right lane. (Remember that your right outside mirror is
convex. The vehicle
you just passed may seem to be farther away from
you than it really is.)
Try not to pass more than one vehicle at a time on two-lane roads.
Reconsider before passing
the next vehicle.
4-1 4
Page 208 of 403
Downloaded from www.Manualslib.com manuals search engine 0 Don't overtake a slowly moving vehicle too rapidly. Even though the
brake lamps are not flashing,
it may be slowing down or starting to turn,
0 If you're being passed, make it easv for the following driver to get
ahead
of you. Perhaps you can easi a little to the right.
LOSS OF CONTROL
Let's review what driving experts sav about what happens when the three
control svstems (brakes, steering an> acceleration)
don't have enough
friction where the tires meet the road to do what the driver has asked.
In any emergency, don't give up. Keep trying to steer and constantly seek
an escape route or area of less danger.
In a skid, a driver can lose control of the vehicle. Defensive drivers avoid
most skids
by taking reasonable care suited to existing conditions, and by
not "overdriving" those conditions.
But skids are always possible.
The three types of skids correspond to your Cadillac's three control
systems.
In the braking skid your wheels aren't rolling. In the steering or
cornering skid, too much speed or steering
in a curve causes tires to slip
and lose cornering force. And
in the acceleration skid too much throttle
causes
the driving wheels to spin.
A cornering skid is best handled by easing your foot off the accelerator
pedal.
Remember: Any traction control system helps avoid only the acceleration skid.
If your traction control system
is off? then an acceleration skid is also best
handled by easing your
foot off the accelerator pedal.
If your vehicle starts to slide, ease your foot off the accelerator pedal and
quickly steer
the way you want the vehicle to go. If you start steering
quickly enough, your vehicle may straighten out. Always be ready for a
second skid
if it occurs.
Of course, traction is reduced when water, snow, ice, gravel, or other material
is on the road. For safety, you'll want to slow down and adjust your driving to
these conditions. It is important to
slow down on slippery surfaces because
stopping distance will be longer and vehicle control more limited.
4-15
Page 211 of 403
Downloaded from www.Manualslib.com manuals search engine DMNG IN THE RAIN
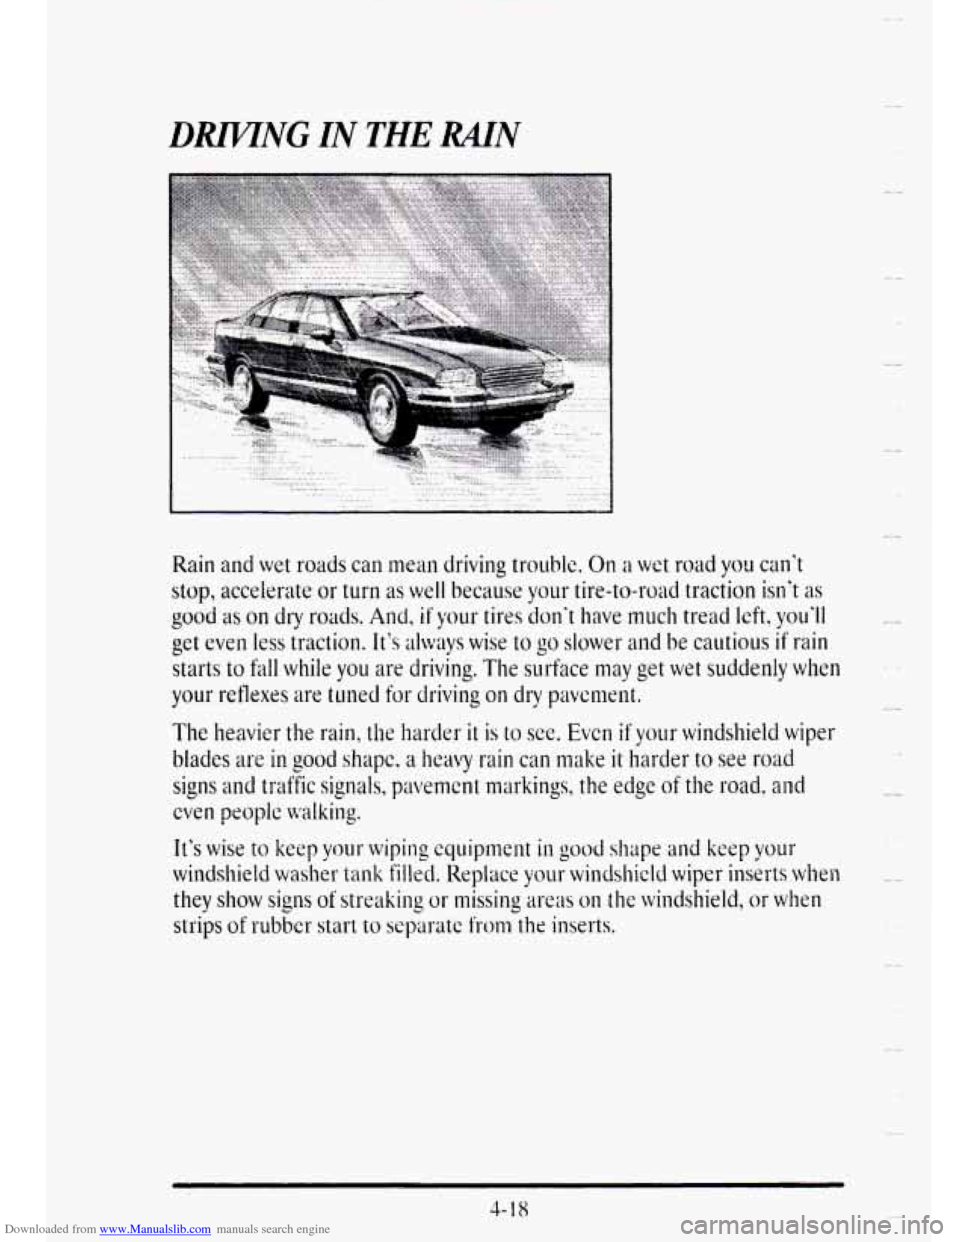
Rain and wet roads can mean driving trouble. On a wet road you can't
stop, accelerate or
turn as well because your tire-to-road traction isn't as
good as on dry roads. And, if your tires don't have much tread left, you'll
get even less traction. It's dwa~s wise to go slower and be cautious if rain
starts to fall while
you are driving. The surface may get wet suddenly when
your reflexes ;u'e tuned for driving on dry pavcment.
The heavier the rain, the harder it is to see. Even if your windshield wiper
blades are in
good shape, a heavy rain can make it harder to see road
signs and traffic signals, pavement markings, the edge of the road. and
cven peoplc walking.
It's wise to keep vour wiping quiptnent in good shape and keep your
windshield wash&
tank filled. Replace your windshield wiper inserts when
they show signs c. of streaking or missing areas on the windshield, or when
strips
of rubber start to separatc from the inserts.
3- 18
b4
Page 216 of 403

Downloaded from www.Manualslib.com manuals search engine Once you are moving on the freeway, make certain you allow a reasonable
following distance. Expect
to move slightly slower at night.
When
you want to leave the freeway, move to the proper lane well in
advance. If vou miss your exit do not, under any circumstances, stop and
back
up. Dr& on tolthe ncst exit.
The exit
ramp can be cuwed, sometimes quite sharply.
The exit
speed is usually posted.
BEFORE LEAUNG ON A LONG TRIP
Make sure vou're ready. Try to be well rested. If vou must start when
you're not iresh -- such as aftcr a day's work -- d6n.t plan to make too
many miles that first part of the journey. Wear comfortable clothing and
shoes
you can easily driw in.
Is vour vehicle ready for a long trip'! If you keep it stlnliced and
miintained, it's ready
to go. If it needs service, have it done before
starting
out. Of course, you'll find experienced and able service experts in
Cadillac dealerships all across North America. They'll be ready and
willing
to help if you need it.
Here are some things you can check before a trip:
Wirdd1ield Woslter Fluid: Is the reservoir full'? Are all windows clean
inside
and outside?
Tires: They are vitally important to a safe, trouble-free trip, Is the tread
good enough for long-distancc driving? Are thc tires all inflated to the
recornnxnded pressure'?
Should you
delay your trip a short time to avoid a major storm system'?
Weather Fomusts: What's the weather outlook along your route?
Mcq~s: Do you have up-to-date maps?
4-23
Page 234 of 403
Downloaded from www.Manualslib.com manuals search engine Parking on Hills
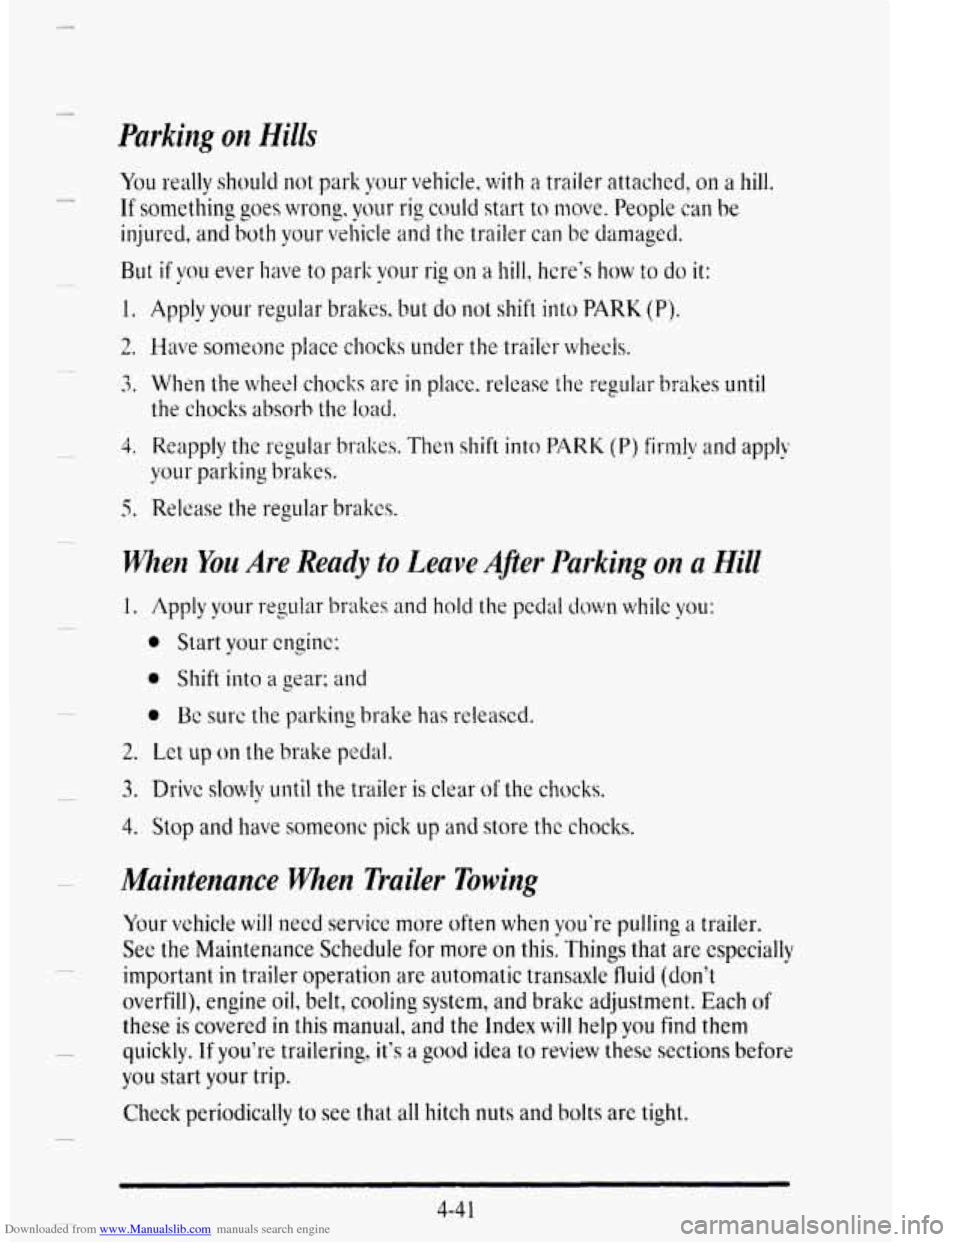
You really should not park your vehicle, with a trailer attached, on a hill.
If something goes wrong, y&r riq could start to move. People can be
injured, and
both your vel;icle and the trailer can be darnagecl.
L.
But if you ever have to park your rig on a hill, hereŌĆśs how to do it:
1. Apply your regular brakes, but do not shift into PARK (P).
2. ILiave sonleone place chocks under the trailer whecls.
Wzen You Are Ready to Leave A@r Parking on n Hill
3
2. Let up on the brake pedal.
3. Drivc slowly until the trailer is clear of the chocks.
4. Stop and have someone pick up and store the chocks.
Maintenance when Trailer Towing
Your vehicle will need service more often when youŌĆÖre pulling a trailer.
See the Maintenance Schedule for more on this. Things that are especially
important
in trailer operation are automatic transaxle fluid (donŌĆÖt
overfill), engine
oil, belt, cooling system, and brake adjustment. Each of
these is covered in this manual, and the Index will help you find them
quickly.
If youŌĆÖre trailering, itŌĆÖs a good idea to review these sections before
you start your trip.
Check periodically
to see that all hitch nuts and bolts are tight.
4-4 1
Page 398 of 403
Downloaded from www.Manualslib.com manuals search engine F I i i
r
P
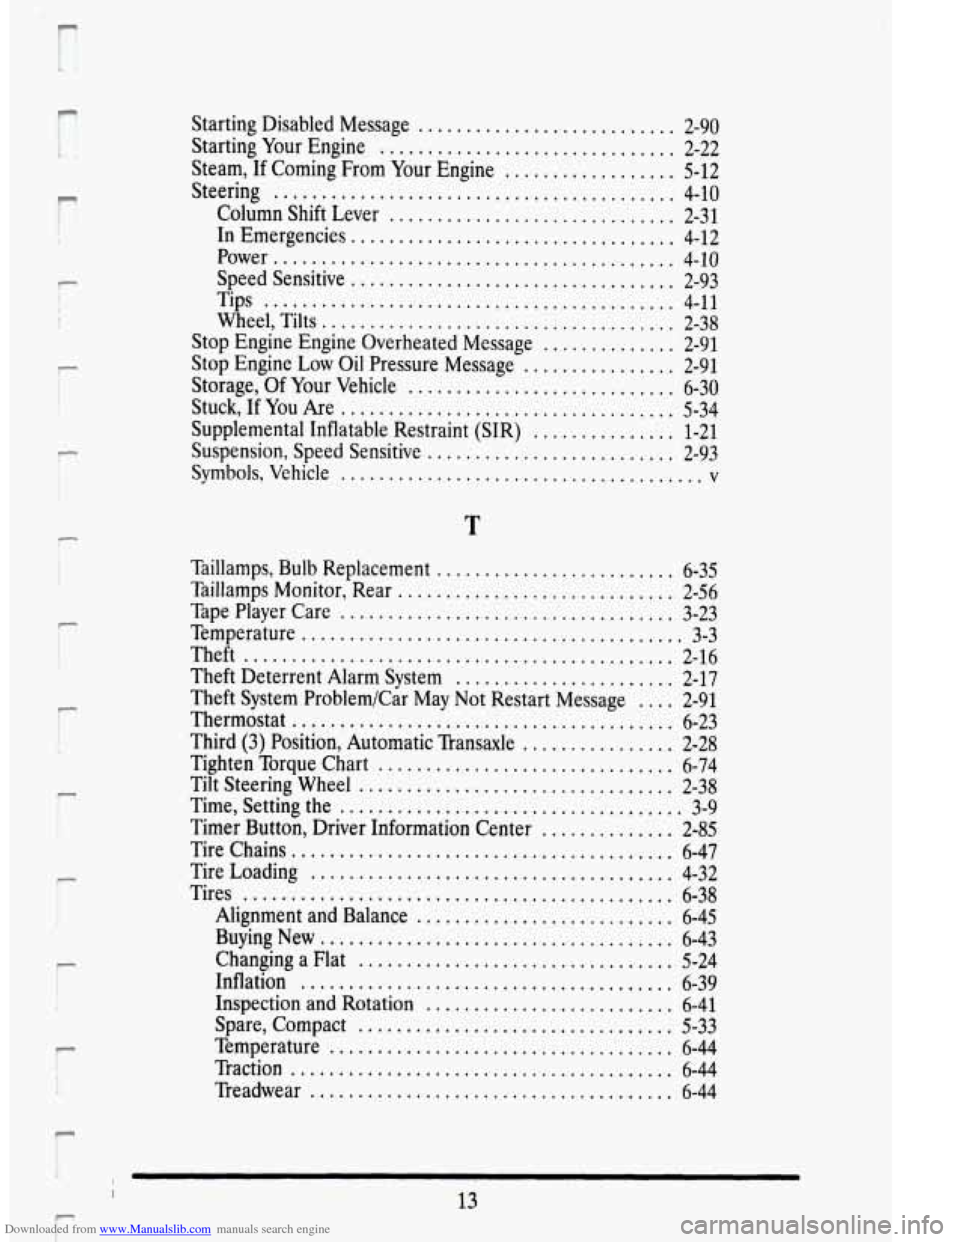
Starting Disabled Message ........................... 2-90
Starting Your Engine ............................... 2-22
Steam. If Coming From Your Engine .................. 5-12
Steering .......................................... 4-10
Column Shift Lever .............................. 2-31
In Emergencies .................................. 4-12
Power .......................................... 4-10
Speed Sensitive .................................. 2-93
Tips ........................................... 4-11
Wheel. Tilts ..................................... 2-38
Stop Engine Engine Overheated Message .............. 2-91
Stop Engine Low Oil Pressure Message ................ 2-91
Storage. Of Your Vehicle ............................ 6-30
Stuck. If You Are ................................... 5-34
Supplemental Inflatable Restraint (SIR) ............... 1-21
Suspension. Speed Sensitive .......................... 2-93
Symbols. Vehicle ...................................... v
T
I
I
r L .
r
r
P t.
Taillamps. Bulb Replacement ......................... 6-35
Taillamps Monitor. Rear ............................. 2-56
Tape Player Care ................................... 3-23
Temperature ........................................ 3-3
Theft ............................................. 2-16
Theft Deterrent Alarm System ....................... 2-17
Theft System Problem/Car May Not Restart Message .... 2-91
Thermostat ........................................ 6-23
Third (3) Position. Automatic Transaxle ................ 2-28
Tighten Torque Chart ............................... 6-74
Tilt Steering Wheel ................................. 2-38
Time. Setting the .................................... 3-9
Timer Button. Driver Information Center .............. 2-85
Tire Chains ........................................ 6-47
Tire Loading ...................................... 4-32
Tires ............................................. 6-38
Alignment and Balance ........................... 6-45
Buying New ..................................... 6-43
Changing a Flat ................................. 5-24
Inflation ....................................... 6-39
Inspection and Rotation .......................... 6-41
Spare. Compact ................................. 5-33
Temperature .................................... 6-44
Traction ........................................ 6-44
Treadwear ...................................... 6-44
I 13