window CADILLAC DEVILLE 1995 7.G Owners Manual
[x] Cancel search | Manufacturer: CADILLAC, Model Year: 1995, Model line: DEVILLE, Model: CADILLAC DEVILLE 1995 7.GPages: 403, PDF Size: 20.69 MB
Page 17 of 403
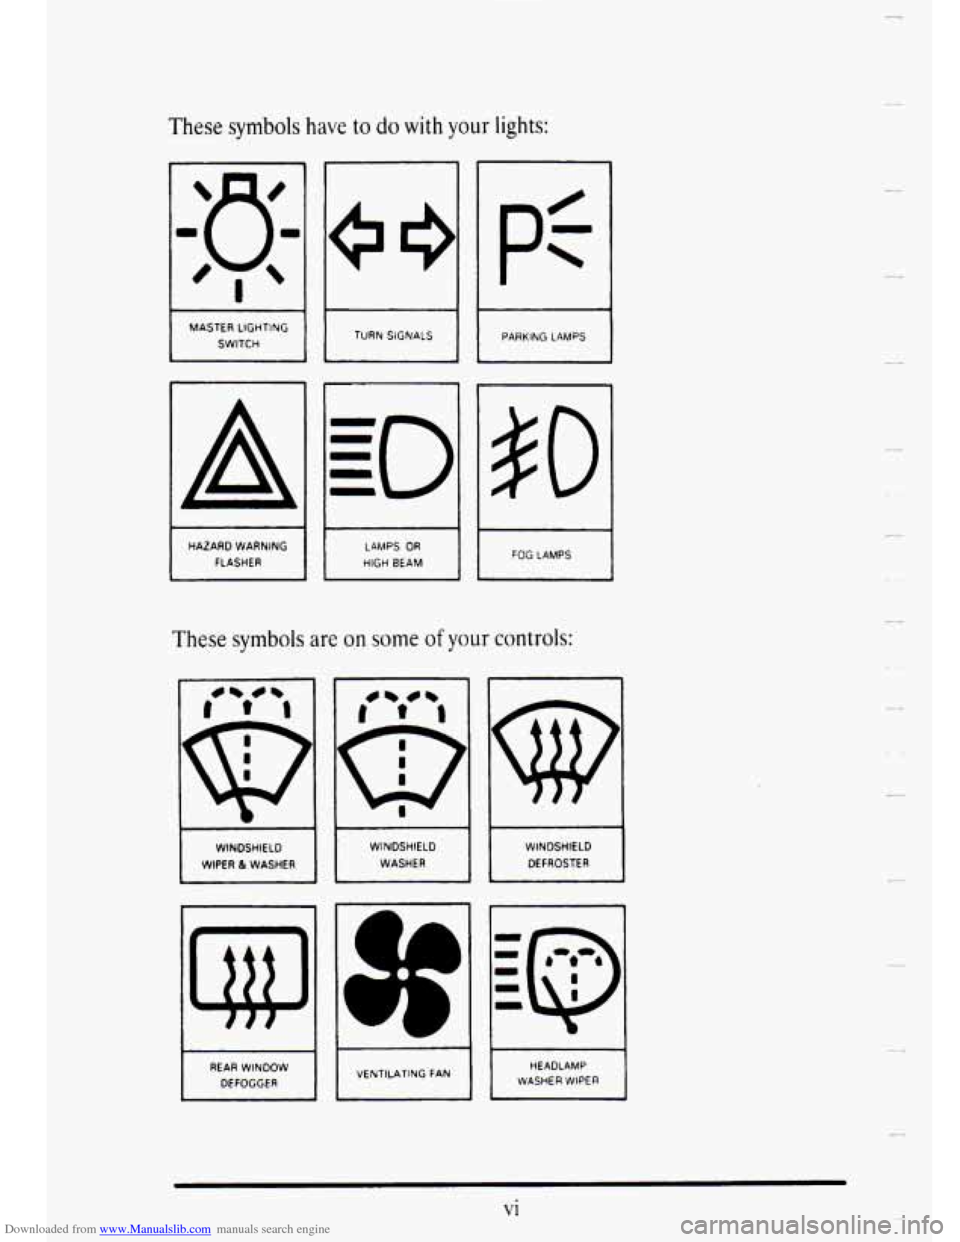
Downloaded from www.Manualslib.com manuals search engine These symbols have to do with your lights:
D
'I q-
I TURN SIGNALS
PARKING LAMPS
MASTER LIGHTING
A 50
I FOG LAMPS I
HAZARD WARNING
FLASHER LAMPS OR
HIGH BEAM
These symbols are on some of your controls:
WINDSHIELD
WASHER WINDSHIELD
DEFROSTER
WINDSHIELD
WIPER
81 WASHER
I I VENTIUTING FAN HEADLAMP
WASHER WIPER
REAR WINDOW
Vi
Page 53 of 403

Downloaded from www.Manualslib.com manuals search engine Lap-Shoulder Belt
The positions next to the windows have lap-shoulder belts. Here's how to
wear one prope.i-ly.
:i
P
Page 70 of 403

Downloaded from www.Manualslib.com manuals search engine ri
To remove the child restraint, just iinkuckle the vehicle's safety belt and
let it
go back all the way.
The safety belt will move freely again and be ready to work for an adult or
larger child passenger.
- Larger Children
r
i
!
r
i
fl
Children who have outgrown child restraints should wear the vehicle's
safety belts.
If you have the choice, a child should sit next to a window so the child can
wear
a lap-shoulder belt and CI get the additional restraint a shoulder belt
cat1 provide.
Accident statistics show that
children are safer if they are restrained in the
rear seat.
But they need to use the safety belts properly.
0 Children who aren't buckled up can be thrown out in a crash.
0 Children who aren't buckled up can strike other people who are.
1-5 1
Page 91 of 403
Downloaded from www.Manualslib.com manuals search engine How to Test the Alarm
1. From insidc the vehicle roll down your window, then get out of your
2. From outside the vehicle with thc door opcn, lock the vehicle using the
3. Reach in and unlock the door using the manual lock and open tile
vehicle, keeping c. the door open.
power door lock or the Keyless Entry System and close the door.
door. The IO^ will sound and your Ileadlanqx will flash.
2- IS
Page 109 of 403

Downloaded from www.Manualslib.com manuals search engine -.
__.
POWER WINDOWS
The controls are near
each window. Here's
how the master control
works.
Move the switch forw;lrd to raise the window.
Your vehicle has Retained Accessory Power (RAP). When you stop your
vehicle and turn the ignition key to OFF. you can still LISC your power
windows. The electrical power to operate the windows will not shut off
until you open ;t door or 10 minutes has passed. If you want this power for
another 10 minutcs, just turn the kcy to RUN and back to OFF.
2-36
Page 110 of 403
Downloaded from www.Manualslib.com manuals search engine r
i
h
r I
I
r
6:
Express Down Window (Auto)
The driver's POMW wiidow has this feature. Just prcss the switch rearward
for half a secolld 01- morc and then let go. The window will lower
completely. If you want to stop the window as it is lowering, press the
switch again.
To raise the window, press and hold the switch forward.
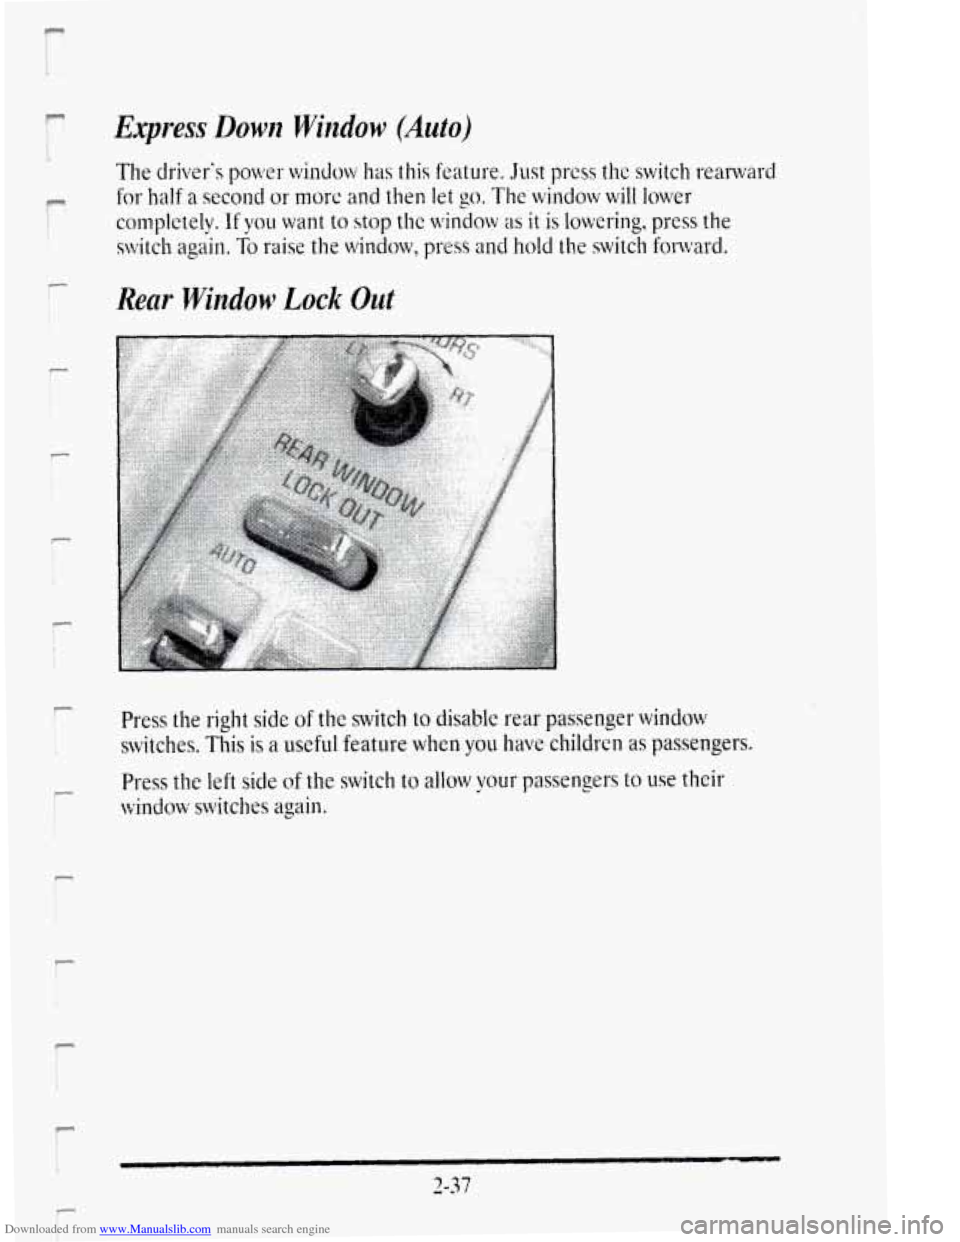
Rear Window Lock Out
Press the right side of the switch to disable rear passenger window
switches. This is a useful feature when you have children as passengers.
Press the
left side of the switch to allow your passengers to use their
window switches again.
Page 133 of 403

Downloaded from www.Manualslib.com manuals search engine OFF Turns off the dayinight function and compass. The mirror will stay in
the day setting.
To keep the photocells operating well, occasionally clean them with a
cotton
swab and glass cleaner.
M: This turns on the day/night portion of the mirror to automatically
reduce glare.
C/M: This setting turns on the compass in addition to the dayinight
function.
A letter denoting the direction headed will appear in the top
right corner
of the mirror.
Once the compass is calibrated, it does not need to be recalibrated.
To calibrate the compass:
1. Set the switch on the mirror control to C/M.
2. Turn the vehicle ignition switch ON. The Ictter C should be displayed
in the mirror compass window. If not, hold the Cal switch (bottom of
the mirror) for more than 10 seconds, and thc letter C will appear. To
hold in the Cal switch, insert a paper clip into the small hole on the
bottom of the mirror housing. The display will show a number first, hut
keep holding urltil the letter C appears.
than 5 mph (8 km/h) until the display reads a compass direction. For
3. For quick calibration, drive the whiclc in a 360-degree circle at less
3-60
..
-
Page 135 of 403
Downloaded from www.Manualslib.com manuals search engine Power Remote Control Mirrors
I ........................................ .. ...
I
...
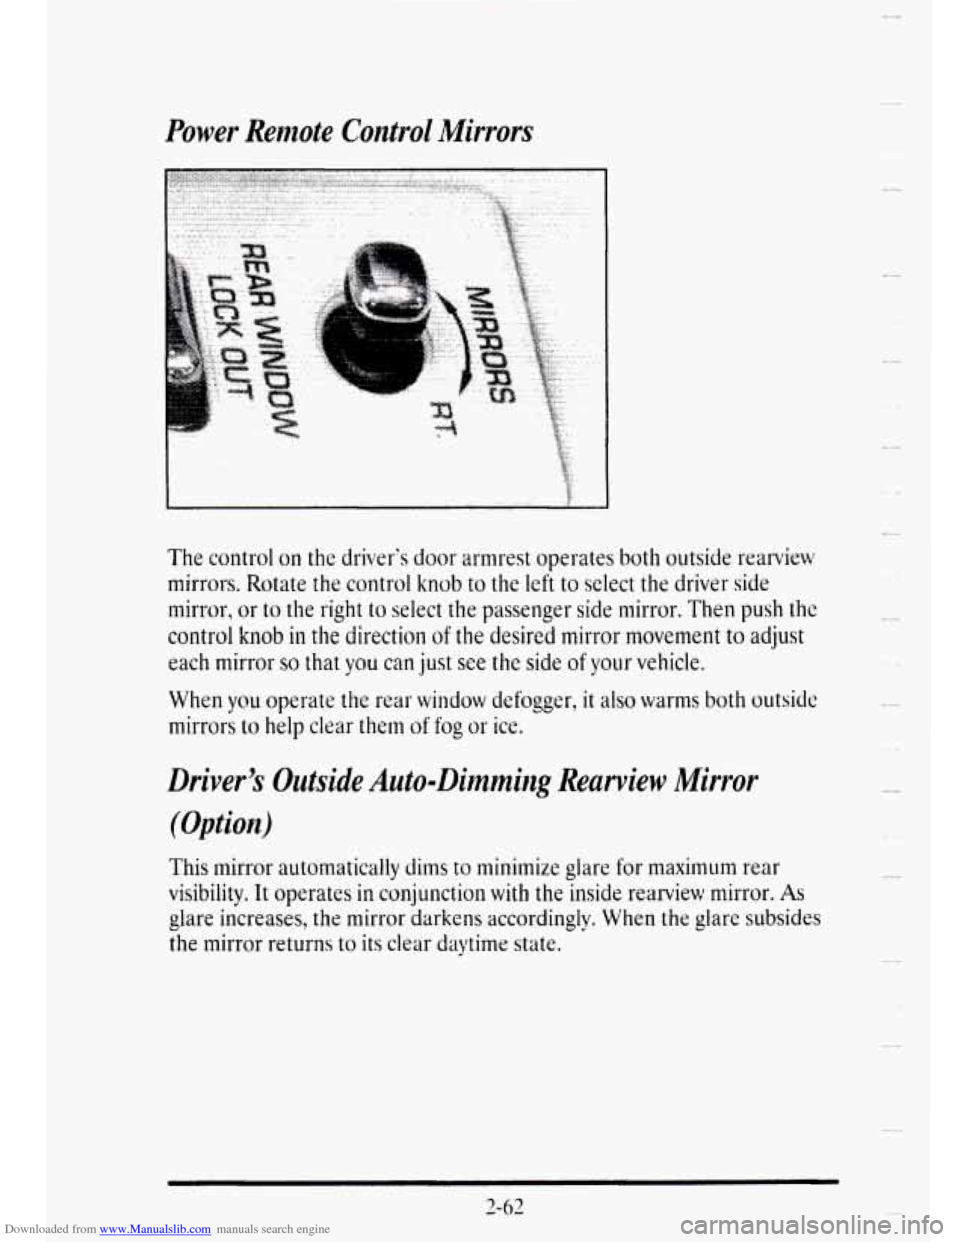
The control on the driver's door armrest operates both outside rearview
mirrors. Rotate
the control knob to the left to select the driver side
mirror, or
to the right to select the passenger side mirror. Then push the
control
knob in the direction of the desired mirror movement to adjust
each mirror so that you can just see the side of your vehicle.
When
you operate the rear window defogger, it also warms both outside
mirrors
to help clear them of fog or ice.
Driver's Outside Auto-Dimmirzg Rearview Mirror
(Option)
This mirror automatically dims to minimize glare for maximum rear
visibility. It operates in conjunction
with the inside rearview mirror. As
glare increases, the mirror darkens accordingly. When the glare subsides
the mirror returns to
its clear daytime state.
2-62
*-*
u
C.
Page 160 of 403
Downloaded from www.Manualslib.com manuals search engine Driver Information Center Messages
These messages will appear if there is a problem sensed in one of your
vehicle's svstems. Vehicles that arc first sold in Canada will have awnumber
after eachmessage. This number helps
to identify the message, which is
only displayed in English. c
APPLY BRAKE TO SHIFT - 46
This message will appear if your vehicle is in PARK (P) for about 15 seconds
and
the brake is not depressed. If VOLI do not want this message to appear,
you can cancel it by holding the OkF and the blue (cooler) button on the
Electronic Climate Control panel for about five seconds.
Hold the same two
buttons again to have this message displayed.
A/C OVERHEATED - A/C COMPRESSOR OFF - 15
If the refrigerant system ever reaches an over-yrcssure condition, this
message will appear to tell you that the air conditioning compressor has
been turned off. Air conditioned air will not be delivered to cool your
vehicle.
If the pressure returns to a normal operating range, vou must
message co11tinues
to appear, have the system repaired as soon as possible
to avoid compressor damage.
select
AUTO, DEFOG, 01- DEFROST to start the
compress& If this
BATTERY NO CHARGE - 07
This message will appear if your battery is not being charged. Have your
electrical system checlwJ by y~lr Cadi1l;lc dealership at your earliest
conxnience.
BATTERY VOLI'S HIGH - OS
This message shows that the electrical charging system is overcharging,
(more
than I6 volts). To avoid being stranded have the electrical system
checked
by your Cadillac dealership. You can reduce the charging
0verlo;d
by using the accessories. Turn on the lamps and radio, set the
climate cohtrol
on AUTO and the fan spced 011 HI, and turn the rear
window defogger on. You can monitor battery
voltage on the Driver
Information Center
by toggling the INFORMATION button. The normal
range is
11.5 to 15.5 volts when the engine is running.
2-87
Page 175 of 403
Downloaded from www.Manualslib.com manuals search engine REAR DEFOGGER
Press this button to
turn on the rear
defogger.
With it, your rear window and both outside rearview mirrors arc heated.
The system
will automatically shut off after 10 minutes. If further
defogging
is desired, simply press the button again.
I NOTICE:
Scraping the inside of your rear window could cut and damage
the heating grids. Your warranty would not cover this damage.
And don't put decals there; you might have to scrape them off.
C I
j
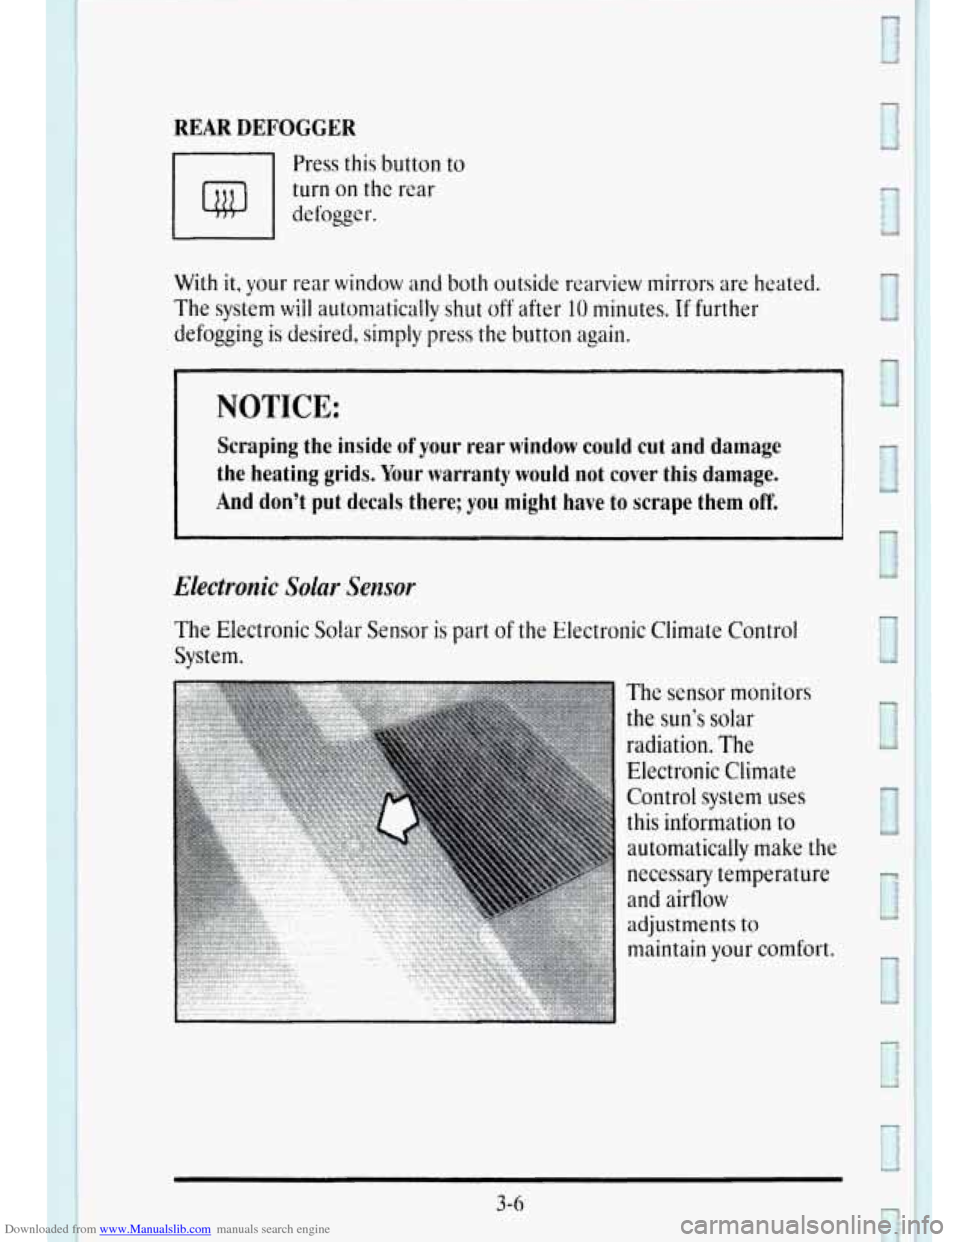
Electronic Solar Sensor
The Electronic Solar Sensor is part of the Electronic Climate Control
System.
The sensor monitors
the
sun's solar
radiation. The
Electronic Climate
Control system
uses
this information to
automatically make the
necessary temperature
and airflow
adjustments to maintain
your comfort.
3-6