clock CADILLAC DEVILLE 1997 7.G Owner's Manual
[x] Cancel search | Manufacturer: CADILLAC, Model Year: 1997, Model line: DEVILLE, Model: CADILLAC DEVILLE 1997 7.GPages: 386, PDF Size: 21.61 MB
Page 273 of 386

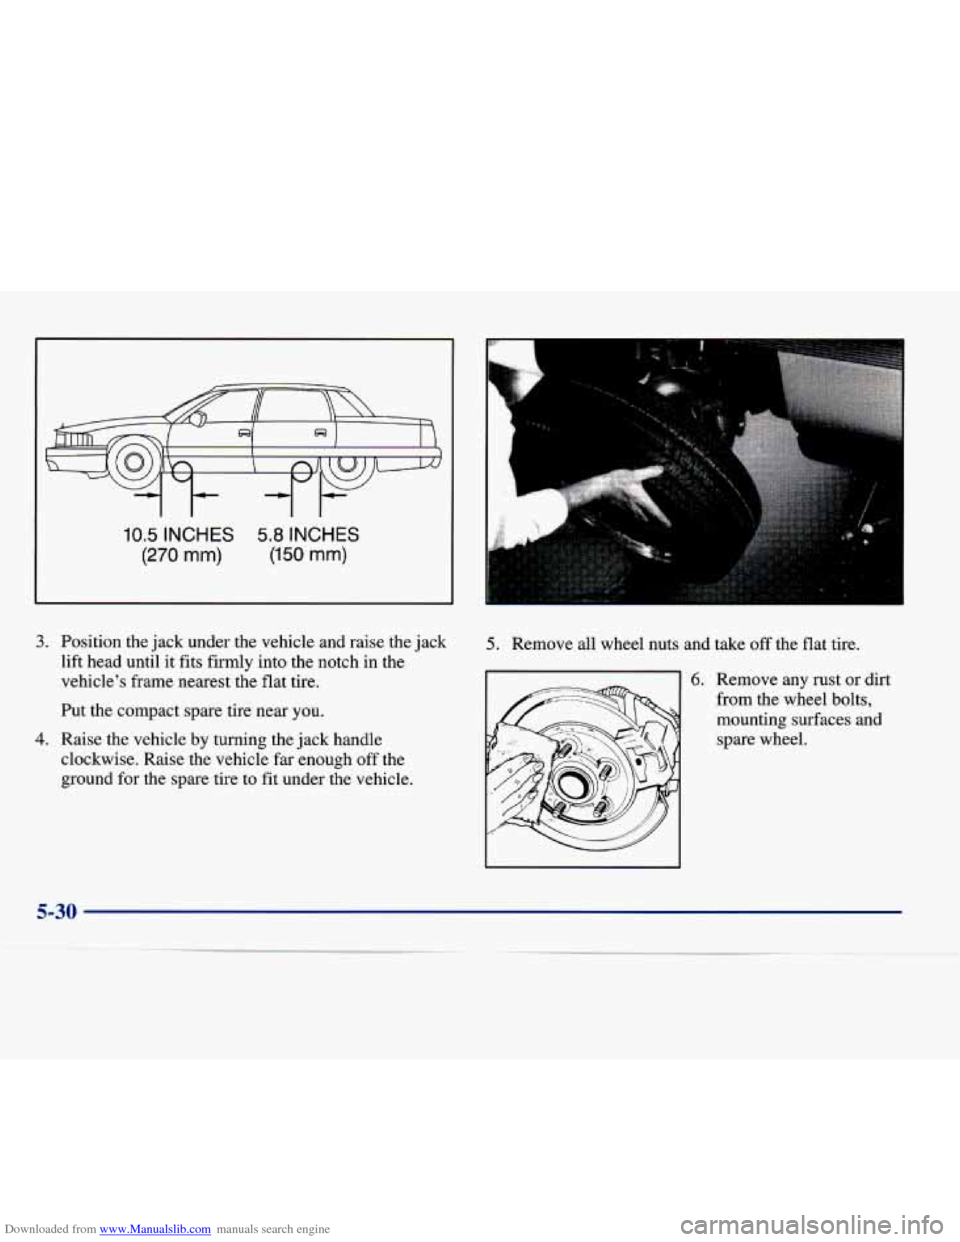
Downloaded from www.Manualslib.com manuals search engine 10.5 INCHES 5.8 INCHES
(270 mm) (150 mm)
3. Position the jack under the vehicle and raise the jack
lift head until it fits firmly into the notch in the
vehicle's frame nearest the flat tire.
Put the compact spare tire near
you.
clockwise. Raise the vehicle far enough off the
ground for the spare tire to fit under the vehicle.
4. Raise the vehicle by turning the jack handle
5. Remove all wheel nuts and take off the flat tire.
6. Remove any rust or dirt
from the wheel bolts,
mounting surfaces and spare wheel.
Page 275 of 386

Downloaded from www.Manualslib.com manuals search engine 8. Lower the vehicle by turning the jack handle
counterclockwise. Lower the jack completely.
9. Tighten the wheel nuts
firmly in a criss-cross
sequence as shown.
I A CAUTION:
Incorrect wheel nuts or improperly tightenea
wheel nuts can cause the wheel to become loose
and even come
off. This could lead to an accident.
Be sure to use the correct wheel nuts.
If you have
to replace them, be sure to get new
GM original
equipment wheel nuts.
Stop somewhere as soon
as you can and have the
nuts tightened with a torque wrench to
100 lb-ft
(140 Nom).
I I
Page 289 of 386

Downloaded from www.Manualslib.com manuals search engine An alternate fuel door
release
is located inside of
the trunk on the left hand
side. Pull it
to release the
fuel door.
To take off the cap, turn it slowly to the left
(counterclockwise).
If you get gasoline on yourself and then
something ignites it, you could be badly burned.
Gasoline can spray out on you
if you open the
fuel filler cap too quickly. This spray can happen
if your tank
is nearly full, and is more likely in
hot weather. Open the fuel filler cap slowly and
wait for any “hiss” noise to stop. Then unscrew
the cap all the way.
Be careful not to spill gasoline. Clean gasoline from
painted surfaces as soon as possible. See “Cleaning the Outside of Your Cadillac” in the Index.
Hang the cap inside the fuel door while refueling.
6-6
Page 290 of 386

Downloaded from www.Manualslib.com manuals search engine When you put the cap back on, turn it to the right
(clockwise) until you hear
a clicking sound. Make sure
you fully install the cap.
NOTICE:
If you need a new cap, be sure to get the right
type. Your dealer can get one
for you. If you get
the wrong type, it may not
fit or have proper
venting, and your fuel tank and emissions system
might be damaged.
Checking Thiw~s Under the Hood
A CAU I ION: I
r- - I
An electric fan under the hood can start up and
injure you even when the engine is not running.
Keep hands, clothing and tools away from any
underhood electric fan.
Things that burn can get on hot engine parts and
start a fire. These include liquids like gasoline,
oil, coolant, brake fluid, windshield washer and
other fluids, and plastic or rubber. You or others
could be burned. Be careful not to drop or spill
things that will burn onto a hot engine.
6-7
I
Page 294 of 386

Downloaded from www.Manualslib.com manuals search engine Checking Engine Oil
111 out the dipstick and clean it with a paper towel or
cloth, then push it back in all the way. Remove it again,
keeping the tip down, and check the level.
When to Add Oil
If the oil is at or below the ADD line, then you’ll
need to add at least one quart of oil. But you must use
the right kind. This part explains what kind of oil to use.
For crankcase capacity, see “Capacities and
Specifications”
in the Index.
I NOTICE:
Don’t add too much oil. If your engine has so
much oil that the oil level gets above the upper
mark that shows the proper operating range,
your engine could be damaged.
The oil fill cap is located
behind the radiator on the
passenger’s side of the
engine. Turn the cap
counterclockwise to
remove it.
Be sure to fill it enough to put the level somewhere in
the proper operating range. Push the dipstick all the way
back in when you’re through.
6-11
Page 302 of 386

Downloaded from www.Manualslib.com manuals search engine To get the right reading, the fluid should be at normal
operating temperature, which is 1
80 OF to 200 OF
(82°C to 93°C).
Get the vehicle warmed up by driving about
15 miles
(24
km) when outside temperatures are above 50°F
(10°C). If it's colder than 50°F (lO"C), you may
have to drive longer.
Checking the Fluid Level
Park your vehicle on a level place. Keep the
engine running.
With the parking brake applied, place the shift lever
in PARK
(P).
With your foot on the brake pedal, move the shift
lever through each gear range, pausing for about
three seconds in each range. Then, position the shift
lever in PARK (P).
0 Let the engine run at idle for three to five minutes. Then,
without shutting off the engine, follow
these steps:
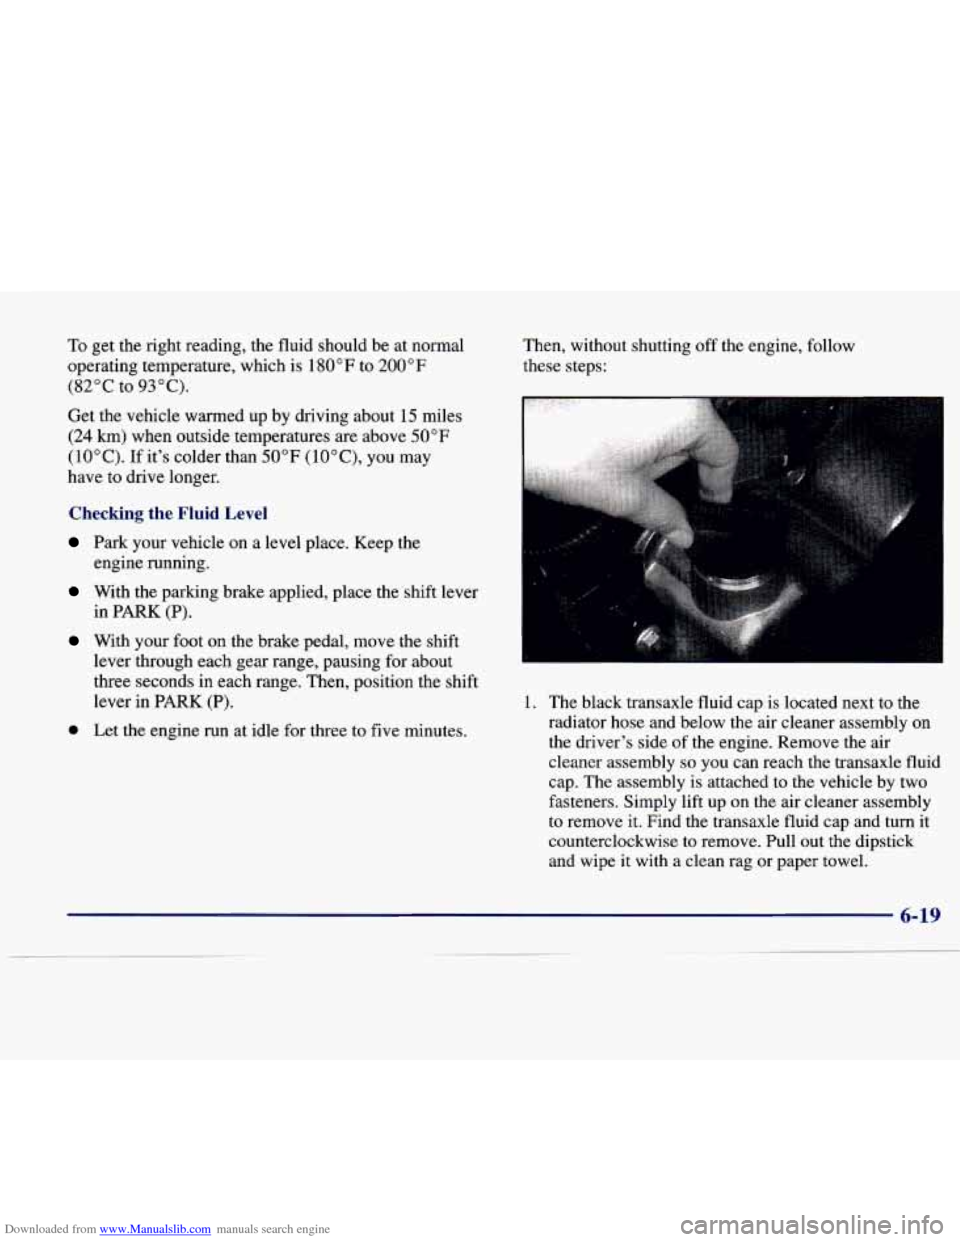
1. The black transaxle fluid cap is located next to the
radiator hose and below the air cleaner assembly on the driver's side of the engine. Remove the air
cleaner assembly
so you can reach the transaxle fluid
cap. The assembly is attached to the vehicle by two
fasteners. Simply lift up on the air cleaner assembly
to remove
it. Find the transaxle fluid cap and turn it
counterclockwise to remove. Pull out the dipstick
and wipe it with a clean rag or paper towel.
Page 315 of 386

Downloaded from www.Manualslib.com manuals search engine A
2. Turn the headlamp housing socket counterclockwise
to unlock the socket from the lamp housing. 3. Disconnect the socket from the harness by separating
the locking
clip.
4. Install the new bulb and socket to the wiring harness
connector. Make sure that the harness is locked to the
bulb socket.
6-32
Page 319 of 386

Downloaded from www.Manualslib.com manuals search engine Front Turn Signal Lamps
1. The turn signal lamps are located below the
headlamps.
To access, lift off the headlamp cover
(see Step
1 under “Headlamps”).
2. Turn the housing socket clockwise to unlock the
socket from the lamp housing.
3. Remove the turn signal
replace the bulb. lamp
housing socket and
6-36
Page 320 of 386

Downloaded from www.Manualslib.com manuals search engine Center High-Mounted Stoplamp (CHMSL)
1. Lift the trim cover to remove.
2. Twist the socket counterclockwise and remove the
socket and bulb from the
housing.
3. Replace the bulb.
Reverse the steps to reassemble the stoplamp assembly.
Page 321 of 386

Downloaded from www.Manualslib.com manuals search engine Rear Turn Signal Lamps and Taillamps
1. Loosen the upper Tom@ screw, but don't remove it.
2. Gently tilt the top portion of the lamp housing to
access the bulb sockets.
If you can't access the lower
bulb socket, remove the lamp housing completely.
I
3. Press the bulb socket housing lever and rotate the
socket counterclockwise to remove it.
6-38