headlamp CADILLAC DEVILLE 1997 7.G Owner's Manual
[x] Cancel search | Manufacturer: CADILLAC, Model Year: 1997, Model line: DEVILLE, Model: CADILLAC DEVILLE 1997 7.GPages: 386, PDF Size: 21.61 MB
Page 314 of 386

Downloaded from www.Manualslib.com manuals search engine Bulb Replacement
For any bulb changing procedure not listed in this
section, contact your Cadillac dealer service department.
Halogen Bulbs
I A CAUTION:
I
- 1
Halogen bulbs have pressurized gas inside and
can burst if
you drop or scratch the bulb. You or
others could be injured. Be sure to read and
follow the instructions on the bulb package.
Headlamps
1. To access the headlamps, lift the cover as shown.
6-3 1
Page 315 of 386

Downloaded from www.Manualslib.com manuals search engine A
2. Turn the headlamp housing socket counterclockwise
to unlock the socket from the lamp housing. 3. Disconnect the socket from the harness by separating
the locking
clip.
4. Install the new bulb and socket to the wiring harness
connector. Make sure that the harness is locked to the
bulb socket.
6-32
Page 316 of 386

Downloaded from www.Manualslib.com manuals search engine 5. Reinstall the headlamp housing socket back into the
headlamp assembly.
Headlamp Aiming
Your vehicle has the 55 x 135 mini-quad headlamp
system. These headlamps have horizontal and vertical
aim indicators. The aim has been pre-set at the factory
and should need
no further adjustment.
If your vehicle is damaged in an accident and the
headlamp aim seems to be affected, see your
Cadillac dealer. Headlamps
on damaged vehicles
may require recalibration of the horizontal aim by
your Cadillac dealer.
To check the aim, the vehicle should be properly
prepared as follows:
The vehicle must have all four tires on a perfectly
level surface.
The vehicle should not have any snow, ice or mud
attached to it.
0 There should not be any cargo or loading of the
vehicle, except it should have a full tank of gas and
one person or
160 lbs. (75 kg) on the driver’s seat.
0 Tires should be properly inflated.
The horizontal indicator should read “0.”
6-33
Page 317 of 386

Downloaded from www.Manualslib.com manuals search engine NOTICE:
To make sure your headlamps are aimed
properly, read all the instructions before
beginning. Failure to follow these instructions
could cause damage to headlamp parts.
State inspection stations will allow a vertical reading of
plus
0.76 degrees or minus 0.76 degrees from the center
of the bubble.
It is recommended that the upper limit not exceed plus
0.4 degrees from the center of the bubble. Other drivers
may flash their high beams at you
if your adjustment is
much above plus
0.4 degrees. If
YOU find that the headlamp aiming needs adjustment,
follow these steps:
1. Start by opening the hood and locating the vertical
and horizontal aim indicators. The aiming screw for
the horizontal aim indicator is
on the outboard side
of the headlamp cover and the aiming screw for the
vertical aim indicator is on the inboard side.
6-34
Page 318 of 386

Downloaded from www.Manualslib.com manuals search engine 2. Check the vertical headlamp aim first. Keep in mind
that your vehicle needs to be on a level surface. Turn
the vertical aiming screw until the bubble inside the
level
is centered at “0.”
3. After the vertical aim is correct, check the horizontal
aim for each headlamp and adjust as necessary. Turn
the horizontal aiming screw until the end
of the
screw aligns with the
“0.”
correct after the horizontal aim adjustment. Adjust as necessary.
4. Recheck the vertical aim to make sure it remains
Page 319 of 386

Downloaded from www.Manualslib.com manuals search engine Front Turn Signal Lamps
1. The turn signal lamps are located below the
headlamps.
To access, lift off the headlamp cover
(see Step
1 under “Headlamps”).
2. Turn the housing socket clockwise to unlock the
socket from the lamp housing.
3. Remove the turn signal
replace the bulb. lamp
housing socket and
6-36
Page 330 of 386

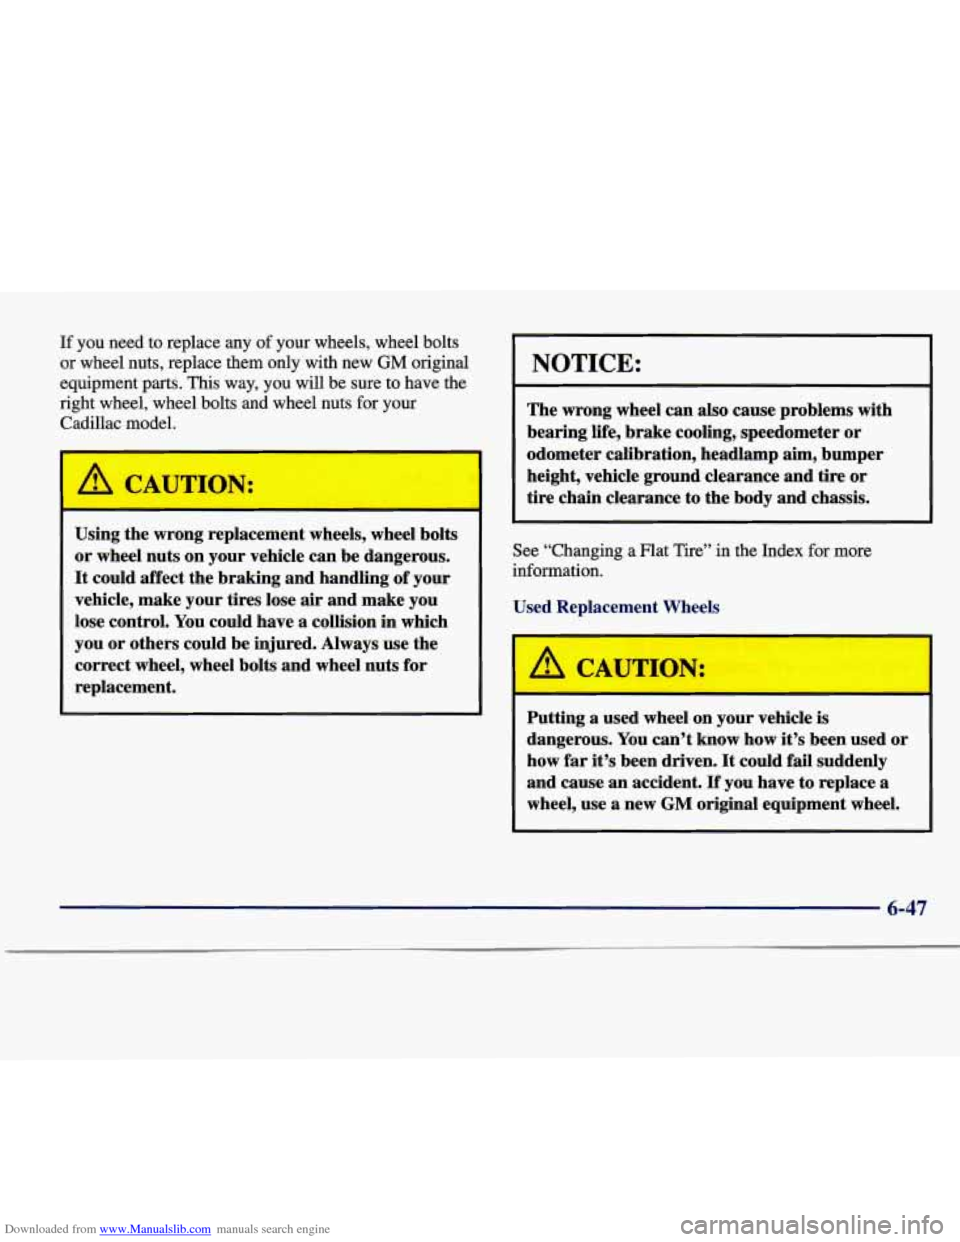
Downloaded from www.Manualslib.com manuals search engine If you need to replace any of your wheels, wheel bolts
or wheel nuts, replace them only with new
GM original
equipment
parts. This way, you will be sure to have the
right wheel, wheel bolts and wheel nuts for your
Cadillac model.
---
~ Using the wrong replacement wheels, wneel bolts
or wheel nuts on your vehicle can be dangerous.
It could affect the braking and handling of your
vehicle, make your tires lose air and make you
lose control. You could have a collision in which
you or others could be injured. Always use the
correct wheel, wheel bolts and wheel nuts for
replacement.
I NOTICE:
The wrong wheel can also cause problems with
bearing life, brake cooling, speedometer or
odometer calibration, headlamp aim, bumper
height, vehicle ground clearance and tire or
tire chain clearance to the body and chassis.
See “Changing a Flat Tire” in the Index for more
information.
Putting a used wheel on your vehicle is
dangerous. You can’t know how it’s been used or
how far it’s been driven. It could fail suddenly
and cause an accident.
If you have to replace a
wheel, use a new
GM original equipment wheel.
6-47
Page 342 of 386

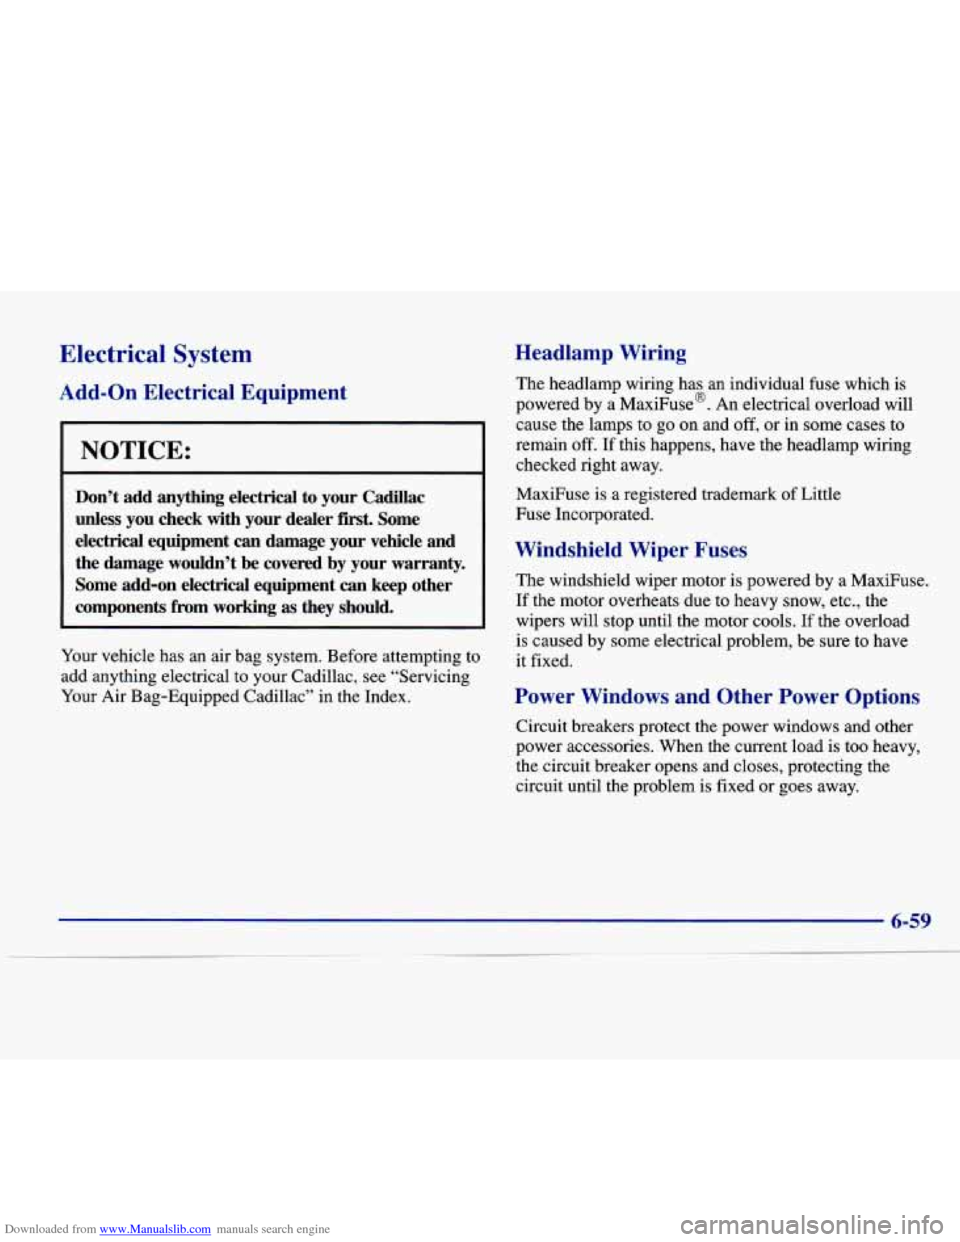
Downloaded from www.Manualslib.com manuals search engine Electrical System
Add-on Electrical Equipment
NOTICE:
Don’t add anything electrical to your Cadillac
unless you check with your dealer first. Some
electrical equipment can damage your vehicle
and
the damage wouldn’t be covered by your warranty.
Some add-on electrical equipment can keep other
components
from working as they should.
Your vehicle has an air bag system. Before attempting to
add anything electrical to your Cadillac, see “Servicing
Your Air Bag-Equipped Cadillac” in the Index.
Headlamp Wiring
The headlamp wiring has an individual fuse which is
powered by a MaxiFuse@. An electrical overload will
cause the lamps to
go on and off, or in some cases to
remain off. If this happens, have the headlamp wiring
checked right away.
MaxiFuse
is a registered trademark of Little
Fuse Incorporated.
Windshield Wiper Fuses
The windshield wiper motor is powered by a MaxiFuse.
If
the motor overheats due to heavy snow, etc., the
wipers will stop until the motor cools. If the overload
is caused by some electrical problem, be
sure to have
it fixed.
Power Windows and Other Power Options
Circuit breakers protect the power windows and other
power accessories. When the current load is too heavy,
the circuit breaker opens and closes, protecting the
circuit until the problem is fixed or goes away.
6-59
,~
Page 344 of 386

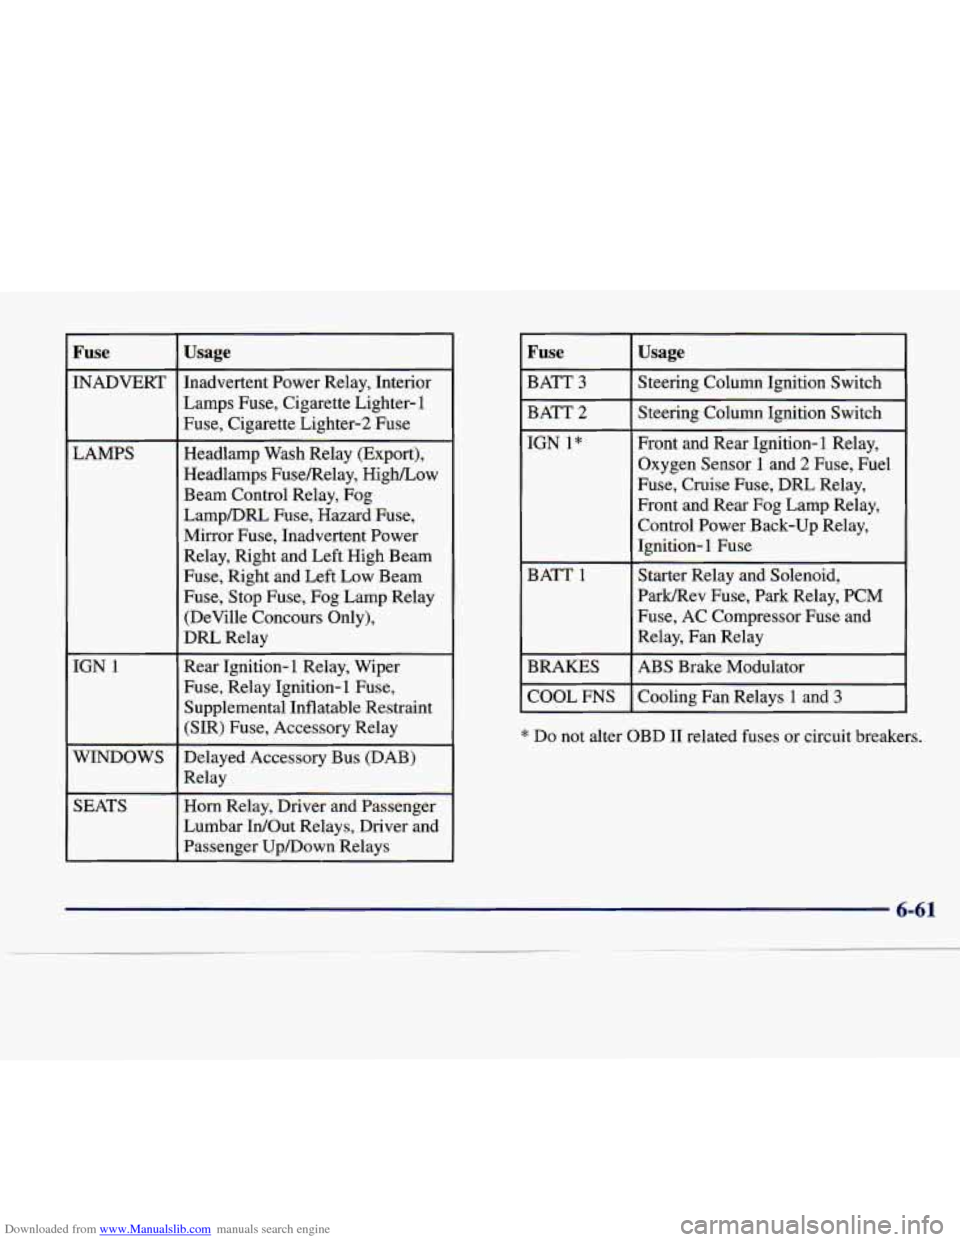
Downloaded from www.Manualslib.com manuals search engine Fuse
INADVERT LAMPS
IGN
1
WINDOWS
SEATS
Usage
Inadvertent Power Relay, Interior Lamps Fuse, Cigarette Lighter-
1
Fuse, Cigarette Lighter-2 Fuse
Headlamp Wash Relay (Export),
Headlamps Fusemelay, High/Low
Beam Control Relay, Fog
LampDRL Fuse, Hazard Fuse,
Mirror Fuse, Inadvertent Power
Relay, Right and Left High Beam
Fuse, Right and Left Low Beam
Fuse, Stop Fuse, Fog Lamp Relay
(DeVille Concours Only),
DRL Relay
Rear Ignition-
1 Relay, Wiper
Fuse, Relay Ignition-1 Fuse, Supplemental Inflatable Restraint
(SIR) Fuse, Accessory Relay
Delayed Accessory Bus (DAB)
Relay
Horn Relay, Driver and Passenger
Lumbar
In/Out Relays, Driver and
Passenger Upmown Relays
Fuse
Front and Rear Ignition- 1 Relay,
IGN l*
Steering Column Ignition Switch
BATT
2 Steering Column Ignition
Switch
BATT
3
Usage
Oxygen Sensor 1 and 2 Fuse, Fuel
Fuse, Cruise Fuse, DRL Relay,
Front and Rear Fog Lamp Relay,
Control Power Back-up Relay,
Ignition-
1 Fuse
BATT
1 Starter Relay and Solenoid,
ParMRev Fuse, Park Relay, PCM
Fuse, AC Compressor Fuse and
Relay, Fan Relay
BRAKES
* Do not alter OBD I1 related fuses or circuit breakers.
Cooling
Fan Relays
1 and 3 COOL FNS
ABS Brake Modulator
6-61
___~
Page 346 of 386

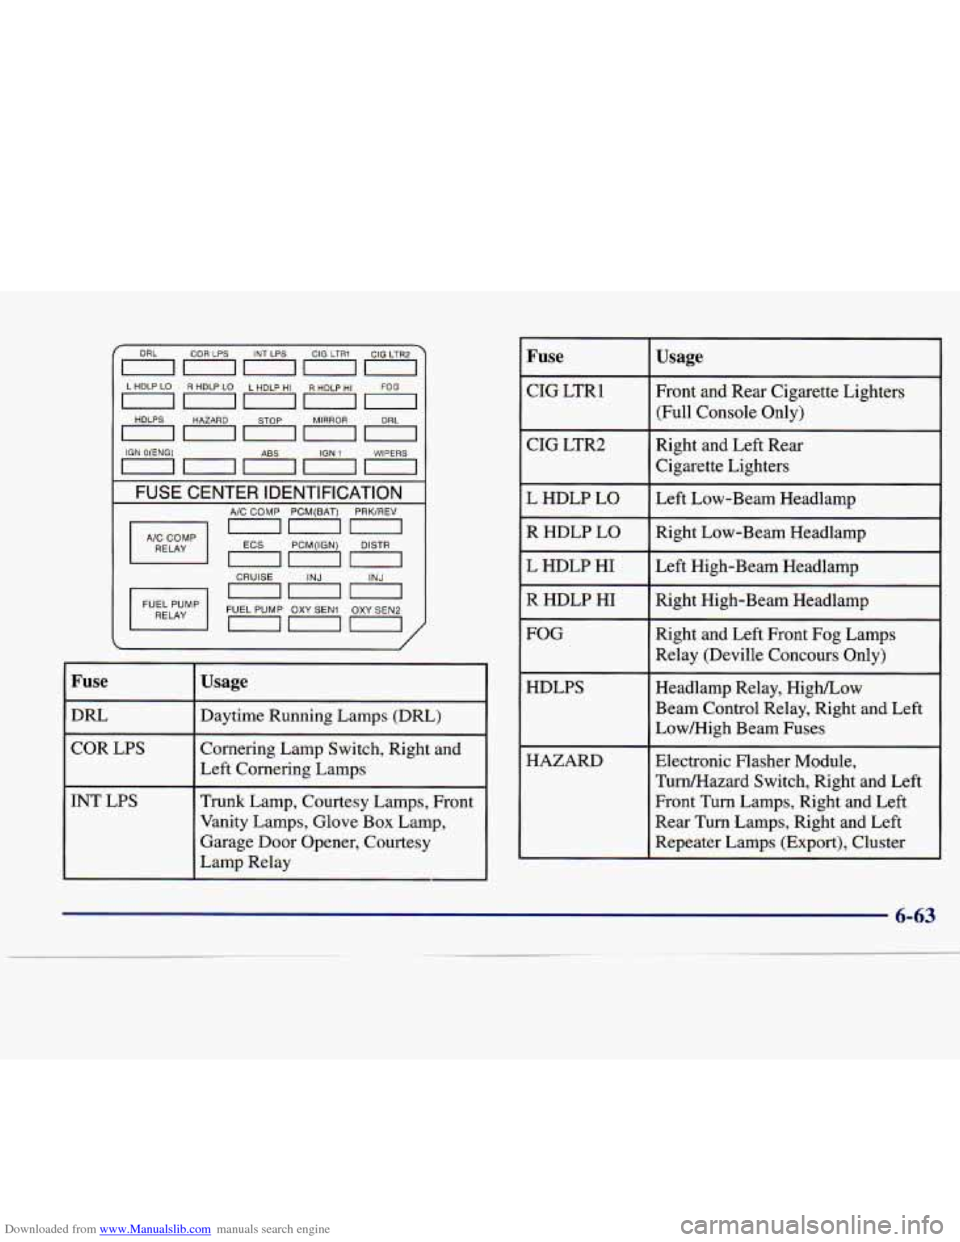
Downloaded from www.Manualslib.com manuals search engine c COR LPS INT LPS CIG LTR1 CIG LTR2
L HDLP Lo R HDLP LO L HOLP HI R HDLP HI
, HDLPS I I HAZARD I , STOP , , MIRROR , , DRL ,
IGN O(ENG) WIPERS
FUSE CENTER IDENTIFICATION
AIC COMP PCM(BAT) PRKiREV
on0
PCM(lGN) DlSTR
RE LAY
Fuse
DRL
COR LPS
INT LPS
Usage
Daytime Running Lamps (DRL)
Cornering Lamp Switch, Right and
Left Cornering Lamps
Trunk Lamp, Courtesy Lamps, Front
Vanity Lamps, Glove
Box Lamp,
Garage Door Opener, Courtesy
Lamp Relay
I Fuse
I CIGLTR1
1 CIG LTR2
L HDLP LO
R HDLP LO
L HDLP HI
R
HDLP HI
FOG
i
HDLPS
HAZARD
Usage
Front and Rear Cigarette Lighters
(Full Console Only)
Right and Left Rear
Cigarette Lighters
Left Low-Beam Headlamp
Right Low-Beam Headlamp
Left High-Beam Headlamp
Right High-Beam Headlamp
Right and Left Front Fog Lamps
Relay (Deville Concours Only)
Headlamp Relay, High/Low
Beam Control Relay, Right and Left
Low/High Beam Fuses
Electronic Flasher Module,
Turn/Hazard Switch, Right and Left
Front Turn Lamps, Right and Left
Rear Turn Lamps, Right and Left
Repeater Lamps (Export), Cluster