light CADILLAC DEVILLE 1999 7.G Owner's Manual
[x] Cancel search | Manufacturer: CADILLAC, Model Year: 1999, Model line: DEVILLE, Model: CADILLAC DEVILLE 1999 7.GPages: 368, PDF Size: 2.61 MB
Page 109 of 368

yellowblue
2-49
Mirrors
Electrochromic Day/Night Rearview Mirror
with Compass
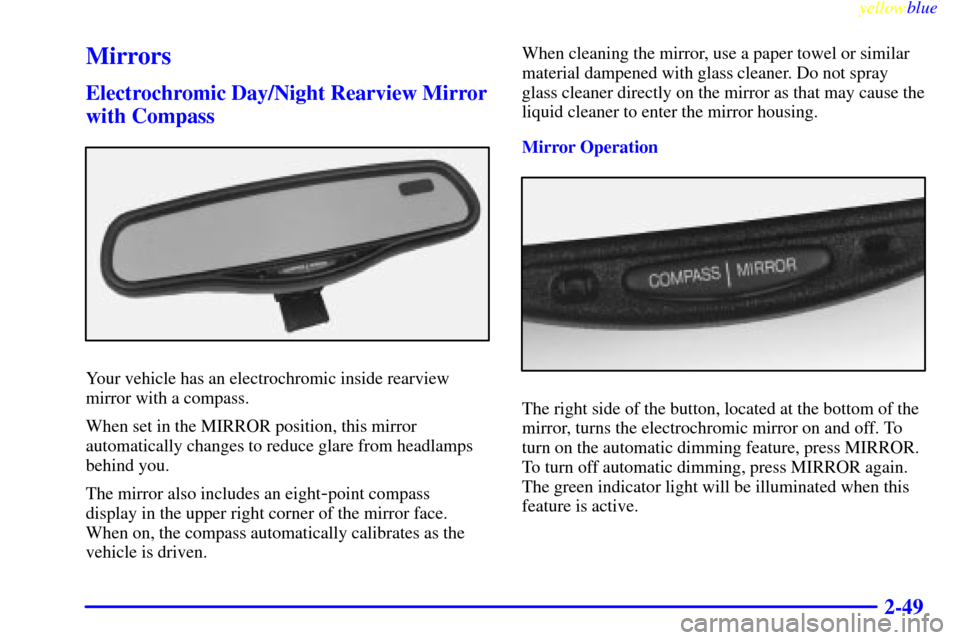
Your vehicle has an electrochromic inside rearview
mirror with a compass.
When set in the MIRROR position, this mirror
automatically changes to reduce glare from headlamps
behind you.
The mirror also includes an eight
-point compass
display in the upper right corner of the mirror face.
When on, the compass automatically calibrates as the
vehicle is driven.When cleaning the mirror, use a paper towel or similar
material dampened with glass cleaner. Do not spray
glass cleaner directly on the mirror as that may cause the
liquid cleaner to enter the mirror housing.
Mirror Operation
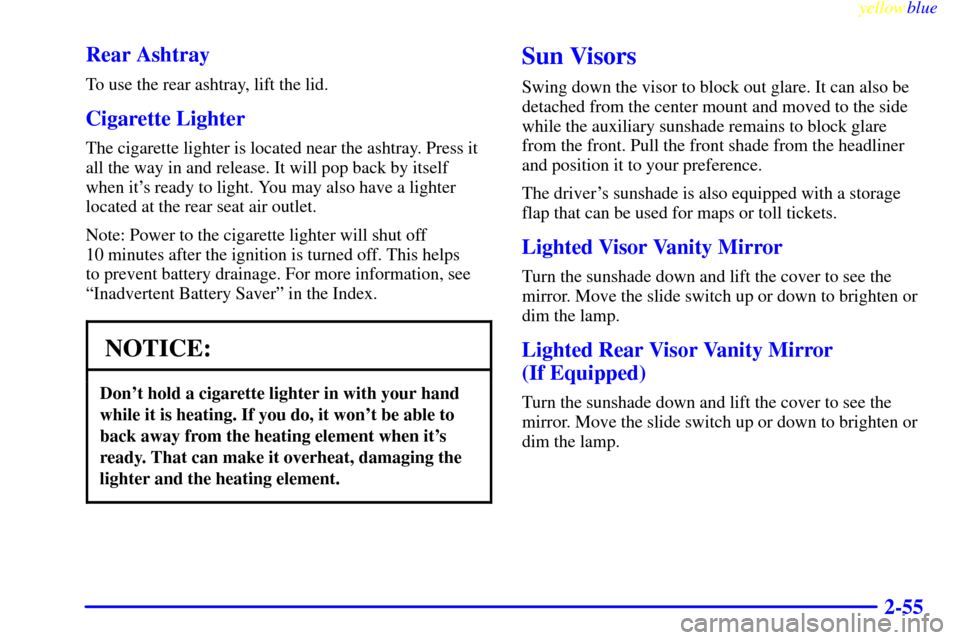
The right side of the button, located at the bottom of the
mirror, turns the electrochromic mirror on and off. To
turn on the automatic dimming feature, press MIRROR.
To turn off automatic dimming, press MIRROR again.
The green indicator light will be illuminated when this
feature is active.
Page 114 of 368

yellowblue
2-54 Rear Storage Armrest (If Equipped)
Your vehicle may be equipped with a rear seat armrest
which includes an open storage compartment and a dual
cupholder that unfolds for use. To open, lift the front
edge. (This feature is available on vehicles with leather
interiors only.)
Convenience Net
The convenience net is located inside the back wall of
the trunk. Put small loads, like grocery bags, behind the
net. It can help keep them from falling over during sharp
turns or quick starts and stops.
The net is not for larger, heavier loads. Store them in the
trunk as far forward as you can. When not using the net,
hook the net to the tabs securing it to the sill plate.
Ashtrays and Cigarette Lighter
NOTICE:
Don't put papers or other flammable items
into your ashtrays. Hot cigarettes or other
smoking materials could ignite them, causing a
damaging fire.
Front Ashtray
With the full center console (available on DeVille
Concours only), the ashtray is located below the climate
control system. To open, press on the lower edge of the
cover. To clean the ashtray, lift it out by gripping the
sides. For vehicles without the center console, pull the
tray out to reveal the ashtray. The tray is located beneath
the radio. To clean this ashtray, lift it out by pulling on
the snuffer.
Page 115 of 368

yellowblue
2-55 Rear Ashtray
To use the rear ashtray, lift the lid.
Cigarette Lighter
The cigarette lighter is located near the ashtray. Press it
all the way in and release. It will pop back by itself
when it's ready to light. You may also have a lighter
located at the rear seat air outlet.
Note: Power to the cigarette lighter will shut off
10 minutes after the ignition is turned off. This helps
to prevent battery drainage. For more information, see
ªInadvertent Battery Saverº in the Index.
NOTICE:
Don't hold a cigarette lighter in with your hand
while it is heating. If you do, it won't be able to
back away from the heating element when it's
ready. That can make it overheat, damaging the
lighter and the heating element.
Sun Visors
Swing down the visor to block out glare. It can also be
detached from the center mount and moved to the side
while the auxiliary sunshade remains to block glare
from the front. Pull the front shade from the headliner
and position it to your preference.
The driver's sunshade is also equipped with a storage
flap that can be used for maps or toll tickets.
Lighted Visor Vanity Mirror
Turn the sunshade down and lift the cover to see the
mirror. Move the slide switch up or down to brighten or
dim the lamp.
Lighted Rear Visor Vanity Mirror
(If Equipped)
Turn the sunshade down and lift the cover to see the
mirror. Move the slide switch up or down to brighten or
dim the lamp.
Page 119 of 368

yellowblue
2-59
Your vehicle's engine should be turned off while
programming the transmitter. Follow these steps to
program up to three channels:
1. If you have previously programmed a transmitter
channel, proceed to Step 2. Otherwise, hold down
the two outside buttons on the Universal Transmitter
until the indicator light begins to flash rapidly (after
20 seconds). Then release the buttons. This
procedure initializes the memory and erases any
previous settings for all three channels.
2. Decide which one of the three channels you want to
program. Hold the end of the hand
-held transmitter
about 2 to 5 inches (5 to 13 cm) away from the
surface of the Universal Transmitter so that you can
still see the indicator light.
3. Using both hands, press the hand
-held transmitter
button and the desired button on the Universal
Transmitter. Continue to press both buttons
through Step 4.
4. Hold down both buttons until you see the indicator
light on the Universal Transmitter flash slowly and
then rapidly. The rapid flashing indicates that the
Universal Transmitter has been programmed.
Release both buttons once the indicator light starts
to flash rapidly.If you have trouble programming the Universal
Transmitter, make sure that you have followed the
directions exactly as described. The Universal
Transmitter may not work with older garage door
openers that do not meet current Federal Consumer
Safety Standards. If you cannot program the transmitter
after repeated attempts, refer to ªRolling Code
Programmingº later in this section or contact the
Universal Transmitter manufacturer at 1
-800-355-3515.
Be sure to keep the original hand
-held transmitter
in case you need to erase and reprogram the
Universal Transmitter.
Note to Canadian Owners: During programming, the
hand
-held transmitter may automatically stop
transmitting after one or two seconds. In this case, you
should press and re
-press the button on the hand-held
transmitter every two seconds without ever releasing the
button on the Universal Transmitter. Release both
buttons when the indicator light on the Universal
Transmitter begins to flash rapidly.
Page 120 of 368

yellowblue
2-60 Operating the Universal Transmitter
Press and release the appropriate button on the Universal
Transmitter. The indicator light comes on while the
signal is being transmitted.
The Universal Transmitter is disabled when the VALET
lockout button inside the glove box is activated. For
more information, see ªValet Lockout Buttonº in
the Index.
If the hand
-held transmitter appears to program the
Universal Transmitter but does not open your garage
door, and if the garage door opener was manufactured
after 1996, the garage door opener may have a ªrolling
codeº system. A rolling code system changes the code
of the garage door opener every time you open or close
the garage door.
To determine if you have this system, press the button
on the Universal Transmitter that you have programmed
already. If the indicator light on the Universal
Transmitter flashes rapidly for two seconds and then
turns solid, the garage door opener has a rolling code
system. In a rolling code system, the garage door motor
head unit must be trained to the Universal Transmitter.
ªRolling Codeº Programming (If Equipped)
If you have not previously programmed the hand-held
transmitter to the Universal Transmitter, see
ªProgramming the Universal Transmitterº listed
previously. If you have completed this programming
already, you now need to train the garage door opener
motor head unit to recognize the Universal Transmitter.
Refer to your garage door opener owner's manual for
the proper transmitter training procedure for your garage
door opener brand.
1. Find the training button on the garage door opener
motor head unit. The exact location and color of the
button may vary by garage door opener brand. If you
have difficulty finding the training button, refer to
your garage door opener owner's manual.
2. Press the training button on the garage door opener
motor head unit.
Note: Following this step, you have 30 seconds to
start Step 3.
Page 121 of 368

yellowblue
2-61
3. Return to the Universal Transmitter in your vehicle
and firmly press and release the Universal
Transmitter button you have already programmed for
two to three seconds. Press and release the button
again (you may need to do this step up to three
times) to make sure that the Universal Transmitter
has been trained to the garage door opener motor
head unit. Check that the training was successful.
The garage door opener should now recognize the
Universal Transmitter. You may either use the Universal
Transmitter or the hand
-held transmitter to open the
garage door.
If after following these instructions, you still have
problems training the garage door opener, contact the
Universal Transmitter manufacturer at 1
-800-355-3515.
Erasing Channels
To erase all three programmed channels, hold down the
two outside buttons until the indicator light begins to
flash (after 20 seconds). Release both buttons.
Accessories
Accessories for the Universal Transmitter are available
from the manufacturer of the unit. If you would like
additional information, please call 1
-800-355-3515.
Page 123 of 368

yellowblue
2-63
The main components of the instrument panel are:
A. Air Outlets
B. Turn Signal/Multifunction Lever
C. Driver Information Center Control Buttons
D. Cluster
E. Steering Column Shift Lever (DeVille and DeVille
d'Elegance only)
F. Electronic Climate Controls
G. RadioH. Lamp Controls
I. HVAC Steering Wheel Controls (or Cellular
Telephone Controls, If Equipped)
J. Hood Release
K. Horn
L. Audio Steering Wheel Controls
M. Ashtray and Cigarette Lighter
N. Glove Box
Page 127 of 368

yellowblue
2-67 Tachometer (Analog Cluster Only)
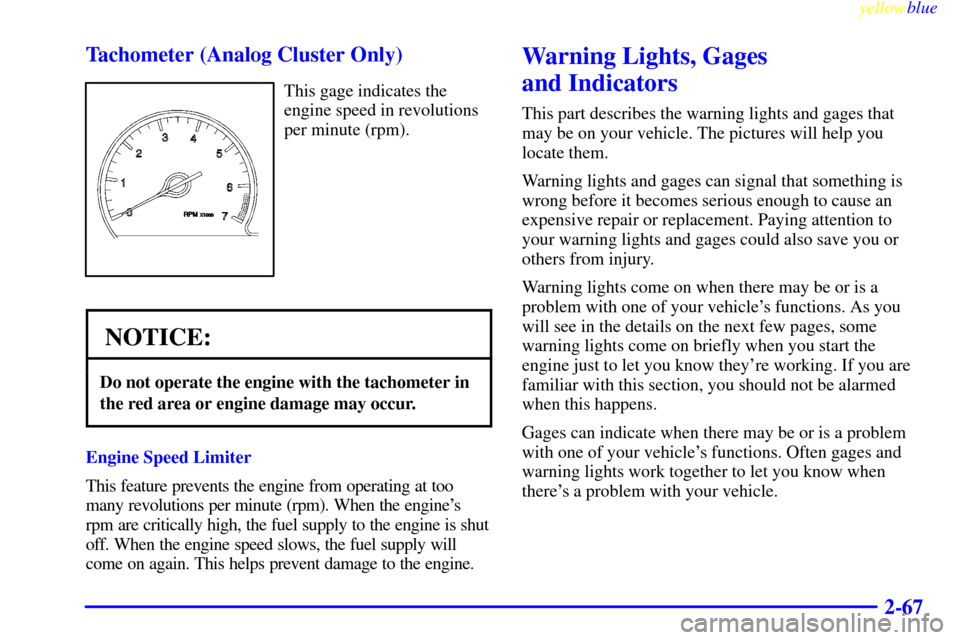
This gage indicates the
engine speed in revolutions
per minute (rpm).
NOTICE:
Do not operate the engine with the tachometer in
the red area or engine damage may occur.
Engine Speed Limiter
This feature prevents the engine from operating at too
many revolutions per minute (rpm). When the engine's
rpm are critically high, the fuel supply to the engine is shut
off. When the engine speed slows, the fuel supply will
come on again. This helps prevent damage to the engine.
Warning Lights, Gages
and Indicators
This part describes the warning lights and gages that
may be on your vehicle. The pictures will help you
locate them.
Warning lights and gages can signal that something is
wrong before it becomes serious enough to cause an
expensive repair or replacement. Paying attention to
your warning lights and gages could also save you or
others from injury.
Warning lights come on when there may be or is a
problem with one of your vehicle's functions. As you
will see in the details on the next few pages, some
warning lights come on briefly when you start the
engine just to let you know they're working. If you are
familiar with this section, you should not be alarmed
when this happens.
Gages can indicate when there may be or is a problem
with one of your vehicle's functions. Often gages and
warning lights work together to let you know when
there's a problem with your vehicle.
Page 128 of 368

yellowblue
2-68
When one of the warning lights comes on and stays on
when you are driving, or when one of the gages shows
there may be a problem, check the section that tells you
what to do about it. Please follow this manual's advice.
Waiting to do repairs can be costly
-- and even
dangerous. So please get to know your warning lights
and gages. They're a big help.
Your vehicle also has a Driver Information Center that
works along with the warning lights and gages. See
ªDriver Information Centerº in the Index.
Safety Belt Reminder Light
When the key is turned to RUN or START, a chime will
come on for about eight seconds to remind people to
fasten their safety belts, unless the driver's safety belt is
already buckled.
The safety belt light will
also come on and stay on
for about 20 seconds,
then it will flash for
about 70 seconds.
If the driver's belt is already buckled, neither the chime
nor the light will come on.
Air Bag Readiness Light
There is an air bag readiness light on the instrument
panel, which shows AIR BAG. The system checks the
air bag's electrical system for malfunctions. The light
tells you if there is an electrical problem. The system
check includes the air bag sensors, the air bag modules,
the wiring and the crash sensing and diagnostic module.
For more information on the air bag system, see ªAir
Bagº in the Index.
This light will come on
when you start your engine,
and it will flash for a few
seconds. Then the light
should go out. This means
the system is ready.
If the air bag readiness light stays on after you start the
engine or comes on when you are driving, your air bag
system may not work properly. Have your vehicle
serviced right away.
The air bag readiness light should flash for a few
seconds when you turn the ignition key to RUN. If the
light doesn't come on then, have it fixed so it will be
ready to warn you if there is a problem.
Page 129 of 368

yellowblue
2-69 Charging System Light
When you turn the
key to RUN, this light will
come on briefly to show
that the generator and
battery charging systems
are working.
If this light stays on, you need service and you should
take your vehicle to the dealer at once. To save your
battery until you get there, turn off all accessories.
Brake System Warning Light
Your vehicle's hydraulic brake system is divided into
two parts. If one part isn't working, the other part can
still work and stop you. For good braking, though, you
need both parts working well.
If the warning light comes on, there is a brake problem.
Have your brake system inspected right away.
This light should come
on briefly when you turn
the ignition key to RUN. If
it doesn't come on then,
have it fixed so it will be
ready to warn you if there's
a problem.
If the light comes on while you are driving, pull off the
road and stop carefully. You may notice that the pedal is
harder to push. Or, the pedal may go closer to the floor.
It may take longer to stop. If the light is still on, have the
vehicle towed for service. (See ªTowing Your Vehicleº
in the Index.)