display CADILLAC DEVILLE 2005 8.G User Guide
[x] Cancel search | Manufacturer: CADILLAC, Model Year: 2005, Model line: DEVILLE, Model: CADILLAC DEVILLE 2005 8.GPages: 420, PDF Size: 2.63 MB
Page 131 of 420

Notice:Going through an automatic car wash with
the wipers on can damage them. Turn the wipers
off when going through an automatic car wash.
The MIST and wash cycles operate as normal and are
not affected by the Rainsense™ II function. The
Rainsense™ II system can be overridden at any time by
manually turning the wiper band to LO or HI speed.
When Rainsense™ II is active, the headlamps will turn
on automatically. The headlamps will turn off again
once the wipers turn off if it is light enough outside. If it
is dark, they will remain on. SeeWiper Activated
Headlamps on page 3-16for more information.
Notice:Do not place stickers or other items on the
exterior glass surface directly in front of the
moisture sensor. Doing this could cause the
moisture sensor to malfunction.Windshield Washer
{CAUTION:
In freezing weather, do not use your washer
until the windshield is warmed. Otherwise the
washer �uid can form ice on the windshield,
blocking your vision.
LPUSHPress and release this paddle, located at the
top of the turn signal/multifunction lever, to spray
washer �uid on the windshield. The wipers will clear the
windshield and either stop or return to your preset
speed. For more washer cycles, press and hold
the paddle.
CHECK WASHER FLUID will be displayed on the Driver
Information Center (DIC) when the washer �uid is low.
3-11
Page 133 of 420

The buttons to operate cruise control are located on the
steering wheel.
1. Press the CRUISE ON/OFF button, located on the
bottom left of the steering wheel, to turn cruise
control on. An indicator light will come on to show
that the cruise control is on.
2. Get up to the speed you want.
3. Press the SET/CST (coast) button located on the
bottom right of the steering wheel. The CRUISE
light will display on the instrument panel cluster.
4. Remove your foot from the accelerator pedal.
Resuming a Set Speed
Suppose you set your cruise control at a desired speed
and then you apply the brake. This shuts off the
cruise control. But you do not need to reset it.
Once the vehicle is traveling approximately 25 mph
(40 km/h) or more, you can press the RES/ACC
(resume/accelerate) button to return to your desired
preset speed. The CRUISE light will be displayed again.
The vehicle will return to and stay at your preset
speed. If you press and hold the RES/ACC button,
the vehicle speed will increase until you release
the button or apply the brake. Unless you want to go
faster, do not press and hold the RES/ACC button.
3-13
Page 137 of 420

When the Twilight Sentinel®lever is on and it is dark
enough outside, the low-beam headlamps at reduced
intensity will turn off and normal low-beam headlamp
operation will occur.
When the Twilight Sentinel
®lever is on and it is bright
enough outside, the regular lamps will go off, and
the low-beam headlamps at reduced brightness will take
over. If you start your vehicle in a dark garage, the
automatic headlamp system will come on immediately.
Once you leave the garage, it will take approximately
one minute for the automatic headlamp system to
change to DRL if it is light outside. During that delay,
your instrument panel cluster may not be as bright
as usual. Make sure your instrument panel brightness
knob is in the full bright position. SeeInstrument
Panel Brightness on page 3-20.
If it is dark enough outside and the Twilight Sentinel
®
lever is off, a HEADLAMPS SUGGESTED message will
display on the Driver’s Information Center (DIC). This
message informs the driver that turning on the exterior
lamps is recommended even though the DRL are
still illuminated.Turning on the Twilight Sentinel
®or the headlamps will
deactivate the DRL and remove the HEADLAMPS
SUGGESTED message. If the parking lamps or the fog
lamps were turned on instead, the DRL will still
deactivate and the HEADLAMPS SUGGESTED
message will continue to be displayed.
To idle your vehicle with the DRL off at night, turn off the
Twilight Sentinel
®and shift the transaxle into PARK (P).
Placing your vehicle in PARK (P) disables the DRL.
The DRL will stay off until you shift out of PARK (P).
To drive your vehicle with the DRL off, turn off the
Twilight Sentinel
®and manually turn on the parking
lamps or fog lamps (if equipped).
As with any vehicle, you should turn on the regular
headlamp system when you need it.
3-17
Page 139 of 420

If you move the lever all the way to the right, the lamps
will remain on for approximately three minutes after
the ignition has been turned to OFF. If you move
the lever so it is barely on, the lamps will go off quickly
when you turn the ignition switch out of OFF. You can
adjust the delay time from only a few seconds to about
three minutes.
If it is dark enough outside and the Twilight Sentinel
®
lever is off, a HEADLAMPS SUGGESTED message will
display on the Driver Information Center (DIC). This
message informs the driver that turning on the exterior
lamps is recommended because it has become dark
enough outside to require the headlamps and/or other
exterior lamps. Turning on the Twilight Sentinel
®or
turning the exterior lamp control to the headlamp
position will remove the HEADLAMPS SUGGESTED
message.
Light Sensor
The light sensor for the DRL and the Twilight Sentinel®
is located in the center of the front defogger grille.
If you cover the sensor, it will read “dark” and the
exterior lamps or the HEADLAMPS SUGGESTED
message will be displayed whenever the ignition is on.
3-19
Page 141 of 420

Courtesy Lamps
The courtesy lamps are located on the headliner above
the rear seat. These lamps come on by turning the
instrument panel brightness knob fully clockwise or when
any door is opened and it is dark outside. Puddle
lamps are located on the bottom of the front and rear
door trim.
Entry Lighting
This feature turns on the courtesy lamps and the
backlighting to the door switches and to the exterior
lamp control when a door is opened or if you press the
remote keyless entry transmitter unlock button. If
activated due to the transmitter, the lighting will remain
active for about 40 seconds. Since the entry lighting
system uses the light sensor, it must be dark outside in
order for the courtesy lamps to turn on. The courtesy
lamps turn off approximately 25 seconds after the
last door is closed. They will dim to off if the ignition key
is placed in ON, or immediately deactivate if the
power locks are activated.
Parade Dimming
This feature prohibits dimming of the digital displays and
backlighting during daylight hours when the key is in
the ignition and the headlamps are on. This feature
operates with the light sensor for the Twilight
Sentinel
®and is fully automatic. When the light sensor
reads darkness outside and the parking lamps are
active, the digital displays can be adjusted by turning
the instrument panel brightness knob counterclockwise
to dim and clockwise to brighten lighting.
Reading Lamps
The reading lamps are located on the overhead console
on the headliner and in the rear door opening. These
lamps come on automatically when any door is opened
and it is dark outside.
For manual operation, press the button to turn them on.
Press it again to turn them off.
If the reading lamps are left on, they automatically shut
off 10 minutes after the ignition has been turned off.
3-21
Page 144 of 420

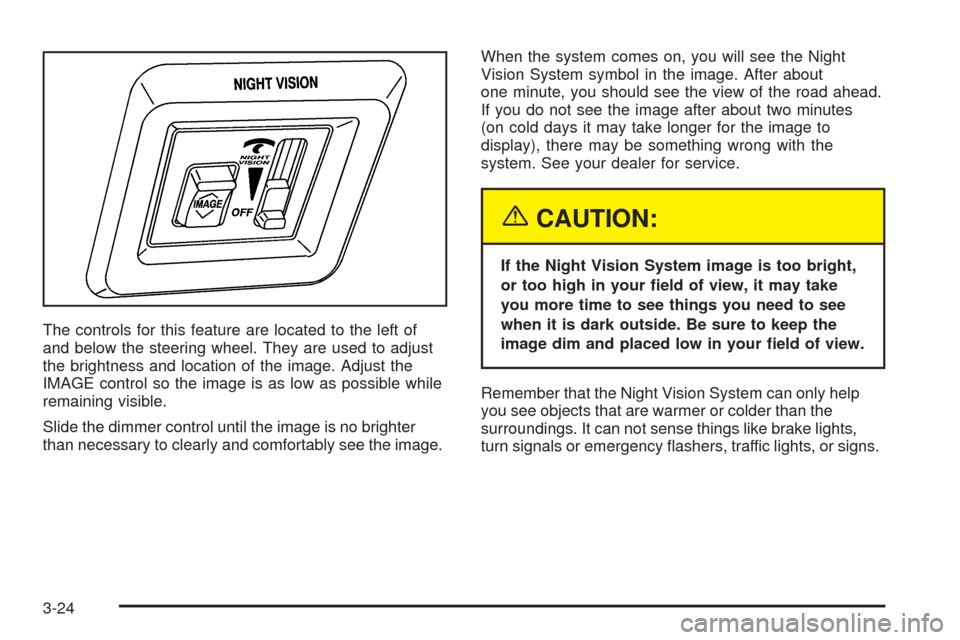
The controls for this feature are located to the left of
and below the steering wheel. They are used to adjust
the brightness and location of the image. Adjust the
IMAGE control so the image is as low as possible while
remaining visible.
Slide the dimmer control until the image is no brighter
than necessary to clearly and comfortably see the image.When the system comes on, you will see the Night
Vision System symbol in the image. After about
one minute, you should see the view of the road ahead.
If you do not see the image after about two minutes
(on cold days it may take longer for the image to
display), there may be something wrong with the
system. See your dealer for service.
{CAUTION:
If the Night Vision System image is too bright,
or too high in your �eld of view, it may take
you more time to see things you need to see
when it is dark outside. Be sure to keep the
image dim and placed low in your �eld of view.
Remember that the Night Vision System can only help
you see objects that are warmer or colder than the
surroundings. It can not sense things like brake lights,
turn signals or emergency �ashers, traffic lights, or signs.
3-24
Page 145 of 420

In dry, clear weather, the system can see pedestrians,
animals, and the direction of the road ahead. In light
rain, light snow, or light fog the image may not be
as clear and you may not be able to see the direction of
the road ahead. In more severe weather conditions,
the image may be unclear and not usable.
{CAUTION:
Do not use the Night Vision System to replace
your normal view of the road ahead. It can not
tell you how far away things are. It senses only
warmer or colder objects, not all objects.
Driving by staring at the image might cause
you not to see important objects in the road
ahead. If you do not see something in time,
you could have a crash in which you and
others could be injured. Use the Night Vision
System only as a driving aid.It is also important to keep your windshield, the HUD
(Head-Up Display for the Night Vision System) lens, and
the camera lens clean. If you do not keep everything
clean, system performance may be affected.
The HUD system is located on the driver’s side of the
instrument panel, next to the windshield and the camera
is located behind the center of the front grille.
Use only household glass cleaner and a soft cloth to
clean the HUD or camera lens. Wipe gently and
dry thoroughly.
Notice:When cleaning, be careful not to scratch
the HUD or camera lenses. Do not spray glass
cleaner directly on the HUD lens because the
cleaner could leak inside the unit and cause
damage.
The camera must also be aligned to work correctly.
If the camera needs adjustment, see your dealer. Do not
attempt to adjust the camera yourself.
3-25
Page 147 of 420

The URPA display is
located inside the vehicle,
above the rear window.
It has three color-coded
lights that can be seen
through the rearview mirror
or by turning around.
How the System Works
URPA comes on automatically when the shift lever is
moved into REVERSE (R). When the system comes on,
the three lights on the display will brie�y illuminate to
let you know that the system is working. If your vehicle is
moving in REVERSE (R) at a speed greater than
3 mph (5 km/h), the red light will �ash to remind you the
system does not work at this speed.
The �rst time an object is detected while in REVERSE (R),
a chime will sound and the following will occur in
sequence, depending on the distance from the object:
At 5 feet (1.5 m) a chime will sound and one amber
light will be lit;
at 40 inches (1.0 m) both amber lights will be lit;
at 20 inches (0.5 m) a continuous chime will sound
and all three lights (amber/amber/red) will be lit; and
at 1 foot (0.3 m) a continuous chime will sound and
all three lights (amber/amber/red) will �ash.
URPA can detect objects 3 inches (7.6 cm) and wider,
and at least 10 inches (25.4 cm) tall, but it cannot detect
objects that are above trunk level. In order for the
rear sensors to recognize an object, it must be within
operating range.
If the URPA system is not functioning properly, the
display will �ash red, indicating that there is a problem.
The light will also �ash red while driving if a trailer is
attached to your vehicle, or a bicycle or object is on the
back of, or hanging out of your trunk. The light will
continue to �ash until the trailer or the object is
removed and your vehicle is driven forward at least
15 mph (25 km/h).
3-27
Page 148 of 420

It may also �ash red if the ultrasonic sensors are not
kept clean. So be sure to keep your rear bumper free of
mud, dirt, snow, ice and slush or materials such as
paint or the system may not work properly. If after
cleaning the rear bumper and driving forward at least
15 mph (25 km/h), the display continues to �ash red,
see your dealer. For cleaning instructions, seeWashing
Your Vehicle on page 5-91.
It may also �ash red if your vehicle is moving in
REVERSE (R) at a speed greater than 3 mph (5 km/h).
Other conditions that may affect system performance
include things like the vibrations from a jackhammer or
the compression of air brakes on a very large truck.
As always, drivers should use care when backing up a
vehicle. Always look behind you, being sure to check
for other vehicles, obstructions and blind spots.
Accessory Power Outlets
Your vehicle is equipped with accessory power outlets.
The outlets can be used to plug in electrical equipment
such as a cellular telephone, CB radio, etc.
If you have a vehicle with a center storage compartment
located on the instrument panel, you may have an
accessory power outlet in the storage drawer. There is
also an outlet on the front passenger’s seat near
the umbrella tray.There are two accessory power outlets in the rear seat
area located on the door armrests next to the ashtrays.
Your vehicle may have a small cap that must be
removed to access the accessory power outlet. If it
does, when not using the outlet be sure to cover it with
the protective cap.
The accessory power outlet will only operate when the
ignition is in ACCESSORY or ON and for 10 minutes
after turning the ignition OFF. If you would like the
accessory power outlet to operate regardless of ignition
position, and for extended periods of time, see your
dealer for more information.
Notice:Leaving electrical equipment on for
extended periods will drain the battery. Always turn
off electrical equipment when not in use and do
not plug in equipment that exceeds the maximum
amperage rating.
Certain accessory power plugs may not be compatible
to the accessory power outlet and could result in
blown vehicle or adapter fuses. If you experience a
problem see your dealer for additional information on the
accessory power outlets.
Notice:Adding any electrical equipment to your
vehicle may damage it or keep other components
from working as they should. The repairs would not
be covered by your warranty. Do not use equipment
exceeding maximum amperage rating. Check
with your dealer before adding electrical equipment.
3-28
Page 150 of 420

Climate Controls
Dual Climate Control System
With this system you can control the heating, cooling
and ventilation for your vehicle.
Automatic Operation
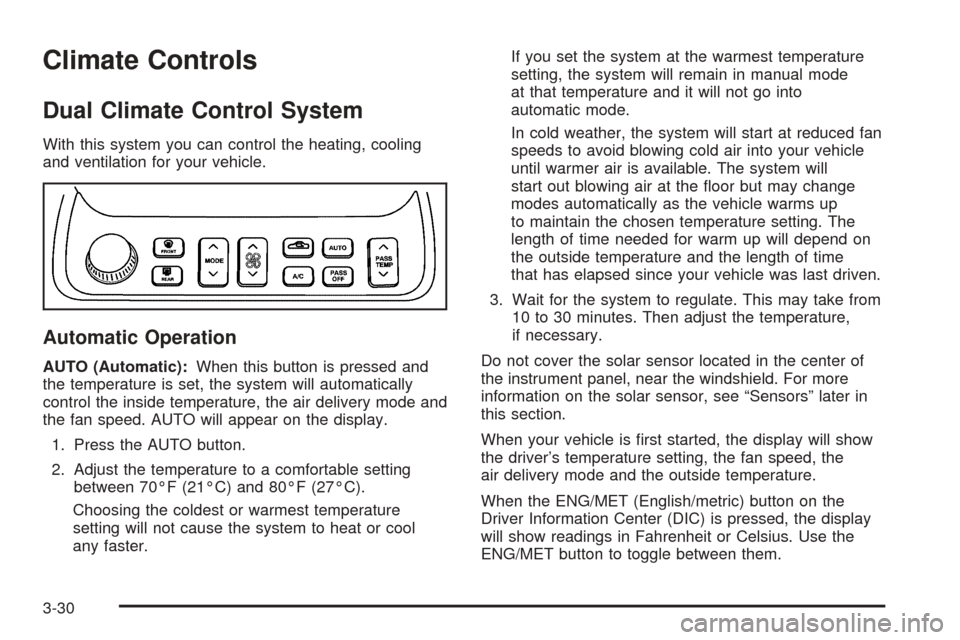
AUTO (Automatic):When this button is pressed and
the temperature is set, the system will automatically
control the inside temperature, the air delivery mode and
the fan speed. AUTO will appear on the display.
1. Press the AUTO button.
2. Adjust the temperature to a comfortable setting
between 70°F (21°C) and 80°F (27°C).
Choosing the coldest or warmest temperature
setting will not cause the system to heat or cool
any faster.If you set the system at the warmest temperature
setting, the system will remain in manual mode
at that temperature and it will not go into
automatic mode.
In cold weather, the system will start at reduced fan
speeds to avoid blowing cold air into your vehicle
until warmer air is available. The system will
start out blowing air at the �oor but may change
modes automatically as the vehicle warms up
to maintain the chosen temperature setting. The
length of time needed for warm up will depend on
the outside temperature and the length of time
that has elapsed since your vehicle was last driven.
3. Wait for the system to regulate. This may take from
10 to 30 minutes. Then adjust the temperature,
if necessary.
Do not cover the solar sensor located in the center of
the instrument panel, near the windshield. For more
information on the solar sensor, see “Sensors” later in
this section.
When your vehicle is �rst started, the display will show
the driver’s temperature setting, the fan speed, the
air delivery mode and the outside temperature.
When the ENG/MET (English/metric) button on the
Driver Information Center (DIC) is pressed, the display
will show readings in Fahrenheit or Celsius. Use the
ENG/MET button to toggle between them.
3-30