clock CADILLAC DEVILLE 2005 8.G Owners Manual
[x] Cancel search | Manufacturer: CADILLAC, Model Year: 2005, Model line: DEVILLE, Model: CADILLAC DEVILLE 2005 8.GPages: 420, PDF Size: 2.63 MB
Page 77 of 420

Rear Door Security Locks
Your vehicle is equipped with rear door security locks
that prevent passengers from opening the rear doors on
your vehicle from the inside.
The rear door security
locks are located on the
edge of each rear
door. You must open the
doors to access them.
To use these locks, do the following:
1. Turn the knob located on the passenger’s side rear
door clockwise to engage the lock.
2. Close the door.
3. Turn the knob located on the driver’s side rear door
counterclockwise to engage the lock.
The rear doors on your vehicle cannot be opened from
the inside when this feature is in use.When you want to open a rear door while the security
lock is on, do the following:
1. Unlock the door using the remote keyless entry
transmitter, the front door power lock switch or
by lifting the rear door manual lock.
2. Then open the door from the outside.
To cancel the rear door security lock, do the following:
1. Unlock the door and open it from the outside.
2. Turn the knob on the passenger’s side of the rear
door counterclockwise all the way back to the
original position.
3. Turn the knob on the driver’s side of the rear door
clockwise all the way back to the original position.
The rear door locks will now work normally.
Lockout Protection
Leaving your key in any ignition position with any door
open will disable the power door lock switches as
well as the lock button on the remote keyless entry
transmitter. If you close the doors, you can lock them
using the remote keyless entry transmitter. It is
always recommended that you remove the ignition key
when locking your vehicle.
The anti-lockout feature can be overridden by holding
the power door lock switch for three seconds or longer.
2-11
Page 140 of 420

Exterior Lighting Battery Saver
If the manual parking lamps or headlamps have been
left on, the exterior lamps will turn off approximately
10 minutes after the ignition is turned to OFF. This
protects against draining the battery in case you have
accidentally left the headlamps or parking lamps
on. The battery saver does not work if the headlamps
are turned on after the ignition switch is turned to OFF.
If you need to leave the lamps on for more than
10 minutes, use the exterior lamp control to turn the
lamps back on. To delay the lamps from turning
off, see “Twilight Sentinel
®” listed previously in
this section.
Instrument Panel Brightness
This feature controls the brightness of the instrument
panel lights.
The knob for this feature is
located to the right of the
Twilight Sentinel
®lever.
Press the knob to release it to the outward position.
Turn the knob clockwise to brighten the lights or
counterclockwise to dim them. Press the knob to return
it to the original storage position.
3-20
Page 141 of 420

Courtesy Lamps
The courtesy lamps are located on the headliner above
the rear seat. These lamps come on by turning the
instrument panel brightness knob fully clockwise or when
any door is opened and it is dark outside. Puddle
lamps are located on the bottom of the front and rear
door trim.
Entry Lighting
This feature turns on the courtesy lamps and the
backlighting to the door switches and to the exterior
lamp control when a door is opened or if you press the
remote keyless entry transmitter unlock button. If
activated due to the transmitter, the lighting will remain
active for about 40 seconds. Since the entry lighting
system uses the light sensor, it must be dark outside in
order for the courtesy lamps to turn on. The courtesy
lamps turn off approximately 25 seconds after the
last door is closed. They will dim to off if the ignition key
is placed in ON, or immediately deactivate if the
power locks are activated.
Parade Dimming
This feature prohibits dimming of the digital displays and
backlighting during daylight hours when the key is in
the ignition and the headlamps are on. This feature
operates with the light sensor for the Twilight
Sentinel
®and is fully automatic. When the light sensor
reads darkness outside and the parking lamps are
active, the digital displays can be adjusted by turning
the instrument panel brightness knob counterclockwise
to dim and clockwise to brighten lighting.
Reading Lamps
The reading lamps are located on the overhead console
on the headliner and in the rear door opening. These
lamps come on automatically when any door is opened
and it is dark outside.
For manual operation, press the button to turn them on.
Press it again to turn them off.
If the reading lamps are left on, they automatically shut
off 10 minutes after the ignition has been turned off.
3-21
Page 151 of 420
Manual Operation
yMODEz:Pressing the MODE switch and changing
the mode cancels automatic operation and places the
system in manual mode. Press AUTO to return to
automatic operation.
To change the current mode, select one of the following:
F(Vent):This mode directs air to the instrument
panel outlets.
*(Bi-Level):This mode directs approximately half of
the air to the instrument panel outlets, and then
directs most of the remaining air to the �oor outlets.
Some air may be directed toward the windshield.
In automatic operation, cooler air is directed to the upper
outlets and warmer air to the �oor outlets.
7(Floor):This mode directs most of the air to the
�oor outlets with some air directed to the outboard
outlets, for the side windows, and a little air directed to
the windshield.
The MODE switch can also be used to select the
�oor/defog mode. Information on defogging and
defrosting can be found later in this section.
y9z(Fan):Press this switch to increase or
decrease the fan speed. Pressing this switch cancels
automatic operation and places the system in manual
mode. Press AUTO to return to automatic operation.
If the air�ow seems low when the fan speed is at
the highest setting, the passenger compartment air �lter
may need to be replaced. For more information, see
Passenger Compartment Air Filter on page 3-36
andScheduled Maintenance on page 6-4.
?(Recirculation):This mode keeps outside air
from coming in the vehicle. It can be used to prevent
outside air and odors from entering your vehicle or
to help heat or cool the air inside your vehicle more
quickly. Press this button to turn the recirculation mode
on or off. When the button is pressed, an indicator
light will come on. The air-conditioning compressor also
comes on.
Driver’s Temperature Knob:Press this knob to turn
the entire climate control system on or off. Turn this
knob clockwise or counterclockwise to manually
increase or decrease the temperature inside your
vehicle.
3-31
Page 178 of 420
AVG MPH (Average Miles per Hour):This
message shows the average speed you have
traveled at since the last time you reset the value.
To reset the value, press the INFO button to
display AVG MPH, then press and hold the INFO
RESET button until 0.0 AVG MPH is displayed.
TIMER:This feature is like a stopwatch, in that you
can clock the time it takes to get from one point to
another.
To operate, press the INFO button to display
TIMER. Each of the �elds for the hours, minutes
and seconds are two numeric digits.
Once TIMER 00:00:00 is displayed, press the
ON/OFF button to start the timing feature. Press
the ON/OFF button again to stop it. If you will
be starting and stopping your vehicle, during a trip
for instance, the TIMER feature will automatically
start timing where it left off when you last stopped.
To reset it, press and hold the INFO RESET
button until the display reads TIMER 00:00:00.
Press the INFO button to exit from the TIMER
display.
ENGINE OIL LIFE:This message shows the
percentage of remaining oil life for your vehicle.
When the oil life is depleted, the CHANGE ENGINE
OIL message will appear on the display. See
Engine Oil on page 5-14andOil Life Indicator on
page 3-79. In addition to the engine oil life
system monitoring the oil life, additional
maintenance is recommended in the Maintenance
Schedule in this manual. SeeScheduled
Maintenance on page 6-4. To reset the engine oil
life system, seeEngine Oil Life System on
page 5-17. This only needs to be reset after you
have had the oil changed.
TRANSMISSION FLUID LIFE:This message
shows the percentage of remaining transmission
�uid life for your vehicle. Under normal conditions,
the rate of deterioration of the transmission �uid
is slow. SeeScheduled Maintenance on page 6-4
for proper �uid and change intervals. To reset
the transmission �uid life, press the INFO button to
display TRANS FLUID LIFE, then press and
hold the INFO RESET button until 100% TRANS
FLUID LIFE is displayed. This only needs to
be reset after you have had the �uid changed.
3-58
Page 217 of 420
¦SEEK¥:The tape must have at least three seconds
of silence between each selection for SEEK to work.
Press the up or the down arrow to seek to the next or to
the previous selection on the tape.
SCAN:Press this button to listen to each selection for
a few seconds. The tape will go to the next selection,
play for a few seconds, then go on to the next selection.
Press this button again to stop scanning.
SOURCE:Press this button to play a cassette tape or
CD when listening to the radio. Available loaded
sources are shown on the display. If a source is being
used, it will be underlined on the display. If none of
the audio sources are loaded, NO SOURCE LOADED
will appear on the display.
BAND:Press this button to listen to the radio when
playing a cassette tape or CD. The inactive tape or CD
will remain safely inside the radio for future listening.
SIDE:Press this button to play the other side of
the tape.
Z(Eject):Press this button, located to the right of
the cassette tape slot, to stop a tape when it is playing
or to eject a tape when it is not playing. Eject may
be activated with the radio and the ignition off.
Cassette tapes may be loaded with the radio and
ignition off if this button is pressed �rst.
Cassette Tape Messages
If an error occurs while trying to play a cassette tape,
it could be for one of the following reasons:
The cassette tape is tight and the cassette player
cannot turn the tape hubs. Remove the tape.
Hold the tape with the open end down and try to
turn the right hub counterclockwise with a
pencil. Turn the tape over and repeat. If the hubs
do not turn easily, the tape may be damaged
and should not be used in the player. Try a new
tape to make sure the player is working properly.
The tape is broken. Try a new tape.
The tape is wrapped around the tape head.
Attempt to get the cassette out. Try a new tape.
CLEAN TAPE:If this message appears on the display,
the cassette tape player needs to be cleaned. It will
still play tapes, but it should be cleaned as soon
as possible to prevent damage to the tapes and player.
SeeCare of the Cassette Tape Player on page 3-105.
If the cassette tape is not playing correctly, for any other
reason, try a known good cassette.
If any error occurs repeatedly or if an error cannot be
corrected, contact your GM dealer. If the radio displays
an error message, write it down and provide it to
your GM dealer when reporting the problem.
3-97
Page 240 of 420

An emergency like this requires close attention and a
quick decision. If you are holding the steering wheel at
the recommended 9 and 3 o’clock positions, you
can turn it a full 180 degrees very quickly without
removing either hand. But you have to act fast, steer
quickly, and just as quickly straighten the wheel
once you have avoided the object.
The fact that such emergency situations are always
possible is a good reason to practice defensive driving
at all times and wear safety belts properly.
Off-Road Recovery
You may �nd that your right wheels have dropped off
the edge of a road onto the shoulder while you’re
driving.
If the level of the shoulder is only slightly below the
pavement, recovery should be fairly easy. Ease off the
accelerator and then, if there is nothing in the way,
steer so that your vehicle straddles the edge of
the pavement. You can turn the steering wheel up to
one-quarter turn until the right front tire contacts
the pavement edge. Then turn your steering wheel to go
straight down the roadway.
4-12
Page 280 of 420
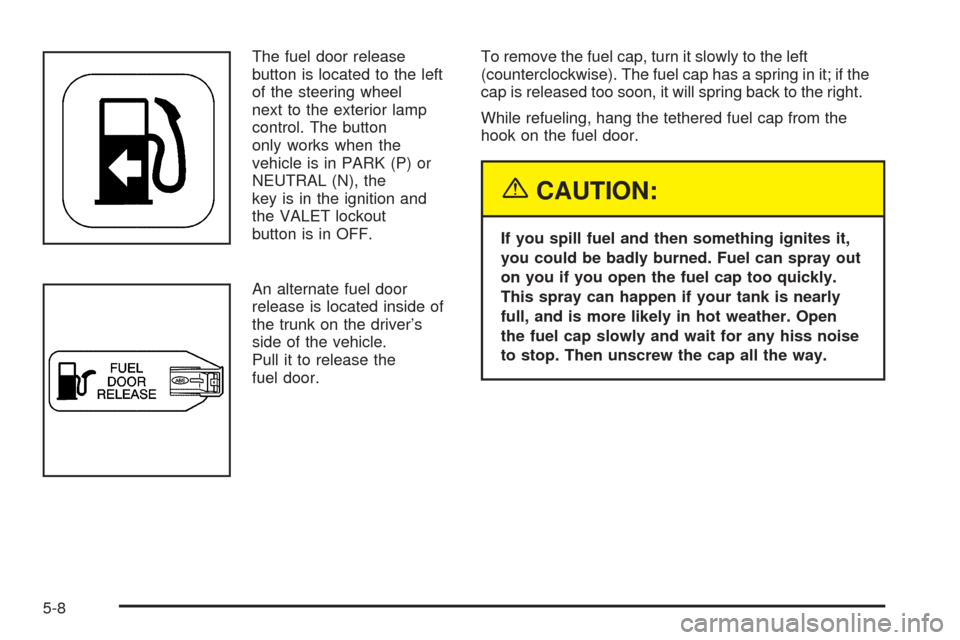
The fuel door release
button is located to the left
of the steering wheel
next to the exterior lamp
control. The button
only works when the
vehicle is in PARK (P) or
NEUTRAL (N), the
key is in the ignition and
the VALET lockout
button is in OFF.
An alternate fuel door
release is located inside of
the trunk on the driver’s
side of the vehicle.
Pull it to release the
fuel door.To remove the fuel cap, turn it slowly to the left
(counterclockwise). The fuel cap has a spring in it; if the
cap is released too soon, it will spring back to the right.
While refueling, hang the tethered fuel cap from the
hook on the fuel door.
{CAUTION:
If you spill fuel and then something ignites it,
you could be badly burned. Fuel can spray out
on you if you open the fuel cap too quickly.
This spray can happen if your tank is nearly
full, and is more likely in hot weather. Open
the fuel cap slowly and wait for any hiss noise
to stop. Then unscrew the cap all the way.
5-8
Page 281 of 420
Be careful not to spill fuel. Do not top off or over�ll the
tank and wait a few seconds after you have �nished
pumping before removing the nozzle. Clean fuel
from painted surfaces as soon as possible.
SeeWashing Your Vehicle on page 5-91.
When replacing the fuel cap, turn it to the right
(clockwise) until it clicks. Make sure the cap is fully
installed. The diagnostic system can determine if
the fuel cap has been left off or improperly installed.
This would allow fuel to evaporate into the atmosphere.
SeeMalfunction Indicator Lamp on page 3-50.
The CHECK GAS CAP message in the Driver
Information Center (DIC) will be displayed if the
fuel cap is not properly installed.
{CAUTION:
If a �re starts while you are refueling, do not
remove the nozzle. Shut off the �ow of fuel
by shutting off the pump or by notifying the
station attendant. Leave the area immediately.
Notice:If you need a new fuel cap, be sure to get
the right type. Your dealer can get one for you.
If you get the wrong type, it may not �t properly.
This may cause your malfunction indicator lamp to
light and may damage your fuel tank and emissions
system. SeeMalfunction Indicator Lamp on
page 3-50.
5-9
Page 287 of 420

When to Add Engine Oil
If the oil is at or below the cross-hatched area at the tip
of the dipstick, then you will need to add at least one
quart of oil. But you must use the right kind. This section
explains what kind of oil to use. For engine oil
crankcase capacity, seeCapacities and Speci�cations
on page 5-106.
Notice:Do not add too much oil. If the engine has
so much oil that the oil level gets above the
cross-hatched area that shows the proper operating
range, the engine could be damaged.SeeEngine Compartment
Overview on page 5-12
for the location of the
engine oil �ll cap.
Turn the cap counterclockwise to remove it.
Be sure to add enough oil to put the level somewhere in
the proper operating range in the cross-hatched area.
Push the dipstick all the way back in when you are
through.
5-15