mirror CADILLAC DTS 2007 1.G Owners Manual
[x] Cancel search | Manufacturer: CADILLAC, Model Year: 2007, Model line: DTS, Model: CADILLAC DTS 2007 1.GPages: 518, PDF Size: 2.77 MB
Page 1 of 518
Seats and Restraint Systems
....................... 7
Front Seats
.............................................. 9
Rear Seats
............................................. 17
Safety Belts
............................................ 19
Child Restraints
...................................... 42
Airbag System
........................................ 70
Restraint System Check
......................... 88
Features and Controls
................................ 91
Keys
....................................................... 93
Doors and Locks
.................................. 102
Windows
............................................... 108
Theft-Deterrent Systems
....................... 112
Starting and Operating Your Vehicle
..... 117
Mirrors
.................................................. 132OnStar®System
................................... 139
Universal Home Remote System
.......... 143
Storage Areas
...................................... 155
Sunroof
................................................ 157
Instrument Panel
....................................... 159
Instrument Panel Overview
................... 162
Climate Controls
................................... 210
Warning Lights, Gages, and Indicators
.... 222
Driver Information Center (DIC)
............ 240
Audio System(s)
................................... 268
Driving Your Vehicle
................................. 301
Your Driving, the Road, and
Your Vehicle
..................................... 302
Towing
................................................. 340
2007 Cadillac DTS Owner ManualM
1
Page 7 of 518
Front Seats..................................................... 9
Power Seats................................................. 9
Power Lumbar............................................. 10
Massaging Lumbar...................................... 10
Heated and Cooled Seats........................... 11
Memory Seat, Mirrors and
Steering Wheel......................................... 12
Power Reclining Seatbacks......................... 14
Head Restraints.......................................... 16
Center Seat................................................ 17
Rear Seats.................................................... 17
Heated Seats.............................................. 17
Rear Seat Pass-Through Door.................... 18
Power Lumbar............................................. 18
Safety Belts.................................................. 19
Safety Belts: They Are for Everyone........... 19
Questions and Answers About
Safety Belts............................................. 23
How to Wear Safety Belts Properly............. 24
Driver Position............................................. 25
Shoulder Belt Height Adjustment................. 33Safety Belt Use During Pregnancy.............. 34
Right Front Passenger Position................... 34
Center Front Passenger Position................. 35
Rear Seat Passengers................................ 36
Rear Safety Belt Comfort Guides................ 39
Safety Belt Pretensioners............................ 41
Safety Belt Extender................................... 42
Child Restraints............................................ 42
Older Children............................................. 42
Infants and Young Children......................... 45
Child Restraint Systems.............................. 49
Where to Put the Restraint.......................... 54
Lower Anchors and Tethers for
Children (LATCH).................................... 55
Securing a Child Restraint in a
Rear Seat Position................................... 63
Securing a Child Restraint in the
Center Front Seat Position....................... 65
Securing a Child Restraint in the
Right Front Seat Position......................... 66
Section 1 Seats and Restraint Systems
7
Page 9 of 518
Front Seats
Power Seats
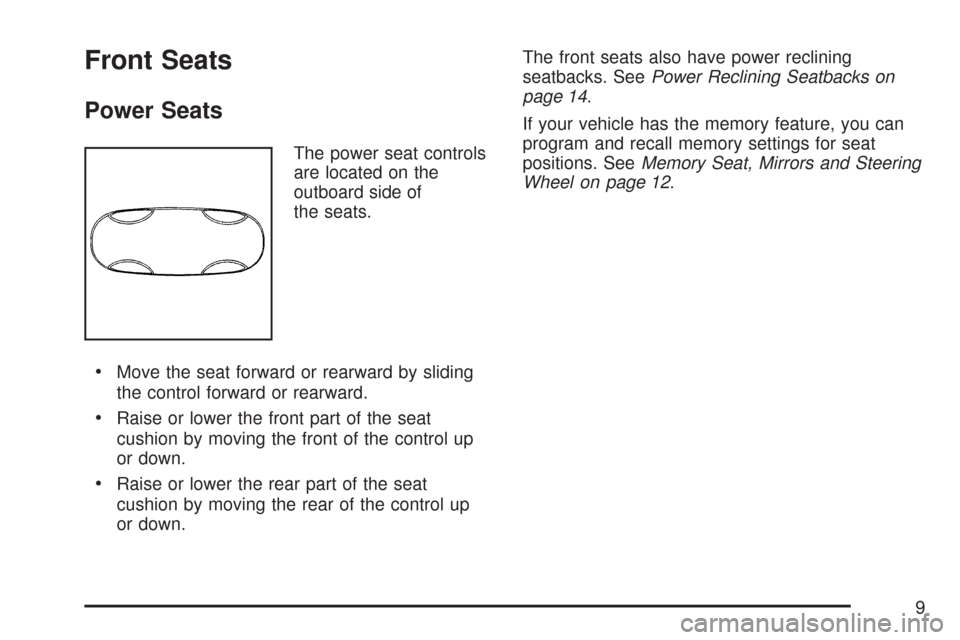
The power seat controls
are located on the
outboard side of
the seats.
Move the seat forward or rearward by sliding
the control forward or rearward.
Raise or lower the front part of the seat
cushion by moving the front of the control up
or down.
Raise or lower the rear part of the seat
cushion by moving the rear of the control up
or down.The front seats also have power reclining
seatbacks. SeePower Reclining Seatbacks on
page 14.
If your vehicle has the memory feature, you can
program and recall memory settings for seat
positions. SeeMemory Seat, Mirrors and Steering
Wheel on page 12.
9
Page 12 of 518
Memory Seat, Mirrors and Steering
Wheel
Your vehicle may have the memory package.
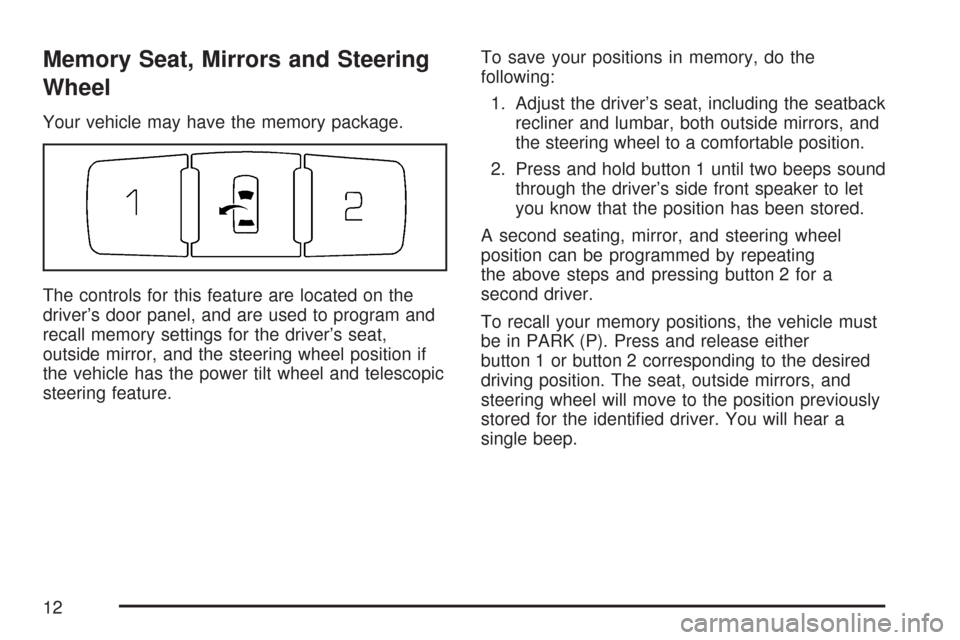
The controls for this feature are located on the
driver’s door panel, and are used to program and
recall memory settings for the driver’s seat,
outside mirror, and the steering wheel position if
the vehicle has the power tilt wheel and telescopic
steering feature.To save your positions in memory, do the
following:
1. Adjust the driver’s seat, including the seatback
recliner and lumbar, both outside mirrors, and
the steering wheel to a comfortable position.
2. Press and hold button 1 until two beeps sound
through the driver’s side front speaker to let
you know that the position has been stored.
A second seating, mirror, and steering wheel
position can be programmed by repeating
the above steps and pressing button 2 for a
second driver.
To recall your memory positions, the vehicle must
be in PARK (P). Press and release either
button 1 or button 2 corresponding to the desired
driving position. The seat, outside mirrors, and
steering wheel will move to the position previously
stored for the identi�ed driver. You will hear a
single beep.
12
Page 13 of 518
If you use the remote keyless entry transmitter to
enter your vehicle and the remote recall memory
feature is on, automatic seat and mirror movement
will occur. See “MEMORY SEAT RECALL”
underDIC Vehicle Customization on page 259for
more information.
To stop recall movement of the memory feature at
any time, press one of the power seat controls,
memory buttons, power tilt wheel control, or power
mirror buttons.
If something has blocked the driver’s seat and/or
the steering column while recalling a memory
position, the driver’s seat and/or the steering
column recall may stop. If this happens remove
the obstruction, then press the appropriate control
for the area that is not recalling for two seconds.
Try recalling the memory position again by
pressing the appropriate memory button. If the
memory position is still not recalling, see
your dealer for service.Easy Exit Seat
The control for this feature is located on the
driver’s door panel between buttons 1 and 2.
With the vehicle in PARK (P), the exit position can
be recalled by pressing the exit button. You will
hear a single beep. The driver’s seat will move
back, and if the vehicle has the power tilt wheel and
telescopic steering feature, the power telescopic
steering column will move up and forward.
If the easy exit seat feature is on in the DIC,
automatic seat and power telescopic steering
column movement will occur when the key
is removed from the ignition. See “EASY EXIT
SEAT” underDIC Vehicle Customization on
page 259for more information.
Further programming for automatic seat and
steering wheel movement can be done using the
Driver Information Center (DIC). You can select
or not select the following:
The easy exit seat feature
The memory seat recall feature
For programming information, seeDIC Vehicle
Customization on page 259.
13
Page 91 of 518
Keys.............................................................. 93
Remote Keyless Entry (RKE) System.......... 95
Remote Keyless Entry (RKE) System
Operation................................................. 96
Doors and Locks........................................ 102
Door Locks................................................ 102
Central Door Unlocking System................. 103
Power Door Locks..................................... 103
Programmable Automatic Door Locks........ 104
Rear Door Security Locks......................... 104
Lockout Protection..................................... 105
Trunk........................................................ 106
Windows...................................................... 108
Power Windows........................................ 109
Sun Visors................................................ 111
Theft-Deterrent Systems............................. 112
Valet Lockout Switch................................. 112
Content Theft-Deterrent............................. 113
PASS-Key
®III+......................................... 115
PASS-Key®III+ Operation......................... 115Starting and Operating Your Vehicle......... 117
New Vehicle Break-In................................ 117
Ignition Positions....................................... 118
Retained Accessory Power (RAP)............. 119
Starting the Engine.................................... 119
Engine Coolant Heater.............................. 121
Automatic Transaxle Operation.................. 122
Performance Shifting................................. 125
Parking Brake........................................... 125
Shifting Into Park (P)................................. 126
Shifting Out of Park (P)............................. 129
Parking Over Things That Burn................. 129
Engine Exhaust......................................... 130
Running the Engine While Parked............. 131
Mirrors......................................................... 132
Automatic Dimming Rearview Mirror with
Intellibeam™, OnStar
®, and Compass.... 132
Automatic Dimming Rearview Mirror
with OnStar
®and Compass................... 134
Automatic Dimming Rearview Mirror
with Compass........................................ 136
Section 2 Features and Controls
91
Page 92 of 518

Outside Power Foldaway Mirrors............... 137
Outside Automatic Dimming Mirror............. 138
Outside Curb View Assist Mirror................ 138
Outside Convex Mirror............................... 138
Outside Heated Mirrors............................. 138
OnStar
®System.......................................... 139
Universal Home Remote System................ 143
System Identi�cation.................................. 143
Universal Home Remote System............... 144
Universal Home Remote System Operation
(With One Triangular LED)...................... 144
Universal Home Remote System
Operation (With Three Round LED)....... 148Storage Areas............................................. 155
Glove Box................................................. 155
Cupholder(s).............................................. 155
Coinholder(s)............................................. 155
Center Console Storage Area.................... 155
Center Flex Storage Unit........................... 156
Floor Mats................................................. 156
Rear Seat Armrest.................................... 157
Convenience Net....................................... 157
Sunroof....................................................... 157
Section 2 Features and Controls
92
Page 111 of 518

The window will rise for as long as the switch is
held. Once the switch is released, the express
mode is re-activated.
In this mode, the window can still close on an
object in its path. Use care when using the
override mode.
Window Lockout
o
(Window Lockout):The rear window lockout
button is located on the driver’s door armrest
near the window switches.
Press the right side of the button to disable the
rear window controls. The light on the button
will illuminate, indicating the feature is in use. The
rear windows still can be raised or lowered
using the driver’s window switches when the
lockout feature is active.
To restore power to the rear windows, press the
button again. The light on the button will go out.
Sun Visors
Swing down the primary visor to block out glare. It
can also be detached from the center mount
and moved to the side while the auxiliary sunshade
remains to block the glare from the front. The
visors also have side-to-side slide capability.
Lighted Visor Vanity Mirror
Pull the visor down and lift the cover to view the
mirror. The light will come on when the cover
is opened. It will go out when you close the cover.
If your vehicle has the adjustable lighting feature,
slide the switch up or down to brighten or dim
the light.
111
Page 132 of 518

Mirrors
Automatic Dimming Rearview Mirror
with Intellibeam™, OnStar
®, and
Compass
Your vehicle may have an automatic dimming
rearview mirror with OnStar®and a compass
display. For more information, seeOnStar®
System on page 139. For more information on
Intellibeam™, see “Intellibeam Intelligent
High-Beam Headlamp Control System” under
Exterior Lamps on page 193.
The mirror includes an eight-point compass
display in the upper right corner of the mirror face.
When on, the compass automatically calibrates
as the vehicle is driven.
Automatic Dimming
Your vehicle is equipped with an automatic
dimming rearview mirror. The automatic dimming
feature is activated whenever the vehicle is
turned on and dims only during nighttime driving.
Compass Operation
AUTO3:Press and hold the “auto highbeam”
button for approximately three seconds to turn
the compass on or off.
When the ignition and the compass feature are
on, the compass will show two character boxes for
about two seconds. After two seconds, the
mirror will display the compass heading.
Compass Calibration
If after two seconds the display does not show the
correct direction, (N for North for example),
there may be a strong magnetic �eld interfering
with the compass. Such interference may be
caused by a magnetic antenna mount, magnetic
note pad holder, or a similar magnetic item.
The compass can be placed in calibration mode
manually by pressing and holding the “auto
highbeam” button for approximately nine seconds
untilaCisshown in the compass display.
The mirror can then be calibrated by driving the
vehicle in circles at 5 mph (8 km/h) or less until the
display reads a direction.
132
Page 133 of 518

Compass Variance
The mirror is set to zone eight upon leaving the
factory. It will be necessary to adjust the compass
to compensate for compass variance if the
vehicle is driven outside zone eight. Under certain
circumstances, such as a long distance,
cross-country trip, it will be necessary to adjust the
compass variance.
Compass variance is the difference between
earth’s magnetic north and true geographic north.
If the mirror is not adjusted to account for zone
changes, the compass could give false readings.
To adjust for zone changes, do the following:
1. Find your current location and variance zone
number on the zone map that follows.
2. Press and hold the “auto highbeam” button
approximately six seconds until a zone number
appears in the display.
3. Once the zone number appears in the display,
press the “auto highbeam” button quickly until
you reach the correct zone number. Stop
pressing the button and the mirror will return to
normal operation. If C appears in the compass
window, the compass needs calibration. See
“Compass Calibration” listed previously.
133