tow CADILLAC DTS 2010 1.G Owners Manual
[x] Cancel search | Manufacturer: CADILLAC, Model Year: 2010, Model line: DTS, Model: CADILLAC DTS 2010 1.GPages: 480, PDF Size: 17.56 MB
Page 1 of 480

In Brief. . . . . . . . . . . . . . . . . . . . . . . . . . . . . . . . . . . . . . . . . . . . . . . . . . . . . . . . . . . 1-1
Instrument Panel. . . . . . . . . . . . . . . . . . . . . . . . . . . . . . . . . . . . . . . . 1-2
Initial Drive Information. . . . . . . . . . . . . . . . . . . . . . . . . . . . . . . 1-4
Vehicle Features. . . . . . . . . . . . . . . . . . . . . . . . . . . . . . . . . . . . . . 1-15
Performance and Maintenance. . . . . . . . . . . . . . . . . . . 1-21
Seats and Restraint System. . . . . . . . . . . . . . . . . . . . . . . . . . . . . 2-1
Head Restraints. . . . . . . . . . . . . . . . . . . . . . . . . . . . . . . . . . . . . . . . . 2-2
Front Seats. . . . . . . . . . . . . . . . . . . . . . . . . . . . . . . . . . . . . . . . . . . . . . . 2-3
Rear Seats. . . . . . . . . . . . . . . . . . . . . . . . . . . . . . . . . . . . . . . . . . . . . . 2-10
Safety Belts. . . . . . . . . . . . . . . . . . . . . . . . . . . . . . . . . . . . . . . . . . . . . 2-12
Child Restraints. . . . . . . . . . . . . . . . . . . . . . . . . . . . . . . . . . . . . . . 2-33
Airbag System. . . . . . . . . . . . . . . . . . . . . . . . . . . . . . . . . . . . . . . . . 2-58
Restraint System Check. . . . . . . . . . . . . . . . . . . . . . . . . . . . 2-74
Features and Controls. . . . . . . . . . . . . . . . . . . . . . . . . . . . . . . . . . . . . 3-1
Keys. . . . . . . . . . . . . . . . . . . . . . . . . . . . . . . . . . . . . . . . . . . . . . . . . . . . . . . . 3-3
Doors and Locks. . . . . . . . . . . . . . . . . . . . . . . . . . . . . . . . . . . . . . . 3-9
Windows. . . . . . . . . . . . . . . . . . . . . . . . . . . . . . . . . . . . . . . . . . . . . . . . . 3-14
Theft-Deterrent Systems. . . . . . . . . . . . . . . . . . . . . . . . . . . . 3-18
Starting and Operating Your Vehicle. . . . . . . . . . . 3-22
Mirrors. . . . . . . . . . . . . . . . . . . . . . . . . . . . . . . . . . . . . . . . . . . . . . . . . . . . 3-36
Object Detection Systems. . . . . . . . . . . . . . . . . . . . . . . . . . 3-40
Universal Home Remote System. . . . . . . . . . . . . . . . 3-48
Storage Areas. . . . . . . . . . . . . . . . . . . . . . . . . . . . . . . . . . . . . . . . . 3-55
Sunroof. . . . . . . . . . . . . . . . . . . . . . . . . . . . . . . . . . . . . . . . . . . . . . . . . . 3-57
Instrument Panel. . . . . . . . . . . . . . . . . . . . . . . . . . . . . . . . . . . . . . . . . . . . . 4-1
Instrument Panel Overview. . . . . . . . . . . . . . . . . . . . . . . . . . 4-3
Climate Controls. . . . . . . . . . . . . . . . . . . . . . . . . . . . . . . . . . . . . . 4-36
Warning Lights, Gages, and Indicators. . . . . . . . 4-46
Driver Information Center (DIC). . . . . . . . . . . . . . . . . . 4-61
Audio System(s). . . . . . . . . . . . . . . . . . . . . . . . . . . . . . . . . . . . . . . 4-88
Driving Your Vehicle. . . . . . . . . . . . . . . . . . . . . . . . . . . . . . . . . . . . . . . 5-1
Your Driving, the Road, and the Vehicle. . . . . . . 5-2
Towing. . . . . . . . . . . . . . . . . . . . . . . . . . . . . . . . . . . . . . . . . . . . . . . . . . . 5-24
Service and Appearance Care. . . . . . . . . . . . . . . . . . . . . . . . . . 6-1
Service. . . . . . . . . . . . . . . . . . . . . . . . . . . . . . . . . . . . . . . . . . . . . . . . . . . . . 6-3
Fuel. . . . . . . . . . . . . . . . . . . . . . . . . . . . . . . . . . . . . . . . . . . . . . . . . . . . . . . . . 6-5
Checking Things Under the Hood. . . . . . . . . . . . . . . 6-10
Headlamp Aiming. . . . . . . . . . . . . . . . . . . . . . . . . . . . . . . . . . . . . 6-40
2010 Cadillac DTS Owner ManualM
Page 16 of 480

Mirror Adjustment
Exterior Mirrors
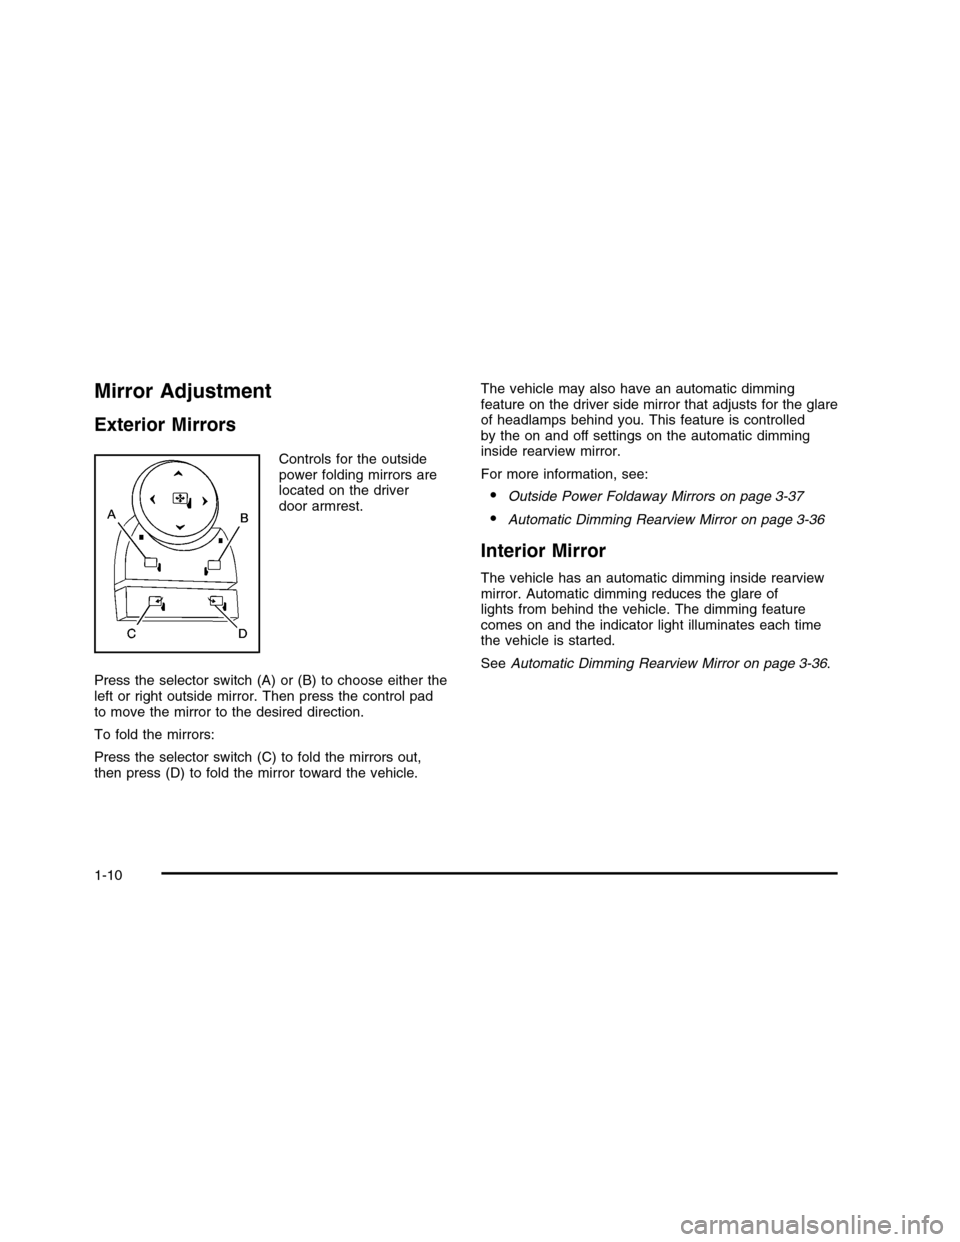
Controls for the outsidepower folding mirrors arelocated on the driverdoor armrest.
Press the selector switch (A) or (B) to choose either theleft or right outside mirror. Then press the control padto move the mirror to the desired direction.
To fold the mirrors:
Press the selector switch (C) to fold the mirrors out,then press (D) to fold the mirror toward the vehicle.
The vehicle may also have an automatic dimmingfeature on the driver side mirror that adjusts for the glareof headlamps behind you. This feature is controlledby the on and off settings on the automatic dimminginside rearview mirror.
For more information, see:
•Outside Power Foldaway Mirrors on page 3-37
•Automatic Dimming Rearview Mirror on page 3-36
Interior Mirror
The vehicle has an automatic dimming inside rearviewmirror. Automatic dimming reduces the glare oflights from behind the vehicle. The dimming featurecomes on and the indicator light illuminates each timethe vehicle is started.
SeeAutomatic Dimming Rearview Mirror on page 3-36.
1-10
Page 17 of 480

Steering Wheel Adjustment
This feature allows the position of the steering wheel tobe adjusted.
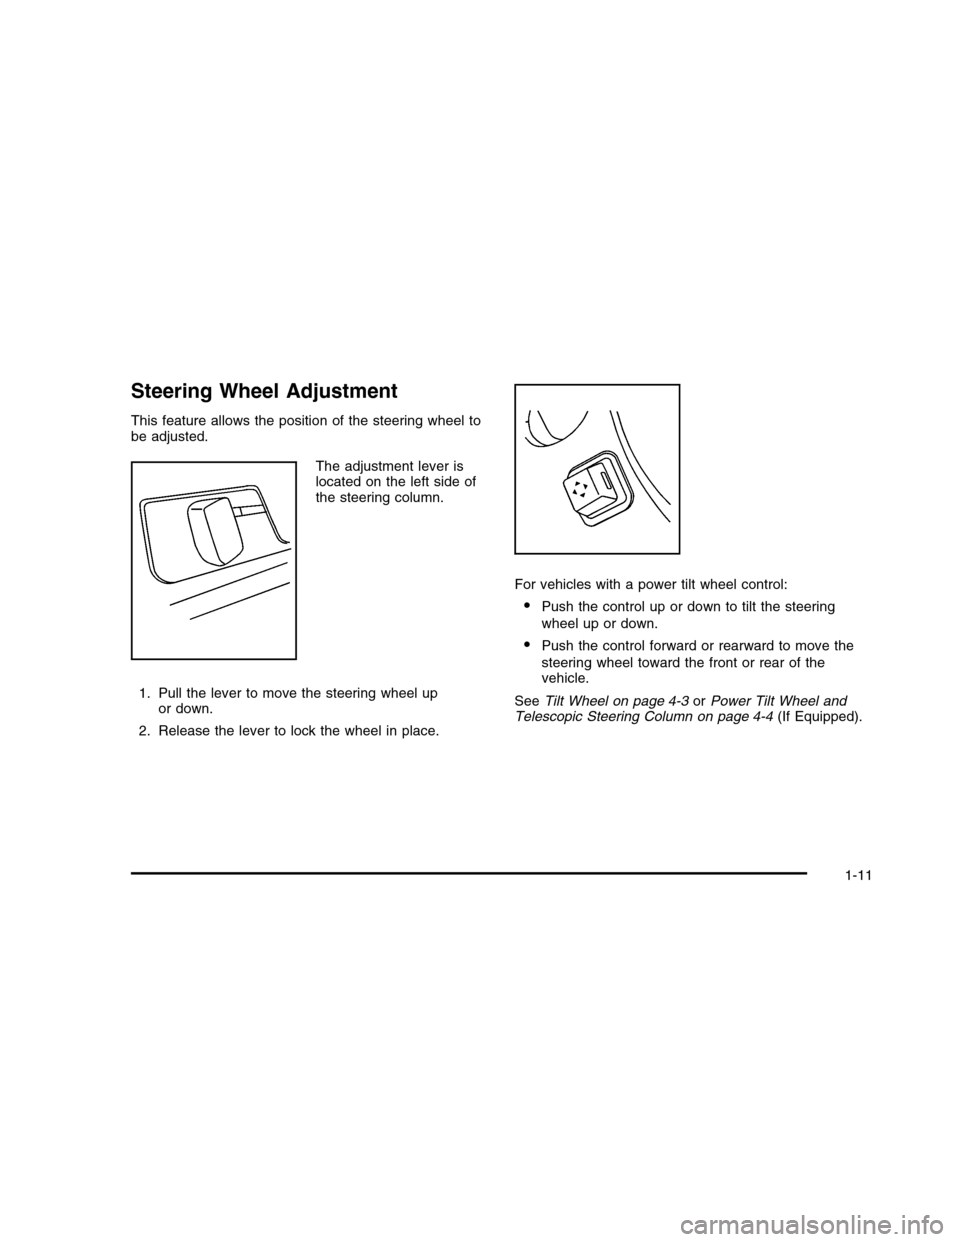
The adjustment lever islocated on the left side ofthe steering column.
1. Pull the lever to move the steering wheel upor down.
2. Release the lever to lock the wheel in place.
For vehicles with a power tilt wheel control:
•Push the control up or down to tilt the steering
wheel up or down.
•Push the control forward or rearward to move the
steering wheel toward the front or rear of thevehicle.
SeeTilt Wheel on page 4-3orPower Tilt Wheel andTelescopic Steering Column on page 4-4(If Equipped).
1-11
Page 40 of 480

Power Reclining Seatbacks
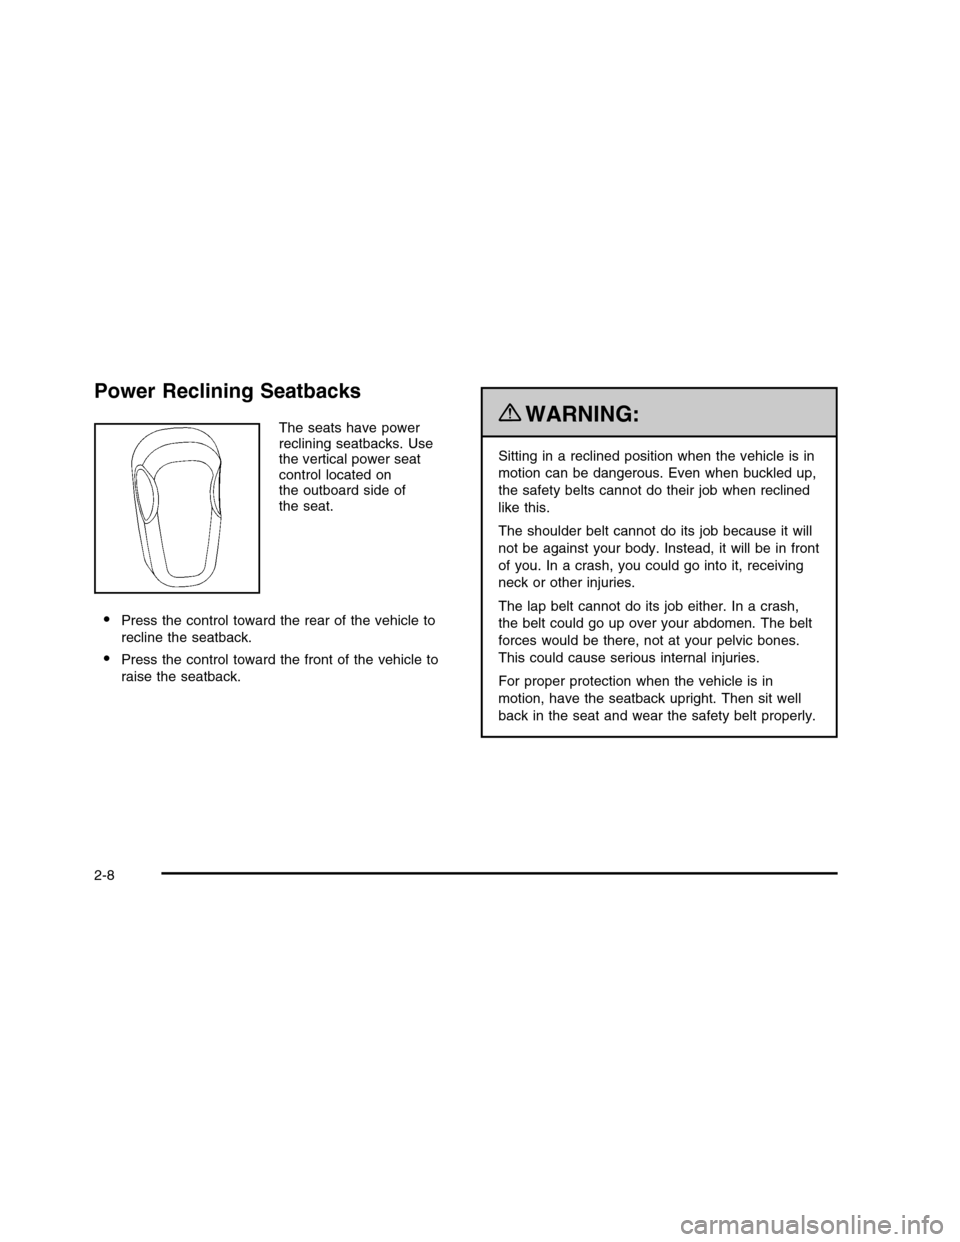
The seats have powerreclining seatbacks. Usethe vertical power seatcontrol located onthe outboard side ofthe seat.
•Press the control toward the rear of the vehicle to
recline the seatback.
•Press the control toward the front of the vehicle to
raise the seatback.
{WARNING:
Sitting in a reclined position when the vehicle is in
motion can be dangerous. Even when buckled up,
the safety belts cannot do their job when reclined
like this.
The shoulder belt cannot do its job because it will
not be against your body. Instead, it will be in front
of you. In a crash, you could go into it, receiving
neck or other injuries.
The lap belt cannot do its job either. In a crash,
the belt could go up over your abdomen. The belt
forces would be there, not at your pelvic bones.
This could cause serious internal injuries.
For proper protection when the vehicle is in
motion, have the seatback upright. Then sit well
back in the seat and wear the safety belt properly.
2-8
Page 48 of 480

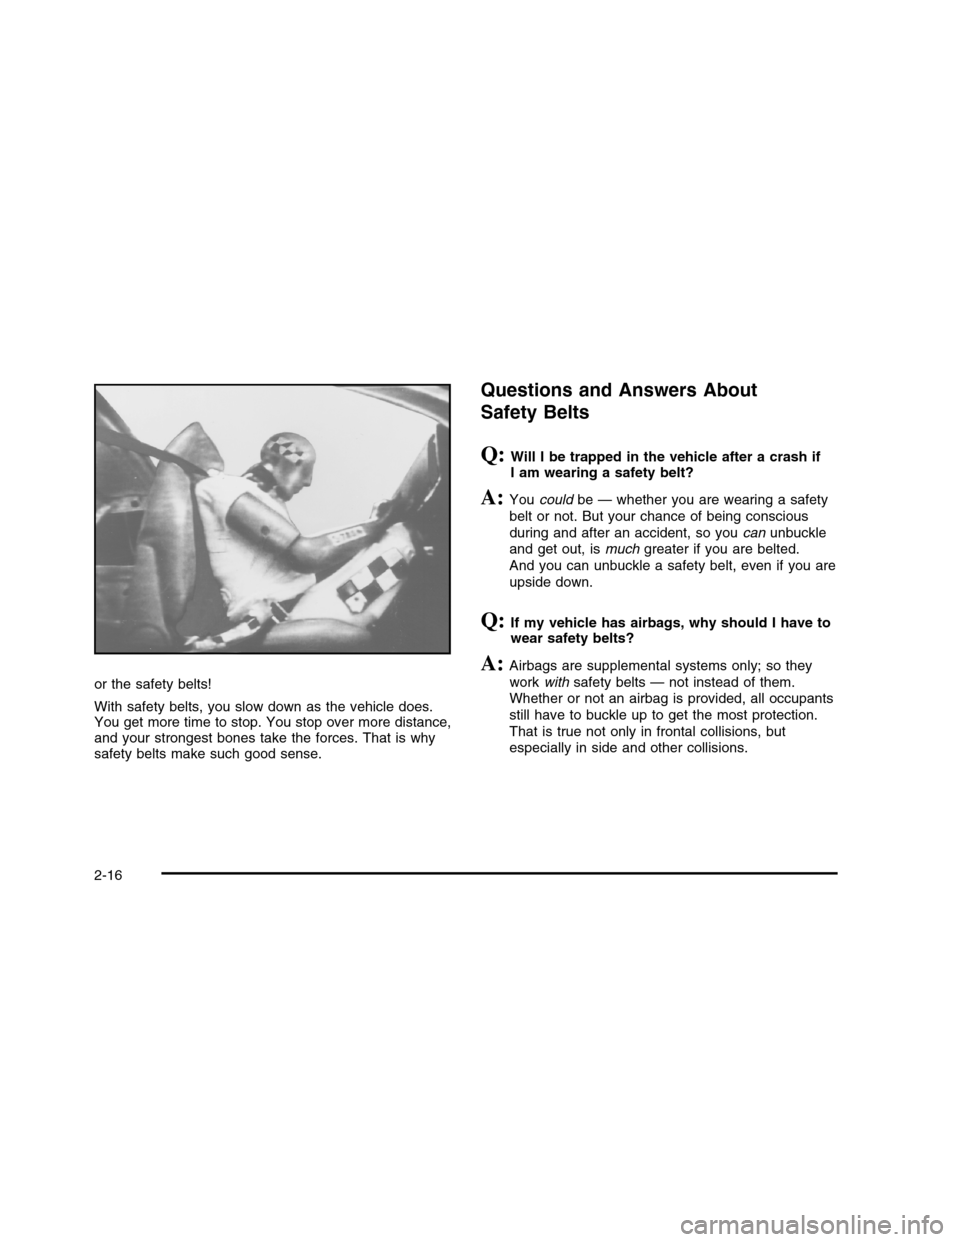
or the safety belts!
With safety belts, you slow down as the vehicle does.You get more time to stop. You stop over more distance,and your strongest bones take the forces. That is whysafety belts make such good sense.
Questions and Answers About
Safety Belts
Q:Will I be trapped in the vehicle after a crash ifI am wearing a safety belt?
A:Youcouldbe — whether you are wearing a safety
belt or not. But your chance of being conscious
during and after an accident, so youcanunbuckle
and get out, ismuchgreater if you are belted.
And you can unbuckle a safety belt, even if you are
upside down.
Q:If my vehicle has airbags, why should I have towear safety belts?
A:Airbags are supplemental systems only; so they
workwithsafety belts — not instead of them.
Whether or not an airbag is provided, all occupants
still have to buckle up to get the most protection.
That is true not only in frontal collisions, but
especially in side and other collisions.
2-16
Page 59 of 480

5. To make the lap part tight, pull up on theshoulder belt.
It may be necessary to pull stitching on the safetybelt through the latch plate to fully tighten thelap belt on smaller occupants.
To unlatch the belt, push the button on the buckle.The belt should return to its stowed position. Slide thelatch plate up the safety belt webbing when thesafety belt is not in use. The latch plate should rest onthe stitching near the guide loop on the side wall.
Before a door is closed, be sure the safety belt is out ofthe way. If a door is slammed against a safety belt,damage can occur to both the belt and the vehicle.
2-27
Page 81 of 480

{WARNING:
Do not attach more than one child restraint to a
single anchor. Attaching more than one child
restraint to a single anchor could cause the anchor
or attachment to come loose or even break during
a crash. A child or others could be injured. To
reduce the risk of serious or fatal injuries during a
crash, attach only one child restraint per anchor.
{WARNING:
Children can be seriously injured or strangled if a
shoulder belt is wrapped around their neck and
the safety belt continues to tighten. Buckle any
unused safety belts behind the child restraint so
children cannot reach them. Pull the shoulder belt
all the way out of the retractor to set the lock, if
your vehicle has one, after the child restraint has
been installed.
Notice:Do not let the LATCH attachments rubagainst the vehicle’s safety belts. This may damagethese parts. If necessary, move buckled safetybelts to avoid rubbing the LATCH attachments.
Do not fold the empty rear seat with a safety beltbuckled. This could damage the safety belt orthe seat. Unbuckle and return the safety belt to itsstowed position, before folding the seat.
1. Attach and tighten the lower attachments to thelower anchors. If the child restraint does not havelower attachments or the desired seating positiondoes not have lower anchors, secure the childrestraint with the top tether and the safety belts.Refer to your child restraint manufacturerinstructions and the instructions in this manual.
1.1. Find the lower anchors for the desiredseating position.
1.2. Put the child restraint on the seat.
1.3. Attach and tighten the lower attachments onthe child restraint to the lower anchors.
2-49
Page 85 of 480

5. To tighten the belt, push down on the child restraint,pull the shoulder portion of the belt to tighten thelap portion of the belt and feed the shoulderbelt back into the retractor. When installing aforward-facing child restraint, it may be helpful touse your knee to push down on the child restraint asyou tighten the belt.
6. If the child restraint has a top tether, follow the childrestraint manufacturer’s instructions regarding theuse of the top tether. SeeLower Anchors andTethers for Children (LATCH) on page 2-45for moreinformation.
7. Push and pull the child restraint in differentdirections to be sure it is secure.
To remove the child restraint, unbuckle the vehicle safetybelt and let it return to the stowed position. If the toptether is attached to a top tether anchor, disconnect it.
Securing a Child Restraint in the
Center Front Seat Position
{WARNING:
A child in a child restraint in the center front seat
can be badly injured or killed by the frontal airbags
if they inflate. Never secure a child restraint in the
center front seat. It is always better to secure a
child restraint in a rear seat.
Do not use child restraints in the center front seatposition.
2-53
Page 89 of 480

6. To tighten the belt, push down on the child restraint,pull the shoulder portion of the belt to tighten thelap portion of the belt and feed the shoulderbelt back into the retractor. When installing aforward-facing child restraint, it may be helpful touse your knee to push down on the child restraint asyou tighten the belt.
7. Push and pull the child restraint in differentdirections to be sure it is secure.
If the airbags are off, the off indicator in the passengerairbag status indicator will come on and stay onwhen the vehicle is started.
If a child restraint has been installed and the onindicator is lit, see “If the On Indicator is Lit for aChild Restraint ” underPassenger Sensing System onpage 2-67for more information.
To remove the child restraint, unbuckle the vehiclesafety belt and let it return to the stowed position.
2-57
Page 97 of 480

What Makes an Airbag Inflate?
In a deployment event, the sensing system sends anelectrical signal triggering a release of gas fromthe inflator. Gas from the inflator fills the airbag causingthe bag to break out of the cover and deploy. Theinflator, the airbag, and related hardware are all part ofthe airbag module.
Frontal airbag modules are located inside the steeringwheel and instrument panel. For vehicles withseat-mounted side impact airbags, there are airbagmodules in the side of the front seatbacks closest to thedoor. For vehicles with roof-rail airbags, there areairbag modules in the ceiling of the vehicle, near theside windows that have occupant seating positions.
How Does an Airbag Restrain?
In moderate to severe frontal or near frontal collisions,even belted occupants can contact the steering wheel orthe instrument panel. In moderate to severe sidecollisions, even belted occupants can contact the insideof the vehicle.
Airbags supplement the protection provided by safetybelts. Frontal airbags distribute the force of theimpact more evenly over the occupant’s upper body,stopping the occupant more gradually. Seat-mountedside impact and roof-rail airbags distribute the forceof the impact more evenly over the occupant’supper body.
But airbags would not help in many types of collisions,primarily because the occupant’s motion is nottoward those airbags. SeeWhen Should an AirbagInflate? on page 2-63for more information.
Airbags should never be regarded as anything morethan a supplement to safety belts.
2-65