tires CADILLAC DTS PROFESSIONAL 2007 1.G Owners Manual
[x] Cancel search | Manufacturer: CADILLAC, Model Year: 2007, Model line: DTS PROFESSIONAL, Model: CADILLAC DTS PROFESSIONAL 2007 1.GPages: 518, PDF Size: 2.77 MB
Page 2 of 518

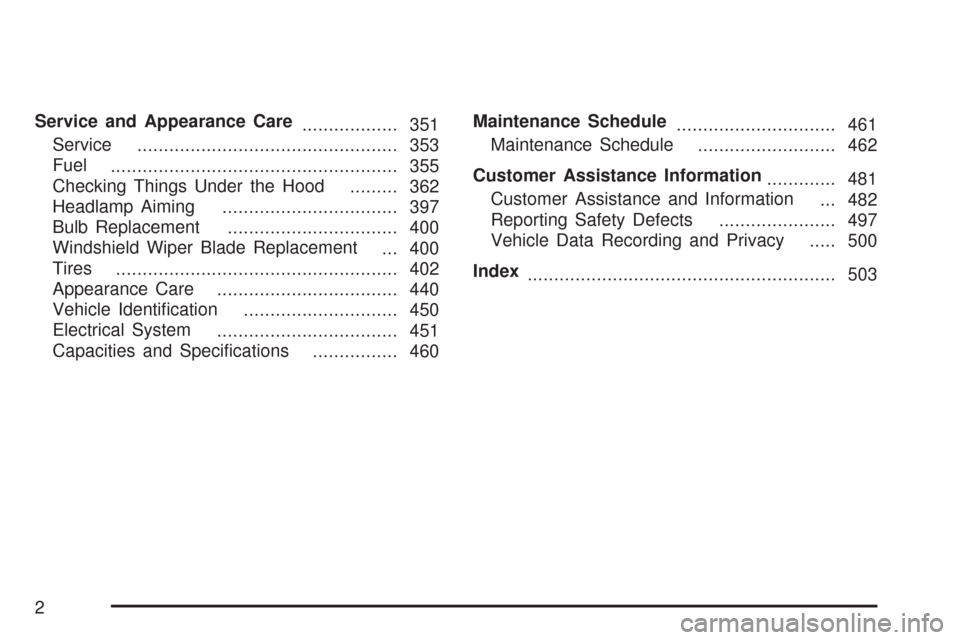
Service and Appearance Care
.................. 351
Service
................................................. 353
Fuel
...................................................... 355
Checking Things Under the Hood
......... 362
Headlamp Aiming
................................. 397
Bulb Replacement
................................ 400
Windshield Wiper Blade Replacement
... 400
Tires
..................................................... 402
Appearance Care
.................................. 440
Vehicle Identi�cation
............................. 450
Electrical System
.................................. 451
Capacities and Speci�cations
................ 460Maintenance Schedule
.............................. 461
Maintenance Schedule
.......................... 462
Customer Assistance Information
............. 481
Customer Assistance and Information
... 482
Reporting Safety Defects
...................... 497
Vehicle Data Recording and Privacy
..... 500
Index
.......................................................... 503
2
Page 125 of 518

FIRST (1):This position reduces vehicle speed
even more than SECOND (2) without using your
brakes. You can use it on very steep hills, or in
deep snow or mud. If the shift lever is put in
FIRST (1) while the vehicle is moving forward, the
transaxle will not shift into �rst gear until the vehicle
is going slowly enough.
Notice:Spinning the tires or holding the
vehicle in one place on a hill using only the
accelerator pedal may damage the transaxle. If
you are stuck, do not spin the tires. When
stopping on a hill, use the brakes, or parking
brake to hold the vehicle in place.
Performance Shifting
If your vehicle has this feature, it can detect a
change in driving patterns. If you make an
aggressive driving maneuver, the vehicle’s
transaxle automatically shifts to the lowest possible
gear to maximize vehicle performance. The
vehicle will automatically return to normal operation
when you return to normal driving patterns.
Parking Brake
The parking brake pedal
is located to the left of
the regular brake pedal,
near the driver’s door.
To set the parking brake, hold the regular brake
pedal down with your right foot and push the
parking brake pedal down with your left foot.
If the ignition is on, the brake system warning light
on the instrument panel cluster should come
on. If it does not, you need to have your vehicle
serviced.
125
Page 231 of 518

If the regular brake system warning light is also
on, you do not have anti-lock brakes and there is
a problem with your regular brakes. SeeBrake
System Warning Light on page 229.
The anti-lock brake system warning light should
come on brie�y when you turn the ignition key to
RUN. If the light does not come on then, have it
�xed so it will be ready to warn you if there is a
problem.
Low Tire Pressure Warning Light
This light will come on
brie�y when you turn
the ignition to RUN.This light will also come on when one or more of
your tires are signi�cantly underin�ated.
A CHECK TIRE PRESSURE DIC message will
accompany the light, seeDIC Warnings and
Messages on page 246
Stop and check your tires as soon as it is safe
to do so. If underin�ated, in�ate to the proper
pressure. SeeTires on page 402for more
information.
This light will �ash for approximately 60 seconds
and then turn on solid if a problem is detected with
the Tire Pressure Monitor system.
SeeTire Pressure Monitor System on page 414
for more information.
231
Page 234 of 518

Malfunction Indicator Lamp
Check Engine Light
Your vehicle has a
computer which
monitors operation
of the fuel, ignition,
and emission control
systems.
This system is called OBD II (On-Board
Diagnostics-Second Generation) and is intended to
assure that emissions are at acceptable levels for
the life of the vehicle, helping to produce a cleaner
environment. The check engine light comes on to
indicate that there is a problem and service is
required. Malfunctions often will be indicated by
the system before any problem is apparent. This
may prevent more serious damage to your vehicle.
This system is also designed to assist your service
technician in correctly diagnosing any malfunction.Notice:If you keep driving your vehicle with
this light on, after awhile, the emission controls
might not work as well, your vehicle’s fuel
economy might not be as good, and the engine
might not run as smoothly. This could lead
to costly repairs that might not be covered
by your warranty.
Notice:Modi�cations made to the engine,
transaxle, exhaust, intake, or fuel system of
your vehicle or the replacement of the original
tires with other than those of the same Tire
Performance Criteria (TPC) can affect your
vehicle’s emission controls and may cause
this light to come on. Modi�cations to these
systems could lead to costly repairs not
covered by your warranty. This may also
result in a failure to pass a required Emission
Inspection/Maintenance test. SeeAccessories
and Modifications on page 353.
234
Page 244 of 518

It cannot be reset accurately until the next oil
change. To reset the engine oil life system, See
Engine Oil Life System on page 368. The display
will show 100% when the system is reset.
UNITS
This display allows you to select between English
or Metric units of measurement. Once in this
display, press the set/reset button to select
between ENGLISH or METRIC units.
PARKING ASSIST
If your vehicle has the Ultrasonic Front and Rear
Parking Assist (UFRPA) system, this display
allows the system to be turned on or off. Once
in this display, press the set/reset button to select
between ON or OFF. If you choose ON, the
system will be turned on. If you choose OFF,
the system will be turned off. The UFRPA system
automatically turns back on after each vehicle
start. When the UFRPA system is turned off and
the vehicle is shifted out of PARK (P), the DIC
will display the PARKING ASSIST OFF message
as a reminder that the system has been turned
off. SeeDIC Warnings and Messages on page 246
andUltrasonic Front and Rear Parking Assist
(UFRPA) on page 202for more information.
FRONT TIRES or REAR TIRES
The pressure for each tire can be viewed in the
DIC. The tire pressure will be shown in either
pounds per square inch (psi) or kilopascals (kPa).
Press the vehicle information button until the
DIC displays FRONT TIRES PSI (kPa) LEFT ##
RIGHT ##. Press the vehicle information button
again until the DIC displays REAR TIRES
PSI (kPa) LEFT ## RIGHT ##.
If a low or high tire pressure condition is detected
by the system while driving, a message advising
you to check the pressure in a speci�c tire will
appear in the display. SeeIn�ation - Tire Pressure
on page 411andDIC Warnings and Messages on
page 246for more information.
If the tire pressure display shows dashes instead of
a value, there may be a problem with your vehicle.
If this consistently occurs, see your dealer for
service.
244
Page 245 of 518

RELEARN TIRE POSITIONS
After rotating the tires or after replacing a tire or
sensor, the Tire Pressure Monitor (TPM) system
must re-learn the tire positions. To re-learn the tire
positions, seeTire Pressure Monitor System on
page 414. SeeTire Inspection and Rotation on
page 418andDIC Warnings and Messages on
page 246for more information.
RELEARN REMOTE KEY
This display allows you to match Remote Keyless
Entry (RKE) transmitters to your vehicle. To match
an RKE transmitter to your vehicle, do the following:
1. Press the vehicle information button until
PRESS
VTO RELEARN REMOTE KEY
displays.
2. Press the set/reset button until REMOTE KEY
LEARNING ACTIVE is displayed.3. Press and hold the lock and unlock buttons
on the �rst transmitter at the same time for
about 15 seconds.
On vehicles with memory recall seats, the �rst
transmitter learned will match driver 1 and
the second will match driver 2.
A chime will sound indicating that the
transmitter is matched.
4. To match additional transmitters at this time,
repeat Step 3.
Each vehicle can have a maximum of
eight transmitters matched to it.
5. To exit the programming mode, you must
cycle the key to OFF.
Blank Display
This display shows no information.
245
Page 247 of 518

CHANGE ENGINE OIL SOON
This message displays when service is required
for your vehicle. See your dealer. SeeEngine
Oil on page 365andScheduled Maintenance on
page 465for more information.
When you reset the CHANGE ENGINE OIL
SOON message by clearing it from the display,
you still must reset the engine oil life system
separately. For more information on resetting
the engine oil life system, seeEngine Oil
Life System on page 368.
CHECK TIRE PRESSURE
This message displays when the tire pressure in
one of the tires needs to be checked. This message
also displays LEFT FRONT, RIGHT FRONT, LEFT
REAR, or RIGHT REAR to indicate which tire needs
to be checked. You can receive more than one tire
pressure message at a time. To read the other
messages that may have been sent at the same
time, press the set/reset button. If a tire pressuremessage appears on the DIC, stop as soon as you
can. Have the tire pressures checked and set to
those shown on the Tire Loading Information label.
SeeTires on page 402,Loading Your Vehicle on
page 333, andIn�ation - Tire Pressure on
page 411. The DIC display also shows the tire
pressure values for the front and rear tires by
pressing the vehicle information button. SeeDIC
Controls and Displays on page 240. If the tire
pressure is low, the low tire pressure warning light
comes on. SeeLow Tire Pressure Warning Light on
page 231.
CLEAN RADAR
This message displays when the Adaptive Cruise
Control (ACC) system and the Forward Collision
Alert (FCA) system are disabled because the radar
is blocked and cannot detect vehicles in your
path. It may also activate during heavy rain or due
to road spray. To clean the system, see “Cleaning
the System” underAdaptive Cruise Control on
page 179.
247
Page 257 of 518

STABILITRAK NOT READY
If your vehicle has StabiliTrak®, this message may
display and the Traction Control System and
StabiliTrak
®Warning Light on the instrument panel
cluster may be on after �rst driving the vehicle
and exceeding 19 mph (30 km/h) for 30 seconds.
The StabiliTrak
®system is not functional until
the light has turned off. SeeStabiliTrak®System
on page 311for more information.
STARTING DISABLED SERVICE
THROTTLE
This message displays when your vehicle’s throttle
system is not functioning properly. Have your
vehicle serviced by your dealer.
THEFT ATTEMPTED
This symbol appears
with this message.This message displays if the content theft-deterrent
system has detected a break-in attempt while
you were away from your vehicle. SeeContent
Theft-Deterrent on page 113for more information.
TIGHTEN GAS CAP
This message displays when the fuel cap has not
been fully tightened. Recheck the fuel cap to
ensure that it is on and tightened properly.
TIRE LEARNING ACTIVE
This message displays when the Tire Pressure
Monitor (TPM) system is re-learning the tire
positions on your vehicle. SeeTire Pressure
Monitor System on page 414. The tire positions
must be re-learned after rotating the tires or
after replacing a tire or sensor. SeeTire Inspection
and Rotation on page 418andIn�ation - Tire
Pressure on page 411for more information.
TRACTION CONTROL OFF
This message displays when the Traction Control
System (TCS) is turned off. Adjust your driving
accordingly. SeeTraction Control System
(TCS) on page 309for more information.
257
Page 306 of 518

Control of a Vehicle
The following three systems help to control your
vehicle while driving — brakes, steering, and
accelerator. At times, as when driving on snow or
ice, it is easy to ask more of those control
systems than the tires and road can provide.
Meaning, you can lose control of your vehicle. See
Traction Control System (TCS) on page 309.
Adding non-dealer/non-retailer accessories can
affect your vehicle’s performance. SeeAccessories
and Modi�cations on page 353.
Braking
SeeBrake System Warning Light on page 229.
Braking action involves perception time and
reaction time.First, you have to decide to push on the brake
pedal. That is perception time. Then you have to
bring up your foot and do it. That is reaction time.
Average reaction time is about three-fourths of a
second. But that is only an average. It might
be less with one driver and as long as two or
three seconds or more with another. Age, physical
condition, alertness, coordination, and eyesight
all play a part. So do alcohol, drugs, and
frustration. But even in three-fourths of a second,
a vehicle moving at 60 mph (100 km/h) travels
66 feet (20 m). That could be a lot of distance in an
emergency, so keeping enough space between
your vehicle and others is important.
And, of course, actual stopping distances vary
greatly with the surface of the road, whether it is
pavement or gravel; the condition of the road,
whether it is wet, dry, or icy; tire tread; the
condition of the brakes; the weight of the vehicle;
and the amount of brake force applied.
306
Page 312 of 518

Panic Brake Assist
Your vehicle may have a panic brake assist
system that monitors the intention of the driver
while braking. If the system senses that the driver
has applied hard/fast pressure to the brake
pedal, the system will generate additional
pressure, making it easier for the driver to maintain
brake application. When this happens the brake
pedal will feel easier to push. Just hold the
brake pedal down �rmly and let the system work
for you. You may feel the brakes vibrate, or
you may notice some noise but this is normal. The
brakes will return to normal operation after the
brake pedal has been released.
Steering
Power Steering
If you lose power steering assist because the
engine stops or the system is not functioning, you
can steer but it will take much more effort.
Magnetic Speed Variable Assist
Steering System
This system continuously adjusts the effort you
feel when steering at all vehicle speeds. It provides
ease when parking, yet a �rm, solid feel at
highway speeds.
Steering Tips
It is important to take curves at a reasonable speed.
A lot of the “driver lost control” accidents mentioned
on the news happen on curves. Here is why:
Experienced driver or beginner, each of us is
subject to the same laws of physics when driving on
curves. The traction of the tires against the road
surface makes it possible for the vehicle to change
its path when you turn the front wheels. If there is
no traction, inertia will keep the vehicle going in the
same direction. If you have ever tried to steer a
vehicle on wet ice, you will understand this.
The traction you can get in a curve depends on
the condition of the tires and the road surface, the
angle at which the curve is banked, and your
speed. While you are in a curve, speed is the
one factor you can control.
312