reset CADILLAC ELDORADO 2000 10.G Owners Manual
[x] Cancel search | Manufacturer: CADILLAC, Model Year: 2000, Model line: ELDORADO, Model: CADILLAC ELDORADO 2000 10.GPages: 323, PDF Size: 2.48 MB
Page 25 of 323
1-13
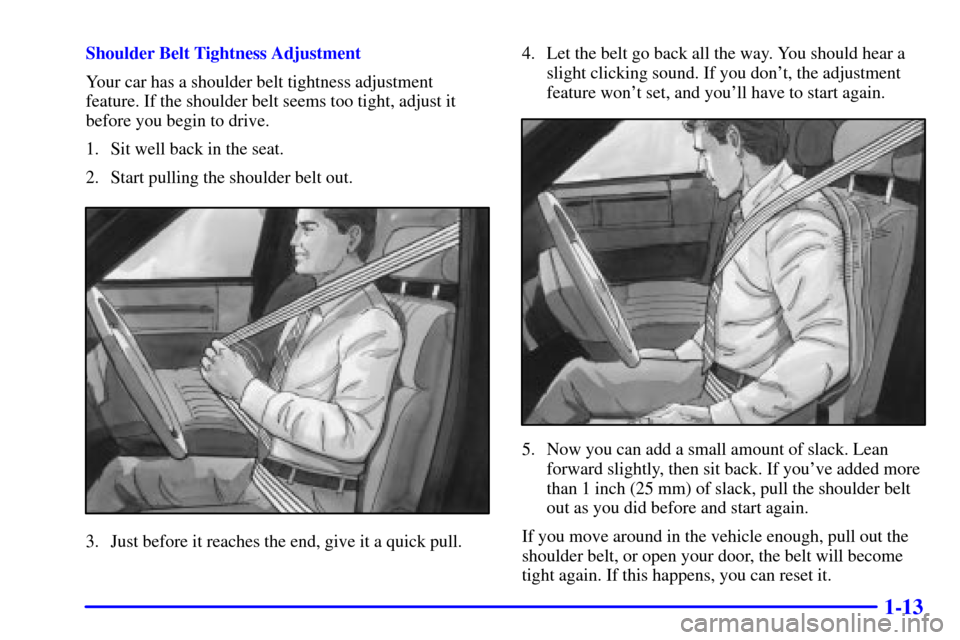
Shoulder Belt Tightness Adjustment
Your car has a shoulder belt tightness adjustment
feature. If the shoulder belt seems too tight, adjust it
before you begin to drive.
1. Sit well back in the seat.
2. Start pulling the shoulder belt out.
3. Just before it reaches the end, give it a quick pull.4. Let the belt go back all the way. You should hear a
slight clicking sound. If you don't, the adjustment
feature won't set, and you'll have to start again.
5. Now you can add a small amount of slack. Lean
forward slightly, then sit back. If you've added more
than 1 inch (25 mm) of slack, pull the shoulder belt
out as you did before and start again.
If you move around in the vehicle enough, pull out the
shoulder belt, or open your door, the belt will become
tight again. If this happens, you can reset it.
Page 70 of 323

2-11
A. Trunk Lid
B. Lever
If for some reason the trunk lid (A) will not close, it may
be because the trunk pull
-down unit was accidentally
bumped. Even though the trunk lid remains open, the
motor from the pull
-down unit has already cycled down.
If this happens, press the lever (B) on the trunk lid. The
pull
-down unit motor will reset itself, allowing the trunk
lid to close when lowered.
Theft
Vehicle theft is big business, especially in some cities.
Although your vehicle has a number of theft
-deterrent
features, we know that nothing we put on it can make
it impossible to steal. However, there are ways you
can help.
Key in the Ignition
If you leave your vehicle with the keys inside, it's an
easy target for joy riders or professional thieves
-- so
don't do it.
When you park your vehicle and open the driver's door,
you'll hear a chime reminding you to remove your key
from the ignition and take it with you. Always do this.
Your steering wheel will be locked, and so will your
ignition and transaxle. And remember to lock the doors.
Parking at Night
Park in a lighted spot, close all windows and lock your
vehicle. Remember to keep your valuables out of sight.
Put them in a storage area, or take them with you.
Page 92 of 323
2-33
The Rainsense system can be activated by turning the
wiper stalk to one of the five sensitivity levels within the
AUTO DELAY area. The AUTO DELAY position
closest to OFF is the lowest sensitivity setting. This
allows more water to collect on the windshield between
wipes. Turning the stalk away from you to the other
AUTO DELAY settings increases the sensitivity of the
system and frequency of wipes. A single wipe will
occur each time you turn the wiper stalk to a higher
sensitivity level. An initial wipe occurs when you turn
the ignition on as a reminder that Rainsense is active.
The windshield wipers also remain in a ªhigh parkº
position (when the wipers are stopped on the windshield
and are not in the normal park position), even when the
ignition is turned off.
The Rainsense wipers operate in a delay mode as well
as a continuous low or high speed depending on the
amount of moisture and the sensitivity level. The MIST
and ªwashº cycles operate as normal and are not
affected by the Rainsense function.
NOTICE:
The wipers must be turned off when going
through a car wash to avoid damage.
It is important to note that the Rainsense wiping feature
(AUTO DELAY) can be overridden at any time by
manually changing the wiper control to LO or HI speed.
If you ever need to replace the windshield, make sure it
is Rainsense compatible.
Windshield Washer
CAUTION:
In freezing weather, don't use your washer until
the windshield is warmed. Otherwise the washer
fluid can form ice on the windshield, blocking
your vision.
At the top of the turn signal/multifunction lever there is
a paddle with the word PUSH on it. To spray washer
fluid on the windshield, press and release this paddle.
The wipers will clear the windshield and either stop or
return to your preset speed. For more washer cycles,
press and hold the paddle.
LOW WASHER FLUID will be displayed on the Driver
Information Center (DIC) when the washer fluid reaches
a low level.
Page 94 of 323
2-35
Setting Cruise Control
CAUTION:
If you leave your cruise control switch on when
you're not using cruise, you might hit a button
and go into cruise when you don't want to. You
could be startled and even lose control. Keep the
cruise control switch off until you want to use
cruise control.
1. Move the cruise control switch to ON.
2. Accelerate to the speed you want.
3. Press the SET CRUISE button at the end of the lever
and release it. The CRUISE ENGAGED message
will display on the Driver Information Center (DIC).
4. Remove your foot from the accelerator pedal.Resuming a Set Speed
Setting the cruise control at a desired speed and then
applying the brake will end the cruise function.
Once you're going about 25 mph (40 km/h) or more,
you can move the cruise control switch from ON to R/A
(Resume/Accelerate) for about half a second to reset.
This returns you to your desired preset speed. The
Driver Information Center (DIC) will display the
CRUISE ENGAGED message again.
If you hold the switch at R/A longer than half a second,
the vehicle will accelerate until you release the switch or
apply the brake. So unless you want to go faster, don't
hold the switch at R/A.
Page 116 of 323
2-57 Speedometer and Odometer
The speedometer lets you see your speed in both miles
per hour (mph) and kilometers per hour (km/h). The
odometer shows how far your vehicle has been driven,
in either miles (used in the United States) or kilometers
(used in Canada).
You may wonder what happens if a vehicle has to have a
new odometer installed. The new one may read the
correct mileage. This is because your vehicle's computer
has stored the mileage in memory.
Trip Odometer
By pressing this button,
you can tell how far you've
traveled since you last
set the trip odometer back
to zero.
For information on resetting this button, see ªDIC
Controls and Displaysº in the Index.
English/Metric Display
Press the INFO (SKIP) button until ENGLISH/METRIC
RESET displays and then press INFO RESET (NO)
to select.Other readings such as temperature, fuel and trip odometer
also go back and forth between English and metric.
Vehicle Speed Limiter
This feature prevents your vehicle from exceeding
speeds that the tires are not rated for. When this
happens, the engine's fuel supply is shut off. When the
vehicle speed slows, the fuel supply will come on again.
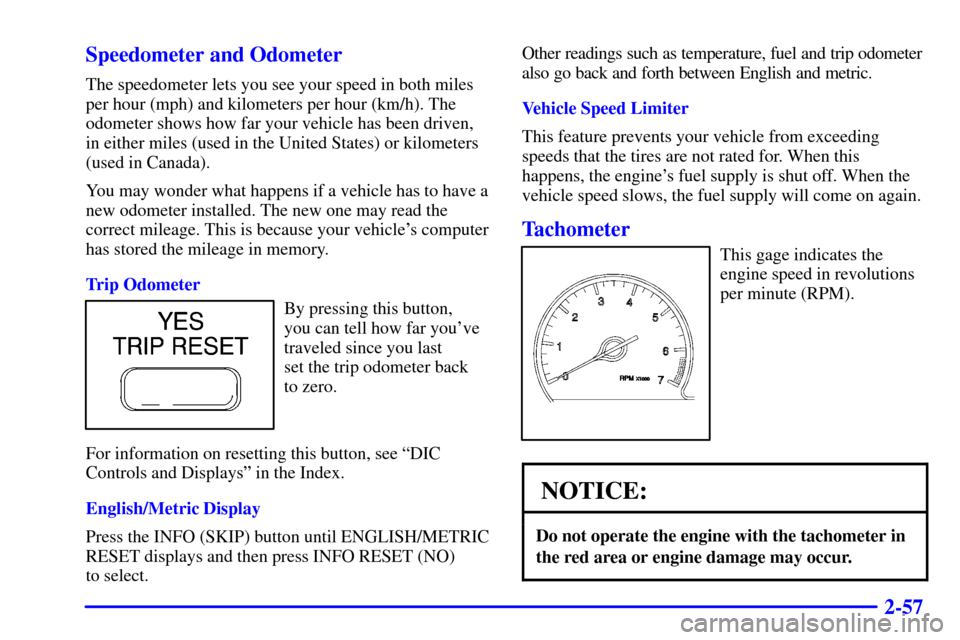
Tachometer
This gage indicates the
engine speed in revolutions
per minute (RPM).
NOTICE:
Do not operate the engine with the tachometer in
the red area or engine damage may occur.
Page 120 of 323
2-61
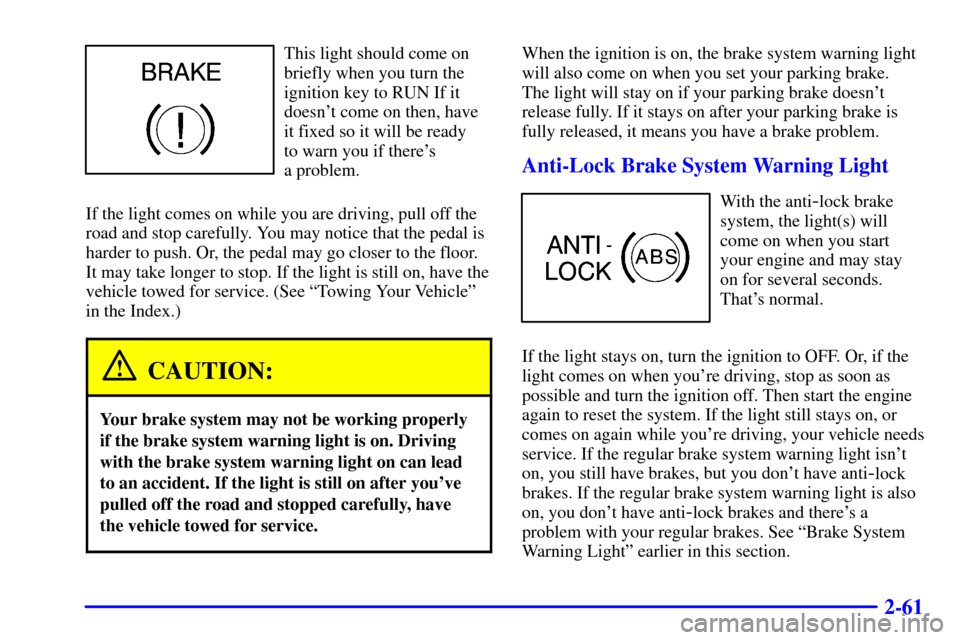
This light should come on
briefly when you turn the
ignition key to RUN If it
doesn't come on then, have
it fixed so it will be ready
to warn you if there's
a problem.
If the light comes on while you are driving, pull off the
road and stop carefully. You may notice that the pedal is
harder to push. Or, the pedal may go closer to the floor.
It may take longer to stop. If the light is still on, have the
vehicle towed for service. (See ªTowing Your Vehicleº
in the Index.)
CAUTION:
Your brake system may not be working properly
if the brake system warning light is on. Driving
with the brake system warning light on can lead
to an accident. If the light is still on after you've
pulled off the road and stopped carefully, have
the vehicle towed for service.
When the ignition is on, the brake system warning light
will also come on when you set your parking brake.
The light will stay on if your parking brake doesn't
release fully. If it stays on after your parking brake is
fully released, it means you have a brake problem.
Anti-Lock Brake System Warning Light
With the anti-lock brake
system, the light(s) will
come on when you start
your engine and may stay
on for several seconds.
That's normal.
If the light stays on, turn the ignition to OFF. Or, if the
light comes on when you're driving, stop as soon as
possible and turn the ignition off. Then start the engine
again to reset the system. If the light still stays on, or
comes on again while you're driving, your vehicle needs
service. If the regular brake system warning light isn't
on, you still have brakes, but you don't have anti
-lock
brakes. If the regular brake system warning light is also
on, you don't have anti
-lock brakes and there's a
problem with your regular brakes. See ªBrake System
Warning Lightº earlier in this section.
Page 127 of 323
2-68 Fuel Data Display
Everything you need to know about the fuel economy
and how far you can travel with your vehicle's
remaining fuel is displayed. Fuel data can be obtained
by pressing the INFO (SKIP) button. See ªDIC Controls
and Displaysº later in this section.
Driver Information Center (DIC)
This display gives you the status of many of your
vehicle's systems. The DIC is also used to display driver
personalization features and warning/status messages.
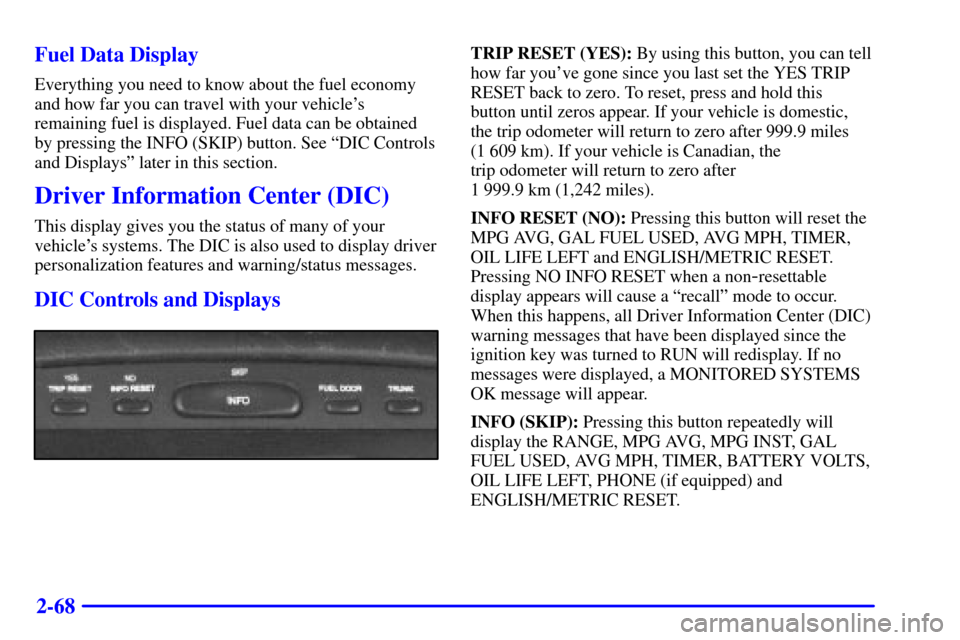
DIC Controls and Displays
TRIP RESET (YES): By using this button, you can tell
how far you've gone since you last set the YES TRIP
RESET back to zero. To reset, press and hold this
button until zeros appear. If your vehicle is domestic,
the trip odometer will return to zero after 999.9 miles
(1 609 km). If your vehicle is Canadian, the
trip odometer will return to zero after
1 999.9 km (1,242 miles).
INFO RESET (NO): Pressing this button will reset the
MPG AVG, GAL FUEL USED, AVG MPH, TIMER,
OIL LIFE LEFT and ENGLISH/METRIC RESET.
Pressing NO INFO RESET when a non
-resettable
display appears will cause a ªrecallº mode to occur.
When this happens, all Driver Information Center (DIC)
warning messages that have been displayed since the
ignition key was turned to RUN will redisplay. If no
messages were displayed, a MONITORED SYSTEMS
OK message will appear.
INFO (SKIP): Pressing this button repeatedly will
display the RANGE, MPG AVG, MPG INST, GAL
FUEL USED, AVG MPH, TIMER, BATTERY VOLTS,
OIL LIFE LEFT, PHONE (if equipped) and
ENGLISH/METRIC RESET.
Page 128 of 323

2-69
FUEL DOOR: Press this button to open the fuel door.
(This feature will work only when the shift lever is in
PARK (P) regardless of whether or not the vehicle
is running.)
TRUNK: Press this button to open the trunk.
(This feature will work only when the shift lever is in
PARK (P) regardless of whether or not the vehicle
is running.)
MPG AVG (Reset): Press the INFO (SKIP) button to
display the MPG AVG (Average Fuel Economy), then
press and hold the NO INFO RESET button until
0.0 MPG AVG is displayed.
GAL FUEL USED (Reset): Press the INFO (SKIP)
button to display the GAL FUEL USED on the Driver
Information Center (DIC), then press and hold the
INFO RESET (NO) button until 0.0 GAL FUEL
USED is displayed.
AVG MPH (Reset): Press the INFO (SKIP) button to
display the AVG MPH (Average Speed), then press and
hold the INFO RESET (NO) button until 0.0 AVG MPH
is displayed.TIMER: This feature is like a stopwatch, in that you can
clock the time it takes to get from one point to another.
To operate, press the INFO (SKIP) button to display
TIMER. Each of the fields for the hours, minutes and
seconds are two numeric digits.
Once TIMER OFF 00:00:00 is displayed, press the INFO
RESET (NO) button to start the timing feature. Press the
INFO RESET (NO) button again to stop it. If you will be
starting and stopping your vehicle
-- during a trip for
instance
-- the TIMER feature will automatically start
timing where it left off when you last stopped. To reset it,
press and hold the INFO RESET (NO) button until the
display reads TIMER 00:00:00. Press the INFO (SKIP)
button to exit from the TIMER function.
OIL LIFE LEFT (Reset): Press the INFO (SKIP)
button to display the OIL LIFE LEFT, then press and
hold the INFO RESET (NO) button until 100% OIL
LIFE LEFT is displayed. (This only needs to be reset
after you have had the oil changed.)
ENGLISH/METRIC (Reset): Press the INFO (SKIP)
button to display ENGLISH/METRIC RESET, then press
the INFO RESET (NO) button to select. The display will
change from English (miles) to metric (kilometers).
Page 129 of 323

2-70 DIC Messages
These messages will appear if there is a problem sensed
in one of your vehicle's systems. Vehicles that are first
sold in Canada will have a number after each message.
This number helps to identify the message which is only
displayed in English.
Pressing the INFO or INFO RESET button (s) will
remove most of the following messages from the
DIC display:
APPLY BRAKE TO SHIFT
- 46: This message
will appear if your vehicle is in PARK (P) for about
15 seconds and the brake is not pressed. On the climate
control panel, press the OFF button (next to the MODE
button) and the down arrow on the PASS TEMP button
for about five seconds. Hold the same two buttons to
display the message again.
BATTERY NOT CHARGING
- 7: This message will
appear if the battery is not being charged. Have the
electrical system checked by your dealership at your
earliest convenience.BATTERY VOLTAGE HIGH
- 8: This message
shows that the electrical charging system is
overcharging (more than 16 volts). To avoid being
stranded, have the electrical system checked by your
dealership. You can reduce the charging overload by
using the accessories. Turn on the lamps and radio, set
the climate control on AUTO and the fan speed on HI,
and turn the rear window defogger on. You can monitor
battery voltage on the DIC by pressing the INFO (SKIP)
button. The normal range is 11.5 to 15.5 volts when the
engine is running.
BATTERY VOLTAGE LOW
- 6: This message will
appear when the electrical system is charging less than
10 volts or if the battery has been drained. If this
message appears immediately after starting, it is possible
that the generator can still recharge the battery. The
battery should recharge and may take a few hours to do
so. Consider using an auxiliary charger to boost the
battery after returning home or to a final destination.
(Be sure to follow the manufacturer's instructions when
using a battery charger.)
Page 130 of 323

2-71
If this message appears and stays on while driving or
after starting your vehicle, have it checked immediately
to determine the cause of this problem. To help the
generator recharge the battery quickly, you can reduce
the load on the electrical system by turning off the
accessories. You can monitor battery voltage on the DIC
by pressing the INFO (SKIP) button. The normal range
is 11.5 to 15.5 volts.
BRAKE VACUUM PROBLEM
-108: The circuit in
the brake booster vacuum has shorted or is loose when
this message appears. Your vehicle may lose power
brakes but you will still have the use of manual brakes.
The power brakes will not be affected if the problem is
caused by a failed sensor. Have your vehicle serviced
immediately at your dealership.
CHANGE ENGINE OIL
- 82: This means that the life
of the engine oil has expired and it should be changed
within 200 miles (322 km). See ªEngine Oilº and ªFilter
Recommendationsº in the Maintenance Schedule
booklet. After an oil change, the Oil Life Indicator must
be reset. See ªOil Life Indicator, How to Resetº in
the Index.CHANGE TRANS FLUID
- 47: This message will
appear when it is time to replace the transaxle fluid.
See the Maintenance Schedule booklet for the proper
fluid and change intervals.
CHECK BRAKE FLUID LEVEL
- 37: This message
will display if the ignition is in RUN to inform the
driver that the brake fluid level is low. Have the brake
system serviced by a technician as soon as possible.
See ªBrake System Warning Lightº in the Index.
CHECK COOLANT LEVEL
- 2: This message will
appear when there is a low level of engine coolant.
Have the cooling system serviced by a technician as
soon as possible.
CHECK FUEL GAUGE
- 39: This message will
appear when the fuel supply is less than 3.5 gallons
(13.2 L) remaining and the display is turned off (digital
clusters only). A single chime will also sound when this
message is displayed.
CHECK GAS CAP
- 61: This message will appear if
the gas cap has not been fully tightened. You should
recheck your gas cap to ensure that it's fully tightened.