lock CADILLAC ELDORADO 2001 10.G Owners Manual
[x] Cancel search | Manufacturer: CADILLAC, Model Year: 2001, Model line: ELDORADO, Model: CADILLAC ELDORADO 2001 10.GPages: 335, PDF Size: 2.72 MB
Page 4 of 335
ii
Table of Contents
Windows
Keys and Door Locks
Remote Keyless Entry System
Trunk Release
Automatic Transaxle
Parking Brake
Tilt Wheel
Turn Signal/Multifunction Lever
Windshield Wipers
Cruise Control
Exterior and Interior LampsMirrors
Storage Compartments
Convenience Net
Accessory Power Outlets
OnStar® System (If Equipped)
Sunroof (Option)
HomeLink® Transmitter (Option)
Instrument Panel, Warning Lights and Gages
Driver Information Center
Memory and Personalization Features (If Equipped) Seats and Seat Controls
Safety BeltsAir Bag Systems
Restraint Systems for Children
Section
1
Section
2
Seats and Restraint Systems
Features and Controls
Page 5 of 335
Section
3
Comfort Controls and Audio Systems
Section
4
Your Driving and the Road
Section
5
Table of Contents (cont'd)
Defensive Driving
Drunken Driving
Control of a Vehicle
BrakingSteering
Driving Tips for Various Road Conditions
Loading Your Vehicle
Towing a Trailer Heating and Air Conditioning
Setting the Radio Clock
Radio/Cassette Player/CD Player (If Equipped)Radio Theft-Deterrent Feature
Steering Wheel Controls
Hazard Warning Flashers
Jump Starting
Towing Your VehicleEngine Overheating
Changing a Flat Tire
If You're Stuck
Problems on the Road
iii
Page 11 of 335

ix
For example,
these symbols
are used on an
original battery:
CAUTION
POSSIBLE
INJURY
PROTECT
EYES BY
SHIELDING
CAUSTIC
BATTERY
ACID COULD
CAUSE
BURNS
AVOID
SPARKS OR
FLAMES
SPARK OR
FLAME
COULD
EXPLODE
BATTERY
These symbols
are important for
you and your
passengers
whenever your
vehicle is driven:
CHILD
RESTRAINT
TOP STRAP
ANCHOR
DOOR LOCK
UNLOCK
FASTEN
SEAT
BELTS
POWER
WINDOW
AIR BAG
These symbols
have to do with
your lamps:
MASTER
LIGHTING
SWITCH
TURN
SIGNALS
PARKING
LAMPS
HAZARD
WARNING
FLASHER
DAYTIME
RUNNING
LAMPS
FOG LAMPS
These symbols
are on some of
your controls:
WINDSHIELD
WIPER
WINDSHIELD
WASHER
WINDSHIELD
DEFROSTER
REAR
WINDOW
DEFOGGER
VENTILATING
FAN
These symbols
are used on
warning and
indicator lights:
ENGINE
COOLANT
TEMP
BATTERY
CHARGING
SYSTEM
BRAKE
COOLANT
ENGINE OIL
PRESSURE
ANTI-LOCK
BRAKES
Here are some
other symbols
you may see:
FUSE
LIGHTER
HORN
FUEL
Vehicle Symbols
These are some of the symbols you may find on your vehicle. Also see ªWarning Lights and Gagesº in the Index.
Page 15 of 335
1-3 Power Lumbar Control (Option)
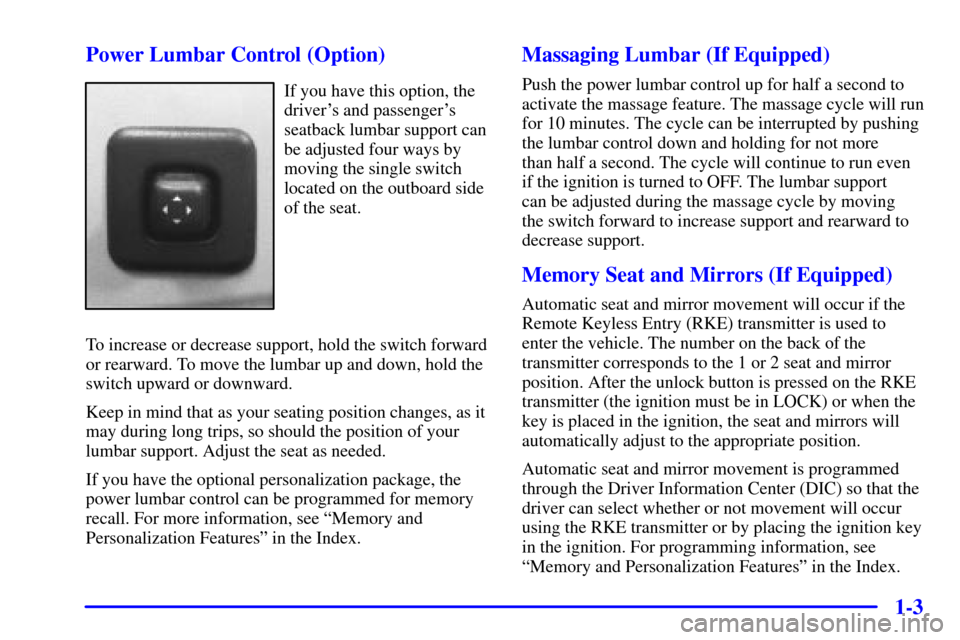
If you have this option, the
driver's and passenger's
seatback lumbar support can
be adjusted four ways by
moving the single switch
located on the outboard side
of the seat.
To increase or decrease support, hold the switch forward
or rearward. To move the lumbar up and down, hold the
switch upward or downward.
Keep in mind that as your seating position changes, as it
may during long trips, so should the position of your
lumbar support. Adjust the seat as needed.
If you have the optional personalization package, the
power lumbar control can be programmed for memory
recall. For more information, see ªMemory and
Personalization Featuresº in the Index.
Massaging Lumbar (If Equipped)
Push the power lumbar control up for half a second to
activate the massage feature. The massage cycle will run
for 10 minutes. The cycle can be interrupted by pushing
the lumbar control down and holding for not more
than half a second. The cycle will continue to run even
if the ignition is turned to OFF. The lumbar support
can be adjusted during the massage cycle by moving
the switch forward to increase support and rearward to
decrease support.
Memory Seat and Mirrors (If Equipped)
Automatic seat and mirror movement will occur if the
Remote Keyless Entry (RKE) transmitter is used to
enter the vehicle. The number on the back of the
transmitter corresponds to the 1 or 2 seat and mirror
position. After the unlock button is pressed on the RKE
transmitter (the ignition must be in LOCK) or when the
key is placed in the ignition, the seat and mirrors will
automatically adjust to the appropriate position.
Automatic seat and mirror movement is programmed
through the Driver Information Center (DIC) so that the
driver can select whether or not movement will occur
using the RKE transmitter or by placing the ignition key
in the ignition. For programming information, see
ªMemory and Personalization Featuresº in the Index.
Page 18 of 335
1-6 Head Restraints
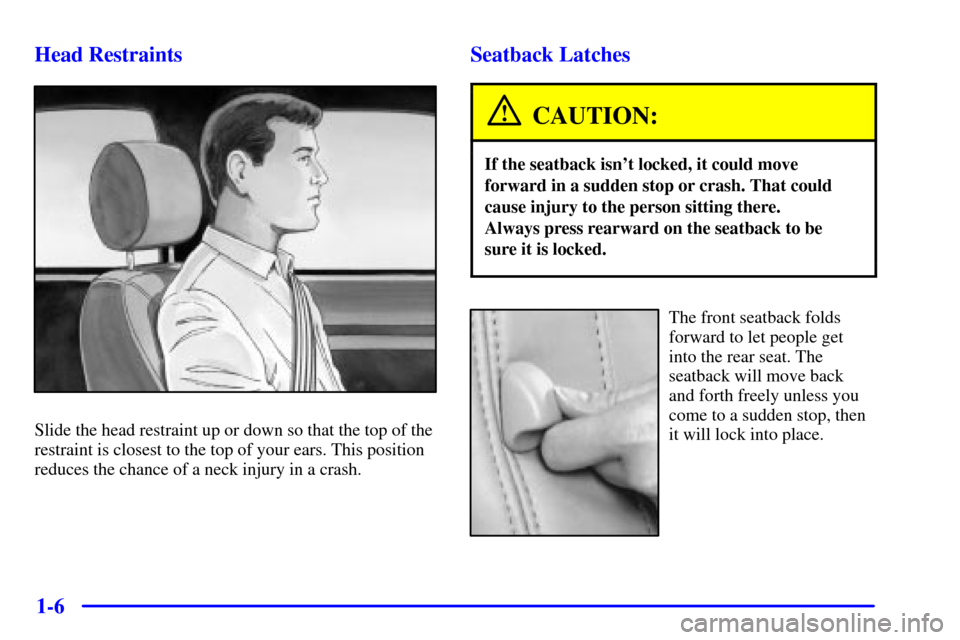
Slide the head restraint up or down so that the top of the
restraint is closest to the top of your ears. This position
reduces the chance of a neck injury in a crash.
Seatback Latches
CAUTION:
If the seatback isn't locked, it could move
forward in a sudden stop or crash. That could
cause injury to the person sitting there.
Always press rearward on the seatback to be
sure it is locked.
The front seatback folds
forward to let people get
into the rear seat. The
seatback will move back
and forth freely unless you
come to a sudden stop, then
it will lock into place.
Page 24 of 335
1-12
Q:If I'm a good driver, and I never drive far from
home, why should I wear safety belts?
A:You may be an excellent driver, but if you're in an
accident
-- even one that isn't your fault -- you
and your passengers can be hurt. Being a good
driver doesn't protect you from things beyond
your control, such as bad drivers.
Most accidents occur within 25 miles (40 km) of
home. And the greatest number of serious
injuries and deaths occur at speeds of less
than 40 mph (65 km/h).
Safety belts are for everyone.
How to Wear Safety Belts Properly
Adults
This part is only for people of adult size.
Be aware that there are special things to know about
safety belts and children. And there are different
rules for smaller children and babies. If a child will
be riding in your vehicle, see the part of this manual
called ªChildren.º Follow those rules for
everyone's protection.
First, you'll want to know which restraint systems
your vehicle has.
We'll start with the driver position.
Driver Position
This part describes the driver's restraint system.
Lap-Shoulder Belt
The driver has a lap-shoulder belt. Here's how to wear
it properly.
1. Close and lock the door.
2. Adjust the seat so you can sit up straight.
To see how, see ªSeatsº in the Index.
Page 25 of 335
1-13
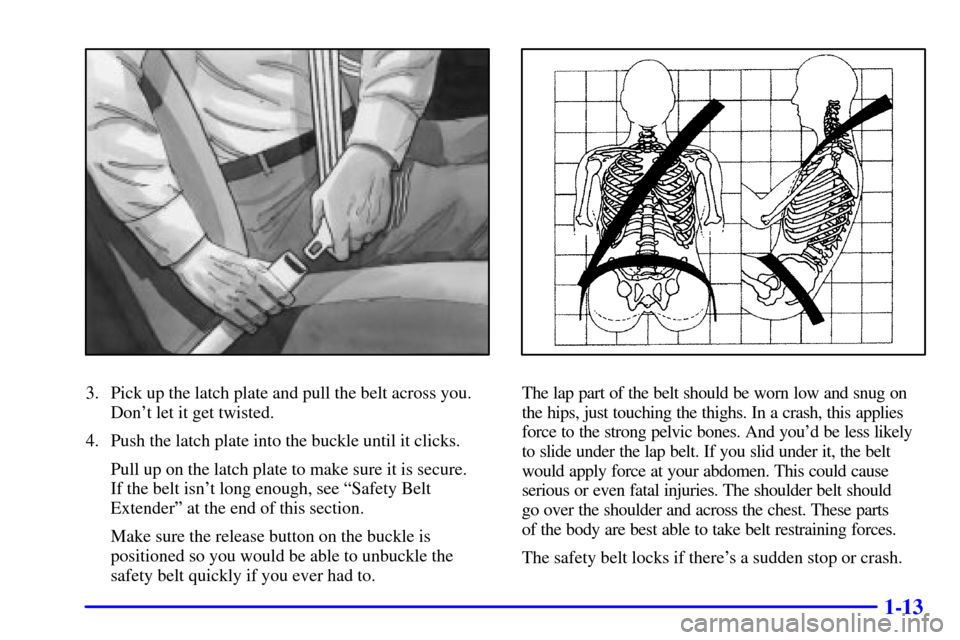
3. Pick up the latch plate and pull the belt across you.
Don't let it get twisted.
4. Push the latch plate into the buckle until it clicks.
Pull up on the latch plate to make sure it is secure.
If the belt isn't long enough, see ªSafety Belt
Extenderº at the end of this section.
Make sure the release button on the buckle is
positioned so you would be able to unbuckle the
safety belt quickly if you ever had to.The lap part of the belt should be worn low and snug on
the hips, just touching the thighs. In a crash, this applies
force to the strong pelvic bones. And you'd be less likely
to slide under the lap belt. If you slid under it, the belt
would apply force at your abdomen. This could cause
serious or even fatal injuries. The shoulder belt should
go over the shoulder and across the chest. These parts
of the body are best able to take belt restraining forces.
The safety belt locks if there's a sudden stop or crash.
Page 32 of 335
1-20
The best way to protect the fetus is to protect the
mother. When a safety belt is worn properly, it's more
likely that the fetus won't be hurt in a crash. For
pregnant women, as for anyone, the key to making
safety belts effective is wearing them properly.
Right Front Passenger Position
To learn how to wear the right front passenger's safety belt
properly, see ªDriver Positionº earlier in this section.
The right front passenger's safety belt works the same way
as the driver's safety belt
-- except for one thing. If you
ever pull the lap portion of the belt out all the way, you will
engage the child restraint locking feature. If this happens,
just let the belt go back all the way and start again.
Supplemental Inflatable Restraint
(SIR) System
This part explains the Supplemental Inflatable
Restraint (SIR) system or air bag system.
Your vehicle has air bags
-- one air bag for the driver
and another air bag for the right front passenger.
Frontal air bags are designed to help reduce the risk of
injury from the force of an inflating air bag. But these
air bags must inflate very quickly to do their job and
comply with federal regulations.Here are the most important things to know about the air
bag system:
CAUTION:
You can be severely injured or killed in a crash if
you aren't wearing your safety belt
-- even if you
have air bags. Wearing your safety belt during a
crash helps reduce your chance of hitting things
inside the vehicle or being ejected from it. Air
bags are ªsupplemental restraintsº to the safety
belts. All air bags are designed to work with
safety belts, but don't replace them. Air bags
are designed to work only in moderate to severe
crashes where the front of your vehicle hits
something. They aren't designed to inflate at
all in rollover, rear, side or low
-speed frontal
crashes. And, for unrestrained occupants, air
bags may provide less protection in frontal
crashes than more forceful air bags have
provided in the past. Everyone in your vehicle
should wear a safety belt properly
-- whether
or not there's an air bag for that person.
Page 36 of 335
1-24
How does an air bag restrain?
In moderate to severe frontal or near
-frontal collisions,
even belted occupants can contact the steering wheel or
the instrument panel. Air bags supplement the protection
provided by safety belts. Air bags distribute the force of
the impact more evenly over the occupant's upper body,
stopping the occupant more gradually. But air bags would
not help you in many types of collisions, including
rollovers, rear impacts and side impacts, primarily because
an occupant's motion is not toward those air bags.
Air bags should never be regarded as anything more than
a supplement to safety belts, and then only in moderate
to severe frontal or near
-frontal collisions.
What will you see after an air bag inflates?
After an air bag inflates, it quickly deflates, so quickly
that some people may not even realize the air bag
inflated. Some components of the air bag module
-- the
steering wheel hub for the driver's air bag, or the
instrument panel for the right front passenger's
bag
-- will be hot for a short time. The parts of the bag
that come into contact with you may be warm, but not
too hot to touch. There will be some smoke and dust
coming from vents in the deflated air bags. Air bag
inflation doesn't prevent the driver from seeing or from
being able to steer the vehicle, nor does it stop people
from leaving the vehicle.
CAUTION:
When an air bag inflates, there is dust in the air.
This dust could cause breathing problems for
people with a history of asthma or other
breathing trouble. To avoid this, everyone in the
vehicle should get out as soon as it is safe to do so.
If you have breathing problems but can't get out
of the vehicle after an air bag inflates, then get
fresh air by opening a window or door.
Your vehicle has a feature that will automatically unlock
the doors and turn the interior lamps on when the air
bags inflate (if battery power is available). You can lock
the doors again and turn the interior lamps off by using
the door lock and interior lamp controls.
In many crashes severe enough to inflate an air bag,
windshields are broken by vehicle deformation.
Additional windshield breakage may also occur from
the right front passenger air bag.
Page 38 of 335
1-26
Rear Seat Passengers
It's very important for rear seat passengers to buckle up!
Accident statistics show that unbelted people in the rear
seat are hurt more often in crashes than those who are
wearing safety belts.
Rear passengers who aren't safety belted can be thrown
out of the vehicle in a crash. And they can strike others
in the vehicle who are wearing safety belts.
Rear Seat Outside Passenger Positions
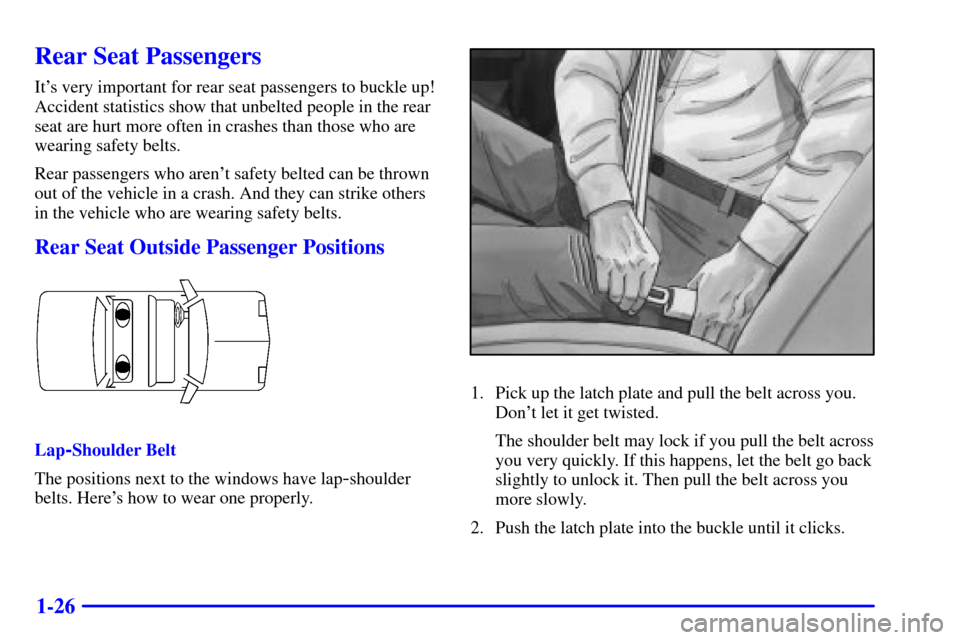
Lap-Shoulder Belt
The positions next to the windows have lap
-shoulder
belts. Here's how to wear one properly.
1. Pick up the latch plate and pull the belt across you.
Don't let it get twisted.
The shoulder belt may lock if you pull the belt across
you very quickly. If this happens, let the belt go back
slightly to unlock it. Then pull the belt across you
more slowly.
2. Push the latch plate into the buckle until it clicks.