climate settings CADILLAC ELR 2014 Convenience & Personalization Guide
[x] Cancel search | Manufacturer: CADILLAC, Model Year: 2014, Model line: ELR, Model: CADILLAC ELR 2014Pages: 20, PDF Size: 4.25 MB
Page 4 of 20
4
Remote Keyless Entry Transmitter (Key Fob)
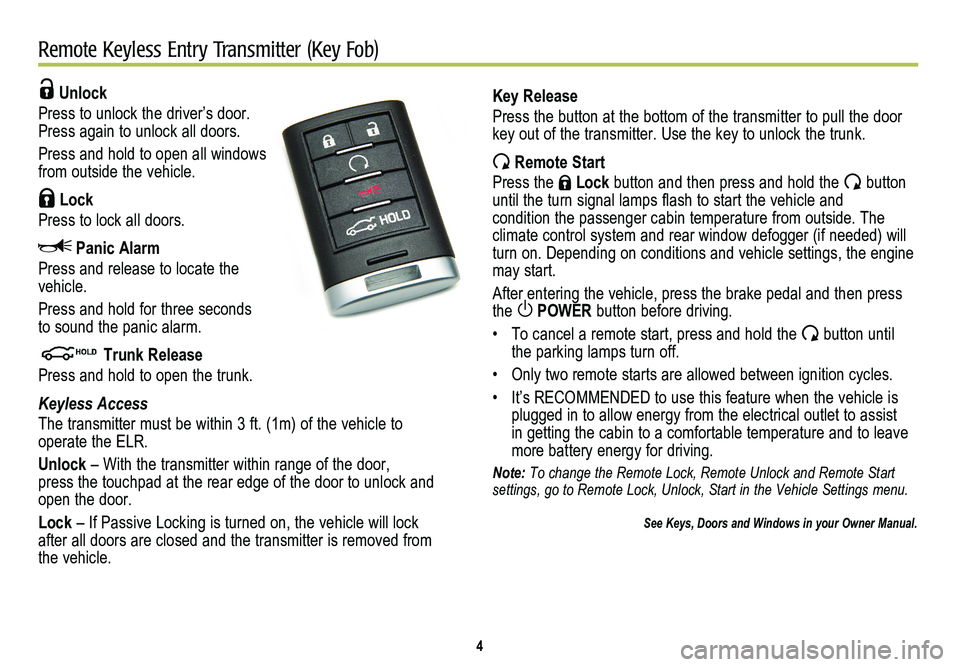
Unlock
Press to unlock the driver’s door. Press again to unlock all doors.
Press and hold to open all windows from outside the vehicle.
Lock
Press to lock all doors.
Panic Alarm
Press and release to locate the vehicle.
Press and hold for three seconds to sound the panic alarm.
Trunk Release
Press and hold to open the trunk.
Keyless Access
The transmitter must be within 3 ft. (1m) of the vehicle to
operate the ELR.
Unlock – With the transmitter within range of the door, press the touchpad at the rear edge of the door to unlock and open the door.
Lock – If Passive Locking is turned on, the vehicle will lock after all doors are closed and the transmitter is removed from the vehicle.
Key Release
Press the button at the bottom of the transmitter to pull the door key out of the transmitter. Use the key to unlock the trunk.
Remote Start
Press the Lock button and then press and hold the button until the turn signal lamps flash to start the vehicle and condition the passenger cabin temperature from outside. The
climate control system and rear window defogger (if needed) will turn on. Depending on conditions and vehicle settings, the engine may start.
After entering the vehicle, press the brake pedal and then press the POWER button before driving.
• To cancel a remote start, press and hold the button until the parking lamps turn off.
• Only two remote starts are allowed between ignition cycles.
• It’s RECOMMENDED to use this feature when the vehicle is plugged in to allow energy from the electrical outlet to assist in getting the cabin to a comfortable temperature and to leave more battery energy for driving.
Note: To change the Remote Lock, Remote Unlock and Remote Start settings, go to Remote Lock, Unlock, Start in the Vehicle Settings menu.\
See Keys, Doors and Windows in your Owner Manual.
Page 6 of 20
6
Electric Mode and Extended-Range Mode
The ELR is an electric vehicle with extended range capability. Plug it in, let it charge overnight, and it’s ready to run on a pure \
electric charge — gas- and tailpipe emissions-free. After that, the ELR uses a range-extending gas engine that produces enough energy to power it for hundreds of miles on a single tank of gas.
Electric Mode
In Electric Mode, the ELR will not use gasoline or produce tailpipe emissions. During this primary mode, the ELR is powered by
electrical energy stored in its high voltage propulsion battery. It can operate in this mode until the battery is depleted to a prede-termined level.
Electric range is affected by colder outside temperatures. During colder months, the energy needed to warm the vehicle’s cabin and high voltage propulsion battery can cause the vehicle’s elec-tric range to decline. See Driving for Better Energy Efficiency in the Driving and Operating section of your Owner Manual.
Extended-Range Mode
Once the electric charge is depleted, the range-extending gas engine will start to generate enough power to continue driving the vehicle. Engine operation ensures that you will not be stranded by a depleted battery. The vehicle determines when the engine
needs to run. Engine speed will vary, depending on driving
conditions, to optimize efficiency. The engine will not fully charge the high voltage propulsion battery. The vehicle must be plugged in to recharge.
Total Vehicle Range
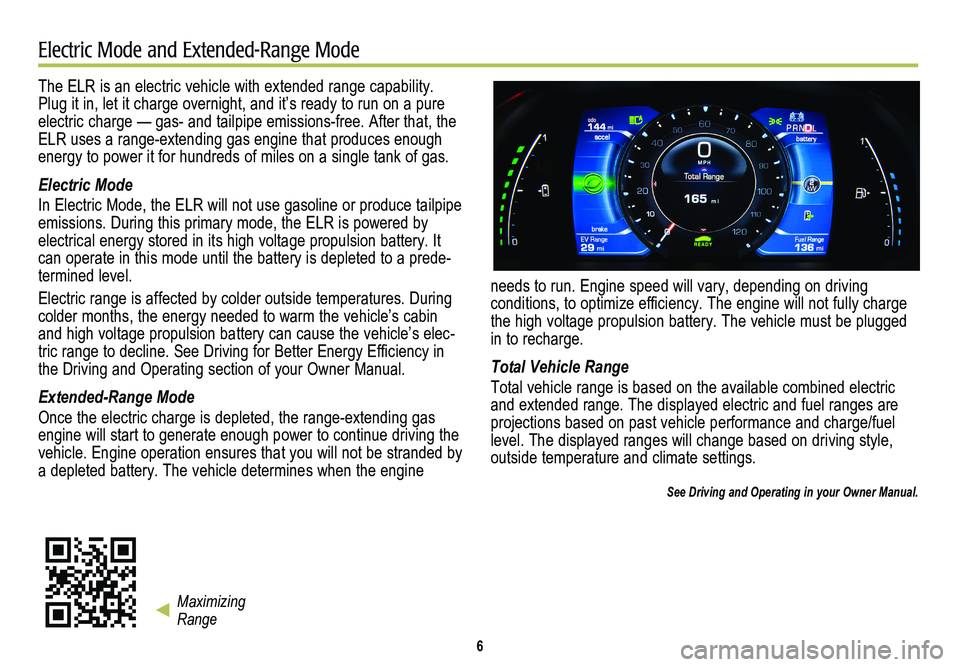
Total vehicle range is based on the available combined electric and extended range. The displayed electric and fuel ranges are
projections based on past vehicle performance and charge/fuel level. The displayed ranges will change based on driving style, outside temperature and climate settings.
See Driving and Operating in your Owner Manual.
Maximizing Range
Page 11 of 20
11
CUE System
Refer to your Owner Manual for important safety information about using \
the infotainment system while driving.
Portable Audio Devices
Two USB ports, an SD media card slot, and an auxiliary audio input jack are located in the center console storage compartment.
Connect an iPod®, iPhone®, MP3 player, a USB flash drive or a USB mass storage device to the USB port or insert an SD media card into the card slot.
Touch Media until the connected device is shown. CUE will read the device and build a list of voice commands.
Bluetooth® System
Before using a Bluetooth-enabled device in the vehicle, it must be paired with the in-vehicle Bluetooth system. Not all
devices will support all functions. The pairing process is disabled when the vehicle is moving. For more information, visit www.gmtotalconnect.com.
Pair a Phone
1. To use voice recognition, press the Push to Talk button on the steering wheel; after the beep, say “Pair phone,” or
Use the touch screen to select the Phone icon > Phones > Pair Device.
2. Start the pairing process on the phone. Locate Cadillac CUE on the phone.
3. Enter the four-digit code that appears on the touch screen into the phone or confirm the six-digit code on the phone.
4. If your phone prompts you to accept the connection or phone book download, click “yes” and always allow.
See your CUE Infotainment System Manual.
The touch screen in the center stack can be used to display and adjust Infotainment, Vehicle Personalization and Climate Control settings.
Use the controls on the center stack and the touch screen to access the various menus and settings.
The center stack controls only need a light touch to operate and work best with bare hands. Use the finger pad rather than the fingertip to minimize response time. The controls work with most gloves but may take longer to respond. Remove gloves if necessary.
In the screen menus, a check mark next to an item indicates it is selected/on.
Infotainment
CUE uses a Bluetooth or USB connection to link a smartphone, cell phone, USB flash drive or portable audio player/iPod® to the touch screen infotainment display. It offers a variety of
entertainment options, including streaming audio from the Internet through a smartphone, and features enhanced hands- free voice control, music information and the ability to play music files from a USB flash drive or an SD media card. For assistance, call 1-855-4-CUE-NOW (1-855-428-3669) or visit www.cadillac.com/cue.
Page 12 of 20
12
Climate Controls
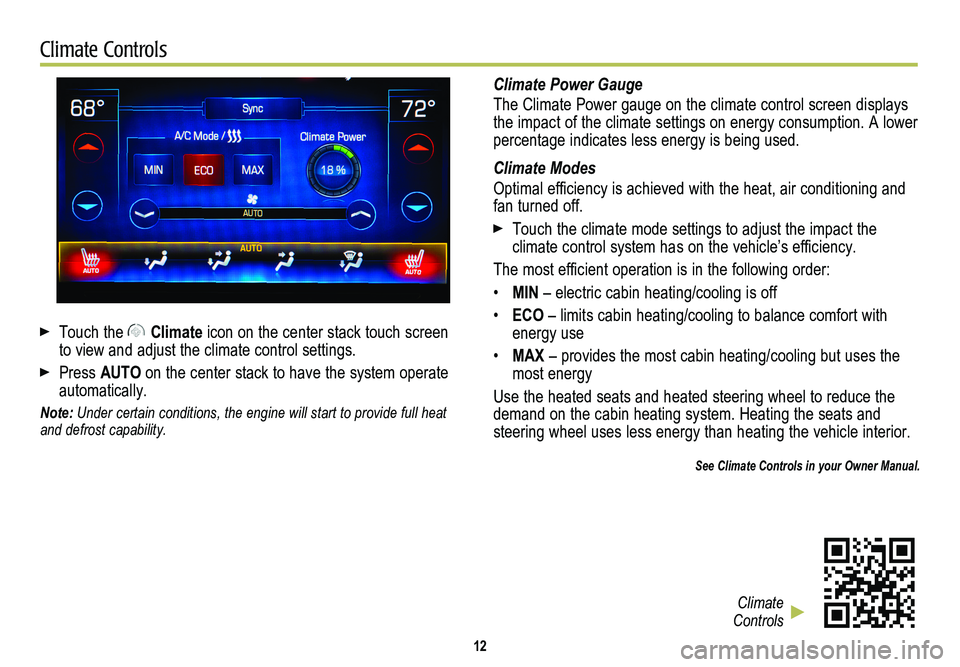
Touch the Climate icon on the center stack touch screen to view and adjust the climate control settings.
Press AUTO on the center stack to have the system operate automatically.
Note: Under certain conditions, the engine will start to provide full heat and defrost capability.
Climate Power Gauge
The Climate Power gauge on the climate control screen displays the impact of the climate settings on energy consumption. A lower percentage indicates less energy is being used.
Climate Modes
Optimal efficiency is achieved with the heat, air conditioning and fan turned off.
Touch the climate mode settings to adjust the impact the
climate control system has on the vehicle’s efficiency.
The most efficient operation is in the following order:
• MIN – electric cabin heating/cooling is off
• ECO – limits cabin heating/cooling to balance comfort with energy use
• MAX – provides the most cabin heating/cooling but uses the most energy
Use the heated seats and heated steering wheel to reduce the demand on the cabin heating system. Heating the seats and steering wheel uses less energy than heating the vehicle interior.
See Climate Controls in your Owner Manual.
Climate Controls
Page 13 of 20
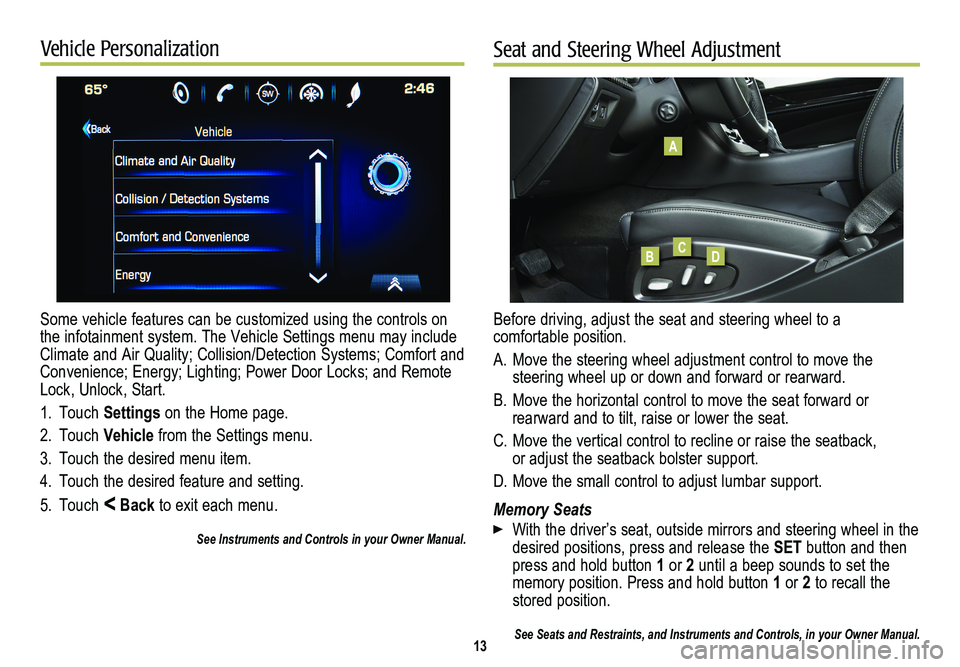
Some vehicle features can be customized using the controls on the infotainment system. The Vehicle Settings menu may include Climate and Air Quality; Collision/Detection Systems; Comfort and Convenience; Energy; Lighting; Power Door Locks; and Remote Lock, Unlock, Start.
1. Touch Settings on the Home page.
2. Touch Vehicle from the Settings menu.
3. Touch the desired menu item.
4. Touch the desired feature and setting.
5. Touch < Back to exit each menu.
See Instruments and Controls in your Owner Manual.
13
Vehicle PersonalizationSeat and Steering Wheel Adjustment
Before driving, adjust the seat and steering wheel to a comfortable position.
A. Move the steering wheel adjustment control to move the
steering wheel up or down and forward or rearward.
B. Move the horizontal control to move the seat forward or
rearward and to tilt, raise or lower the seat.
C. Move the vertical control to recline or raise the seatback, or adjust the seatback bolster support.
D. Move the small control to adjust lumbar support.
Memory Seats
With the driver’s seat, outside mirrors and steering wheel in the desired positions, press and release the SET button and then press and hold button 1 or 2 until a beep sounds to set the memory position. Press and hold button 1 or 2 to recall the stored position.
See Seats and Restraints, and Instruments and Controls, in your Owner Ma\
nual.
A
BCD