remote control CADILLAC ELR 2014 User Guide
[x] Cancel search | Manufacturer: CADILLAC, Model Year: 2014, Model line: ELR, Model: CADILLAC ELR 2014Pages: 408, PDF Size: 4.47 MB
Page 65 of 408

Black plate (9,1)Cadillac ELR Owner Manual (GMNA-Localizing-U.S./Canada-6081525) -
2014 - Second Edition - 1/22/14
Seats and Restraints 3-9
Warning (Continued)
overheat. An overheated seat
heater may cause a burn or may
damage the seat.
The buttons are near the climate
controls on the center stack. To
operate, the ignition must be in ON/
RUN/START.
Press
Jorzto heat the driver or
passenger seat cushion and
seatback. Press the button once for the
highest setting. With each press of
the button, the seat will change to
the next lower setting, and then to
the off setting. The indicator lights
next to the buttons indicate three for
the highest setting and one for the
lowest. If the heated seats are on
high, the level may automatically be
lowered after approximately
30 minutes.
When this feature is off, the heated
seat symbol on the button is white.
When the heated seat is turned on,
the symbol turns red.
The passenger seat may take
longer to heat up.
Auto Heated Seats
The controls can be accessed while
the vehicle is on by pressing
Qon
the center stack.
Press the touch screen
JAUTO or
zAUTO button. The area around
the button will change to red when
this feature is on. When the vehicle is on, this feature
will automatically activate the
heated seats at the level required by
the vehicle’
s interior temperature.
The active high, medium, low, or off
heated seat level will be indicated
by the manual heated seat buttons
on the center stack. Use the touch
screen button or the manual heated
seat buttons on the center stack to
turn auto heated seats off.
If the passenger seat is unoccupied,
the auto heated seats feature will
not activate that seat.
The auto heated seats feature can
be programmed to always be
enabled when the vehicle is on. See
Vehicle Personalization on
page 5-51.
Remote Start Auto Heated Seats
When it is cold outside, the heated
seats can be turned on
automatically during a remote start.
They are canceled when the ignition
is turned on. Press the button to use
the heated seats after the vehicle is
started.
Page 110 of 408
Black plate (2,1)Cadillac ELR Owner Manual (GMNA-Localizing-U.S./Canada-6081525) -
2014 - Second Edition - 1/22/14
5-2 Instruments and Controls
Key and Lock Messages . . . . . 5-45
Lamp Messages . . . . . . . . . . . . . 5-46
Object Detection SystemMessages . . . . . . . . . . . . . . . . . . 5-46
Propulsion Power
Messages . . . . . . . . . . . . . . . . . . 5-48
Ride Control System Messages . . . . . . . . . . . . . . . . . . 5-48
Airbag System Messages . . . . 5-49
Security Messages . . . . . . . . . . 5-49
Service Vehicle Messages . . . 5-49
Starting the Vehicle Messages . . . . . . . . . . . . . . . . . . 5-50
Tire Messages . . . . . . . . . . . . . . . 5-50
Vehicle Reminder Messages . . . . . . . . . . . . . . . . . . 5-51
Vehicle Speed Messages . . . . 5-51
Washer Fluid Messages . . . . . 5-51
Window Messages . . . . . . . . . . . 5-51
Vehicle Personalization
Vehicle Personalization . . . . . . 5-51
Universal Remote System
Universal Remote System . . . 5-59
Universal Remote System Programming . . . . . . . . . . . . . . . 5-59
Universal Remote System Operation . . . . . . . . . . . . . . . . . . 5-62
Controls
Steering Wheel
Adjustment
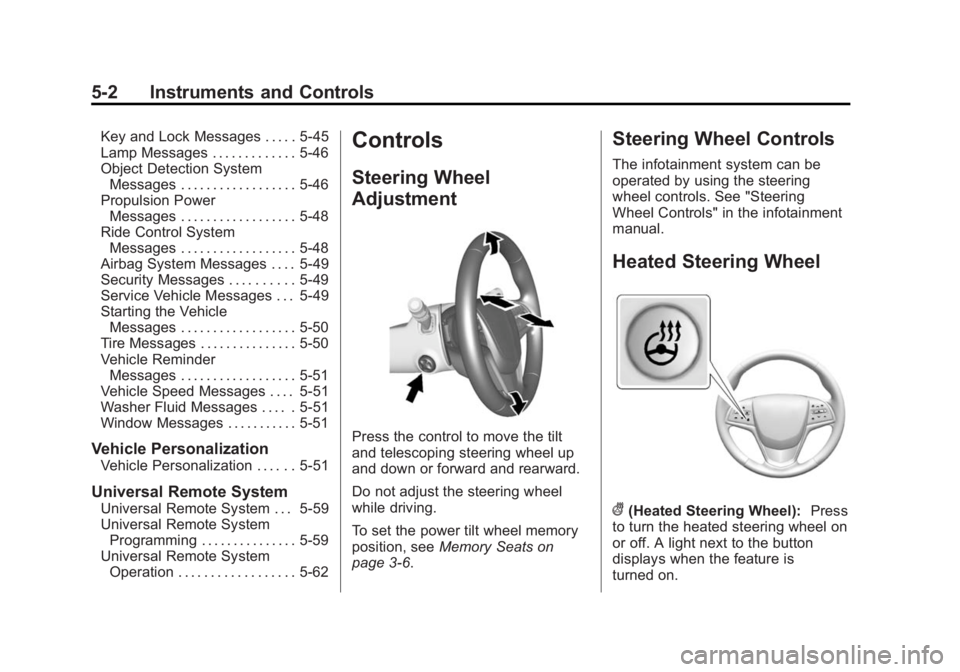
Press the control to move the tilt
and telescoping steering wheel up
and down or forward and rearward.
Do not adjust the steering wheel
while driving.
To set the power tilt wheel memory
position, see Memory Seats on
page 3-6.
Steering Wheel Controls
The infotainment system can be
operated by using the steering
wheel controls. See "Steering
Wheel Controls" in the infotainment
manual.
Heated Steering Wheel
((Heated Steering Wheel): Press
to turn the heated steering wheel on
or off. A light next to the button
displays when the feature is
turned on.
Page 153 of 408

Black plate (45,1)Cadillac ELR Owner Manual (GMNA-Localizing-U.S./Canada-6081525) -
2014 - Second Edition - 1/22/14
Instruments and Controls 5-45
ENGINE NOT AVAILABLE
ADD FUEL
This message displays when the
engine is not available due to
running out of fuel. The vehicle can
continue to be driven in Electric
Mode until the battery is depleted,
but will have reduced acceleration.
When this message is displayed,
refuel the vehicle. SeeOut of Fuel/
Engine Unavailable on page 9-24.
FUEL LEVEL LOW
This message displays when the
vehicle is low on fuel. Refuel as
soon as possible.
READY TO REFUEL
This message displays when the
fuel system is depressurized and
the vehicle can be refueled.
TIGHTEN GAS CAP
This message displays when the
fuel cap is not on tight. Tighten the
fuel cap.
WAIT TO REFUEL
This message displays when the
fuel system is pressurized and you
must to wait to refuel the vehicle.
Key and Lock Messages
NO REMOTE DETECTED
This message displays when the
transmitter battery may be weak.
See “Starting the Vehicle with a Low
Transmitter Battery” underRemote
Keyless Entry (RKE) System
Operation on page 2-2.
NO REMOTE KEY WAS
DETECTED PLACE KEY IN
TRANSMITTER POCKET THEN
START YOUR VEHICLE
This message displays when trying
to start the vehicle if an RKE
transmitter is not detected. The
transmitter battery may be weak.
See “Starting the Vehicle with a Low
Transmitter Battery” underRemote
Keyless Entry (RKE) System
Operation on page 2-2.
NO REMOTE PRESS BRAKE
TO RESTART
This message displays when
attempting to turn off the vehicle
and the RKE transmitter is no longer
detected. Restarting is allowed
without the RKE transmitter for
five minutes. Press the brake pedal
to restart the vehicle.
NUMBER OF KEYS
PROGRAMMED
This message displays when
programming new keys to the
vehicle.
REMOTE LEFT IN VEHICLE
This message displays when
leaving the vehicle with the RKE
transmitter still inside.
REPLACE BATTERY IN
REMOTE KEY
This message displays when the
battery in the RKE transmitter needs
to be replaced.
Page 161 of 408

Black plate (53,1)Cadillac ELR Owner Manual (GMNA-Localizing-U.S./Canada-6081525) -
2014 - Second Edition - 1/22/14
Instruments and Controls 5-53
adjusted to this level. To set the
maximum startup volume, press +
or−to increase or decrease.
Audio Cue Volume
This feature sets the volume of
audio files played at system startup
and shutdown.
Select On, then press + or −to
increase or decrease the volume.
Vehicle
Select and the following may
display:
.Climate and Air Quality
.Collision/Detection Systems
.Comfort and Convenience
.Energy
.Lighting
.Power Door Locks
.Remote Lock, Unlock, Start Climate and Air Quality
Select and the following may
display:
.Auto Fan Max Speed
.Auto Heated Seats
.Auto Defog
.Engine Assisted Heating
Plugged-In
Auto Fan Max Speed
This feature will set the maximum
auto fan speed.
Select Low, Medium, or High.
Auto Heated Seats
When enabled, the auto heated seat
buttons on the touch screen will be
highlighted. This feature will
automatically activate heated seats
at the level required by the interior
temperature. The auto heated seats
can be turned off by using the
heated seat buttons on the center
stack.
Select Off or On. Auto Defog
When set to On, the front defog will
automatically come on when the
vehicle is started.
Select Off or On.
Engine Assisted Heating
Plugged-In
During remote start, this feature
turns on or off the ability for the
engine to run to help heat the
vehicle when it is plugged in.
A change in setting will not take
affect until after the vehicle is first
powered down.
Select Off or On.
Collision/Detection Systems
Select and the following may
display:
.Alert Type
.Auto Collision Preparation
.Go Notifier
.Side Blind Zone Alert
.Rear Cross Traffic Alert
Page 163 of 408

Black plate (55,1)Cadillac ELR Owner Manual (GMNA-Localizing-U.S./Canada-6081525) -
2014 - Second Edition - 1/22/14
Instruments and Controls 5-55
Easy Exit Options
This feature automatically recalls
the current driver’s previously stored
EXIT button position when exiting
the vehicle. See Memory Seats on
page 3-6.
Select Off or On.
Chime Volume
This allows the selection of the
chime volume level.
Press + or −to adjust the volume.
Reverse Tilt Mirror
This allows the feature to be turned
on or off.
Select Off, On - Driver and
Passenger, On - Driver, or
On - Passenger.
Rainsense Wipers
This allows the feature to be turned
on or off.
Select Off or On. Energy
Select and the following may
display:
.Energy Summary Pop-up
.Charge Status Feedback
.Charge Cord Theft Alert
.Charge Power Loss Alert
Energy Summary Pop-up
This allows the feature to be turned
on or off.
Select Off or On.
Charge Status Feedback
This allows the horn chirp and
outside rear view mirror charge
status feedback to be turned on
or off.
Select Off or Horn Chirps.
Charge Cord Theft Alert
This allows the feature to be turned
on or off.
Select Off or On. Charge Power Loss Alert
This allows the feature to be turned
on or off.
Select Off or On.
Lighting
Select and the following may
display:.Vehicle Locator Lights
.Exit Lighting
.Auto High Beam
Vehicle Locator Lights
This feature will flash the exterior
lamps when
Kon the Remote
Keyless Entry (RKE) transmitter is
pressed to locate the vehicle.
Select Off or On.
Exit Lighting
This allows the selection of how
long the exterior lamps stay on
when leaving the vehicle when it is
dark outside.
Page 164 of 408

Black plate (56,1)Cadillac ELR Owner Manual (GMNA-Localizing-U.S./Canada-6081525) -
2014 - Second Edition - 1/22/14
5-56 Instruments and Controls
Select Off, 30 Seconds, 60
Seconds, or 120 Seconds.
Auto High Beam
This allows the feature to be turned
on or off.
Select Off or On.
Power Door Locks
Select and the following may
display:
.Unlocked Door Anti-Lockout
.Auto Door Unlock
.Delayed Door Lock
Unlocked Door Anti-Lockout
When on, this feature will keep the
driver door from locking when the
door is open. If Off is selected, the
Delayed Door Lock menu will be
available.
Select Off or On. Auto Door Unlock
This allows selection of which of the
doors will automatically unlock when
the vehicle is shifted into P (Park).
Select Off, All Doors, or Driver Door.
Delayed Door Lock
When on, this feature will delay the
locking of the doors. To override the
delay, press the power door lock
switch on the door.
Select Off or On.
Remote Lock, Unlock, Start
Select and the following may
display:
.Remote Unlock Light Feedback
.Remote Lock Feedback
.Remote Door Unlock
.Remote Start Auto Heat Seats
.Passive Door Unlock
.Passive Door Lock
.Remote Left in Vehicle AlertRemote Unlock Light Feedback
When on, the exterior lamps will
flash when unlocking the vehicle
with the RKE transmitter.
Select Off or Flash Lights.
Remote Lock Feedback
This allows selection of what type of
feedback is given when locking the
vehicle with the RKE transmitter.
Select Off, Lights and Horn, Lights
Only, or Horn Only.
Remote Door Unlock
This allows selection of which doors
will unlock when pressing
Kon the
RKE transmitter.
Select All Doors or Driver Door.
Remote Start Auto Heat Seats
If equipped and turned on, this
feature will turn the heated seats on
when using remote start on
cold days.
Select Off or On.
Page 165 of 408
Black plate (57,1)Cadillac ELR Owner Manual (GMNA-Localizing-U.S./Canada-6081525) -
2014 - Second Edition - 1/22/14
Instruments and Controls 5-57
Passive Door Unlock
This allows the selection of what
doors will unlock when using the
door handle touch pad button on the
driver door to unlock the vehicle.
Select All Doors or Driver Door.
Passive Door Lock
This allows passive locking to be
turned on or off and selects
feedback. See“Passive Locking” in
Remote Keyless Entry (RKE)
System Operation on page 2-2.
Select Off, On with Horn
Chirp, or On.
Remote Left in Vehicle Alert
This feature sounds an alert when
the RKE transmitter is left in the
vehicle.
Select Off or On.Bluetooth
Select and the following may
display:
.Pair New Device
.Device Management
.Ringtones
.Voice Mail Numbers
Pair New Device
Select to pair a new device. See
“Pairing” in“Infotainment Controls”
under “Bluetooth” in the infotainment
manual.
Device Management
Select to connect to a different
phone source, disconnect a phone,
or delete a phone.
Ringtones
Press to change the ring tone for
the specific phone. The phone does
not need to be connected to change
the ring tone. Voice Mail Numbers
This feature displays the voice mail
number for all connected phones.
To change the voice mail number,
select EDIT or pressing the EDIT
button and typing in a new number,
then select SAVE or press the
SAVE button.Voice
Select and the following may
display:
.Confidence Threshold
.Prompt Length
.Audio Feedback Speed
Confidence Threshold
This feature allows the adjustment
of the sensitivity of the speech
recognition system.
Select Confirm More or
Confirm Less.
Page 167 of 408
Black plate (59,1)Cadillac ELR Owner Manual (GMNA-Localizing-U.S./Canada-6081525) -
2014 - Second Edition - 1/22/14
Instruments and Controls 5-59
Restore Vehicle Settings
This allows selection of restoring
vehicle settings.
Select Restore or Cancel.
Clear All Private Data
This allows selection to clear all
private information from the vehicle.
Select Delete or Cancel.
Restore Radio Settings
This allows selection to restore
radio settings.
Select Restore or Cancel.
Software Information
Select to view the infotainment
system current software information.
Universal Remote
System
SeeRadio Frequency Statement on
page 13-15.
Universal Remote System
Programming
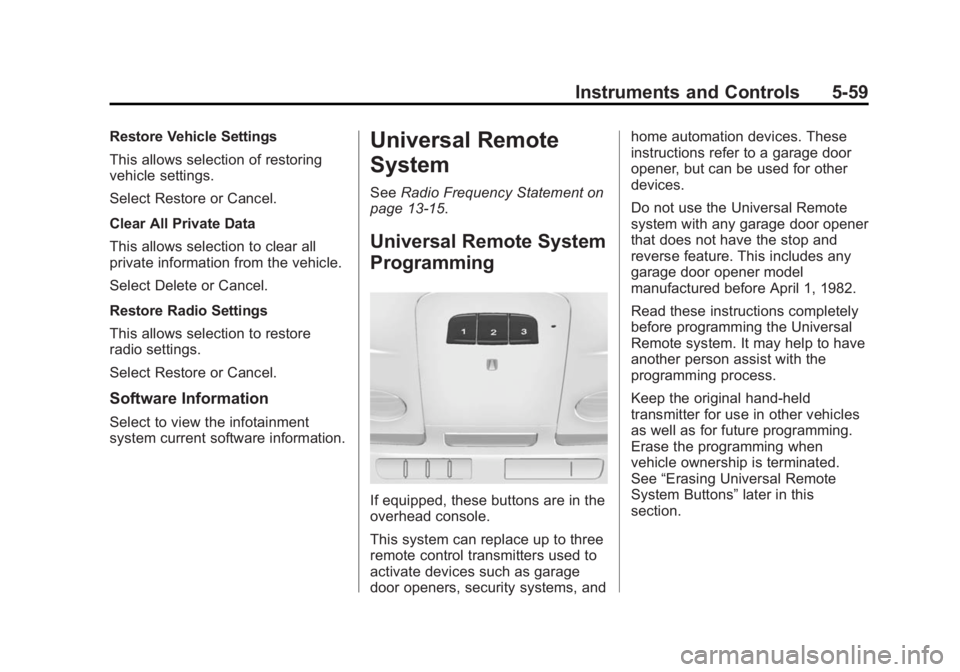
If equipped, these buttons are in the
overhead console.
This system can replace up to three
remote control transmitters used to
activate devices such as garage
door openers, security systems, and home automation devices. These
instructions refer to a garage door
opener, but can be used for other
devices.
Do not use the Universal Remote
system with any garage door opener
that does not have the stop and
reverse feature. This includes any
garage door opener model
manufactured before April 1, 1982.
Read these instructions completely
before programming the Universal
Remote system. It may help to have
another person assist with the
programming process.
Keep the original hand-held
transmitter for use in other vehicles
as well as for future programming.
Erase the programming when
vehicle ownership is terminated.
See
“Erasing Universal Remote
System Buttons” later in this
section.
Page 168 of 408
Black plate (60,1)Cadillac ELR Owner Manual (GMNA-Localizing-U.S./Canada-6081525) -
2014 - Second Edition - 1/22/14
5-60 Instruments and Controls
To program a garage door opener,
park outside directly in line with and
facing the garage door opener
receiver. Clear all people and
objects near the garage door.
Make sure the hand-held transmitter
has a new battery for quick and
accurate transmission of the
radio-frequency signal.
Programming the Universal
Remote System
For questions or help programming
the Universal Remote system, call
1-800-355-3515 or see
www.homelink.com.
Programming involves
time-sensitive actions, and may time
out causing the procedure to be
repeated.
To program up to three devices:
1. Hold the end of the hand-heldtransmitter about 3 to 8 cm (1 to
3 in) away from the Universal
Remote system buttons with the
indicator light in view. The hand-held transmitter was
supplied by the manufacturer of
the garage door opener receiver.
2. At the same time, press and hold both the hand-held
transmitter button and one of the
three Universal Remote system
buttons to be used to operate
the garage door. Do not release
either button until the indicator
light changes from a slow to a
rapid flash. Then release both
buttons.
Some garage door openers may
require substitution of Step 2
with the procedure under in
“Radio Signals for Canada and
Some Gate Operators” later in
this section.
3. Press and hold the newly programmed Universal Remote
system button for five seconds
while watching the indicator light
and garage door activation.
.If the indicator light stays on
continuously or the garage
door moves when the button is pressed, then
programming is complete.
There is no need to
complete Steps 4–6.
.If the indicator light does
not come on or the garage
door does not move, a
second button press may
be required. For a second
time, press and hold the
newly programmed button
for five seconds. If the light
stays on or the garage door
moves, programming is
complete.
.If the indicator light blinks
rapidly for two seconds,
then changes to a solid light
and the garage door does
not move, continue with
programming Steps 4–6.
Page 169 of 408
Black plate (61,1)Cadillac ELR Owner Manual (GMNA-Localizing-U.S./Canada-6081525) -
2014 - Second Edition - 1/22/14
Instruments and Controls 5-61
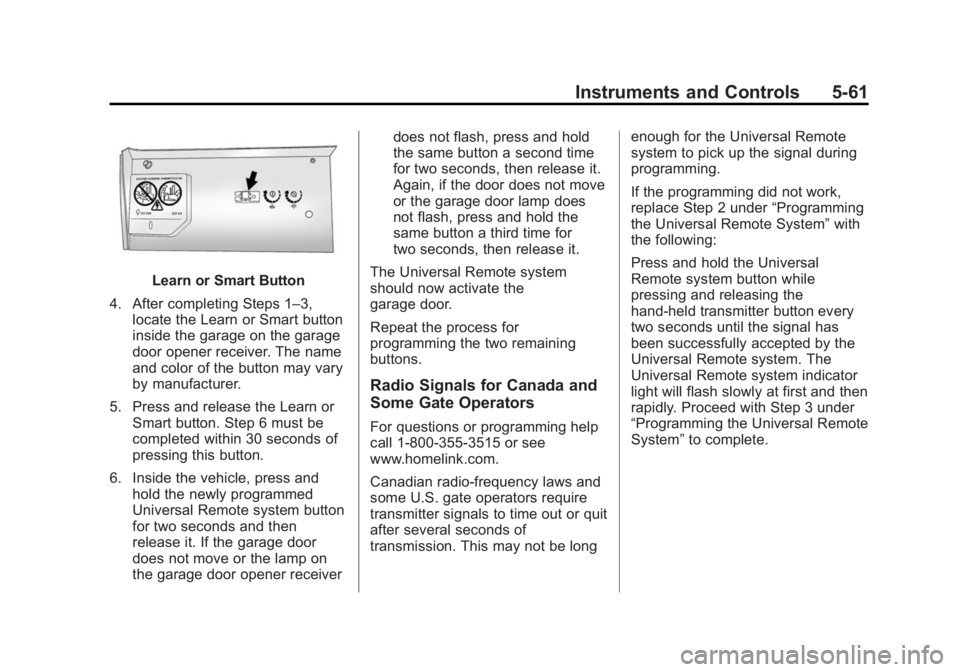
Learn or Smart Button
4. After completing Steps 1–3, locate the Learn or Smart button
inside the garage on the garage
door opener receiver. The name
and color of the button may vary
by manufacturer.
5. Press and release the Learn or Smart button. Step 6 must be
completed within 30 seconds of
pressing this button.
6. Inside the vehicle, press and hold the newly programmed
Universal Remote system button
for two seconds and then
release it. If the garage door
does not move or the lamp on
the garage door opener receiver does not flash, press and hold
the same button a second time
for two seconds, then release it.
Again, if the door does not move
or the garage door lamp does
not flash, press and hold the
same button a third time for
two seconds, then release it.
The Universal Remote system
should now activate the
garage door.
Repeat the process for
programming the two remaining
buttons.
Radio Signals for Canada and
Some Gate Operators
For questions or programming help
call 1-800-355-3515 or see
www.homelink.com.
Canadian radio-frequency laws and
some U.S. gate operators require
transmitter signals to time out or quit
after several seconds of
transmission. This may not be long enough for the Universal Remote
system to pick up the signal during
programming.
If the programming did not work,
replace Step 2 under
“Programming
the Universal Remote System” with
the following:
Press and hold the Universal
Remote system button while
pressing and releasing the
hand-held transmitter button every
two seconds until the signal has
been successfully accepted by the
Universal Remote system. The
Universal Remote system indicator
light will flash slowly at first and then
rapidly. Proceed with Step 3 under
“Programming the Universal Remote
System” to complete.