ECU CADILLAC ELR 2014 Owner's Manual
[x] Cancel search | Manufacturer: CADILLAC, Model Year: 2014, Model line: ELR, Model: CADILLAC ELR 2014Pages: 408, PDF Size: 4.47 MB
Page 1 of 408

Black plate (1,1)Cadillac ELR Owner Manual (GMNA-Localizing-U.S./Canada-6081525) -
2014 - Second Edition - 1/22/14
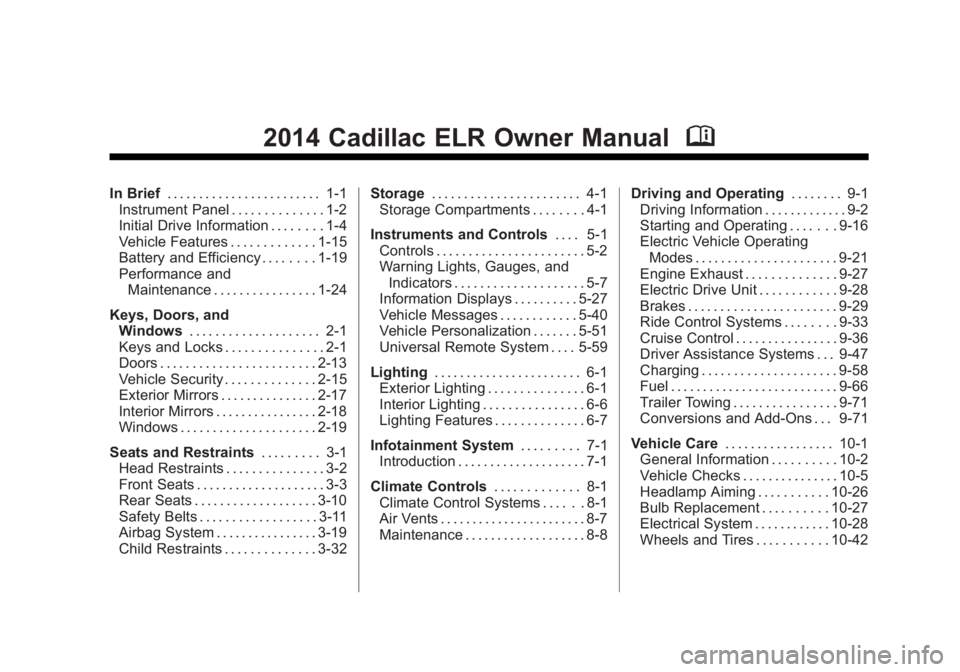
2014 Cadillac ELR Owner ManualM
In Brief. . . . . . . . . . . . . . . . . . . . . . . . 1-1
Instrument Panel . . . . . . . . . . . . . . 1-2
Initial Drive Information . . . . . . . . 1-4
Vehicle Features . . . . . . . . . . . . . 1-15
Battery and Efficiency . . . . . . . . 1-19
Performance and
Maintenance . . . . . . . . . . . . . . . . 1-24
Keys, Doors, and Windows . . . . . . . . . . . . . . . . . . . . 2-1
Keys and Locks . . . . . . . . . . . . . . . 2-1
Doors . . . . . . . . . . . . . . . . . . . . . . . . 2-13
Vehicle Security . . . . . . . . . . . . . . 2-15
Exterior Mirrors . . . . . . . . . . . . . . . 2-17
Interior Mirrors . . . . . . . . . . . . . . . . 2-18
Windows . . . . . . . . . . . . . . . . . . . . . 2-19
Seats and Restraints . . . . . . . . . 3-1
Head Restraints . . . . . . . . . . . . . . . 3-2
Front Seats . . . . . . . . . . . . . . . . . . . . 3-3
Rear Seats . . . . . . . . . . . . . . . . . . . 3-10
Safety Belts . . . . . . . . . . . . . . . . . . 3-11
Airbag System . . . . . . . . . . . . . . . . 3-19
Child Restraints . . . . . . . . . . . . . . 3-32 Storage
. . . . . . . . . . . . . . . . . . . . . . . 4-1
Storage Compartments . . . . . . . . 4-1
Instruments and Controls . . . . 5-1
Controls . . . . . . . . . . . . . . . . . . . . . . . 5-2
Warning Lights, Gauges, and Indicators . . . . . . . . . . . . . . . . . . . . 5-7
Information Displays . . . . . . . . . . 5-27
Vehicle Messages . . . . . . . . . . . . 5-40
Vehicle Personalization . . . . . . . 5-51
Universal Remote System . . . . 5-59
Lighting . . . . . . . . . . . . . . . . . . . . . . . 6-1
Exterior Lighting . . . . . . . . . . . . . . . 6-1
Interior Lighting . . . . . . . . . . . . . . . . 6-6
Lighting Features . . . . . . . . . . . . . . 6-7
Infotainment System . . . . . . . . . 7-1
Introduction . . . . . . . . . . . . . . . . . . . . 7-1
Climate Controls . . . . . . . . . . . . . 8-1
Climate Control Systems . . . . . . 8-1
Air Vents . . . . . . . . . . . . . . . . . . . . . . . 8-7
Maintenance . . . . . . . . . . . . . . . . . . . 8-8 Driving and Operating
. . . . . . . . 9-1
Driving Information . . . . . . . . . . . . . 9-2
Starting and Operating . . . . . . . 9-16
Electric Vehicle Operating
Modes . . . . . . . . . . . . . . . . . . . . . . 9-21
Engine Exhaust . . . . . . . . . . . . . . 9-27
Electric Drive Unit . . . . . . . . . . . . 9-28
Brakes . . . . . . . . . . . . . . . . . . . . . . . 9-29
Ride Control Systems . . . . . . . . 9-33
Cruise Control . . . . . . . . . . . . . . . . 9-36
Driver Assistance Systems . . . 9-47
Charging . . . . . . . . . . . . . . . . . . . . . 9-58
Fuel . . . . . . . . . . . . . . . . . . . . . . . . . . 9-66
Trailer Towing . . . . . . . . . . . . . . . . 9-71
Conversions and Add-Ons . . . 9-71
Vehicle Care . . . . . . . . . . . . . . . . . 10-1
General Information . . . . . . . . . . 10-2
Vehicle Checks . . . . . . . . . . . . . . . 10-5
Headlamp Aiming . . . . . . . . . . . 10-26
Bulb Replacement . . . . . . . . . . 10-27
Electrical System . . . . . . . . . . . . 10-28
Wheels and Tires . . . . . . . . . . . 10-42
Page 24 of 408

Black plate (18,1)Cadillac ELR Owner Manual (GMNA-Localizing-U.S./Canada-6081525) -
2014 - Second Edition - 1/22/14
1-18 In Brief
vehicle to help avoid or lessen the
severity of crashes while moving
forward.
SeeActive Emergency Braking
System on page 9-53.
Power Outlets
The accessory power outlets can be
used to plug in electrical equipment,
such as a cell phone or MP3 player.
The vehicle has two accessory
power outlets:
.Inside the front center console.
.Inside the center console bin
behind the shift lever.
Lift the cover to access the
accessory power outlet.
See Power Outlets on page 5-6.
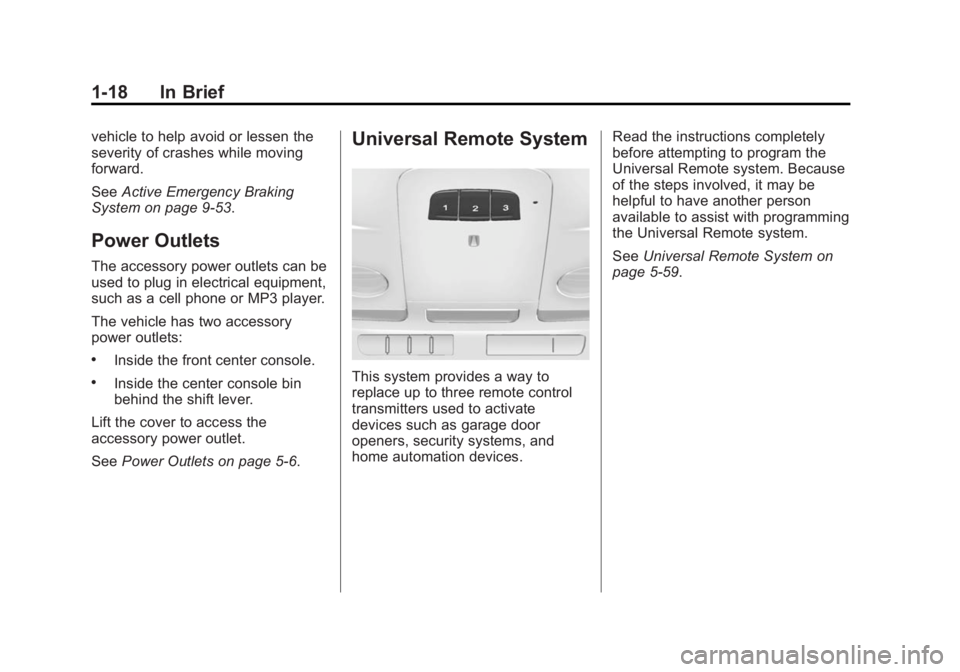
Universal Remote System
This system provides a way to
replace up to three remote control
transmitters used to activate
devices such as garage door
openers, security systems, and
home automation devices. Read the instructions completely
before attempting to program the
Universal Remote system. Because
of the steps involved, it may be
helpful to have another person
available to assist with programming
the Universal Remote system.
See
Universal Remote System on
page 5-59.
Page 34 of 408

Black plate (28,1)Cadillac ELR Owner Manual (GMNA-Localizing-U.S./Canada-6081525) -
2014 - Second Edition - 1/22/14
1-28 In Brief
OnStar®
If equipped, this vehicle has a
comprehensive, in-vehicle system
that can connect to a live Advisor
for Emergency, Security, Navigation,
Connection, and Diagnostic
Services. SeeOnStar Overview on
page 14-1.
Page 35 of 408

Black plate (1,1)Cadillac ELR Owner Manual (GMNA-Localizing-U.S./Canada-6081525) -
2014 - Second Edition - 1/22/14
Keys, Doors, and Windows 2-1
Keys, Doors, and
Windows
Keys and Locks
Keys . . . . . . . . . . . . . . . . . . . . . . . . . . 2-1
Remote Keyless Entry (RKE)System . . . . . . . . . . . . . . . . . . . . . . 2-2
Remote Keyless Entry (RKE) System Operation . . . . . . . . . . . 2-2
Remote Start . . . . . . . . . . . . . . . . . . 2-8
Door Locks . . . . . . . . . . . . . . . . . . 2-10
Power Door Locks . . . . . . . . . . . 2-11
Delayed Locking . . . . . . . . . . . . . 2-12
Automatic Door Locks . . . . . . . 2-13
Lockout Protection . . . . . . . . . . . 2-13
Doors
Trunk . . . . . . . . . . . . . . . . . . . . . . . . 2-13
Vehicle Security
Vehicle Security . . . . . . . . . . . . . . 2-15
Vehicle Alarm System . . . . . . . 2-15
Immobilizer . . . . . . . . . . . . . . . . . . 2-16
Immobilizer Operation . . . . . . . 2-16
Exterior Mirrors
Convex Mirrors . . . . . . . . . . . . . . 2-17
Power Mirrors . . . . . . . . . . . . . . . . 2-17
Folding Mirrors . . . . . . . . . . . . . . . 2-18
Heated Mirrors . . . . . . . . . . . . . . . 2-18
Reverse Tilt Mirrors . . . . . . . . . . 2-18
Interior Mirrors
Interior Rearview Mirrors . . . . . 2-18
Automatic Dimming Rearview Mirror . . . . . . . . . . . . . . . . . . . . . . . 2-18
Windows
Windows . . . . . . . . . . . . . . . . . . . . . 2-19
Power Windows . . . . . . . . . . . . . 2-19
Sun Visors . . . . . . . . . . . . . . . . . . . 2-21
Keys and Locks
Keys
{Warning
Leaving children in a vehicle with
a Remote Keyless Entry (RKE)
transmitter is dangerous and
children or others could be
seriously injured or killed. They
could operate the power windows
or other controls or make the
vehicle move. The windows will
function with the RKE transmitter
in the vehicle, and children or
others could be caught in the path
of a closing window. Do not leave
children in a vehicle with an RKE
transmitter.
The key that is part of the RKE
transmitter can be used for the
trunk.
Page 49 of 408

Black plate (15,1)Cadillac ELR Owner Manual (GMNA-Localizing-U.S./Canada-6081525) -
2014 - Second Edition - 1/22/14
Keys, Doors, and Windows 2-15
{Caution
Do not use the emergency trunk
release handle as a tie-down or
anchor point when securing items
in the trunk as it could damage
the handle.
There is a glow-in-the-dark
emergency trunk release handle on
the trunk lid. This handle will glow
following exposure to light. Pull the
release handle to open the trunk
from the inside.
Vehicle Security
This vehicle has theft-deterrent
features; however, they do not make
the vehicle impossible to steal.
Vehicle Alarm System
This vehicle has an anti-theft alarm
system.
Arming the Alarm System
1. Close the trunk and the hood. Turn off the vehicle.
2. Lock the vehicle in one of three ways:
.Use the RKE transmitter.
.Use the Keyless Access
system.
.With a door open, pressQ
on the interior of the door.
3. After 30 seconds the alarm system will arm. Pressing
Qon
the RKE transmitter a second time will bypass the 30-second
delay and immediately arm the
alarm system.
If the driver door is opened without
first unlocking with the RKE
transmitter, the horn will chirp and
the lights will flash to indicate
pre-alarm. If the vehicle is not
started, or the door is not unlocked
by pressing
Kon the RKE
transmitter during the 10-second
pre-alarm, the alarm will be
activated.
If the charge cord theft alert is
enabled, the alarm will also be
activated when there is an attempt
to remove the charge cord, or if a
passenger door, the trunk, or the
hood is opened without first
disarming the system. When the
alarm is activated, the turn signals
flash and the horn sounds for about
30 seconds. The alarm system will
then re-arm to monitor for the next
unauthorized event.
Page 50 of 408

Black plate (16,1)Cadillac ELR Owner Manual (GMNA-Localizing-U.S./Canada-6081525) -
2014 - Second Edition - 1/22/14
2-16 Keys, Doors, and Windows
The Charge Cord Theft Alert feature
may be disabled through the vehicle
personalization. See“Charge Cord
Theft Alert” underVehicle
Personalization on page 5-51.
Disarming the Alarm System
To disarm the alarm system or turn
off the alarm if it has been activated:
.PressKon the RKE transmitter.
.Unlock the vehicle using the
Keyless Access system.
.Start the vehicle.
To avoid setting off the alarm by
accident:
.Lock the vehicle after all
occupants have left the vehicle
and all doors are closed.
.Always unlock a door with the
RKE transmitter or use the
Keyless Access system.
How to Detect a Tamper
Condition
IfKis pressed on the transmitter
and the horn chirps three times, a
previous alarm occurred while the
system was armed.
If the alarm has been activated, a
message will appear on the DIC.
See Security Messages on
page 5-49.
Immobilizer
See Radio Frequency Statement on
page 13-15.
Immobilizer Operation
This vehicle has a passive
theft-deterrent system. The system
does not have to be manually
armed or disarmed.
The vehicle is automatically
immobilized when the vehicle is
turned off. The system is automatically
disarmed when the vehicle is
started with a valid RKE transmitter
in the vehicle. The RKE transmitter
uses electronic coding that matches
an immobilizer control unit in the
vehicle and automatically disarms
the system. Only a correct
transmitter can be used to turn the
vehicle on.
The security light in the instrument
cluster comes on if there is a
problem with arming or disarming
the theft-deterrent system.
When trying to start the vehicle, the
security light comes on briefly when
the vehicle is turned on.
Page 51 of 408

Black plate (17,1)Cadillac ELR Owner Manual (GMNA-Localizing-U.S./Canada-6081525) -
2014 - Second Edition - 1/22/14
Keys, Doors, and Windows 2-17
If the vehicle does not start and the
security light stays on, there is a
problem with the system. Attempt to
turn the vehicle off and try it again.
Do not leave the RKE transmitter in
the vehicle.Exterior Mirrors
Convex Mirrors
{Warning
A convex mirror can make things,
like other vehicles, look farther
away than they really are. If you
cut too sharply into the right lane,
you could hit a vehicle on the
right. Check the inside mirror or
glance over your shoulder before
changing lanes.
The passenger side mirror is convex
shaped. A convex mirror's surface is
curved so more can be seen from
the driver seat.
Power Mirrors
Controls for the outside power
mirrors are on the driver door.
To adjust a mirror:
1. Move the selector switch to L (Left) or R (Right) to choose the
driver or passenger mirror.
2. Press the arrows on the control pad to move each mirror in the
desired direction.
3. Return the selector switch to the center position.
Page 57 of 408

Black plate (1,1)Cadillac ELR Owner Manual (GMNA-Localizing-U.S./Canada-6081525) -
2014 - Second Edition - 1/22/14
Seats and Restraints 3-1
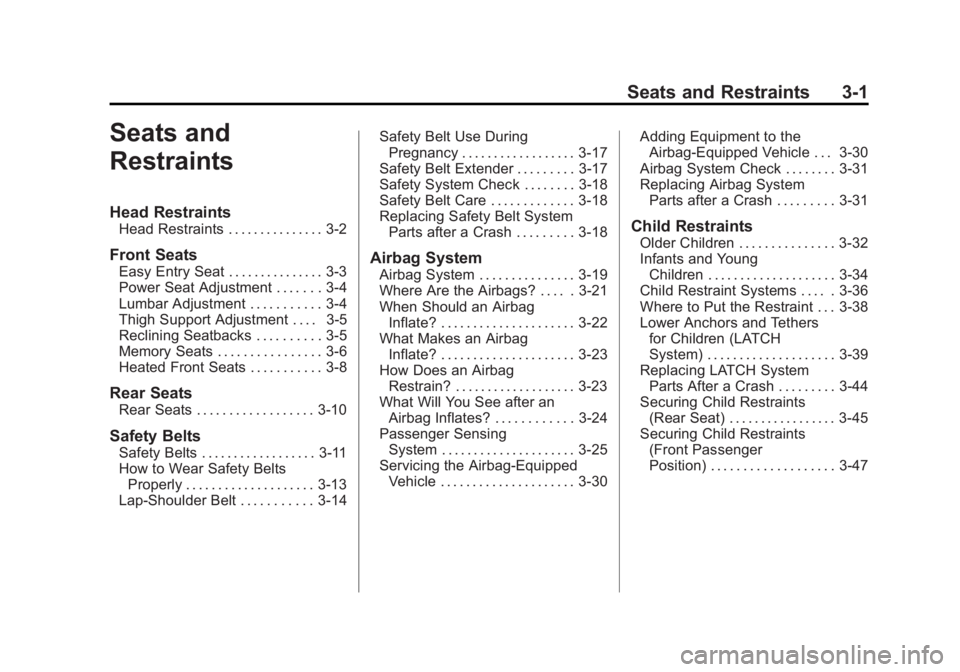
Seats and
Restraints
Head Restraints
Head Restraints . . . . . . . . . . . . . . . 3-2
Front Seats
Easy Entry Seat . . . . . . . . . . . . . . . 3-3
Power Seat Adjustment . . . . . . . 3-4
Lumbar Adjustment . . . . . . . . . . . 3-4
Thigh Support Adjustment . . . . 3-5
Reclining Seatbacks . . . . . . . . . . 3-5
Memory Seats . . . . . . . . . . . . . . . . 3-6
Heated Front Seats . . . . . . . . . . . 3-8
Rear Seats
Rear Seats . . . . . . . . . . . . . . . . . . 3-10
Safety Belts
Safety Belts . . . . . . . . . . . . . . . . . . 3-11
How to Wear Safety BeltsProperly . . . . . . . . . . . . . . . . . . . . 3-13
Lap-Shoulder Belt . . . . . . . . . . . 3-14 Safety Belt Use During
Pregnancy . . . . . . . . . . . . . . . . . . 3-17
Safety Belt Extender . . . . . . . . . 3-17
Safety System Check . . . . . . . . 3-18
Safety Belt Care . . . . . . . . . . . . . 3-18
Replacing Safety Belt System Parts after a Crash . . . . . . . . . 3-18
Airbag System
Airbag System . . . . . . . . . . . . . . . 3-19
Where Are the Airbags? . . . . . 3-21
When Should an AirbagInflate? . . . . . . . . . . . . . . . . . . . . . 3-22
What Makes an Airbag Inflate? . . . . . . . . . . . . . . . . . . . . . 3-23
How Does an Airbag Restrain? . . . . . . . . . . . . . . . . . . . 3-23
What Will You See after an Airbag Inflates? . . . . . . . . . . . . 3-24
Passenger Sensing System . . . . . . . . . . . . . . . . . . . . . 3-25
Servicing the Airbag-Equipped Vehicle . . . . . . . . . . . . . . . . . . . . . 3-30 Adding Equipment to the
Airbag-Equipped Vehicle . . . 3-30
Airbag System Check . . . . . . . . 3-31
Replacing Airbag System Parts after a Crash . . . . . . . . . 3-31
Child Restraints
Older Children . . . . . . . . . . . . . . . 3-32
Infants and Young
Children . . . . . . . . . . . . . . . . . . . . 3-34
Child Restraint Systems . . . . . 3-36
Where to Put the Restraint . . . 3-38
Lower Anchors and Tethers for Children (LATCH
System) . . . . . . . . . . . . . . . . . . . . 3-39
Replacing LATCH System Parts After a Crash . . . . . . . . . 3-44
Securing Child Restraints (Rear Seat) . . . . . . . . . . . . . . . . . 3-45
Securing Child Restraints (Front Passenger
Position) . . . . . . . . . . . . . . . . . . . 3-47
Page 70 of 408

Black plate (14,1)Cadillac ELR Owner Manual (GMNA-Localizing-U.S./Canada-6081525) -
2014 - Second Edition - 1/22/14
3-14 Seats and Restraints
Lap-Shoulder Belt
All seating positions in the vehicle
have a lap-shoulder belt.
The following instructions explain
how to wear a lap-shoulder belt
properly.
1. Adjust the seat, if the seat isadjustable, so you can sit up
straight. To see how, see “Seats”
in the Index.
2. Pick up the latch plate and pull the belt across you. Do not let it
get twisted.
The lap-shoulder belt may lock if
you pull the belt across you very
quickly. If this happens, let the
belt go back slightly to unlock it.
Then pull the belt across you
more slowly.
If the shoulder portion of a
passenger belt is pulled out all
the way, the child restraint
locking feature may be engaged.
If this happens, let the belt go
back all the way and start again.
3. Push the latch plate into the
buckle until it clicks.
Pull up on the latch plate to
make sure it is secure. If the belt
is not long enough, see Safety
Belt Extender on page 3-17.
Position the release button on
the buckle so that the safety belt
could be quickly unbuckled if
necessary.
Page 74 of 408

Black plate (18,1)Cadillac ELR Owner Manual (GMNA-Localizing-U.S./Canada-6081525) -
2014 - Second Edition - 1/22/14
3-18 Seats and Restraints
use it for securing child seats. To
wear it, attach it to the regular safety
belt. See the instruction sheet that
comes with the extender.
Safety System Check
Now and then, check that the safety
belt reminder light, safety belts,
buckles, latch plates, retractors, and
anchorages are all working properly.
Look for any other loose or
damaged safety belt system parts
that might keep a safety belt system
from doing its job. See your dealer
to have it repaired. Torn or frayed
safety belts may not protect you in a
crash. They can rip apart under
impact forces. If a belt is torn or
frayed, get a new one right away.
Make sure the safety belt reminder
light is working. SeeSafety Belt
Reminders on page 5-14.
Keep safety belts clean and dry.
See Safety Belt Care on page 3-18.
Safety Belt Care
Keep belts clean and dry.
{Warning
Do not bleach or dye safety belts.
It may severely weaken them. In
a crash, they might not be able to
provide adequate protection.
Clean safety belts only with mild
soap and lukewarm water.
Replacing Safety Belt
System Parts after a
Crash
{Warning
A crash can damage the safety
belt system in the vehicle.
A damaged safety belt system
may not properly protect the
person using it, resulting in
serious injury or even death in a
(Continued)
Warning (Continued)
crash. To help make sure the
safety belt systems are working
properly after a crash, have them
inspected and any necessary
replacements made as soon as
possible.
After a minor crash, replacement of
safety belts may not be necessary.
But the safety belt assemblies that
were used during any crash may
have been stressed or damaged.
See your dealer to have the safety
belt assemblies inspected or
replaced.
New parts and repairs may be
necessary even if the safety belt
system was not being used at the
time of the crash.