ECO mode CADILLAC ESCALADE 2006 2.G User Guide
[x] Cancel search | Manufacturer: CADILLAC, Model Year: 2006, Model line: ESCALADE, Model: CADILLAC ESCALADE 2006 2.GPages: 484, PDF Size: 2.84 MB
Page 127 of 484
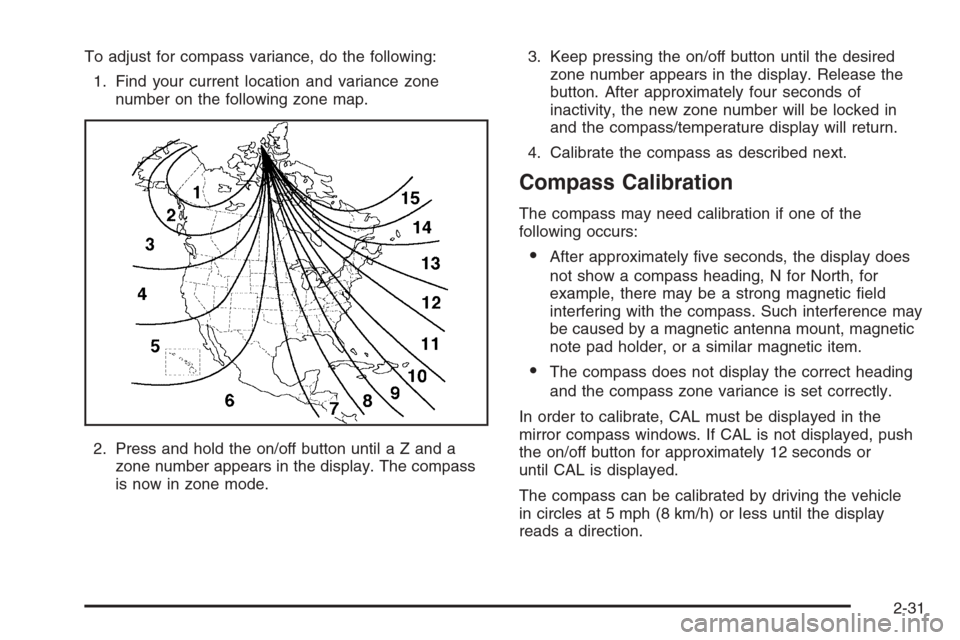
To adjust for compass variance, do the following:
1. Find your current location and variance zone
number on the following zone map.
2. Press and hold the on/off button until a Z and a
zone number appears in the display. The compass
is now in zone mode.3. Keep pressing the on/off button until the desired
zone number appears in the display. Release the
button. After approximately four seconds of
inactivity, the new zone number will be locked in
and the compass/temperature display will return.
4. Calibrate the compass as described next.
Compass Calibration
The compass may need calibration if one of the
following occurs:
After approximately �ve seconds, the display does
not show a compass heading, N for North, for
example, there may be a strong magnetic �eld
interfering with the compass. Such interference may
be caused by a magnetic antenna mount, magnetic
note pad holder, or a similar magnetic item.
The compass does not display the correct heading
and the compass zone variance is set correctly.
In order to calibrate, CAL must be displayed in the
mirror compass windows. If CAL is not displayed, push
the on/off button for approximately 12 seconds or
until CAL is displayed.
The compass can be calibrated by driving the vehicle
in circles at 5 mph (8 km/h) or less until the display
reads a direction.
2-31
Page 129 of 484
Compass Calibration
Press and hold the on/off button down for nine seconds
to activate the compass calibration mode. CAL will
be displayed in the compass window on the mirror.
The compass can be calibrated by driving the vehicle in
circles at 5 mph (8 km/h) or less until the display
reads a direction.
Compass Variance
Compass variance is the difference between earth’s
magnetic north and true geographic north. The mirror is
set to zone eight upon leaving the factory. It will be
necessary to adjust the compass to compensate
for compass variance if you live outside zone eight.
Under certain circumstances, such as during a
long distance cross-country trip, it will be necessary
to adjust for compass variance. If not adjusted to
account for compass variance, your compass could
give false readings.
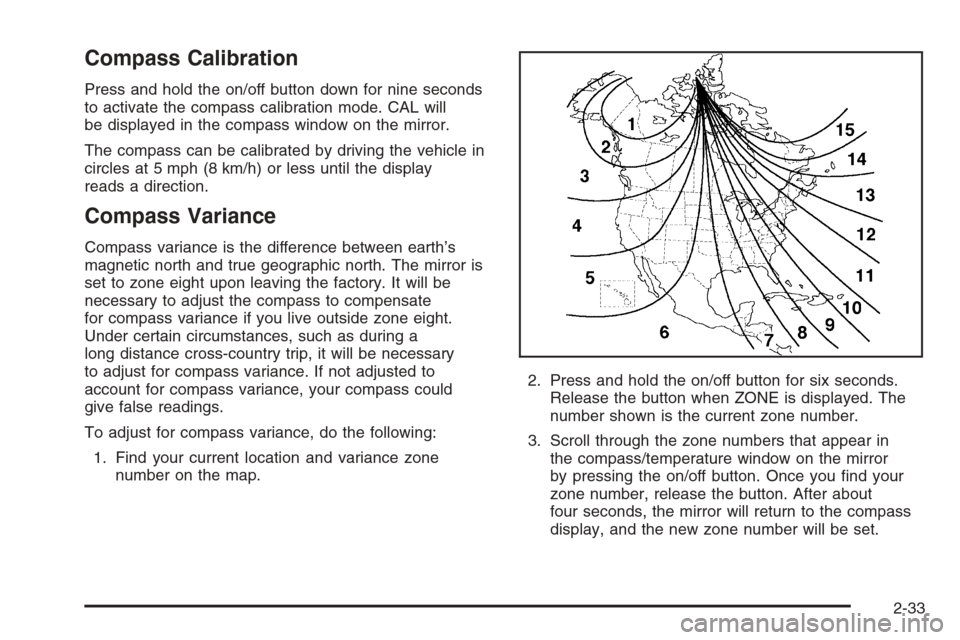
To adjust for compass variance, do the following:
1. Find your current location and variance zone
number on the map.2. Press and hold the on/off button for six seconds.
Release the button when ZONE is displayed. The
number shown is the current zone number.
3. Scroll through the zone numbers that appear in
the compass/temperature window on the mirror
by pressing the on/off button. Once you �nd your
zone number, release the button. After about
four seconds, the mirror will return to the compass
display, and the new zone number will be set.
2-33
Page 135 of 484
This device complies with RSS-210 of Industry Canada.
Operation is subject to the following two conditions:
1. This device may not cause interference.
2. This device must accept any interference received,
including interference that may cause undesired
operation of the device.
Changes and modi�cations to this system by other than
an authorized service facility could void authorization
to use this equipment.
Universal Home Remote System
Operation
Do not use the Universal Home Remote with any
garage door opener that does not have the stop and
reverse feature. This includes any garage door opener
model manufactured before April 1, 1982. If you
have a newer garage door opener with rolling codes,
please be sure to follow Steps 6 through 8 to complete
the programming of your Universal Home Remote
Transmitter.
Read the instructions completely before attempting to
program the Universal Home Remote. Because of
the steps involved, it may be helpful to have another
person available to assist you in the programming steps.Keep the original hand-held transmitter for use in other
vehicles as well as for future Universal Home Remote
programming. It is also recommended that upon the
sale of the vehicle, the programmed Universal Home
Remote buttons should be erased for security purposes.
See “Erasing Universal Home Remote Buttons” later
in this section or, for assistance, seeCustomer
Assistance Offices on page 7-4.
Be sure that people and objects are clear of the garage
door or gate operator you are programming. When
programming a garage door, it is advised to park outside
of the garage.
It is recommended that a new battery be installed in
your hand-held transmitter for quicker and more
accurate transmission of the radio-frequency signal.
Programming Universal Home Remote
Follow these steps to program up to three channels:
1. Press and hold down the two outside Universal
Home Remote buttons, releasing only when the
Universal Home Remote indicator light begins
to �ash, after 20 seconds. Do not hold down the
buttons for longer than 30 seconds and do not
repeat this step to program a second and/or
third hand-held transmitter to the remaining
two Universal Home Remote buttons.
2-39
Page 137 of 484
Gate Operator and Canadian
Programming
Canadian radio-frequency laws require transmitter
signals to time out or quit after several seconds of
transmission. This may not be long enough for Universal
Home Remote to pick up the signal during programming.
Similarly, some U.S. gate operators are manufactured
to time out in the same manner.
If you live in Canada, or you are having difficulty
programming a gate operator or garage door opener
by using the “Programming Universal Home Remote”
procedures, regardless of where you live, replace Step 3
under “Programming Universal Home Remote” with
the following:
Continue to press and hold the Universal Home Remote
button while you press and release every two seconds
(cycle) the hand-held transmitter button until the
frequency signal has been successfully accepted by the
Universal Home Remote. The Universal Home Remote
indicator light will �ash slowly at �rst and then rapidly.
Proceed with Step 4 under “Programming Universal
Home Remote” to complete.
Using Universal Home Remote
Press and hold the appropriate Universal Home Remote
button for at least half of a second. The indicator light
will come on while the signal is being transmitted.
Erasing Universal Home Remote
Buttons
To erase programming from the three Universal Home
Remote buttons do the following:
1. Press and hold down the two outside buttons until
the indicator light begins to �ash, after 20 seconds.
Do not hold the two outside buttons for longer
than 30 seconds.
2. Release both buttons.
The Universal Home Remote is now in the training
(learning) mode and can be programmed at any time
beginning with Step 2 under “Programming Universal
Home Remote” shown earlier in this section.
Individual buttons cannot be erased, but they can be
reprogrammed. See “Reprogramming a Single Universal
Home Remote Button” following this section.
2-41
Page 168 of 484
Climate Controls
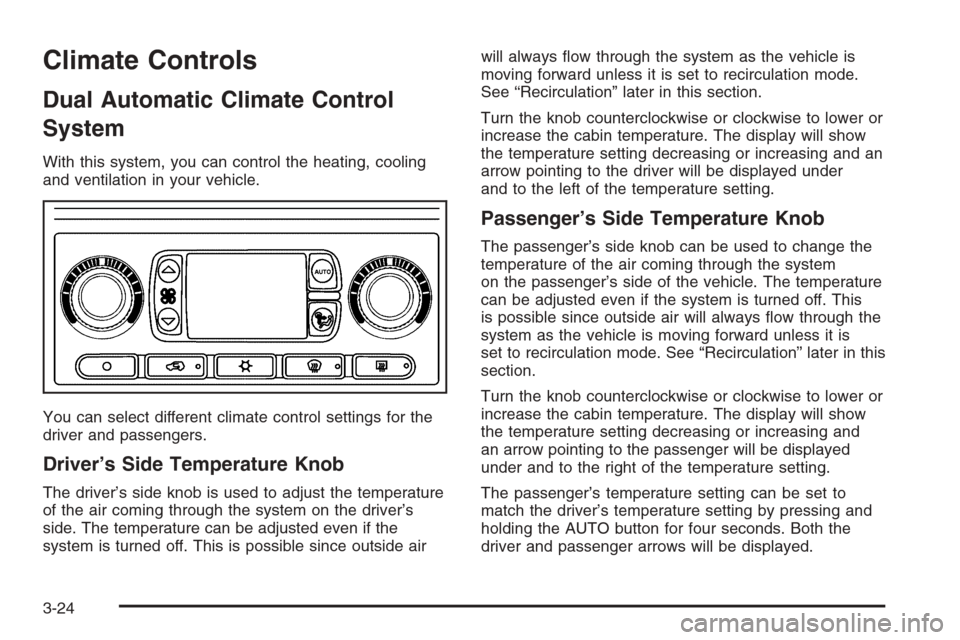
Dual Automatic Climate Control
System
With this system, you can control the heating, cooling
and ventilation in your vehicle.
You can select different climate control settings for the
driver and passengers.
Driver’s Side Temperature Knob
The driver’s side knob is used to adjust the temperature
of the air coming through the system on the driver’s
side. The temperature can be adjusted even if the
system is turned off. This is possible since outside airwill always �ow through the system as the vehicle is
moving forward unless it is set to recirculation mode.
See “Recirculation” later in this section.
Turn the knob counterclockwise or clockwise to lower or
increase the cabin temperature. The display will show
the temperature setting decreasing or increasing and an
arrow pointing to the driver will be displayed under
and to the left of the temperature setting.
Passenger’s Side Temperature Knob
The passenger’s side knob can be used to change the
temperature of the air coming through the system
on the passenger’s side of the vehicle. The temperature
can be adjusted even if the system is turned off. This
is possible since outside air will always �ow through the
system as the vehicle is moving forward unless it is
set to recirculation mode. See “Recirculation” later in this
section.
Turn the knob counterclockwise or clockwise to lower or
increase the cabin temperature. The display will show
the temperature setting decreasing or increasing and
an arrow pointing to the passenger will be displayed
under and to the right of the temperature setting.
The passenger’s temperature setting can be set to
match the driver’s temperature setting by pressing and
holding the AUTO button for four seconds. Both the
driver and passenger arrows will be displayed.
3-24
Page 169 of 484
Automatic Operation
AUTO (Automatic):When automatic operation is
active the system will control the inside temperature,
the air delivery, and the fan speed.
Use the steps below to place the entire system in
automatic mode:
1. Press the AUTO button.
When AUTO is selected, the display will change to
show the current driver’s set temperature, delivery
mode and fan speed. Press the AUTO button again
within �ve seconds to display the passenger’s set
temperature.
If the driver’s and passenger’s temperature settings
are the same when AUTO is pressed, the
temperature setting and both arrows will be
displayed for �ve seconds along with the automatic
air delivery mode and fan speed. After the
�ve-second update, the display will change to show
the temperature setting, both arrows and AUTO.
If the driver’s and passenger’s temperature settings
are not the same, the opposite side temperature
setting will be displayed for an additional �ve
seconds. To make the passenger’s temperature the
same as the driver’s press and hold the AUTO
button for about four seconds.When auto is selected, the air conditioning operation
and air inlet will be automatically controlled. The
air conditioning compressor will run when the
outside temperature is over about 40°F (4°C). The
air inlet will normally be set to outside air. If it’s
hot outside, the air inlet may automatically switch to
recirculate inside air to help quickly cool down
your vehicle. The light on the button will illuminate
in recirculation.
2. Set the driver’s and passenger’s temperature.
To �nd your comfort setting, start with a 74°F (23°C)
temperature setting and allow about 20 minutes
for the system to regulate. Turn the driver’s or
passenger’s side temperature knob to adjust the
temperature setting as necessary. If you choose the
temperature setting of 60°F (15°C) the system
will remain at the maximum cooling setting. If you
choose the temperature setting of 90°F (32°C)
the system will remain at the maximum heat setting.
Choosing either maximum setting will not cause
the vehicle to heat or cool any faster.
Be careful not to cover the sensor located on the
top of the instrument panel near the windshield. This
sensor regulates air temperature based on sun
load, and also turns on your headlamps.
3-25
Page 191 of 484
A reading in the low pressure zone may be caused
by a dangerously low oil level or some other problem
causing low oil pressure. Check your oil as soon
as possible. SeeDIC Warnings and Messages on
page 3-54.
{CAUTION:
Do not keep driving if the oil pressure is low. If
you do, your engine can become so hot that it
catches �re. You or others could be burned.
Check your oil as soon as possible and have
your vehicle serviced.
Notice:Lack of proper engine oil maintenance may
damage the engine. The repairs would not be
covered by your warranty. Always follow the
maintenance schedule in this manual for changing
engine oil.
Security Light
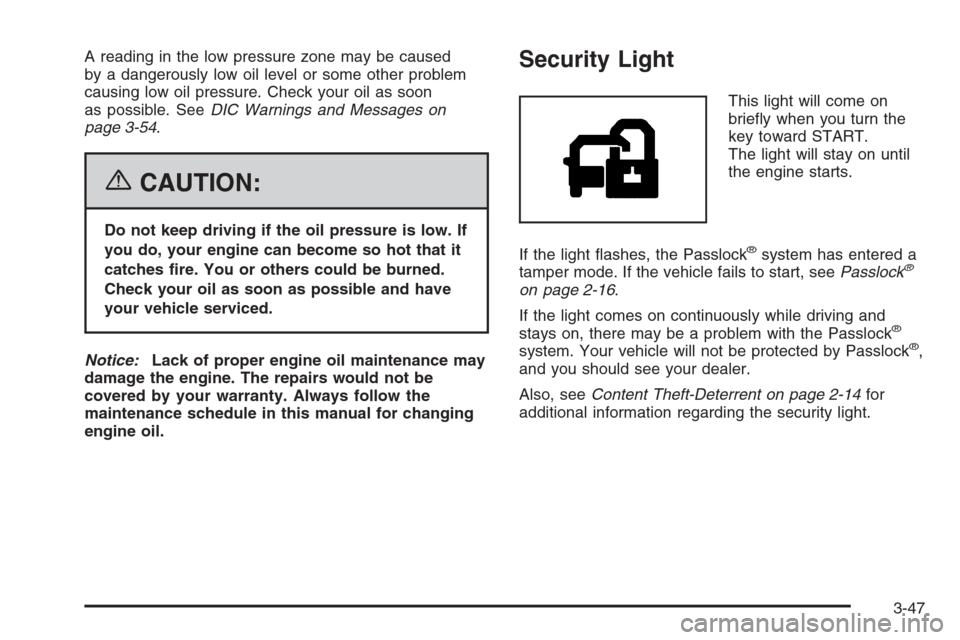
This light will come on
brie�y when you turn the
key toward START.
The light will stay on until
the engine starts.
If the light �ashes, the Passlock
®system has entered a
tamper mode. If the vehicle fails to start, seePasslock®
on page 2-16.
If the light comes on continuously while driving and
stays on, there may be a problem with the Passlock
®
system. Your vehicle will not be protected by Passlock®,
and you should see your dealer.
Also, seeContent Theft-Deterrent on page 2-14for
additional information regarding the security light.
3-47
Page 194 of 484
Driver Information Center (DIC)
The Driver Information Center (DIC) display is located
on the instrument panel cluster, below the speedometer.
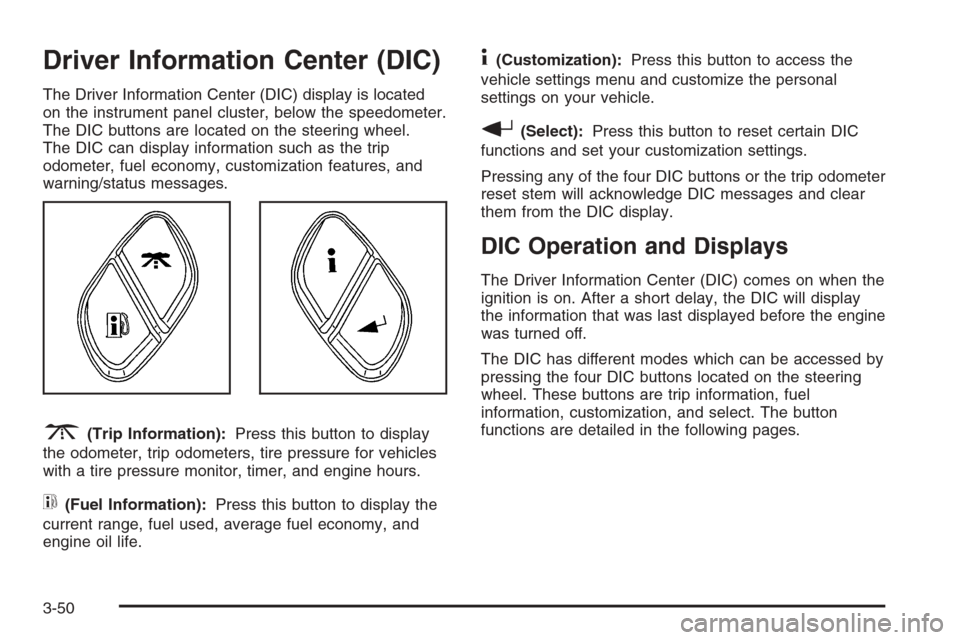
The DIC buttons are located on the steering wheel.
The DIC can display information such as the trip
odometer, fuel economy, customization features, and
warning/status messages.
3(Trip Information):Press this button to display
the odometer, trip odometers, tire pressure for vehicles
with a tire pressure monitor, timer, and engine hours.
t(Fuel Information):Press this button to display the
current range, fuel used, average fuel economy, and
engine oil life.
4(Customization):Press this button to access the
vehicle settings menu and customize the personal
settings on your vehicle.
r(Select):Press this button to reset certain DIC
functions and set your customization settings.
Pressing any of the four DIC buttons or the trip odometer
reset stem will acknowledge DIC messages and clear
them from the DIC display.
DIC Operation and Displays
The Driver Information Center (DIC) comes on when the
ignition is on. After a short delay, the DIC will display
the information that was last displayed before the engine
was turned off.
The DIC has different modes which can be accessed by
pressing the four DIC buttons located on the steering
wheel. These buttons are trip information, fuel
information, customization, and select. The button
functions are detailed in the following pages.
3-50
Page 195 of 484
Trip Information Button
3
(Trip Information):Press the trip information
button to scroll through the ODOMETER, TRIP A,
TRIP B, TIRE PRESSURES, TIMER, and ENGINE
HOURS.
Odometer:Press the trip information button until
ODOMETER appears on the display. This mode shows
the total distance the vehicle has been driven in
either miles or kilometers. Pressing the reset stem
located on the instrument cluster with the vehicle off will
also display the odometer.
Trip A:Press the trip information button until TRIP A
appears on the display. This mode shows the current
distance traveled since the last reset for TRIP A in either
miles or kilometers.
Trip B:Press the trip information button until TRIP B
appears on the display. This mode shows the current
distance traveled since the last reset for TRIP B in either
miles or kilometers.
To reset TRIP A or TRIP B information, press and hold
the select button for one second while in one of the
trip modes. This will reset the information for TRIP A or
TRIP B.You can also reset TRIP A or TRIP B while they are
displayed by pressing the reset stem on the cluster.
If you press and hold the reset stem or the select button
for four seconds, the display will show the distance
traveled since the last ignition cycle for TRIP A or
TRIP B.
SeeTrip Odometer on page 3-34for more information.
Tire Pressures:The tire pressure mode is available
only on vehicles equipped with a tire pressure
monitor. Press the trip information button until TIRE
PRESSURES appears on the display. This mode shows
the tire pressure in pounds per square inch (psi) or
kilopascals (kPa). Press the select button to scroll
through the following information:
LF TIRE shows the tire pressure for the front
driver’s side tire.
RF TIRE shows the tire pressure for the front
passenger’s side tire.
LR TIRE shows the tire pressure for the rear
driver’s side tire.
RR TIRE shows the tire pressure for the rear
passenger’s side tire.
3-51
Page 196 of 484
Timer:The DIC can be used as a timer. Press the
select button while TIMER is displayed to start the timer.
The display will show the amount of time that has
passed since the timer was last reset, not including time
the ignition is off. Time will continue to be counted as
long as the ignition is on, even if another display is being
shown on the DIC. The timer will record up to 99 hours,
59 minutes and 59 seconds (99:59:59) after which
the display will roll back to zero.
To stop the counting of time, press the select button
brie�y while TIMER is displayed.
To reset the timer to zero, press and hold the select
button while TIMER is displayed.
Engine Hours:Press the trip information button until
ENGINE HOURS appears on the display. This
mode shows the total number of hours the engine has
run. Pressing and holding the reset stem located on
the instrument cluster for about four seconds will also
display the engine hour information after the odometer
is displayed when the vehicle is off.Fuel Information Button
t
(Fuel Information):Press the fuel information
button to scroll through the range, fuel used, average
fuel economy, and the engine oil life system.
Fuel Range:Press the fuel information button until
RANGE appears on the display. This mode shows the
remaining distance you can drive without refueling.
It is based on fuel economy and the fuel remaining in
the fuel tank. The display will show LOW if the fuel level
is low.
The fuel economy data used to determine fuel range
is an average of recent driving conditions. As your
driving conditions change, this data is gradually updated.
Fuel range cannot be reset.
Fuel Used:Press the fuel information button until
FUEL USED appears on the display. This mode shows
the number of gallons or liters of fuel used since the
last reset of this menu item. To reset the fuel used
information, press and hold the select button for
one second while FUEL USED is displayed.
3-52