ignition CADILLAC ESCALADE 2006 2.G Workshop Manual
[x] Cancel search | Manufacturer: CADILLAC, Model Year: 2006, Model line: ESCALADE, Model: CADILLAC ESCALADE 2006 2.GPages: 484, PDF Size: 2.84 MB
Page 214 of 484
Here are some ways in which you can help avoid
distraction while driving.
While your vehicle is parked:
Familiarize yourself with all of its controls.
Familiarize yourself with its operation.
Set up your audio system by presetting your
favorite radio stations, setting the tone, and
adjusting the speakers. Then, when driving
conditions permit, you can tune to your favorite
radio stations using the presets and steering wheel
controls if the vehicle has them.
Notice:Before adding any sound equipment to
your vehicle, such as an audio system, CD player,
CB radio, mobile telephone, or two-way radio, make
sure that it can be added by checking with your
dealer. Also, check federal rules covering mobile
radio and telephone units. If sound equipment can
be added, it is very important to do it properly.
Added sound equipment may interfere with
the operation of your vehicle’s engine, radio, or
other systems, and even damage them. Your
vehicle’s systems may interfere with the operation
of sound equipment that has been added.
Notice:The chime signals related to safety belts,
parking brake, and other functions of your vehicle
operate through the radio/entertainment system.If that equipment is replaced or additional equipment
is added to your vehicle, the chimes may not
work. Make sure that replacement or additional
equipment is compatible with your vehicle before
installing it. SeeAccessories and Modifications
on page 5-3.
Your vehicle has a feature called Retained Accessory
Power (RAP). With RAP, the audio system can be
played even after the ignition is turned off. SeeRetained
Accessory Power (RAP) on page 2-17for more
information.
Setting the Time
Press and hold the HR button until the correct hour
appears on the display. Press and hold the MN button
until the correct minute appears on the display. The time
can be set with the ignition on or off.
To synchronize the time with an FM station broadcasting
Radio Data System (RDS) information, press and hold
the hour and minute buttons at the same time until RDS
TIME appears on the display. To accept this time, press
and hold the hour and minute buttons, at the same time,
for another two seconds. If the time is not available from
the station, NO UPDAT will appear on the display.
RDS time is broadcast once a minute. After tuning to an
RDS broadcast station, it may take a few minutes for
the time to update.
3-70
Page 216 of 484
Playing the Radio
PWR (Power):Press this knob to turn the system on
and off.
oVOLp(Volume):Turn this knob to increase or to
decrease the volume.
INFO (Information):When the ignition is off, press this
knob to display the time.
For RDS, press the INFO knob to change what appears
on the display while using RDS. The display options
are station name, RDS station frequency, PTY, and the
name of the program (if available).
For XM™ (if equipped), press the INFO knob while
in XM™ mode to retrieve four different categories
of information related to the current song or channel:
Artist, Song Title, Category or PTY, Channel
Number/Channel Name.
To change the default on the display, press the INFO
knob until you see the display you want, then hold
the knob until you hear a beep. The selected display
will now be the default.AUTO VOL (Automatic Volume):If your vehicle is
equipped with a Bose
®audio system, it includes Bose
AudioPilot®noise compensation technology. When
turned on, AudioPilot®continuously adjusts the audio
system equalization, to compensate for background
noise, so that your music always sounds the same at the
set volume level.
This feature is most effective at lower radio volume
settings where background noise can affect how well
you hear the music being played through your vehicle’s
audio system. At higher volume settings, where the
music is much louder than the background noise, there
may be little or no adjustments by AudioPilot
®.
To use AudioPilot
®, set the radio volume at a low to
moderate listening level. Begin listening while the vehicle
is stopped with the motor running; turn the AudioPilot
®
on by pressing the AUTO VOL button until AVOL
ON appears on the display. Then, resume driving,
gradually increasing the vehicle speed. You will notice
that your music sounds the same regardless of
background noises; such as road noise, tire hum, or
wind. With the AudioPilot
®turned off, repeat this process
again without adjusting the volume or tone controls.
you will notice that background noise is now audible,
and will prevent you from hearing softer passages of the
music. To turn AudioPilot
®off, press AUTO VOL until
AVOL OFF appears on the display. For additional
information on AudioPilot
®, please visit www.bose.com.
3-72
Page 224 of 484
Playing a Cassette Tape
The tape player is built to work best with tapes that are
up to 30 to 45 minutes long on each side. Tapes
longer than that are so thin they may not work well in
this player. The longer side with the tape visible should
face to the right. If you hear nothing or hear a garbled
sound, the tape may not be in squarely. Press the eject
button to remove the tape and start over.
If the ignition and radio are off, the tape can be inserted,
but will not play until the ignition and radio are on.
If the ignition is on and the radio is off, the tape can be
inserted and will begin playing.
While the tape is playing, use the VOL, AUDIO, and
SEEK controls just as you do for the radio. The cassette
tape symbol will appear on the display and an arrow
showing which side of the tape is playing. The tape
player will play the other side of the tape when it
reaches the end.
Cassette tape adapter kits for portable CD players will
work in the cassette tape player. See “CD Adapter Kits”
later for more information.
The tape bias is set automatically when a metal or
chrome tape is inserted.
If an error appears on the display, see “Cassette Tape
Messages” later in this section.1 PREV (Previous):The tape must have at least three
seconds of silence between each selection for
previous to work. Press this pushbutton to go to the
previous selection on the tape if the current selection
has been playing for less than three seconds. If pressed
when the current selection has been playing from
three to 13 seconds, it will go to the beginning of the
previous selection or the beginning of the current
selection, depending on the position on the tape. If
pressed when the current selection has been playing for
more than 13 seconds, it will go to the beginning of
the current selection.
SEEK and a negative number will appear on the display
while the cassette player is in the previous mode.
Pressing this pushbutton multiple times will increase the
number of selections to be searched back, up to−9.
2 NEXT:The tape must have at least three seconds
of silence between each selection for next to work.
Press this pushbutton to go to the next selection on the
tape. Pressing this pushbutton multiple times, in next
mode, will increase the number of selections to be
searched forward. SEEK and a positive number
will appear on the display.
3-80
Page 226 of 484
Cassette Tape Messages
CHK TAPE (Check Tape):If this message appears on
the display, the tape will not play due to one of the
following errors:
The tape is tight and the player cannot turn the
tape hubs. Remove the tape. Hold the tape with
the open end down and try to turn the right
hub counterclockwise with a pencil. Turn the tape
over and repeat. If the hubs do not turn easily,
the tape may be damaged and should not be used
in the player. Try a new tape to make sure your
player is working properly.
The tape is broken. Try a new tape.
The tape is wrapped around the tape head.
Attempt to get the cassette out. Try a new tape.
CLEAN:If this message appears on the display, the
cassette tape player needs to be cleaned. It will still play
tapes, but it should be cleaned as soon as possible to
prevent damage to the tapes and player. SeeCare
of the Cassette Tape Player on page 3-104.
If the cassette tape is not playing correctly, for any other
reason, try a known good cassette.If any error occurs repeatedly or if an error cannot be
corrected, contact your GM dealer. If the radio displays
an error message, write it down and provide it to
your GM dealer when reporting the problem.
CD Adapter Kits
It is possible to use a portable CD player with the
cassette tape player after activating the bypass feature
on your tape player.
To activate the bypass feature, perform the following
steps:
1. Turn the ignition on.
2. Turn the radio off.
3. Press and hold the TAPE DISC button for �ve
seconds. READY will appear on the display and
the tape symbol on the display will �ash, indicating
the feature is active.
4. Insert the adapter into the cassette tape slot. It will
power up the radio and begin playing.
The override feature will remain active until the eject
button is pressed.
3-82
Page 227 of 484
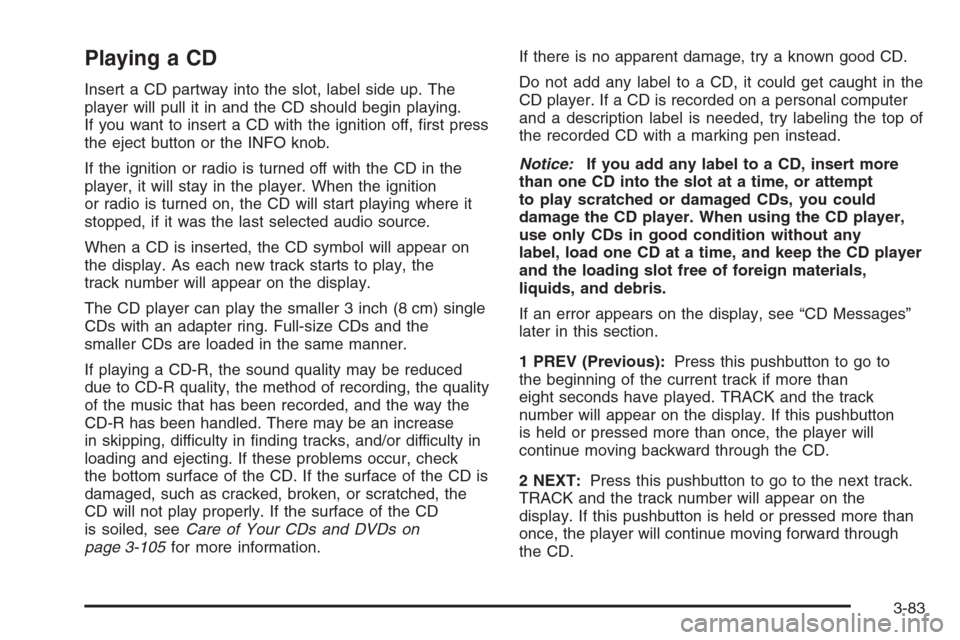
Playing a CD
Insert a CD partway into the slot, label side up. The
player will pull it in and the CD should begin playing.
If you want to insert a CD with the ignition off, �rst press
the eject button or the INFO knob.
If the ignition or radio is turned off with the CD in the
player, it will stay in the player. When the ignition
or radio is turned on, the CD will start playing where it
stopped, if it was the last selected audio source.
When a CD is inserted, the CD symbol will appear on
the display. As each new track starts to play, the
track number will appear on the display.
The CD player can play the smaller 3 inch (8 cm) single
CDs with an adapter ring. Full-size CDs and the
smaller CDs are loaded in the same manner.
If playing a CD-R, the sound quality may be reduced
due to CD-R quality, the method of recording, the quality
of the music that has been recorded, and the way the
CD-R has been handled. There may be an increase
in skipping, difficulty in �nding tracks, and/or difficulty in
loading and ejecting. If these problems occur, check
the bottom surface of the CD. If the surface of the CD is
damaged, such as cracked, broken, or scratched, the
CD will not play properly. If the surface of the CD
is soiled, seeCare of Your CDs and DVDs on
page 3-105for more information.If there is no apparent damage, try a known good CD.
Do not add any label to a CD, it could get caught in the
CD player. If a CD is recorded on a personal computer
and a description label is needed, try labeling the top of
the recorded CD with a marking pen instead.
Notice:If you add any label to a CD, insert more
than one CD into the slot at a time, or attempt
to play scratched or damaged CDs, you could
damage the CD player. When using the CD player,
use only CDs in good condition without any
label, load one CD at a time, and keep the CD player
and the loading slot free of foreign materials,
liquids, and debris.
If an error appears on the display, see “CD Messages”
later in this section.
1 PREV (Previous):Press this pushbutton to go to
the beginning of the current track if more than
eight seconds have played. TRACK and the track
number will appear on the display. If this pushbutton
is held or pressed more than once, the player will
continue moving backward through the CD.
2 NEXT:Press this pushbutton to go to the next track.
TRACK and the track number will appear on the
display. If this pushbutton is held or pressed more than
once, the player will continue moving forward through
the CD.
3-83
Page 228 of 484
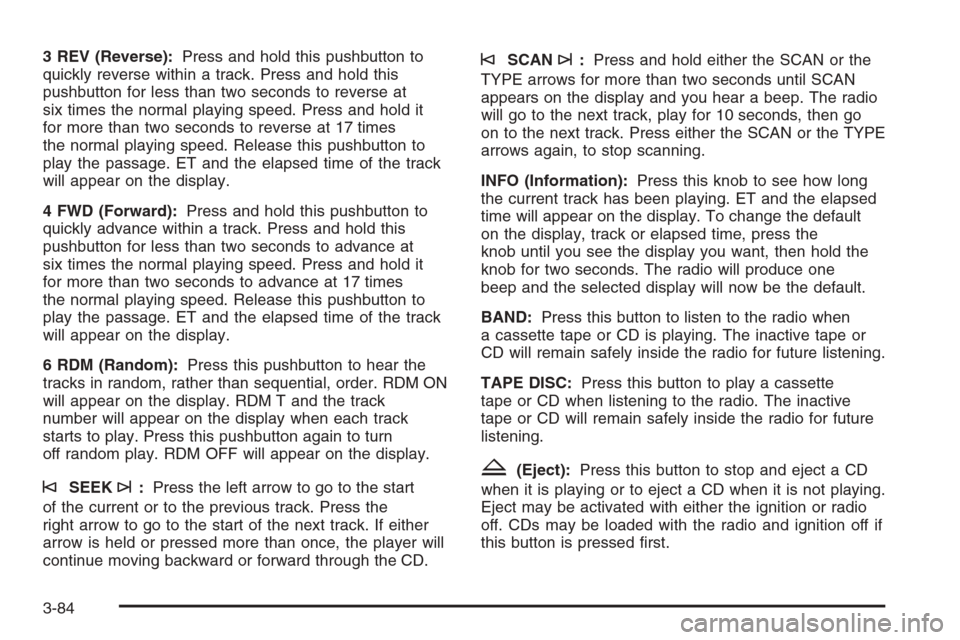
3 REV (Reverse):Press and hold this pushbutton to
quickly reverse within a track. Press and hold this
pushbutton for less than two seconds to reverse at
six times the normal playing speed. Press and hold it
for more than two seconds to reverse at 17 times
the normal playing speed. Release this pushbutton to
play the passage. ET and the elapsed time of the track
will appear on the display.
4 FWD (Forward):Press and hold this pushbutton to
quickly advance within a track. Press and hold this
pushbutton for less than two seconds to advance at
six times the normal playing speed. Press and hold it
for more than two seconds to advance at 17 times
the normal playing speed. Release this pushbutton to
play the passage. ET and the elapsed time of the track
will appear on the display.
6 RDM (Random):Press this pushbutton to hear the
tracks in random, rather than sequential, order. RDM ON
will appear on the display. RDM T and the track
number will appear on the display when each track
starts to play. Press this pushbutton again to turn
off random play. RDM OFF will appear on the display.
©SEEK¨:Press the left arrow to go to the start
of the current or to the previous track. Press the
right arrow to go to the start of the next track. If either
arrow is held or pressed more than once, the player will
continue moving backward or forward through the CD.
©SCAN¨:Press and hold either the SCAN or the
TYPE arrows for more than two seconds until SCAN
appears on the display and you hear a beep. The radio
will go to the next track, play for 10 seconds, then go
on to the next track. Press either the SCAN or the TYPE
arrows again, to stop scanning.
INFO (Information):Press this knob to see how long
the current track has been playing. ET and the elapsed
time will appear on the display. To change the default
on the display, track or elapsed time, press the
knob until you see the display you want, then hold the
knob for two seconds. The radio will produce one
beep and the selected display will now be the default.
BAND:Press this button to listen to the radio when
a cassette tape or CD is playing. The inactive tape or
CD will remain safely inside the radio for future listening.
TAPE DISC:Press this button to play a cassette
tape or CD when listening to the radio. The inactive
tape or CD will remain safely inside the radio for future
listening.
Z(Eject):Press this button to stop and eject a CD
when it is playing or to eject a CD when it is not playing.
Eject may be activated with either the ignition or radio
off. CDs may be loaded with the radio and ignition off if
this button is pressed �rst.
3-84
Page 230 of 484

Navigation/Radio System
Your vehicle may have a navigation radio system.
The navigation system has built-in features intended to
minimize driver distraction. Technology alone, no
matter how advanced, can never replace your own
judgment. See the Navigation System manual for some
tips to help you reduce distractions while driving.
Rear Seat Entertainment System
Your vehicle may have the Digital Versatile Disc (DVD)
Rear Seat Entertainment (RSE) system. The RSE
system includes a DVD player, a video display screen,
two sets of wireless headphones, and a remote
control.
Parental Control
This button is located behind the video screen. Press
this button while a DVD or CD is playing to freeze
the video and mute the audio. The video screen will
display Parental Control ON and the power indicator
light on the DVD player will �ash. It will also disable all
other button operations from the remote control and
the DVD player, with the exception of the eject button.
Press this button again to restore operation of the
DVD player.This button may also be used to turn the DVD player
power on and automatically resume play if the ignition is
in RUN, ACCESSORY, or if RAP is active. See
Retained Accessory Power (RAP) on page 2-17for
more information.
Before You Drive
The RSE system is for rear seat passengers only.
The driver cannot safely view the video screen while
driving and should not try to do so.
Headphones
The RSE system includes two sets of wireless
headphones.
Each set of headphones has an ON/OFF control.
An indicator light will illuminate on the headphones
when they are on. If the light does not illuminate, the
batteries may need to be replaced. See “Battery
Replacement” later in this section for more information.
To turn the headphones off activate the ON/OFF
control.
Each set of headphones has a volume knob. To adjust
the volume, adjust this knob.
3-86
Page 233 of 484
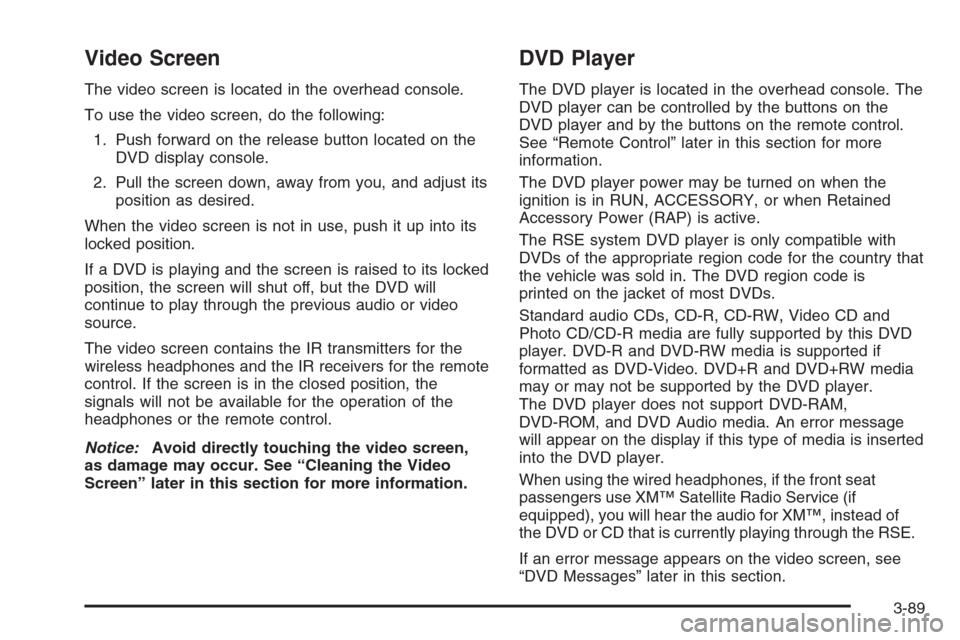
Video Screen
The video screen is located in the overhead console.
To use the video screen, do the following:
1. Push forward on the release button located on the
DVD display console.
2. Pull the screen down, away from you, and adjust its
position as desired.
When the video screen is not in use, push it up into its
locked position.
If a DVD is playing and the screen is raised to its locked
position, the screen will shut off, but the DVD will
continue to play through the previous audio or video
source.
The video screen contains the IR transmitters for the
wireless headphones and the IR receivers for the remote
control. If the screen is in the closed position, the
signals will not be available for the operation of the
headphones or the remote control.
Notice:Avoid directly touching the video screen,
as damage may occur. See “Cleaning the Video
Screen” later in this section for more information.
DVD Player
The DVD player is located in the overhead console. The
DVD player can be controlled by the buttons on the
DVD player and by the buttons on the remote control.
See “Remote Control” later in this section for more
information.
The DVD player power may be turned on when the
ignition is in RUN, ACCESSORY, or when Retained
Accessory Power (RAP) is active.
The RSE system DVD player is only compatible with
DVDs of the appropriate region code for the country that
the vehicle was sold in. The DVD region code is
printed on the jacket of most DVDs.
Standard audio CDs, CD-R, CD-RW, Video CD and
Photo CD/CD-R media are fully supported by this DVD
player. DVD-R and DVD-RW media is supported if
formatted as DVD-Video. DVD+R and DVD+RW media
may or may not be supported by the DVD player.
The DVD player does not support DVD-RAM,
DVD-ROM, and DVD Audio media. An error message
will appear on the display if this type of media is inserted
into the DVD player.
When using the wired headphones, if the front seat
passengers use XM™ Satellite Radio Service (if
equipped), you will hear the audio for XM™, instead of
the DVD or CD that is currently playing through the RSE.
If an error message appears on the video screen, see
“DVD Messages” later in this section.
3-89
Page 239 of 484
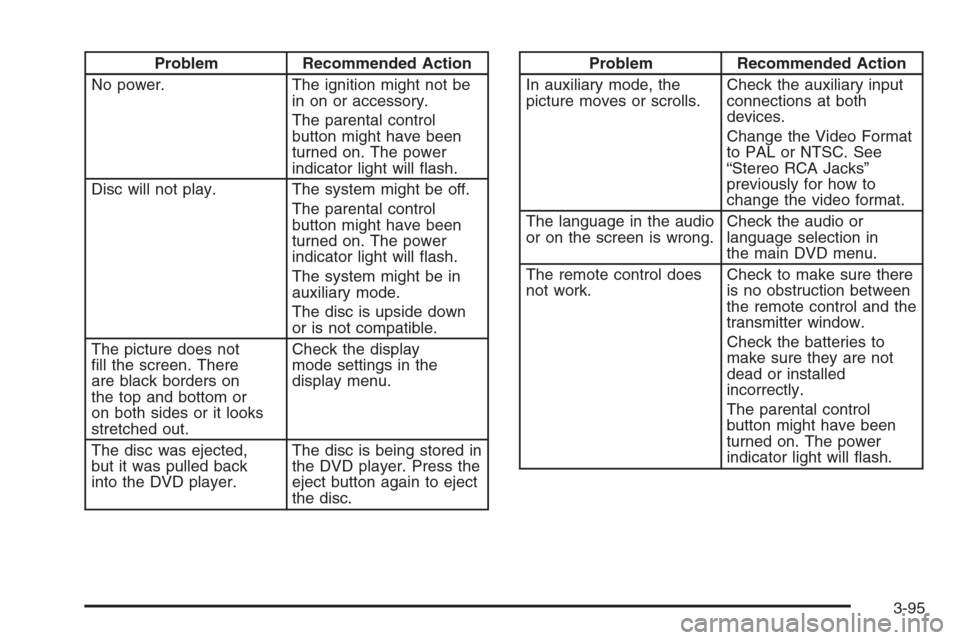
Problem Recommended Action
No power. The ignition might not be
in on or accessory.
The parental control
button might have been
turned on. The power
indicator light will �ash.
Disc will not play. The system might be off.
The parental control
button might have been
turned on. The power
indicator light will �ash.
The system might be in
auxiliary mode.
The disc is upside down
or is not compatible.
The picture does not
�ll the screen. There
are black borders on
the top and bottom or
on both sides or it looks
stretched out.Check the display
mode settings in the
display menu.
The disc was ejected,
but it was pulled back
into the DVD player.The disc is being stored in
the DVD player. Press the
eject button again to eject
the disc.Problem Recommended Action
In auxiliary mode, the
picture moves or scrolls.Check the auxiliary input
connections at both
devices.
Change the Video Format
to PAL or NTSC. See
“Stereo RCA Jacks”
previously for how to
change the video format.
The language in the audio
or on the screen is wrong.Check the audio or
language selection in
the main DVD menu.
The remote control does
not work.Check to make sure there
is no obstruction between
the remote control and the
transmitter window.
Check the batteries to
make sure they are not
dead or installed
incorrectly.
The parental control
button might have been
turned on. The power
indicator light will �ash.
3-95
Page 243 of 484
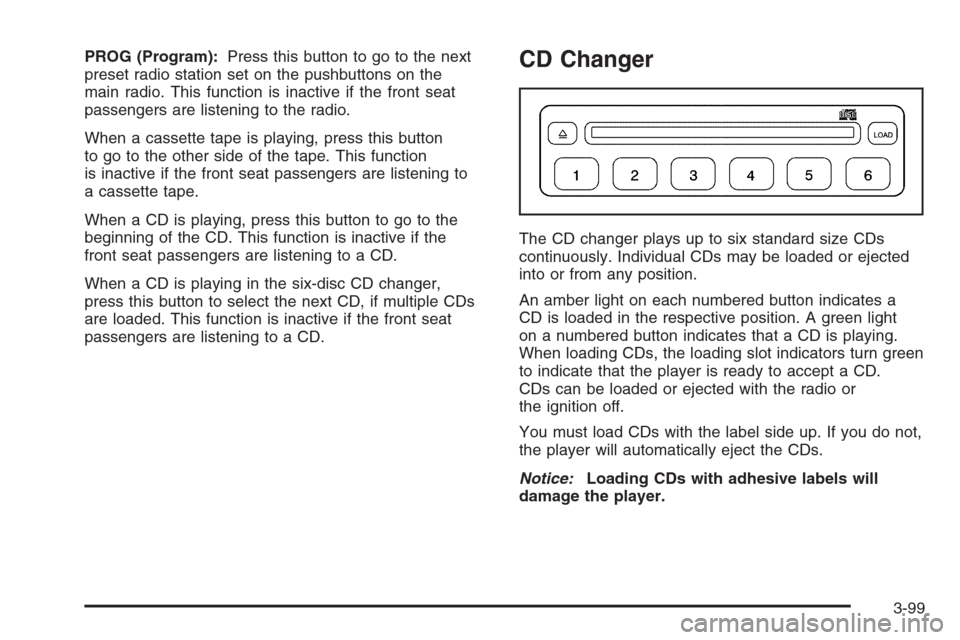
PROG (Program):Press this button to go to the next
preset radio station set on the pushbuttons on the
main radio. This function is inactive if the front seat
passengers are listening to the radio.
When a cassette tape is playing, press this button
to go to the other side of the tape. This function
is inactive if the front seat passengers are listening to
a cassette tape.
When a CD is playing, press this button to go to the
beginning of the CD. This function is inactive if the
front seat passengers are listening to a CD.
When a CD is playing in the six-disc CD changer,
press this button to select the next CD, if multiple CDs
are loaded. This function is inactive if the front seat
passengers are listening to a CD.CD Changer
The CD changer plays up to six standard size CDs
continuously. Individual CDs may be loaded or ejected
into or from any position.
An amber light on each numbered button indicates a
CD is loaded in the respective position. A green light
on a numbered button indicates that a CD is playing.
When loading CDs, the loading slot indicators turn green
to indicate that the player is ready to accept a CD.
CDs can be loaded or ejected with the radio or
the ignition off.
You must load CDs with the label side up. If you do not,
the player will automatically eject the CDs.
Notice:Loading CDs with adhesive labels will
damage the player.
3-99