CADILLAC ESCALADE 2007 3.G Owners Manual
Manufacturer: CADILLAC, Model Year: 2007, Model line: ESCALADE, Model: CADILLAC ESCALADE 2007 3.GPages: 574, PDF Size: 2.89 MB
Page 181 of 574
Rear Seat Armrest
Your vehicle’s second row seat may have an
armrest/storage compartment.
Pull the loop at the top of the armrest out to lower
the armrest.
To open the compartment, if equipped, push the
button on the front of the armrest and pull the
top open.
Convenience Net
The convenience net (if equipped) in the rear of
your vehicle helps to keep small loads in place
during sharp turns or quick stops and starts.
The net is not designed for larger, heavier items.
To install the net, attach the hooks to the
raised cargo tie downs. Then, attach the cord
loops to the button retainers in the side trim.
You can unhook the net so that it will lie �at when
you’re not using it.
Cargo Cover
{CAUTION:
An improperly stored cargo cover could
be thrown about the vehicle during a
collision or sudden maneuver. You or
others could be injured. If you remove the
cover, always store it in the proper
storage location. When you put it back,
always be sure that it is securely
reattached.
If you have a cargo cover, you can use it to cover
items in the cargo area of your vehicle.
To use the cover, do the following:
1. Pull the cover handle toward the rear of the
vehicle.
2. Latch the cover posts into the retaining
sockets on the cargo area trim panels.
181
Page 182 of 574
To return the cover to the retracted position, do
the following:
1. Pull up on the cover handle to release the
cover posts from the retaining sockets.
2. Let the cover move forward to the full retracted
position.
To remove the cover, from a regular wheelbase
model, do the following:
1. Let the cover go all the way into the holder.
2. Then, grasping the driver’s side cover endcap,
push the cover endcap toward the passenger’s
side of the vehicle.
3. Swing the cover rearward and take it out of
the vehicle.
To put the cover in the vehicle, do the following:
1. Make sure the cover slot in the holder faces
rearward with the round surface facing down.
2. Then, hold the cover at an angle and place
the cover endcap into the slot in the
passenger’s side trim panel.
3. Move the other end of the cover forward and
hold it next to the driver’s side trim panel slot.4. Press the endcaps in, this will allow the cover
to �t into the trim slot.
5. Lightly pull on the cover holder to make sure
it is secure.
On the extended wheelbase models there are
two cover positions. The slots furthest
forward allow the cover to be used if the third
seat is removed or folded down. The cover
can be installed and removed from either side.
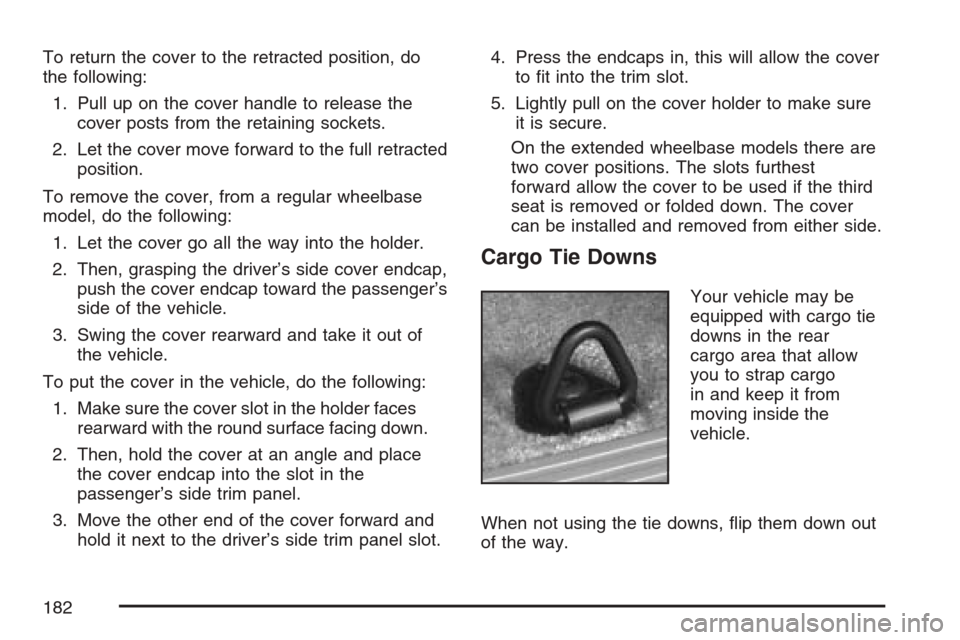
Cargo Tie Downs
Your vehicle may be
equipped with cargo tie
downs in the rear
cargo area that allow
you to strap cargo
in and keep it from
moving inside the
vehicle.
When not using the tie downs, �ip them down out
of the way.
182
Page 183 of 574
Cargo Management System
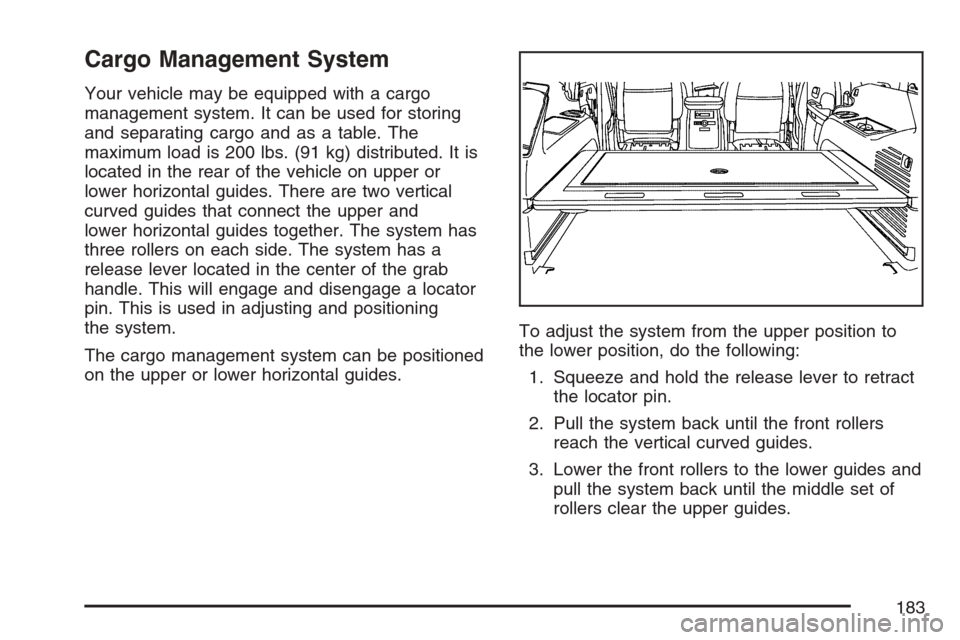
Your vehicle may be equipped with a cargo
management system. It can be used for storing
and separating cargo and as a table. The
maximum load is 200 lbs. (91 kg) distributed. It is
located in the rear of the vehicle on upper or
lower horizontal guides. There are two vertical
curved guides that connect the upper and
lower horizontal guides together. The system has
three rollers on each side. The system has a
release lever located in the center of the grab
handle. This will engage and disengage a locator
pin. This is used in adjusting and positioning
the system.
The cargo management system can be positioned
on the upper or lower horizontal guides.To adjust the system from the upper position to
the lower position, do the following:
1. Squeeze and hold the release lever to retract
the locator pin.
2. Pull the system back until the front rollers
reach the vertical curved guides.
3. Lower the front rollers to the lower guides and
pull the system back until the middle set of
rollers clear the upper guides.
183
Page 184 of 574
4. Lower the system until the middle rollers are
lined up with lower guides. While holding in
the release lever, push the system forward
until all three sets of rollers are on the guides.
5. Release the lever and push the system until
the locator pin reaches the locator hole.
To adjust the system from the lower position to
the upper position, do the following:
1. Squeeze and hold the release lever to retract
the locator pin.
2. Pull the system back and lift until the middle
rollers can be placed into the upper guides.
3. Push the system forward until the front rollers
are lined up with the vertical curved guides.
4. Push down on the rear of the system and
raise the front rollers up the vertical curved
guides.
5. Push the system forward until all three sets of
rollers are resting on the guides and release
the lever to engage the locating pin into
the hole.To utilize the cargo management system as a
table feature, squeeze the release lever and pull
the system towards you until the locator pin
reaches the next hole. The system will extend out
of the vehicle. The liftgate cannot be closed in
this position. Do not operate the vehicle with
liftgate open.
The cargo management system can be removed
from the vehicle. This procedure should be
completed by two people. While squeezing the
release lever, pull the system back until the rollers
clear the guides. To reinstall the system, align
the rollers to the guides, squeeze the release lever
and push into position.
On one side of the system is a retractable
storage area.
184
Page 185 of 574
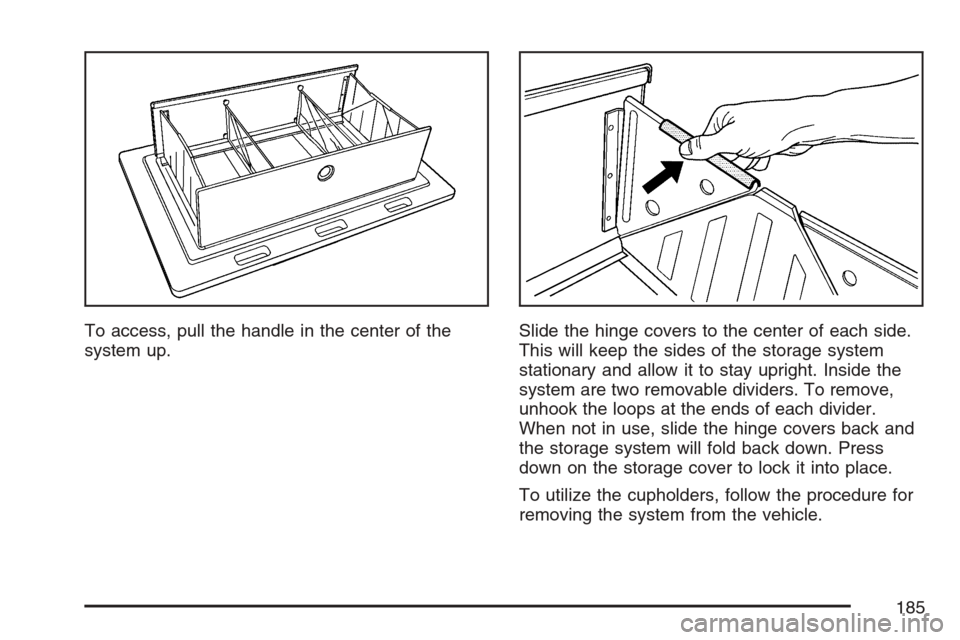
To access, pull the handle in the center of the
system up.Slide the hinge covers to the center of each side.
This will keep the sides of the storage system
stationary and allow it to stay upright. Inside the
system are two removable dividers. To remove,
unhook the loops at the ends of each divider.
When not in use, slide the hinge covers back and
the storage system will fold back down. Press
down on the storage cover to lock it into place.
To utilize the cupholders, follow the procedure for
removing the system from the vehicle.
185
Page 186 of 574
Sunroof
Your vehicle may be equipped with a power
sliding sunroof. To open or close the sunroof, the
ignition needs to be turned to ON, or Retained
Accessory Power (RAP) must be active.
When RAP is active, the sunroof will work for
10 minutes after the ignition is turned off, or until a
front door is opened. SeeRetained Accessory
Power (RAP) on page 141for more information.
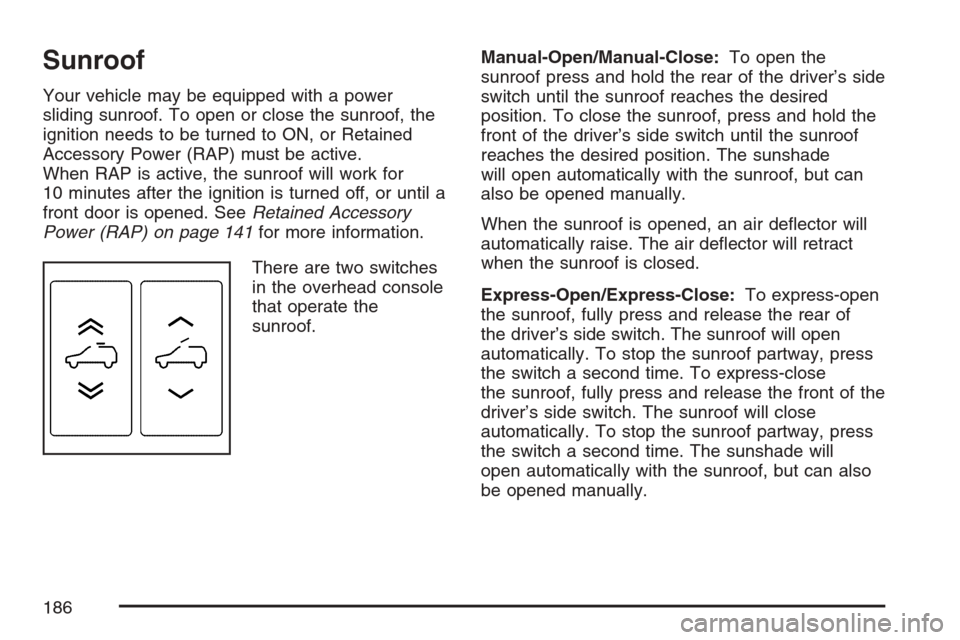
There are two switches
in the overhead console
that operate the
sunroof.Manual-Open/Manual-Close:To open the
sunroof press and hold the rear of the driver’s side
switch until the sunroof reaches the desired
position. To close the sunroof, press and hold the
front of the driver’s side switch until the sunroof
reaches the desired position. The sunshade
will open automatically with the sunroof, but can
also be opened manually.
When the sunroof is opened, an air de�ector will
automatically raise. The air de�ector will retract
when the sunroof is closed.
Express-Open/Express-Close:To express-open
the sunroof, fully press and release the rear of
the driver’s side switch. The sunroof will open
automatically. To stop the sunroof partway, press
the switch a second time. To express-close
the sunroof, fully press and release the front of the
driver’s side switch. The sunroof will close
automatically. To stop the sunroof partway, press
the switch a second time. The sunshade will
open automatically with the sunroof, but can also
be opened manually.
186
Page 187 of 574
When the sunroof is opened, an air de�ector will
automatically raise. The air de�ector will retract
when the sunroof is closed.
Vent:From the closed position, press the rear of
the passenger’s side switch to vent the sunroof.
To stop the sunroof partway, press the switch
a second time. To close the sunroof, press and
hold the front of the passenger’s side switch.
To stop the sunroof partway, release the switch.Anti-Pinch Feature:If an object is in the path of
the sunroof while it is closing, the anti-pinch
feature will detect the object and stop the sunroof
from closing at the point of the obstruction.
The sunroof will then open halfway, and the air
de�ector will raise. To close the sunroof once
it has re-opened, refer to the “Express-Close” or
“Manual-Close” functions described previously.
If the sunroof is in the vent position, and there is
an object in the path of the sunroof when it
closing, the anti-pinch feature will detect the object
and stop the sunroof. To close the sunroof once
it has re-opened, refer to the “Manual-Close”
or “Express-Close” functions described previously.
187
Page 188 of 574

✍NOTES
188
Page 189 of 574
Instrument Panel Overview........................ 192
Hazard Warning Flashers.......................... 194
Other Warning Devices............................. 194
Horn.......................................................... 194
Tilt Wheel.................................................. 195
Heated Steering Wheel............................. 195
Turn Signal/Multifunction Lever.................. 196
Turn and Lane-Change Signals................. 196
Headlamp High/Low-Beam Changer.......... 197
Windshield Wipers..................................... 198
Rainsense™ II Wipers............................... 199
Windshield Washer.................................... 200
Rear Window Wiper/Washer...................... 201
Cruise Control........................................... 202
Exterior Lamps.......................................... 205
Headlamps on Reminder........................... 210
Daytime Running Lamps (DRL)................. 210
Automatic Headlamp System..................... 211
Fog Lamps................................................ 212
Instrument Panel Brightness...................... 212
Dome Lamps............................................. 212
Dome Lamp Override................................ 213
Entry Lighting............................................ 213
Exit Lighting.............................................. 213
Reading Lamps......................................... 213Battery Run-Down Protection..................... 213
Ultrasonic Rear Parking Assist (URPA)...... 214
Accessory Power Outlet(s)........................ 218
Ashtray(s) and Cigarette Lighter................ 219
Analog Clock............................................. 219
Climate Controls......................................... 220
Dual Automatic Climate Control System.... 220
Outlet Adjustment...................................... 225
Rear Air Conditioning and Heating
System and Electronic Climate
Controls................................................. 226
Warning Lights, Gages, and Indicators..... 228
Instrument Panel Cluster........................... 229
Speedometer and Odometer...................... 230
Trip Odometer........................................... 230
Tachometer............................................... 230
Safety Belt Reminder Light........................ 231
Passenger Safety Belt Reminder Light....... 231
Airbag Readiness Light............................. 232
Passenger Airbag Status Indicator............. 233
Charging System Light.............................. 235
Brake System Warning Light..................... 235
Anti-Lock Brake System Warning Light...... 237
StabiliTrak
®Indicator Light......................... 237
Section 3 Instrument Panel
189
Page 190 of 574
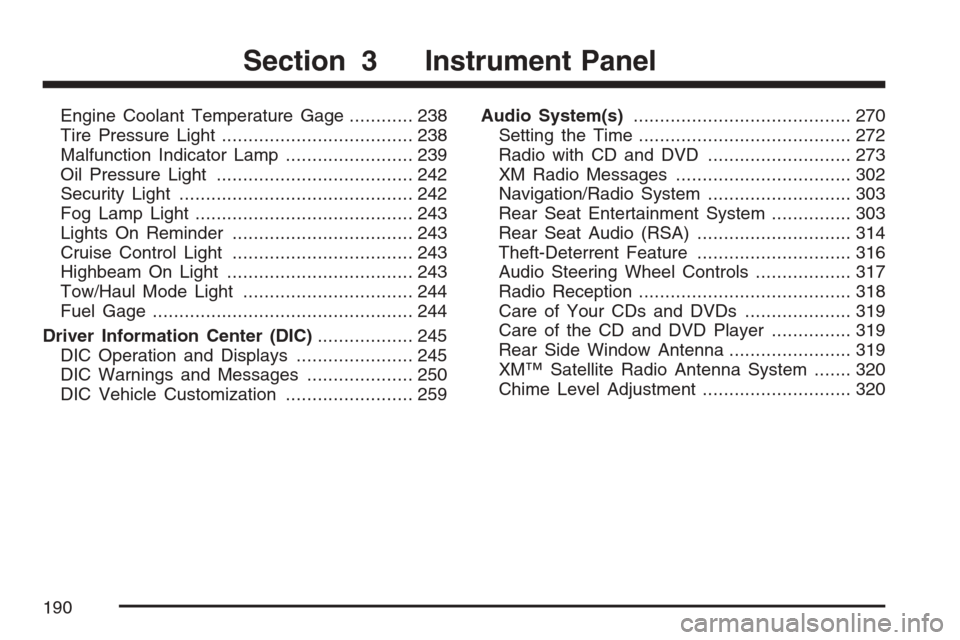
Engine Coolant Temperature Gage............ 238
Tire Pressure Light.................................... 238
Malfunction Indicator Lamp........................ 239
Oil Pressure Light..................................... 242
Security Light............................................ 242
Fog Lamp Light......................................... 243
Lights On Reminder.................................. 243
Cruise Control Light.................................. 243
Highbeam On Light................................... 243
Tow/Haul Mode Light................................ 244
Fuel Gage................................................. 244
Driver Information Center (DIC).................. 245
DIC Operation and Displays...................... 245
DIC Warnings and Messages.................... 250
DIC Vehicle Customization........................ 259Audio System(s)......................................... 270
Setting the Time........................................ 272
Radio with CD and DVD........................... 273
XM Radio Messages................................. 302
Navigation/Radio System........................... 303
Rear Seat Entertainment System............... 303
Rear Seat Audio (RSA)............................. 314
Theft-Deterrent Feature............................. 316
Audio Steering Wheel Controls.................. 317
Radio Reception........................................ 318
Care of Your CDs and DVDs.................... 319
Care of the CD and DVD Player............... 319
Rear Side Window Antenna....................... 319
XM™ Satellite Radio Antenna System....... 320
Chime Level Adjustment............................ 320
Section 3 Instrument Panel
190