CADILLAC ESCALADE 2010 3.G Owner's Manual
Manufacturer: CADILLAC, Model Year: 2010, Model line: ESCALADE, Model: CADILLAC ESCALADE 2010 3.GPages: 616, PDF Size: 39.41 MB
Page 21 of 616
Windshield Wiper/Washer
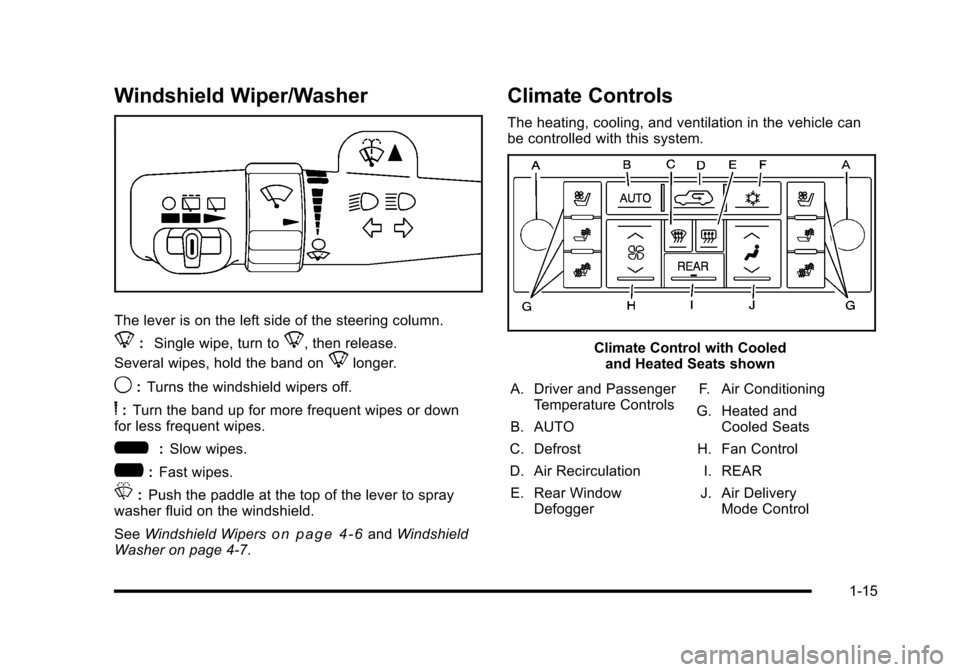
The lever is on the left side of the steering column.
8:Single wipe, turn to8, then release.
Several wipes, hold the band on8longer.
9:Turns the windshield wipers off.
6:Turn the band up for more frequent wipes or downfor less frequent wipes.
6:Slow wipes.
?:Fast wipes.
L:Push the paddle at the top of the lever to spraywasher fluid on the windshield.
SeeWindshield Wiperso n p a g e 4!6andWindshieldWasher on page 4!7.
Climate Controls
The heating, cooling, and ventilation in the vehicle canbe controlled with this system.
Climate Control with Cooledand Heated Seats shown
A. Driver and PassengerTemperature Controls
B. AUTO
C. Defrost
D. Air Recirculation
E. Rear WindowDefogger
F. Air Conditioning
G. Heated andCooled Seats
H. Fan Control
I. REAR
J. Air DeliveryMode Control
1-15
Page 22 of 616

SeeDual Automatic Climate Control Systemonpage 4!20andRear Air Conditioning and HeatingSystem and Electronic Climate Controlson page 4!26(If Equipped).
Transmission
Driver Shift Control (DSC)
The DSC switch is located on the shift lever.To enable the DSC feature, move the column shiftlever to the M (Manual) position. The Driver InformationCenter (DIC) display will show the message MANUALSHIFT on the first line and the current gear will bedisplayed on the second line. SeeDriver Information
Center (DIC)on page 4!41andDIC Operation andDisplayson page 4!41for more information. This is thehighest attainable range with all lower gears accessible.As an example, when 4 (Fourth) gear is selected,1 (First) through 4 (Fourth) gears are available.
Press the plus/minus buttons, located on the steeringcolumn shift lever, to select the desired range of gearsfor current driving conditions. SeeAutomaticTransmission Operationon page 3!32.
While using DSC, cruise control and the tow/haul modecan be used.
Grade Braking is not available when DSC is active.SeeTow/Haul Mode on page 3!36.
Vehicle Features
Satellite Radio
XM is a satellite radio service that is based in the48 contiguous United States and 10 Canadianprovinces. XM satellite radio has a wide varietyof programming and commercial-free music,coast-to-coast, and in digital-quality sound.
A fee is required to receive the XM service.
For more information, refer to:
.www.xmradio.com or call 1-800-929-2100 (U.S.)
.www.xmradio.ca or call 1-877-438-9677 (Canada)
1-16
Page 23 of 616
Portable Audio Devices
This vehicle may have an auxilliary input, located on theaudio faceplate and a USB port located in the centerconsole. External devices such as iPod®, laptopcomputers, MP3 players, CD changers, USB storagedevice, etc. can be connected to the auxiliary port usinga 3.5 mm (1/8 in.) input jack or the USB port dependingon the audio system.
See“Using the Auxiliary Input Jack”and“Using theUSB Port”underAuxiliary Devices on page 5!85.
Steering Wheel Controls
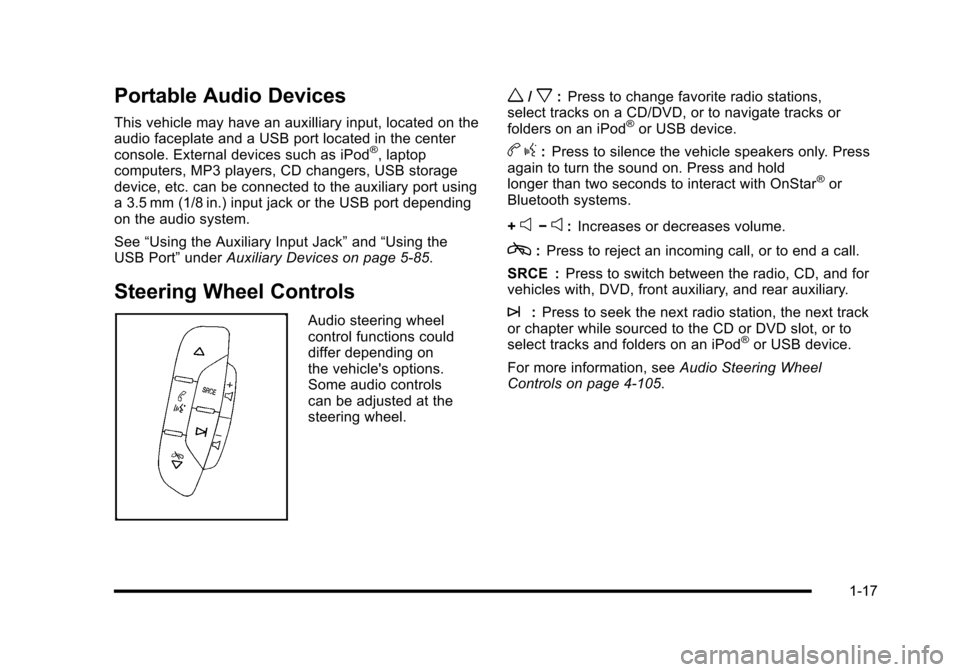
Audio steering wheelcontrol functions coulddiffer depending onthe vehicle's options.Some audio controlscan be adjusted at thesteering wheel.
w/x:Press to change favorite radio stations,select tracks on a CD/DVD, or to navigate tracks orfolders on an iPod®or USB device.
bg:Press to silence the vehicle speakers only. Pressagain to turn the sound on. Press and holdlonger than two seconds to interact with OnStar®orBluetooth systems.
+e!e:Increases or decreases volume.
c:Press to reject an incoming call, or to end a call.
SRCE :Press to switch between the radio, CD, and forvehicles with, DVD, front auxiliary, and rear auxiliary.
¨:Press to seek the next radio station, the next trackor chapter while sourced to the CD or DVD slot, or toselect tracks and folders on an iPod®or USB device.
For more information, seeAudio Steering WheelControls on page 4!105.
1-17
Page 24 of 616

Bluetooth®
For vehicles with an in-vehicle Bluetooth system, itallows users with a Bluetooth enabled cell phone tomake and receive hands-free calls using the vehicle’saudio system and controls.
The Bluetooth enabled cell phone must be paired withthe in-vehicle Bluetooth system before it can be usedin the vehicle. Not all phones will support all functions.For more information visit www.gm.com/bluetooth.
For more information, seeBluetooth®on page 4!67.
Navigation System
The vehicle's navigation system provides detailed mapsof most major freeways and roads throughout theUnited States and Canada. After a destination has beenset, the system provides turn-by-turn instructions forreaching the destination. In addition, the system canhelp locate a variety of points of interest (POI), such asbanks, airports, restaurants, and more.
See Navigation System in the owner's manual formore information.
Driver Information Center (DIC)
The DIC display is located at the bottom of theinstrument panel cluster. It shows the status of manyvehicle systems and enables access to thepersonalization menu.
The DIC buttons arelocated on the instrumentpanel, next to the steeringwheel.
3(Trip/Fuel):Press this button to display theodometer, trip odometer, fuel range, average economy,fuel used, timer, and transmission temperature. Thecompass and outside air temperature will also be shownin the display. The temperature will be shown in °F or°C depending on the units selected.
1-18
Page 25 of 616
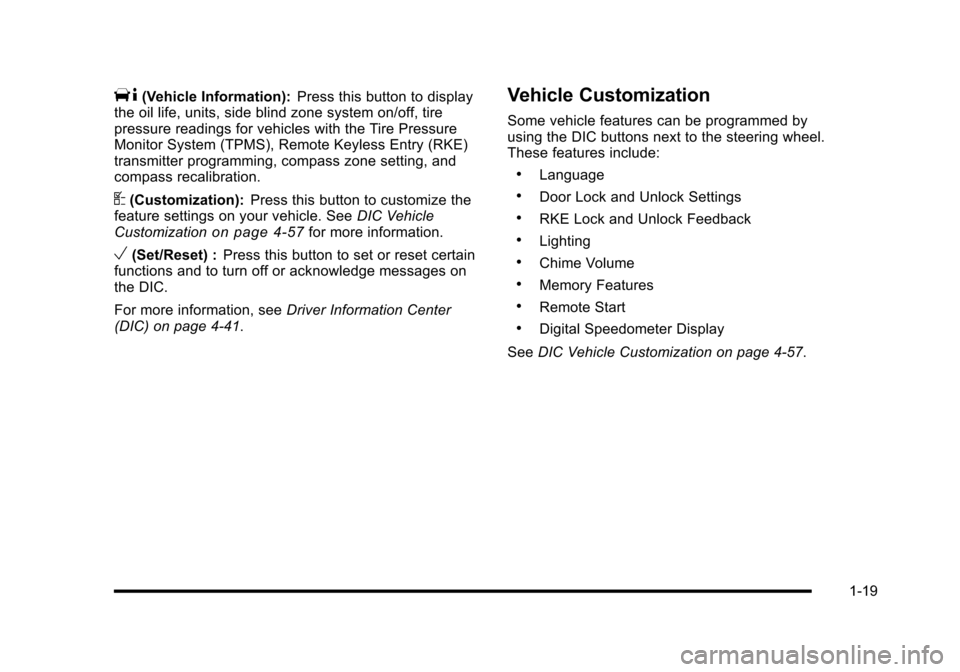
T(Vehicle Information):Press this button to displaythe oil life, units, side blind zone system on/off, tirepressure readings for vehicles with the Tire PressureMonitor System (TPMS), Remote Keyless Entry (RKE)transmitter programming, compass zone setting, andcompass recalibration.
U(Customization):Press this button to customize thefeature settings on your vehicle. SeeDIC VehicleCustomizationon page 4!57for more information.
V(Set/Reset) :Press this button to set or reset certainfunctions and to turn off or acknowledge messages onthe DIC.
For more information, seeDriver Information Center(DIC) on page 4!41.
Vehicle Customization
Some vehicle features can be programmed byusing the DIC buttons next to the steering wheel.These features include:
.Language
.Door Lock and Unlock Settings
.RKE Lock and Unlock Feedback
.Lighting
.Chime Volume
.Memory Features
.Remote Start
.Digital Speedometer Display
SeeDIC Vehicle Customization on page 4!57.
1-19
Page 26 of 616

Cruise Control
Cruise Control shown withHeated Steering WheelButton (If Equipped)
The cruise control buttons are located on left side ofthe steering wheel.
T:Turns the system on or off. The indicator light ison when cruise control is on and turns off when cruisecontrol is off.
+ RES :Press to make the vehicle accelerate orresume a previously set speed.
SET!:Press to set the speed or make the vehicledecelerate.
[:Press to cancel cruise control without erasing theset speed from memory.
SeeCruise Control on page 4!8.
Side Blind Zone Alert (SBZA)
This feature may alert you to vehicles located in yourside blind zone. When the system detects a vehicle inthe side blind zone, an amber SBZA display will light upin the corresponding outside side mirror.
The system is enabled at every vehicle startup. It canbe disabled through the Driver Information Center (DIC).
If the message SIDE BLIND ZONE SYSTEMUNAVAILABLE appears on the DIC, the system hasbeen disabled because the sensor is blocked andcannot detect vehicles in the blind zone. The sensormay be blocked by mud, dirt, snow, ice, slush, or evenheavy rainstorms. This message may also activateduring heavy rain or due to road spray. The vehicledoes not need service.
SeeSide Blind Zone Alert (SBZA)on page 3!48formore information.
1-20
Page 27 of 616

Rear Vision Camera (RVC)
The rear vision camera displays a view of the areabehind the vehicle on the navigation screen when thevehicle is shifted into R (Reverse). Once shifted out ofR (Reverse), the navigation screen will go back to thelast screen that had been displayed, after a delay.
To clean the camera lens, located above the licenseplate, rinse it with water and wipe it with a soft cloth.
Ultrasonic Parking Assist
This feature uses sensors on the rear bumper to detectobjects while parking the vehicle. It operates at speedsless than 8 km/h (5 mph). URPA uses audio beeps toprovide distance and system information.
Keep the sensors on the vehicle's rear bumper clean toensure proper operation.
The system can be disabled by pressing the rear parkaid disable button located next to the radio.
SeeUltrasonic Rear Parking Assist (URPA)onpage 3!46for more information.
Power Outlets
The accessory power outlets let you plug in auxiliaryelectrical equipment, such as a cellular telephone.
The vehicle has three accessory power outlets located:
.Inside the floor console storage bin.
.On the rear of the floor console.
.In the rear cargo area on the passenger side.
The accessory power outlets are powered, even whenthe ignition is in LOCK/OFF. Continuing to use poweroutlets while the ignition is in LOCK/OFF may cause thevehicle's battery to run down.
Universal Remote System
The Universal Home Remote System allows for garagedoor openers, security systems, and home automationdevices to be programmed to work with these buttons inthe vehicle.
SeeUniversal Home Remote Systemon page 3!55.
1-21
Page 28 of 616
Performance and Maintenance
StabiliTrak®
The vehicle may have a traction control system thatlimits wheel spin and the StabiliTrak system that assistswith directional control of the vehicle in difficult drivingconditions. Both systems turn on automatically everytime the vehicle is started.
.To turn off traction control, press and release5on
the instrument panel.Filluminates and the
appropriate DIC message displays. SeeDICWarnings and Messages on page 4!48.
.To turn off both traction control and Electronic
Stability Control, press and hold5untilF
illuminates and the appropriate DIC messagedisplays. SeeDIC Warnings and Messagesonpage 4!48.
.Press and release the button again to turn onboth systems.
For more information, seeStabiliTrak®Systemonp a g e 6!6.
Tire Pressure Monitor
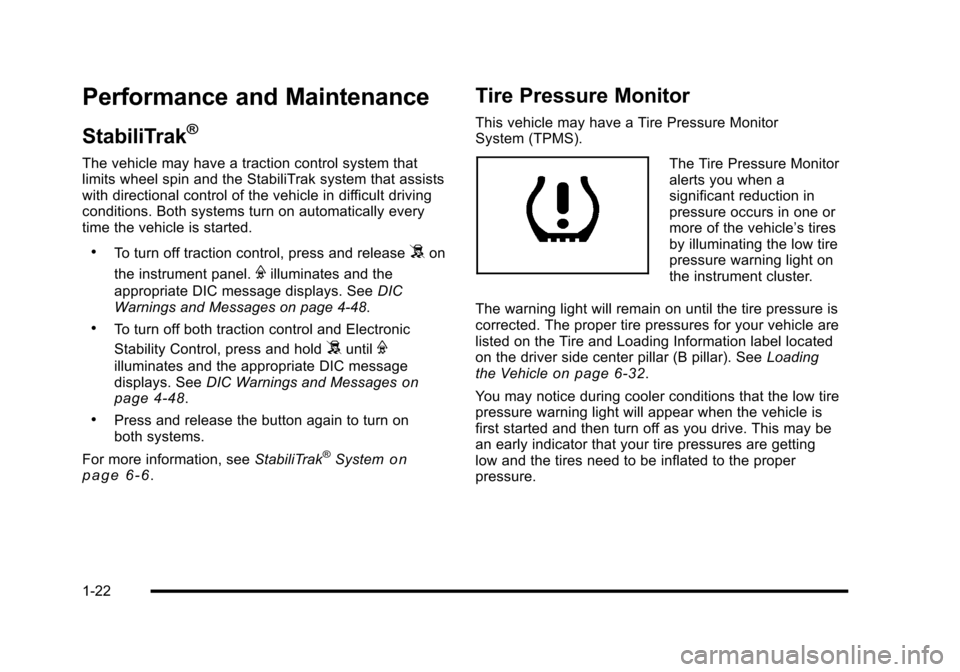
This vehicle may have a Tire Pressure MonitorSystem (TPMS).
The Tire Pressure Monitoralerts you when asignificant reduction inpressure occurs in one ormore of the vehicle’s tiresby illuminating the low tirepressure warning light onthe instrument cluster.
The warning light will remain on until the tire pressure iscorrected. The proper tire pressures for your vehicle arelisted on the Tire and Loading Information label locatedon the driver side center pillar (B pillar). SeeLoadingthe Vehicleon page 6!32.
You may notice during cooler conditions that the low tirepressure warning light will appear when the vehicle isfirst started and then turn off as you drive. This may bean early indicator that your tire pressures are gettinglow and the tires need to be inflated to the properpressure.
1-22
Page 29 of 616
Note:The Tire Pressure Monitor can alert you aboutlow tire pressure, but it does not replace normal monthlytire maintenance. It is the driver’s responsibility tomaintain correct tire pressures.
SeeTire Pressure Monitor Systemon page 7!67andTire Pressure Monitor Operation on page 7!68.
Engine Oil Life System
The engine oil life system calculates engine oil lifebased on vehicle use and displays a DIC messagewhen it is necessary to change the engine oil and filter.The oil life system should be reset to 100% onlyfollowing an oil change.
Resetting the Oil Life System
1. Display the OIL LIFE REMAINING on the DIC.
2. Press and hold the SET/RESET button on the DICfor more than five seconds. The oil life will changeto 100%.
SeeEngine Oil Life System on page 7!20.
Fuel E85 (85% Ethanol)
This vehicle has a yellow fuel cap and can use eitherunleaded gasoline or ethanol fuel containing up to85% ethanol (E85). SeeGasoline Octaneo n p a g e 7!8andFuel E85 (85% Ethanol) on page 7!9.
Driving for Better Fuel Economy
Driving habits can affect fuel mileage. Here are somedriving tips to get the best fuel economy possible.
.Avoid fast starts and accelerate smoothly.
.Brake gradually and avoid abrupt stops.
.Avoid idling the engine for long periods of time.
.When road and weather conditions areappropriate, use cruise control, if equipped.
.Always follow posted speed limits or drive moreslowly when conditions require.
.Keep vehicle tires properly inflated.
.Combine several trips into a single trip.
.Replace the vehicle's tires with the same TPCSpec number molded into the tire's sidewall nearthe size.
.Follow recommended scheduled maintenance.
1-23
Page 30 of 616

Roadside Service
U.S. or Canada:1-800-882-1112
TTY Users:1-888-889-2438
As the owner of a new Cadillac, you are automaticallyenrolled in the Roadside Service program which isavailable 24 hours a day, 365 days a year.
Roadside Service and OnStar
If you have a current OnStar subscription, press theOnStar button and the current GPS location will be sentto an OnStar Advisor who will assess your problem,contact Roadside Service, and relay exact location toget you the help you need.
Online Owner Center
The Online Owner Center is a complimentary servicethat includes online service reminders, vehiclemaintenance tips, online owner manual, specialprivileges and more.
Sign up today at:www.gmownercenter.com/cadillac(U.S.) orwww.gm.ca(Canada).
OnStar®
OnStar®uses several innovative technologies and liveadvisors to provide a wide range of safety, security,navigation, diagnostics, and calling services.
Automatic Crash Response
In a crash, built in sensors can automatically alert anOnStar advisor who is immediately connected to thevehicle to see if you need help.
1-24