window CADILLAC ESCALADE 2010 3.G Owner's Guide
[x] Cancel search | Manufacturer: CADILLAC, Model Year: 2010, Model line: ESCALADE, Model: CADILLAC ESCALADE 2010 3.GPages: 616, PDF Size: 39.41 MB
Page 215 of 616
Manual Operation
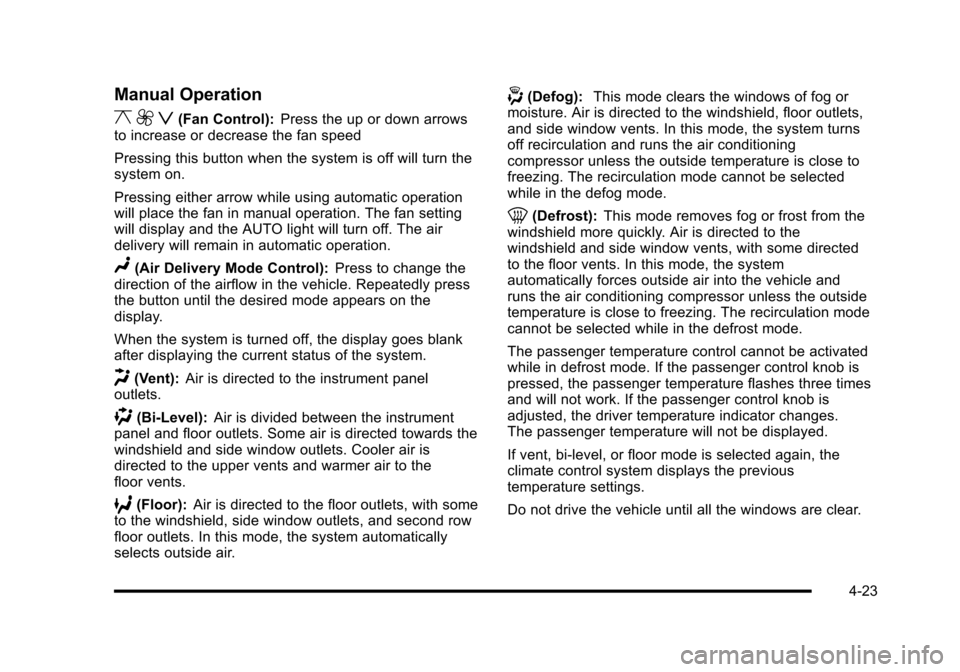
y9z(Fan Control):Press the up or down arrowsto increase or decrease the fan speed
Pressing this button when the system is off will turn thesystem on.
Pressing either arrow while using automatic operationwill place the fan in manual operation. The fan settingwill display and the AUTO light will turn off. The airdelivery will remain in automatic operation.
N(Air Delivery Mode Control):Press to change thedirection of the airflow in the vehicle. Repeatedly pressthe button until the desired mode appears on thedisplay.
When the system is turned off, the display goes blankafter displaying the current status of the system.
H(Vent):Air is directed to the instrument paneloutlets.
)(Bi-Level):Air is divided between the instrumentpanel and floor outlets. Some air is directed towards thewindshield and side window outlets. Cooler air isdirected to the upper vents and warmer air to thefloor vents.
6(Floor):Air is directed to the floor outlets, with someto the windshield, side window outlets, and second rowfloor outlets. In this mode, the system automaticallyselects outside air.
-(Defog):This mode clears the windows of fog ormoisture. Air is directed to the windshield, floor outlets,and side window vents. In this mode, the system turnsoff recirculation and runs the air conditioningcompressor unless the outside temperature is close tofreezing. The recirculation mode cannot be selectedwhile in the defog mode.
0(Defrost):This mode removes fog or frost from thewindshield more quickly. Air is directed to thewindshield and side window vents, with some directedto the floor vents. In this mode, the systemautomatically forces outside air into the vehicle andruns the air conditioning compressor unless the outsidetemperature is close to freezing. The recirculation modecannot be selected while in the defrost mode.
The passenger temperature control cannot be activatedwhile in defrost mode. If the passenger control knob ispressed, the passenger temperature flashes three timesand will not work. If the passenger control knob isadjusted, the driver temperature indicator changes.The passenger temperature will not be displayed.
If vent, bi-level, or floor mode is selected again, theclimate control system displays the previoustemperature settings.
Do not drive the vehicle until all the windows are clear.
4-23
Page 216 of 616

#(Air Conditioning):Press to turn the airconditioning (A/C) compressor on and off. An indicatorlight comes on to show that the air conditioning is on.
Pressing this button when the outside temperatureis too cool for air conditioning will make the airconditioning indicator flash three times and then turn offindicating the air conditioning mode is not available.If the air conditioning is on and the outside temperaturedrops below a temperature which is too cool for airconditioning to be effective, the air conditioning lightturns off to show that the air conditioning mode hasbeen canceled.
On hot days, open the windows long enough to let hotinside air escape. This helps to reduce the time it takesfor the vehicle to cool down. It also helps the system tooperate more efficiently.
The air conditioning system removes moisture from theair, so a small amount of water might drip under thevehicle while idling or after turning off the engine.This is normal.
@(Recirculation):Press to turn the recirculationmode on or off. An indicator light comes on to show thatthe recirculation is on.
This mode recirculates and helps to quickly cool the airinside the vehicle. It can be used to help preventoutside air and odors from entering the vehicle.
The recirculation mode cannot be used with floor, defog,or defrost modes. If recirculation is selected with one ofthose modes, the indicator light flashes three times andthen turns off. The air conditioning compressor alsocomes on when this mode is activated. While inrecirculation mode the windows may fog when theweather is cold and damp. To clear the fog, select eitherthe defog or defrost mode and increase the fan speed.
The recirculation mode can also be turned off by turningoff the ignition.
REAR :For vehicles with the rear heating and airconditioning controls. Press the REAR button to turn therear climate control system on or off. SeeRear AirConditioning and Heating System and ElectronicClimate Controls on page 4!26.
4-24
Page 217 of 616

Rear Window Defogger
The rear window defogger uses a warming grid toremove fog from the rear window.
<(Rear Window Defogger):Press to turn the rearwindow defogger on or off. It automatically turns offafter it has been activated. The defogger can also beturned off by turning off the engine. Do not drive thevehicle until all the windows are clear.
Notice:Do not use a razor blade or sharp object toclear the inside rear window. Do not adhereanything to the defogger grid lines in the rear glass.These actions may damage the rear defogger.Repairs would not be covered by your warranty.
Heated Mirrors :For vehicles with heated outsiderearview mirrors, the mirrors heat to help clear fog orfrost from the surface of the mirror when the rearwindow defog button is pressed. SeeOutside HeatedMirrors on page 3!45.
Heated or Cooled Seats :For vehicles with heated andcooled seats, seeHeated and Cooled Seatsonp a g e 2!5.
Outlet Adjustment
Use the air outlets located in the center and on the sideof the instrument panel to direct the airflow.
Operation Tips
.Keep the hood and front air inlets free of ice, snow,or any other obstruction (such as leaves). Theheater and defroster will work far better, reducingthe chance of fogging the inside of the windows.
.When you enter a vehicle in cold weather, pressthe fan up button to the maximum fan level beforedriving. This helps clear the intake ducts of snowand moisture, and reduces the chance of foggingthe inside of the window.
.Keep the air path under the front seats clear ofobjects. This helps air to circulate throughout thevehicle.
.Adding outside equipment to the front of thevehicle, such as hood-air deflectors, may affect theperformance of the heating and air conditioningsystem. Check with your dealer/retailer beforeadding equipment to the outside of the vehicle.
4-25
Page 240 of 616
Compass Calibration
The compass can be manually calibrated. Only calibratethe compass in a magnetically clean and safe location,such as an open parking lot, where driving the vehiclein circles is not a danger. It is suggested to calibrateaway from tall buildings, utility wires, manhole covers,or other industrial structures, if possible.
If CAL should ever appear in the DIC display, thecompass should be calibrated.
If the DIC display does not show a heading, forexample, N for North, or the heading does not changeafter making turns, there may be a strong magnetic fieldinterfering with the compass. Such interference may becaused by a magnetic CB or cell phone antenna mount,a magnetic emergency light, magnetic note pad holder,or any other magnetic item. Turn off the vehicle, movethe magnetic item, then turn on the vehicle and calibratethe compass.
To calibrate the compass, use the following procedure:
Compass Calibration Procedure
1. Before calibrating the compass, make sure thecompass zone is set to the variance zone in whichthe vehicle is located. See“Compass Variance(Zone) Procedure”earlier in this section.
Do not operate any switches such as window,sunroof, climate controls, seats, etc. during thecalibration procedure.
2. Press the vehicle information button until
PRESSVTO CALIBRATE COMPASS displays.
3. Press the set/reset button to start the compasscalibration.
4. The DIC will display CALIBRATING: DRIVE INCIRCLES. Drive the vehicle in tight circles at lessthan 5 mph (8 km/h) to complete the calibration.The DIC will display CALIBRATION COMPLETEfor a few seconds when the calibration is complete.The DIC display will then return to theprevious menu.
DIC Warnings and Messages
Messages are displayed on the DIC to notify the driverthat the status of the vehicle has changed and thatsome action may be needed by the driver to correct thecondition. Multiple messages may appear one afteranother.
Some messages may not require immediate action, butyou can press any of the DIC buttons on the instrumentpanel to acknowledge that you received the messagesand to clear them from the display.
Some messages cannot be cleared from the DICdisplay because they are more urgent. Thesemessages require action before they can be cleared.
4-48
Page 274 of 616
The overhead console contains the IR (infrared)transmitters for the wireless headphones and the IRreceivers for the remote control. They are located at therear of the console.
Notice:Avoid directly touching the video screen,as damage may occur. See“Cleaning the VideoScreen”later in this section for more information.
Remote Control
To use the remote control, aim it at the transmitterwindow at the rear of the overhead console and pressthe desired button. Direct sunlight or very bright lightcan affect the ability of the RSE transmitter to receivesignals from the remote control. If the remote controldoes not seem to be working, the batteries may need tobe replaced. See“Battery Replacement”later in thissection. Objects blocking the line of sight can also affectthe function of the remote control.
If a CD or DVD is in the Radio DVD slot, the remotecontrol power button can be used to turn on the videoscreen display and start the disc. The radio can alsoturn on the video screen display. SeeNavigation AudioSystemon page 5!60for more information.
Notice:Storing the remote control in a hot area orin direct sunlight can damage it, and the repairs willnot be covered by the warranty. Storage in extremecold can weaken the batteries. Keep the remotecontrol stored in a cool, dry place.
If the remote control becomes lost or damaged, a newuniversal remote control can be purchased. If thishappens, make sure the universal remote control usesa code set of Toshiba®.
Remote Control Buttons
O(Power):Press to turn the video screen on and off.
P(Illumination):Press to turn the remote controlbacklight on. The backlight automatically times out after7 to 10 seconds if no other button is pressed while thebacklight is on.
v(Title):Press to return the DVD to the main menu ofthe DVD. This function can vary for each disc.
y(Main Menu):Press to access the DVD menu.The DVD menu is different on every DVD. Use thenavigation arrows to move the cursor around the DVDmenu. After making a selection press the enter button.This button only operates when using a DVD.
Q,R,q,r(Menu Navigation Arrows):Use thearrow buttons to navigate through a menu.
4-82
Page 277 of 616

Tips and Troubleshooting Chart (cont'd)
ProblemRecommended Action
In auxiliary mode, thepicture moves or scrolls.Check the auxiliary inputconnections at bothdevices.
The remote control doesnot work.Check to make sure thereis no obstruction betweenthe remote control and thetransmitter window.Check the batteries tomake sure they are notdead or installedincorrectly.
After stopping the player,I push Play but sometimesthe DVD starts where I leftoff and sometimes at thebeginning.
If the stop button waspressed one time, the DVDplayer resumes playingwhere the DVD wasstopped. If the stop buttonwas pressed two times theDVD player begins to playfrom the beginning ofthe DVD.
Tips and Troubleshooting Chart (cont'd)
ProblemRecommended Action
The auxiliary source isrunning but there is nopicture or sound.
Check that the RSE videoscreen is in the auxiliarysource mode.Check the auxiliary inputconnections at bothdevices.
Sometimes the wirelessheadphone audio cuts outor buzzes.
Check for obstructions, lowbatteries, reception range,and interference fromcellular telephone towers orby using a cellulartelephone in the vehicle.Check that the headphonesare on correctly using theL (left) and R (right) on theheadphones.
I lost the remote and/or theheadphones.See your dealer/retailer forassistance.
The DVD is playing, butthere is no picture orsound.
Check that the RSE videoscreen is sourced to theDVD player.
4-85
Page 294 of 616
Using the REPEAT Feature
REPEAT :Press to change between Repeat One andRepeat Folder.
.Repeat One—Repeats the song that is playing.
.Repeat Folder—Repeats the folder that isplaying.
Tips and Troubleshooting Chart
ProblemRecommended Action
IR Sensor Inoperative.Check that thebatteries are goodin the remotecontrol..Check that theremote Control IRSensor is notblocked..Aim the remotecontrol toward theIR Sensor beingcontrolled..Select the correctscreen, 3 or 4.
ProblemRecommended Action
No picture.Check that thecorrect video inputmode is selected..Check that thevideo cable isplugged into thejack securely.
No Sound.Check that thecorrect audio inputmode is selected..Check that theaudio cable issecurely pluggedinto the jack.
Cleaning the Video Screens
The video display screens are made of a speciallycoated glass and can be scratched or damaged byabrasive products, solvents, or ammonia-based windowcleaners. Clean with a soft, lint-free, cotton cloth thathas been slightly dampened with warm water. Dry thescreens by wiping with a clean dry cotton cloth.
4-102
Page 300 of 616
Cellular Phone Usage
Cellular phone usage may cause interference with thevehicle's radio. This interference may occur whenmaking or receiving phone calls, charging the phone'sbattery, or simply having the phone on. Thisinterference causes an increased level of static whilelistening to the radio. If static is received while listeningto the radio, unplug the cellular phone and turn it off.
Rear Side Window Antenna
The AM-FM antenna is located in the passenger rearside windows. Make sure the inside surfaces of the rearside windows are not scratched and that the lines onthe glass are not damaged. If the inside surfaces aredamaged, they could interfere with radio reception.
If a cellular telephone antenna needs to be attached tothe glass, make sure that the grid lines for the AM-FMantenna are not damaged. There is enough spacebetween the grid lines to attach a cellular telephoneantenna without interfering with radio reception.
Notice:Using a razor blade or sharp object to clearthe inside of the rear side windows may affect radioreception or damage the rear side window antenna.Repairs would not be covered by the warranty. Donot clear the inside of the rear side windows withsharp objects.
Notice:Do not apply aftermarket glass tinting withmetallic film. The metallic film in some tintingmaterials will interfere with or distort the incomingradio reception. Any damage caused to the antennadue to metallic tinting materials will not be coveredby the warranty.
XM™Satellite Radio Antenna
System
The XM Satellite Radio antenna is located on the roof ofthe vehicle. Keep the antenna clear of obstructions forclear radio reception.
If the vehicle has a sunroof, the performance of theXM system may be affected if the sunroof is open.
4-108
Page 357 of 616

Global Positioning System (GPS)
The navigation system determines the position of thevehicle by using satellite signals, various vehiclesignals, and map data.
At times, other interferences such as the satellitecondition, road configuration, the condition of thevehicle and/or other circumstances can interfere withthe navigation system's ability to determine the accurateposition of the vehicle.
The GPS shows the current position of the vehicleusing signals sent by the GPS Satellites of the UnitedStates Department of Defense. When the vehicle is notreceiving signals from the satellites, a symbol appearson the map screen. Refer toSymbols on page 5!17.
This system may not be available or interferences mayoccur if any of the following are true:
.Signals are obstructed by tall buildings, trees, largetrucks, or a tunnel.
.Objects are located on the front dash of thevehicle.
.Satellites are being repaired or improved.
.After-market glass tinting has been applied to thevehicle's windshield.
Notice:Do not apply after-market glass tinting tothe vehicle's windows. Glass tinting interferes withthe system's ability to receive GPS signals andcauses the system to malfunction. The windowmight have to be replaced to correct the problem.This would not be covered by the warranty.
For more information if the GPS is not functioningproperly, seeIf the System Needs Serviceonpage 5!59andProblems with Route Guidanceonpage 5!58.
Vehicle Positioning
At times, the position of the vehicle on the map may beinaccurate due to one or more of the following reasons:
.Road system has changed.
.Vehicle is driving on slippery road surfaces suchas in sand, gravel, and/or snow.
.Vehicle is traveling on winding roads.
.Vehicle is on a long straight road.
.Vehicle is approaching a tall building or alarge vehicle.
.Surface streets run parallel to a freeway.
.Vehicle has just been transferred by a vehiclecarrier or a ferry.
.Current position calibration is set incorrectly.
5-57
Page 416 of 616

Other Rainy Weather Tips
Besides slowing down, other wet weather drivingtips include:
.Allow extra following distance.
.Pass with caution.
.Keep windshield wiping equipment in good shape.
.Keep the windshield washer fluid reservoir filled.
.Have good tires with proper tread depth.SeeTires on page 7!58.
.Turn off cruise control.
Before Leaving on a Long Trip
To prepare your vehicle for a long trip, consider havingit serviced by your dealer/retailer before departing.
Things to check on your own include:
.Windshield Washer Fluid:Reservoir full?Windows clean—inside and outside?
.Wiper Blades:In good shape?
.Fuel, Engine Oil, Other Fluids:All levels checked?
.Lamps:Do they all work and are lenses clean?
.Tires:Are treads good? Are tires inflated torecommended pressure?
.Weather and Maps:Safe to travel?Have up-to-date maps?
Highway Hypnosis
Always be alert and pay attention to your surroundingswhile driving. If you become tired or sleepy, find a safeplace to park your vehicle and rest.
Other driving tips include:
.Keep the vehicle well ventilated.
.Keep interior temperature cool.
.Keep your eyes moving—scan the roadahead and to the sides.
.Check the rearview mirror and vehicleinstruments often.
6-26