keyless CADILLAC ESCALADE 2012 3.G User Guide
[x] Cancel search | Manufacturer: CADILLAC, Model Year: 2012, Model line: ESCALADE, Model: CADILLAC ESCALADE 2012 3.GPages: 538, PDF Size: 7.59 MB
Page 43 of 538

Black plate (13,1)Cadillac Escalade/Escalade ESV Owner Manual - 2012
Keys, Doors, and Windows 2-13
The liftgate will open after a slight
delay. The vehicle must be in
P (Park) to open the liftgate. To
close the liftgate, use the pull cup or
pull strap as an aid.
The liftgate or liftglass cannot be
opened if the rear wipers are in
motion. Attempting to open the
liftgate or liftglass while the rear
wipers are in motion will cause the
release of the liftglass or liftgate to
delay until the wipers are parked off
the liftglass.
Both the liftglass and liftgate have
an electric latch. If the battery is
disconnected or has low voltage,
the liftglass and liftgate will not
open. The liftglass and liftgate will
resume operation when the battery
is reconnected and charged.
If the battery is properly connected
and has adequate voltage, and
the liftgate or liftglass still will not
function, your vehicle should be
taken to a dealership for service.Power Assist Steps
The vehicle may have power assist
steps.
The switch used to disable the
power assist steps is located on the
center console below the climate
control system.
The power assist steps
automatically extend from beneath
the vehicle on the side in which the
door has been opened. Once the
door is closed, the assist steps
automatically move back under
the vehicle after a brief delay. The
vehicle must not be moving for the
assist steps to extend or retract.
The assist steps cannot be disabled
in the extended position.
Vehicle Security
This vehicle has theft-deterrent
features; however, they do not make
it impossible to steal.
Anti-theft Alarm System
Your vehicle has a content
theft-deterrent alarm system.
This is the security light.
To arm the theft-deterrent system:
1. Open the door.
2. Lock the door with the RemoteKeyless Entry (RKE) transmitter
or the power door lock switch.
Page 60 of 538

Black plate (6,1)Cadillac Escalade/Escalade ESV Owner Manual - 2012
3-6 Seats and Restraints
To recall, press and release“1”
or “2.” The vehicle must be in
P (Park). A single beep will sound.
The seat, outside mirrors, power
steering column, and adjustable
throttle and brake pedals will move
to the positions previously stored for
the identified driver.
Memory Remote Recall
The memory feature can recall the
driver seat, outside mirrors, power
steering column, and pedals to
stored positions when entering the
vehicle.
To activate, unlock the driver
door with the Remote Keyless
Entry (RKE) transmitter. The driver
seat, outside mirrors, power steering
column, and adjustable pedals will
move to the memory positions
associated with the transmitter used
to unlock the vehicle. This feature can be turned on or off
using the vehicle personalization
menu. See
Vehicle Personalization
on page 5‑38 for more information.
To stop recall movement, press one
of the power seat controls, memory
or power mirror buttons, power
steering column control, or the
adjustable pedal switch.
If something has blocked the driver
seat, power steering column, or the
adjustable pedals while recalling a
memory position, the recall may
stop. Remove the obstruction; then
press and hold the appropriate
manual control for the memory item
that is not recalling for two seconds.
Try recalling the memory position
again by pressing the appropriate
memory button. If the memory
position is still not recalling, see
your dealer for service. Easy Exit Positions
This feature can move the driver
seat rearward and the power
steering column up and forward to
allow extra room to exit the vehicle.
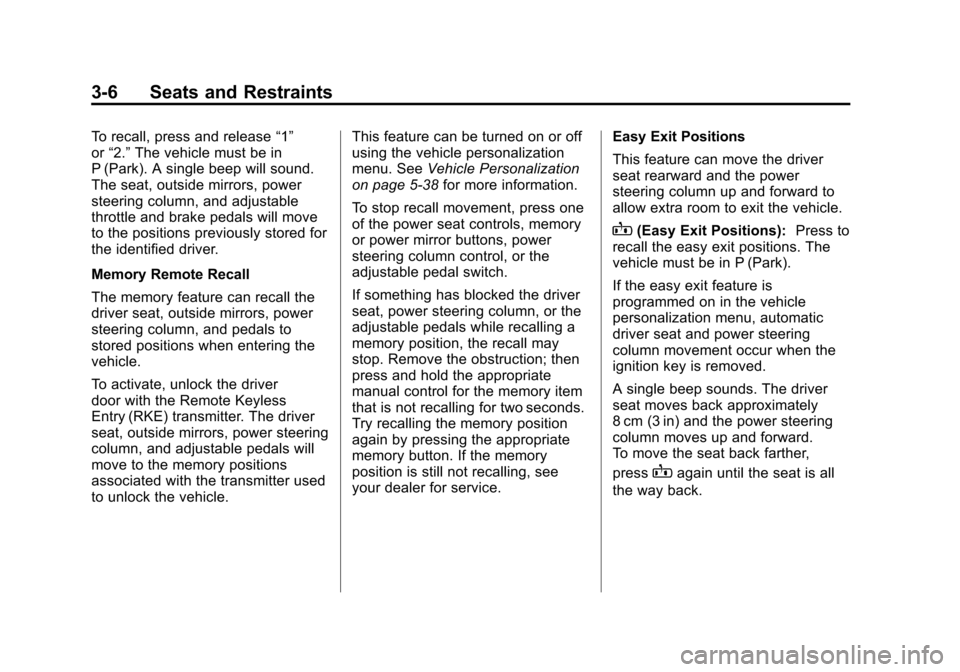
B(Easy Exit Positions):
Press to
recall the easy exit positions. The
vehicle must be in P (Park).
If the easy exit feature is
programmed on in the vehicle
personalization menu, automatic
driver seat and power steering
column movement occur when the
ignition key is removed.
A single beep sounds. The driver
seat moves back approximately
8 cm (3 in) and the power steering
column moves up and forward.
To move the seat back farther,
press
Bagain until the seat is all
the way back.
Page 155 of 538

Black plate (33,1)Cadillac Escalade/Escalade ESV Owner Manual - 2012
Instruments and Controls 5-33
Fuel System Messages
FUEL LEVEL LOW
This message displays and a chime
sounds if the fuel level is low. Refuel
as soon as possible. SeeFuel
Gauge on page 5‑12 andFuel on
page 9‑51 for more information.
TIGHTEN GAS CAP
This message may display along
with the check engine light on the
instrument panel cluster if the fuel
cap is not tightened properly. See
Malfunction Indicator Lamp on
page 5‑16. Reinstall the fuel cap
fully. SeeFilling the Tank on
page 9‑54. The diagnostic system
can determine if the fuel cap has
been left off or improperly installed.
A loose or missing fuel cap
allows fuel to evaporate into the
atmosphere. A few driving trips with
the cap properly installed should
turn this light and message off.
Key and Lock Messages
REPLACE BATTERY IN
REMOTE KEY
This message displays if a Remote
Keyless Entry (RKE) transmitter
battery is low. The battery needs to
be replaced in the transmitter. See
“Battery Replacement” under
Remote Keyless Entry (RKE)
System Operation on page 2‑3.
Lamp Messages
SERVICE LEFT HEADLAMP
ASSEMBLY
On some models, this message
will be displayed when the left
headlamp is out and needs to be
serviced. See “LED Lighting” inLED
Lighting on page 10‑35 for more
information.
SERVICE RIGHT HEADLAMP
ASSEMBLY
On some models, this message
will be displayed when the right
headlamp is out and needs to be
serviced. See “LED Lighting” inLED
Lighting on page 10‑35 for more
information.
TURN SIGNAL ON
This message displays and a chime
sounds if a turn signal is left on for
1.2 km (3/4 of a mi). Move the turn
signal/multifunction lever to the off
position.
Object Detection System
Messages
PARKING ASSIST BLOCKED
SEE OWNERS MANUAL
This message displays if there is
something interfering with the park
assist system. See Ultrasonic
Parking Assist on page 9‑43 for
more information.
Page 162 of 538

Black plate (40,1)Cadillac Escalade/Escalade ESV Owner Manual - 2012
5-40 Instruments and Controls
ALL IN PARK (default):All of the
doors will unlock when the vehicle is
shifted into P (Park).
NO CHANGE: No change will be
made to this feature. The current
setting will remain.
To select a setting, press the set/
reset button while the desired
setting is displayed on the DIC.
REMOTE DOOR LOCK
This feature allows you to select the
type of feedback you will receive
when locking the vehicle with the
Remote Keyless Entry (RKE)
transmitter. You will not receive
feedback when locking the vehicle
with the RKE transmitter if the doors
are open. See Remote Keyless
Entry (RKE) System Operation on
page 2‑3 for more information.
Press the customization button until
REMOTE DOOR LOCK appears on
the DIC display. Press the set/reset
button once to access the settings for this feature. Then press the
customization button to scroll
through the following settings:
OFF:
There will be no feedback
when you press the lock button on
the RKE transmitter.
LIGHTS ONLY: The exterior lamps
will flash when you press the lock
button on the RKE transmitter.
HORN ONLY: The horn will sound
on the second press of the lock
button on the RKE transmitter.
HORN & LIGHTS (default): The
exterior lamps will flash when you
press the lock button on the RKE
transmitter, and the horn will sound
when the lock button is pressed
again within five seconds of the
previous command.
NO CHANGE: No change will be
made to this feature. The current
setting will remain.
To select a setting, press the set/
reset button while the desired
setting is displayed on the DIC. REMOTE DOOR UNLOCK
This feature allows you to select the
type of feedback you will receive
when unlocking the vehicle with
the Remote Keyless Entry (RKE)
transmitter. You will not receive
feedback when unlocking the
vehicle with the RKE transmitter if
the doors are open. See
Remote
Keyless Entry (RKE) System
Operation on page 2‑3 for more
information.
Press the customization button until
REMOTE DOOR UNLOCK appears
on the DIC display. Press the set/
reset button once to access the
settings for this feature. Then press
the customization button to scroll
through the following settings:
LIGHTS OFF: The exterior lamps
will not flash when you press the
unlock button on the RKE
transmitter.
LIGHTS ON (default): The exterior
lamps will flash when you press
the unlock button on the RKE
transmitter.
Page 164 of 538

Black plate (42,1)Cadillac Escalade/Escalade ESV Owner Manual - 2012
5-42 Instruments and Controls
APPROACH LIGHTING
This feature allows you to select
whether or not to have the exterior
lamps turn on briefly during low
light periods after unlocking the
vehicle using the Remote Keyless
Entry (RKE) transmitter.
Press the customization button until
APPROACH LIGHTING appears on
the DIC display. Press the set/reset
button once to access the settings
for this feature. Then press the
customization button to scroll
through the following settings:
OFF:The exterior lamps will not
turn on when you unlock the vehicle
with the RKE transmitter.
ON (default): If it is dark enough
outside, the exterior lamps will turn
on briefly when you unlock the
vehicle with the RKE transmitter.
The lamps will remain on for
20 seconds or until the lock button
on the RKE transmitter is pressed,
or the vehicle is no longer off. See
Remote Keyless Entry (RKE)
System Operation on page 2‑3 for
more information.
NO CHANGE: No change will be
made to this feature. The current
setting will remain.
To select a setting, press the set/
reset button while the desired
setting is displayed on the DIC.
AUTO HIGH BEAMS
If your vehicle has this feature, it
allows you to select to have the
IntelliBeam system turned off or on.
See Exterior Lamp Controls on
page 6‑1 for more information.
Press the customization button until
AUTO HIGH BEAMS appears on
the DIC display. Press the set/reset
button once to access the settings
for this feature. Then press the
customization button to scroll
through the following settings:
OFF (default): The IntelliBeam
system will be turned off. ON:
The IntelliBeam system will be
turned on.
NO CHANGE: No change will be
made to this feature. The current
setting will remain.
To select a setting, press the set/
reset button while the desired
setting is displayed on the DIC.
CHIME VOLUME
This feature allows you to select the
volume level of the chime.
Press the customization button until
CHIME VOLUME appears on the
DIC display. Press the set/reset
button once to access the settings
for this feature. Then press the
customization button to scroll
through the following settings:
NORMAL: The chime volume will
be set to a normal level.
LOUD: The chime volume will be
set to a loud level.
NO CHANGE: No change will be
made to this feature. The current
setting will remain.
Page 166 of 538

Black plate (44,1)Cadillac Escalade/Escalade ESV Owner Manual - 2012
5-44 Instruments and Controls
The automatic easy exit seat
movement will only occur one time
after the key is removed from the
ignition. If the automatic movement
has already occurred, and you put
the key back in the ignition and
remove it again, the seat and
steering column will stay in the
original exit position, unless a
memory recall took place prior to
removing the key again.
NO CHANGE:No change will be
made to this feature. The current
setting will remain.
To select a setting, press the set/
reset button while the desired
setting is displayed on the DIC.
EASY EXIT SETUP
If your vehicle has this feature, it
allows you to select which areas will
recall with the automatic easy exit
seat feature. It also allows you to
turn off the automatic easy exit
feature. See Memory Seats on
page 3‑5 and“EASY EXIT RECALL”
earlier for more information. Press the customization button until
EASY EXIT SETUP appears on the
DIC display. Press the set/reset
button once to access the settings
for this feature. Then press the
menu up/down button to scroll
through the following settings:
OFF:
No automatic seat exit will
recall.
SEAT ONLY: The driver seat will
recall.
TILT ONLY: The steering wheel tilt
feature will recall.
SEAT & TILT (default): The driver
seat and the steering wheel tilt
feature will recall.
NO CHANGE: No change will be
made to this feature. The current
setting will remain.
To select a setting, press the set/
reset button while the desired
setting is displayed on the DIC. MEMORY SEAT RECALL
This feature allows you to select
your preference for the remote
memory seat recall feature. See
Memory Seats on page 3‑5
for more
information.
Press the customization button until
MEMORY SEAT RECALL appears
on the DIC display. Press the set/
reset button once to access the
settings for this feature. Then press
the customization button to scroll
through the following settings:
OFF (default): No remote memory
seat recall will occur.
ON: The driver seat, and on
some vehicles, the outside mirrors
will automatically move to the
stored driving position when the
unlock button on the Remote
Keyless Entry (RKE) transmitter
is pressed. On some vehicles with
the adjustable throttle and brake
pedal feature, the pedals will also
automatically move.
Page 167 of 538

Black plate (45,1)Cadillac Escalade/Escalade ESV Owner Manual - 2012
Instruments and Controls 5-45
NO CHANGE:No change will be
made to this feature. The current
setting will remain.
To select a setting, press the set/
reset button while the desired
setting is displayed on the DIC.
REMOTE START
If your vehicle has this feature, it
allows you to turn the remote start
off or on. The remote start feature
allows you to start the engine from
outside of the vehicle using the
Remote Keyless Entry (RKE)
transmitter. See Remote Vehicle
Start on page 2‑5 for more
information.
Press the customization button until
REMOTE START appears on the
DIC display. Press the set/reset
button once to access the settings
for this feature. Then press the
customization button to scroll
through the following settings:
OFF: The remote start feature will
be disabled. ON (default):
The remote start
feature will be enabled.
NO CHANGE: No change will be
made to this feature. The current
setting will remain.
To select a setting, press the set/
reset button while the desired
setting is displayed on the DIC.
DISPLAY DIGITAL SPEED
This feature allows you to enable or
disable the digital speedometer on
the DIC.
Press the customization button until
DISPLAY DIGITAL SPEED appears
on the DIC display. Press the set/
reset button once to access the
settings for this feature. Then press
the customization button to scroll
through the following settings:
OFF: The digital speedometer will
be disabled.
ON (default): The digital
speedometer will be enabled. NO CHANGE:
No change will be
made to this feature. The current
setting will remain.
To select a setting, press the set/
reset button while the desired
setting is displayed on the DIC.
FACTORY SETTINGS
This feature allows you to set all of
the customization features back to
their factory default settings.
Press the customization button until
FACTORY SETTINGS appears on
the DIC display. Press the set/reset
button once to access the settings
for this feature. Then press the
customization button to scroll
through the following settings:
RESTORE ALL (default): The
customization features will be set to
their factory default settings.
DO NOT RESTORE: The
customization features will not be
set to their factory default settings.
Page 371 of 538

Black plate (3,1)Cadillac Escalade/Escalade ESV Owner Manual - 2012
Vehicle Care 10-3
California
Proposition 65 Warning
Most motor vehicles, including this
one, contain and/or emit chemicals
known to the State of California to
cause cancer and birth defects or
other reproductive harm. Engine
exhaust, many parts and systems,
many fluids, and some component
wear by-products contain and/or
emit these chemicals.
California Perchlorate
Materials Requirements
Certain types of automotive
applications, such as airbag
initiators, seat belt pretensioners,
and lithium batteries contained in
Remote Keyless Entry transmitters,
may contain perchlorate materials.
Special handling may be necessary.
For additional information, see
www.dtsc.ca.gov/hazardouswaste/
perchlorate.
Accessories and
Modifications
Adding non‐dealer accessories or
making modifications to the vehicle
can affect vehicle performance and
safety, including such things as
airbags, braking, stability, ride and
handling, emissions systems,
aerodynamics, durability, and
electronic systems like antilock
brakes, traction control, and stability
control. These accessories or
modifications could even cause
malfunction or damage not covered
by the vehicle warranty.Damage to vehicle components
resulting from modifications or the
installation or use of non‐GM
certified parts, including control
module or software modifications, is
not covered under the terms of the
vehicle warranty and may affect
remaining warranty coverage for
affected parts.
GM Accessories are designed to
complement and function with other
systems on the vehicle. See your
dealer to accessorize the vehicle
using genuine GM Accessories
installed by a dealer technician.
Also, see
Adding Equipment to the
Airbag-Equipped Vehicle on
page 3‑40.
Page 413 of 538

Black plate (45,1)Cadillac Escalade/Escalade ESV Owner Manual - 2012
Vehicle Care 10-45
FusesUsage
17 Interior Lamps
18 Power Door Lock 1
(Unlock Feature)
19 Rear Seat
Entertainment
20 Ultrasonic Rear
Parking Assist, Power
Liftgate
21 Power Door Lock 1
(Lock Feature)
22 Driver Information
Center (DIC)
23 Rear Wiper
24 Cooled Seats
25 Driver Seat Module,
Remote Keyless Entry
System
26 Driver Power Door
Lock (Unlock Feature) Circuit
Breaker Usage
LT DR Driver Side Power
Window Circuit
Breaker
Harness
Connector Usage
LT DR Driver Door
Harness
Connection
BODY Harness Connector
BODY Harness Connector
Center Instrument Panel Fuse
Block
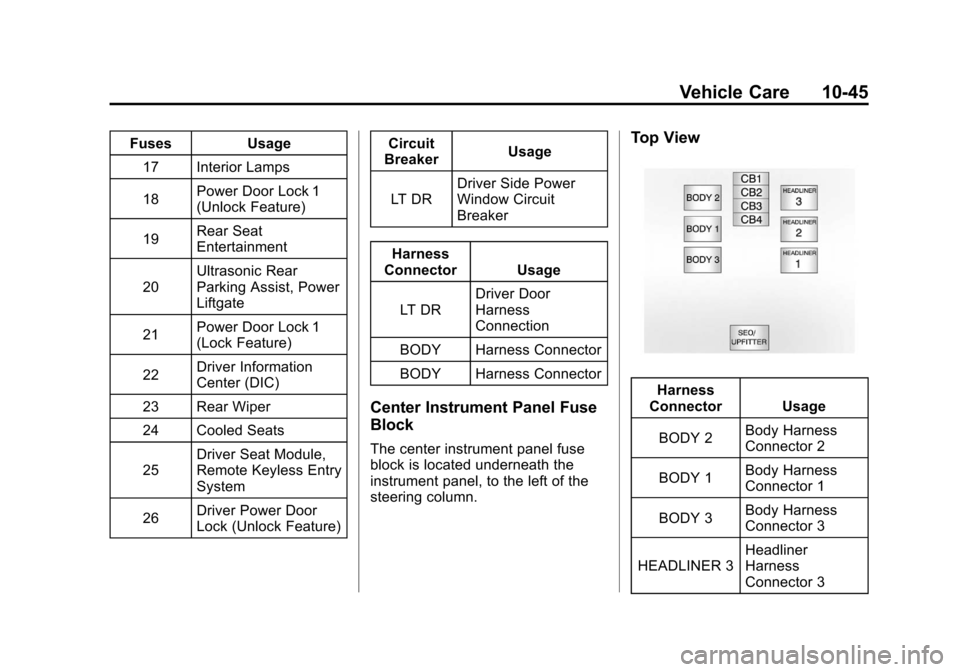
The center instrument panel fuse
block is located underneath the
instrument panel, to the left of the
steering column.
Top View
Harness
Connector Usage
BODY 2 Body Harness
Connector 2
BODY 1 Body Harness
Connector 1
BODY 3 Body Harness
Connector 3
HEADLINER 3 Headliner
Harness
Connector 3
Page 425 of 538

Black plate (57,1)Cadillac Escalade/Escalade ESV Owner Manual - 2012
Vehicle Care 10-57
.Operating electronic devices or
being near facilities using radio
wave frequencies similar to the
TPMS could cause the TPMS
sensors to malfunction.
If the TPMS is not functioning
properly, it cannot detect or signal a
low tire condition. See your dealer
for service if the TPMS malfunction
light and DIC message comes on
and stays on.
TPMS Sensor Matching
Process
Each TPMS sensor has a unique
identification code. The identification
code needs to be matched to a new
tire/wheel position after rotating the
vehicle’s tires or replacing one or
more of the TPMS sensors. The
TPMS sensor matching process
should also be performed after
replacing a spare tire with a road
tire containing the TPMS sensor.
The malfunction light and the DIC
message should go off at the next
ignition cycle. The sensors are
matched to the tire/wheel positions, using a TPMS relearn tool, in the
following order: driver side front tire,
passenger side front tire, passenger
side rear tire, and driver side rear.
See your dealer for service or to
purchase a relearn tool.
There are two minutes to match
the first tire/wheel position, and
five minutes overall to match all
four tire/wheel positions. If it takes
longer, the matching process stops
and must be restarted.
The TPMS sensor matching process
is outlined below:
1. Set the parking brake.
2. Turn the ignition to ON/RUN with
the engine off.
3. Press
QandKon the
Remote Keyless Entry (RKE)
transmitter at the same time for
approximately five seconds. The
horn sounds twice to signal the
receiver is in relearn mode and
TIRE LEARNING ACTIVE
message displays on the DIC
screen. 4. Start with the driver side
front tire.
5. Place the relearn tool against the tire sidewall, near the valve
stem. Then press the button
to activate the TPMS sensor.
A horn chirp confirms that the
sensor identification code has
been matched to this tire and
wheel position.
6. Proceed to the passenger side front tire, and repeat the
procedure in Step 5.
7. Proceed to the passenger side rear tire, and repeat the
procedure in Step 5.
8. Proceed to the driver side rear tire, and repeat the procedure
in Step 5. The horn sounds
two times to indicate the sensor
identification code has been
matched to the driver side rear
tire, and the TPMS sensor
matching process is no longer
active. The TIRE LEARNING
ACTIVE message on the DIC
display screen goes off.