turn signal CADILLAC ESCALADE 2012 3.G Owner's Guide
[x] Cancel search | Manufacturer: CADILLAC, Model Year: 2012, Model line: ESCALADE, Model: CADILLAC ESCALADE 2012 3.GPages: 538, PDF Size: 7.59 MB
Page 404 of 538
Black plate (36,1)Cadillac Escalade/Escalade ESV Owner Manual - 2012
10-36 Vehicle Care
Back-Up Lamps
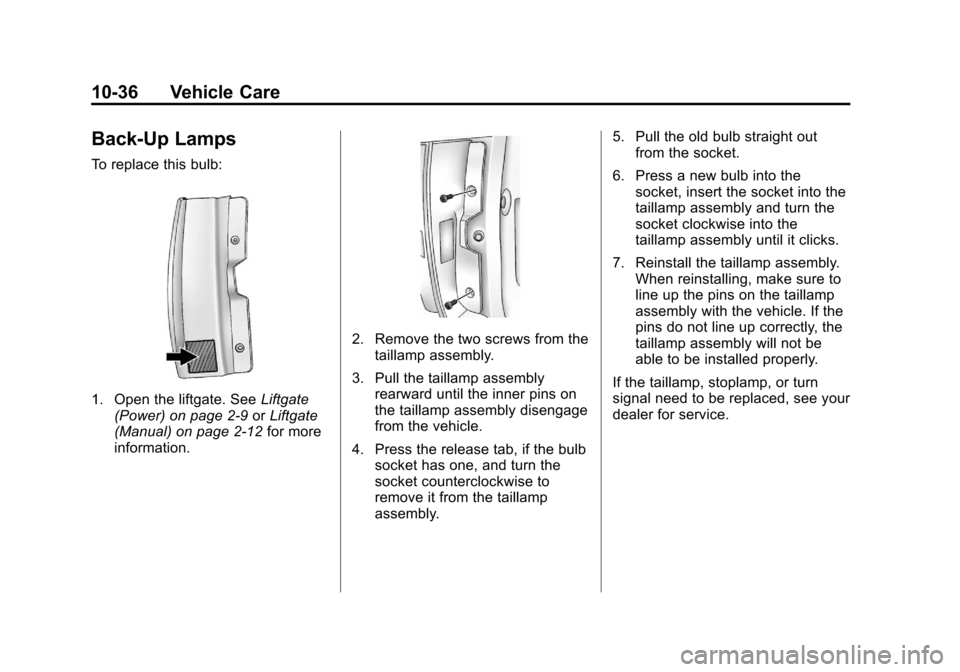
To replace this bulb:
1. Open the liftgate. SeeLiftgate
(Power) on page 2‑9 orLiftgate
(Manual) on page 2‑12 for more
information.
2. Remove the two screws from the
taillamp assembly.
3. Pull the taillamp assembly rearward until the inner pins on
the taillamp assembly disengage
from the vehicle.
4. Press the release tab, if the bulb socket has one, and turn the
socket counterclockwise to
remove it from the taillamp
assembly. 5. Pull the old bulb straight out
from the socket.
6. Press a new bulb into the socket, insert the socket into the
taillamp assembly and turn the
socket clockwise into the
taillamp assembly until it clicks.
7. Reinstall the taillamp assembly. When reinstalling, make sure to
line up the pins on the taillamp
assembly with the vehicle. If the
pins do not line up correctly, the
taillamp assembly will not be
able to be installed properly.
If the taillamp, stoplamp, or turn
signal need to be replaced, see your
dealer for service.
Page 412 of 538

Black plate (44,1)Cadillac Escalade/Escalade ESV Owner Manual - 2012
10-44 Vehicle Care
The vehicle may not be equipped
with all of the fuses, relays, and
features shown.Fuses Usage
1 Rear Seats
2 Rear Accessory
Power Outlet Fuses Usage
3 Steering Wheel
Controls Backlight
4 Driver Door Module
5 Dome Lamps, Driver
Side Turn Signal Fuses Usage
6 Driver Side Turn
Signal, Stoplamp
7 Instrument Panel
Back Lighting
8 Passenger Side Turn
Signal, Stoplamp
9 Passenger Door
Module, Driver Unlock
10 Power Door Lock 2
(Unlock Feature)
11 Power Door Lock 2
(Lock Feature)
12 Stoplamps, Center
High‐Mounted
Stoplamp
13 Rear Climate Controls
14 Power Mirror
15 Body Control
Module (BCM)
16 Accessory Power
Outlets
Page 422 of 538
Black plate (54,1)Cadillac Escalade/Escalade ESV Owner Manual - 2012
10-54 Vehicle Care
Return the tires to the
recommended cold tire inflation
pressure when high-speed driving
has ended. SeeVehicle Load Limits
on page 9‑15 andTire Pressure on
page 10‑52.
Tire Pressure Monitor
System
The Tire Pressure Monitor System
(TPMS) uses radio and sensor
technology to check tire pressure
levels. The TPMS sensors monitor
the air pressure in your tires and
transmit tire pressure readings to a
receiver located in the vehicle.
Each tire, including the spare
(if provided), should be checked
monthly when cold and inflated to
the inflation pressure recommended
by the vehicle manufacturer on the
vehicle placard or tire inflation
pressure label. (If your vehicle has
tires of a different size than the size
indicated on the vehicle placard or tire inflation pressure label, you
should determine the proper tire
inflation pressure for those tires.)
As an added safety feature, your
vehicle has been equipped with a
tire pressure monitoring system
(TPMS) that illuminates a low tire
pressure telltale when one or
more of your tires is significantly
under‐inflated.
Accordingly, when the low tire
pressure telltale illuminates, you
should stop and check your tires as
soon as possible, and inflate them
to the proper pressure. Driving on
a significantly under‐inflated tire
causes the tire to overheat and can
lead to tire failure. Under‐inflation
also reduces fuel efficiency and
tire tread life, and may affect the
vehicle's handling and stopping
ability.
Please note that the TPMS is
not a substitute for proper tire
maintenance, and it is the driver's
responsibility to maintain correct tire
pressure, even if under‐inflation hasnot reached the level to trigger
illumination of the TPMS low tire
pressure telltale.
Your vehicle has also been
equipped with a TPMS malfunction
indicator to indicate when the
system is not operating properly.
The TPMS malfunction indicator is
combined with the low tire pressure
telltale. When the system detects a
malfunction, the telltale will flash for
approximately one minute and then
remain continuously illuminated.
This sequence will continue upon
subsequent vehicle start‐ups as
long as the malfunction exists.
When the malfunction indicator is
illuminated, the system may not be
able to detect or signal low tire
pressure as intended. TPMS
malfunctions may occur for a variety
of reasons, including the installation
of replacement or alternate tires or
wheels on the vehicle that prevent
the TPMS from functioning properly.
Always check the TPMS malfunction
telltale after replacing one or more
tires or wheels on your vehicle to
Page 425 of 538
Black plate (57,1)Cadillac Escalade/Escalade ESV Owner Manual - 2012
Vehicle Care 10-57
.Operating electronic devices or
being near facilities using radio
wave frequencies similar to the
TPMS could cause the TPMS
sensors to malfunction.
If the TPMS is not functioning
properly, it cannot detect or signal a
low tire condition. See your dealer
for service if the TPMS malfunction
light and DIC message comes on
and stays on.
TPMS Sensor Matching
Process
Each TPMS sensor has a unique
identification code. The identification
code needs to be matched to a new
tire/wheel position after rotating the
vehicle’s tires or replacing one or
more of the TPMS sensors. The
TPMS sensor matching process
should also be performed after
replacing a spare tire with a road
tire containing the TPMS sensor.
The malfunction light and the DIC
message should go off at the next
ignition cycle. The sensors are
matched to the tire/wheel positions, using a TPMS relearn tool, in the
following order: driver side front tire,
passenger side front tire, passenger
side rear tire, and driver side rear.
See your dealer for service or to
purchase a relearn tool.
There are two minutes to match
the first tire/wheel position, and
five minutes overall to match all
four tire/wheel positions. If it takes
longer, the matching process stops
and must be restarted.
The TPMS sensor matching process
is outlined below:
1. Set the parking brake.
2. Turn the ignition to ON/RUN with
the engine off.
3. Press
QandKon the
Remote Keyless Entry (RKE)
transmitter at the same time for
approximately five seconds. The
horn sounds twice to signal the
receiver is in relearn mode and
TIRE LEARNING ACTIVE
message displays on the DIC
screen. 4. Start with the driver side
front tire.
5. Place the relearn tool against the tire sidewall, near the valve
stem. Then press the button
to activate the TPMS sensor.
A horn chirp confirms that the
sensor identification code has
been matched to this tire and
wheel position.
6. Proceed to the passenger side front tire, and repeat the
procedure in Step 5.
7. Proceed to the passenger side rear tire, and repeat the
procedure in Step 5.
8. Proceed to the driver side rear tire, and repeat the procedure
in Step 5. The horn sounds
two times to indicate the sensor
identification code has been
matched to the driver side rear
tire, and the TPMS sensor
matching process is no longer
active. The TIRE LEARNING
ACTIVE message on the DIC
display screen goes off.
Page 522 of 538
Black plate (6,1)Cadillac Escalade/Escalade ESV Owner Manual - 2012
14-6 OnStar
OnStar service cannot work unless
your vehicle is in a place where
OnStar has an agreement with a
wireless service provider for service
in that area, and the wireless
service provider has coverage,
network capacity, reception, and
technology compatible with OnStar’s
service. Service involving location
information about the vehicle cannot
work unless GPS signals are
available, unobstructed, and
compatible with the OnStar
hardware. OnStar service may not
work if the OnStar equipment is not
properly installed or it has not been
properly maintained. If equipment
or software is added, connected,
or modified, OnStar service may
not work. Other problems beyond
OnStar ’s control may prevent
service such as hills, tall buildings,
tunnels, weather, electrical system
design and architecture of the
vehicle, damage to the vehicle in a
crash, or wireless phone network
congestion or jamming. See
Radio Frequency Statement on
page 13‑22 for information
regarding Part 15 of the Federal
Communications Commission (FCC)
rules and Industry Canada
Standards RSS-GEN/210/220/310.
Services for People with
Disabilities
Advisors provide services to help
subscribers with physical disabilities
and medical conditions.
Push
Qfor help with:
.Locating a gas station with an
attendant to pump gas.
.Finding a hotel, restaurant, etc.,
that meets accessibility needs.
.Providing directions to the
closest hospital or pharmacy in
urgent situations.
TTY Users
OnStar has the ability to
communicate to the deaf,
hard‐of‐hearing, or speech‐impaired
customers while in the vehicle. The
available dealer‐installed TTY
system can provide in-vehicle
access to all of the OnStar services,
except Virtual Advisor and OnStar
Turn‐by‐Turn Navigation.
Onstar.com
The website provides access to
account information, manages the
OnStar subscription, and allows
viewing of videos of each service.
Get subscription plan pricing
and sign up for OnStar Vehicle
Diagnostics. Click on the “My
Account” tab on the home page.
Page 523 of 538
Black plate (7,1)Cadillac Escalade/Escalade ESV Owner Manual - 2012
OnStar 14-7
OnStar Personal Identification
Number (PIN)
A PIN is needed to access some of
the OnStar services, like Remote
Door Unlock and Stolen Vehicle
Assistance. You will be prompted
to change the PIN the first time
when speaking with an Advisor. To
change the OnStar PIN, call OnStar
and provide the Advisor with the
current number.
Warranty
OnStar equipment may be
warranted as part of the new-vehicle
limited warranty. The manufacturer
of the vehicle furnishes detailed
warranty information.
Languages
The vehicle can be programmed
to respond in French or Spanish.
Push
Qand ask an Advisor.
Advisors can speak French or
Spanish.
Potential Issues
Some OnStar services are disabled
after five days. OnStar cannot
perform Remote Door Unlock or
Stolen Vehicle Assistance after the
vehicle has been off continuously
for five days. After five days, OnStar
can contact Roadside Assistance
and a locksmith to help gain access
to the vehicle.
Global Positioning
System (GPS)
.Obstruction of the GPS can
occur in a large city with tall
buildings; in parking garages;
around airports; in tunnels,
underpasses, or parking
garages; or in an area with very
dense trees. If GPS signals
are not available, the OnStar
system should still operate to
call OnStar. However, OnStar
could have difficulty identifying
the exact location.
.In emergency situations, OnStar
can use the last stored GPS
location to send to emergency
responders.
.A temporary loss of GPS can
cause loss of the ability to send
a Turn-by-Turn Navigation route.
The Advisor may give a verbal
route or may ask for a call back
after the vehicle is driven into an
open area.
Cellular and GPS Antennas
Avoid placing items over or near the
antenna to prevent blocking cellular
and GPS signal reception. Cellular
reception is required for OnStar to
send remote signals to the vehicle.
Page 535 of 538

Black plate (11,1)Cadillac Escalade/Escalade ESV Owner Manual - 2012
INDEX i-11
SeatsHead Restraints . . . . . . . . . . . . . . . 3-2
Heated and Ventilated Front . . . 3-7
Heated, Rear . . . . . . . . . . . . . . . . . . 3-8
Lumbar Adjustment, Front . . . . . 3-3
Memory . . . . . . . . . . . . . . . . . . . . . . . . 3-5
Power Adjustment, Front . . . . . . 3-3
Reclining Seatbacks . . . . . . . . . . . 3-4
Second Row . . . . . . . . . . . . . . . . . . . 3-9
Third Row Seat . . . . . . . . . . . . . . . 3-14
Second Row Seats . . . . . . . . . . . . . 3-9
Secondary Latch System . . . . . 10-85
Securing Child
Restraints . . . . . . . . 3-58, 3-61, 3-62
Security Light . . . . . . . . . . . . . . . . . . . . . . . . . . 5-22
Vehicle . . . . . . . . . . . . . . . . . . . . . . . 2-13
Security, OnStar
®. . . . . . . . . . . . . . 14-2
Service Accessories andModifications . . . . . . . . . . . . . . . . 10-3
Doing Your Own Work . . . . . . . . 10-4
Engine Soon Light . . . . . . . . . . . . 5-16 Service (cont'd)
Maintenance Records . . . . . . .11-16
Maintenance, General
Information . . . . . . . . . . . . . . . . . . 11-1
Parts Identification Label . . . . . 12-1
Publications Ordering Information . . . . . . . . . . . . . . . . 13-18
Scheduling Appointments . . . 13-14
Servicing the Airbag . . . . . . . . . . . 3-40
Shift Lock Control Function
Check, Automatic
Transmission . . . . . . . . . . . . . . . . 10-30
Shifting Into Park . . . . . . . . . . . . . . . . . . . . . . 9-26
Out of Park . . . . . . . . . . . . . . . . . . . 9-27
Side Blind Zone Alert . . . . . . . . . . 9-45
Signals, Turn and Lane-Change . . . . . . . . . . . . . . . . . 6-7
Specifications and Capacities . . . . . . . . . . . . . . . . . . . . 12-2
Speedometer . . . . . . . . . . . . . . . . . . 5-12 StabiliTrak
OFF Light . . . . . . . . . . . . . . . . . . . . . 5-20
System . . . . . . . . . . . . . . . . . . . . . . . 9-37
Start Assist, Hills . . . . . . . . . . . . . . 9-36
Start Vehicle, Remote . . . . . . . . . . 2-5
Starter Switch Check . . . . . . . . . 10-30
Starting the Engine . . . . . . . . . . . . 9-23
Steering . . . . . . . . . . . . . . . . . . . . . . . . 9-4 Fluid, Power . . . . . . . . . . . . . . . . 10-22
Heated Wheel . . . . . . . . . . . . . . . . . 5-4
Wheel Adjustment . . . . . . . . . . . . . 5-2
Wheel Controls . . . . . . . . . . . . . . . . 5-2
Steps Power Assist . . . . . . . . . . . . . . . . . 2-13
Storage Rear . . . . . . . . . . . . . . . . . . . . . . . . . . . 4-2
Storage Areas Armrest . . . . . . . . . . . . . . . . . . . . . . . . 4-2
Center Console . . . . . . . . . . . . . . . . 4-3
Glove Box . . . . . . . . . . . . . . . . . . . . . 4-1
Roof Rack System . . . . . . . . . . . . . 4-3
Page 537 of 538

Black plate (13,1)Cadillac Escalade/Escalade ESV Owner Manual - 2012
INDEX i-13
Towing (cont'd)Trailer . . . . . . . . . . . . . . . . . . . . . . . . 9-61
Trailer Sway Control (TSC) . . . 9-68
Vehicle . . . . . . . . . . . . . . . . . . . . . 10-93
Traction Control System (TCS)/StabiliTrak
®Light . . . . . . . . . . . . 5-21
Road Sensing Suspension . . . 9-39
Trailer
Sway Control (TSC) . . . . . . . . . . 9-68
Trailer Towing . . . . . . . . . . . . . . . . . 9-61
Transmission Automatic . . . . . . . . . . . . . . . . . . . . . 9-29
Fluid, Automatic . . . . . . . . . . . . .10-11
Messages . . . . . . . . . . . . . . . . . . . . 5-37
Transportation Program, Courtesy . . . . . . . . . . . . . . . . . . . . 13-14
Trip Odometer . . . . . . . . . . . . . . . . . 5-12
Turn and Lane-Change
Signals . . . . . . . . . . . . . . . . . . . . . . . . 6-7
U
Ultrasonic Parking Assist . . . . . . 9-43
Uniform Tire QualityGrading . . . . . . . . . . . . . . . . . . . . . 10-62
Universal Remote System . . . . . 5-46 Operation . . . . . . . . . . . . . . . . . . . . . 5-51
Programming . . . . . . . . . . . . . . . . . 5-46
Updates Map Data . . . . . . . . . . . . . . . . . . . . . 7-96
Using This Manual . . . . . . . . . . . . . . . . iv
V
Vehicle Canadian Owners . . . . . . . . . . . . . . . iii
Control . . . . . . . . . . . . . . . . . . . . . . . . 9-3
IdentificationNumber (VIN) . . . . . . . . . . . . . . . 12-1
Load Limits . . . . . . . . . . . . . . . . . . . 9-15
Messages . . . . . . . . . . . . . . . . . . . . 5-29
Personalization . . . . . . . . . . . . . . . 5-38
Positioning . . . . . . . . . . . . . . . . . . . 7-95
Reminder Messages . . . . . . . . . . 5-37 Vehicle (cont'd)
Remote Start . . . . . . . . . . . . . . . . . . 2-5
Security . . . . . . . . . . . . . . . . . . . . . . 2-13
Towing . . . . . . . . . . . . . . . . . . . . . . 10-93
Vehicle Care Storing the Tire Sealantand Compressor Kit . . . . . . . 10-74
Tire Pressure . . . . . . . . . . . . . . . 10-52
Vehicle Identification
Service Parts IdentificationLabel . . . . . . . . . . . . . . . . . . . . . . . . 12-1
Ventilation, Air . . . . . . . . . . . . . . . . . . 8-7
Visors . . . . . . . . . . . . . . . . . . . . . . . . . 2-22
Voice Recognition . . . . . . . . . . . . . 7-97
W
Warning Brake System Light . . . . . . . . . . . 5-18
Warning Lights, Gauges, and Indicators . . . . . . . . . . . . . . . . 5-10
Warnings . . . . . . . . . . . . . . . . . . . . . . . . . iv Cautions and Danger . . . . . . . . . . . .iv
Hazard Flashers . . . . . . . . . . . . . . . 6-7