CADILLAC ESCALADE 2012 3.G Repair Manual
Manufacturer: CADILLAC, Model Year: 2012, Model line: ESCALADE, Model: CADILLAC ESCALADE 2012 3.GPages: 538, PDF Size: 7.59 MB
Page 61 of 538
Black plate (7,1)Cadillac Escalade/Escalade ESV Owner Manual - 2012
Seats and Restraints 3-7
If something has blocked the driver
seat while recalling the exit position,
the recall may stop. Remove the
obstruction; then press and hold
the power seat control rearward for
two seconds. Try recalling the exit
position again. If the exit position is
still not recalling, see your dealer for
service.
SeeVehicle Personalization on
page 5‑38 for more information.Heated and Ventilated
Front Seats
{WARNING
If you cannot feel temperature
change or pain to the skin, the
seat heater may cause burns
even at low temperatures. To
reduce the risk of burns, people
with such a condition should use
care when using the seat heater,
especially for long periods of
time. Do not place anything on
the seat that insulates against
heat, such as a blanket, cushion,
cover, or similar item. This
may cause the seat heater to
overheat. An overheated seat
heater may cause a burn or may
damage the seat.
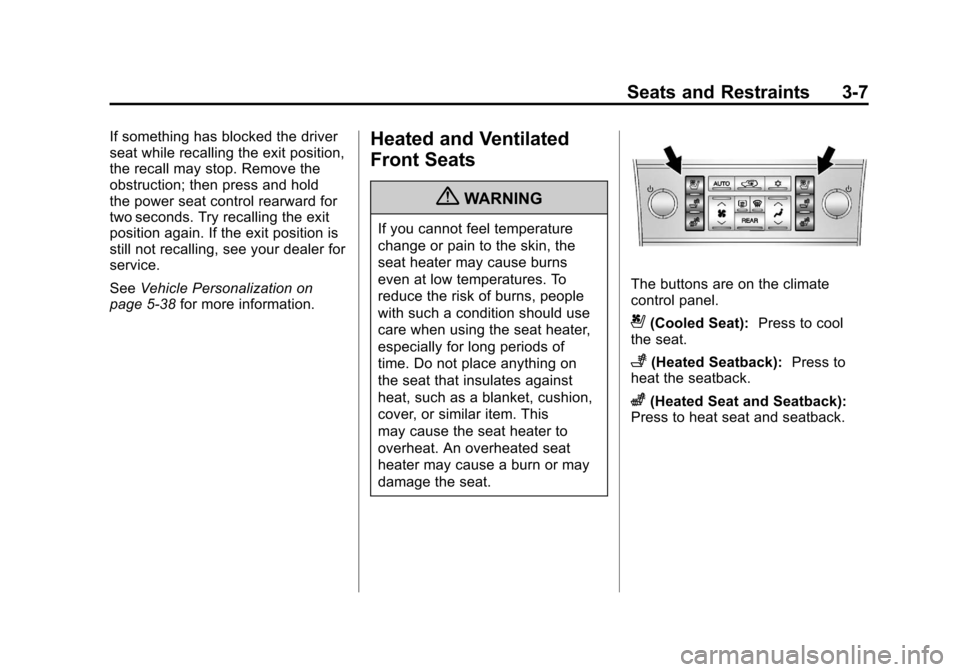
The buttons are on the climate
control panel.
{(Cooled Seat): Press to cool
the seat.
+(Heated Seatback): Press to
heat the seatback.
z(Heated Seat and Seatback):
Press to heat seat and seatback.
Page 62 of 538

Black plate (8,1)Cadillac Escalade/Escalade ESV Owner Manual - 2012
3-8 Seats and Restraints
Press the desired button once for
the highest setting. With each press
of the button, the seat will change to
the next lower setting, and then to
the off setting. Indicator bars next to
the symbol on the climate control
display show the selected setting:
three for high, two for medium, and
one for low.
The heated and cooled seats
are canceled when the ignition is
turned off. To use this feature after
restarting the vehicle, press the
desired button again.Rear Seats
Heated Rear Seats
{WARNING
If you cannot feel temperature
change or pain to the skin, the
seat heater may cause burns
even at low temperatures. See
the Warning underHeated and
Ventilated Front Seats on
page 3‑7.
The buttons are on the Rear Seat
Audio (RSA) panel on the rear of the
center console.
Press
MorLto heat the left
outboard or right outboard seat
cushion. An indicator on the RSA
display appears when this feature
is on.
Page 63 of 538
Black plate (9,1)Cadillac Escalade/Escalade ESV Owner Manual - 2012
Seats and Restraints 3-9
Press the button once for the
highest setting. With each press of
the button, the heated seat changes
to the next lower setting, and then
the off setting. Indicator bars next to
the symbol show the setting: three
for high, two for medium, and one
for low.
The heated seats are canceled
ten seconds after the ignition is
turned off. To use this feature after
the vehicle is restarted, press the
desired button.
Second Row Seats
The second row seats can be folded
for additional cargo space or folded
and tumbled for easy entry and exit
to the third row seat, if equipped.
The seat has either the manual fold
and tumble feature or the automatic
seat release fold and tumble
feature.
Reclining Seatbacks (Bucket
Seats Only)
On vehicles with second row bucket
seats, the seatbacks can be
reclined.
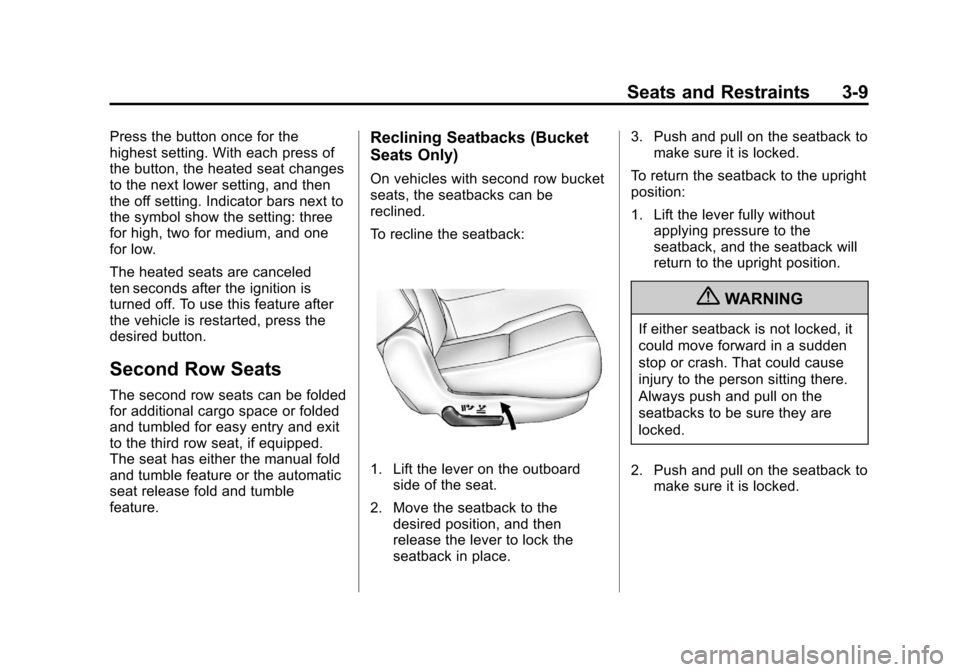
To recline the seatback:
1. Lift the lever on the outboardside of the seat.
2. Move the seatback to the desired position, and then
release the lever to lock the
seatback in place. 3. Push and pull on the seatback to
make sure it is locked.
To return the seatback to the upright
position:
1. Lift the lever fully without applying pressure to the
seatback, and the seatback will
return to the upright position.
{WARNING
If either seatback is not locked, it
could move forward in a sudden
stop or crash. That could cause
injury to the person sitting there.
Always push and pull on the
seatbacks to be sure they are
locked.
2. Push and pull on the seatback to make sure it is locked.
Page 64 of 538
Black plate (10,1)Cadillac Escalade/Escalade ESV Owner Manual - 2012
3-10 Seats and Restraints
Manual Fold and Tumble
Feature
Folding and Tumbling the Seat
To fold and tumble the seat:
1. Make sure that there is nothingunder, in front of, or on the seat.
Notice: Folding a rear seat with
the safety belts still fastened may
cause damage to the seat or the
safety belts. Always unbuckle the
safety belts and return them to
their normal stowed position
before folding a rear seat.
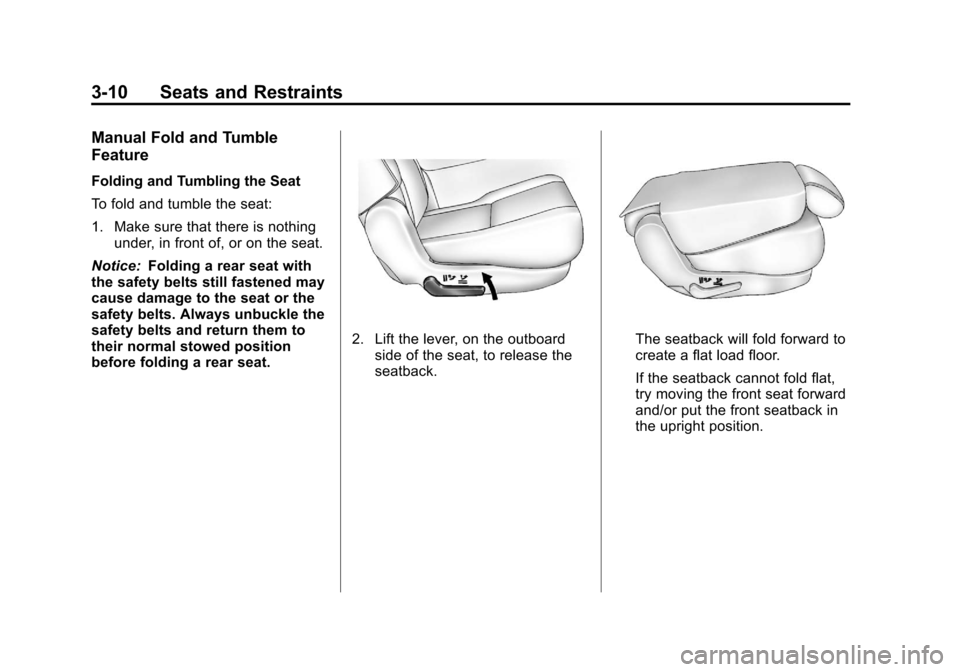
2. Lift the lever, on the outboard side of the seat, to release the
seatback.The seatback will fold forward to
create a flat load floor.
If the seatback cannot fold flat,
try moving the front seat forward
and/or put the front seatback in
the upright position.
Page 65 of 538
Black plate (11,1)Cadillac Escalade/Escalade ESV Owner Manual - 2012
Seats and Restraints 3-11
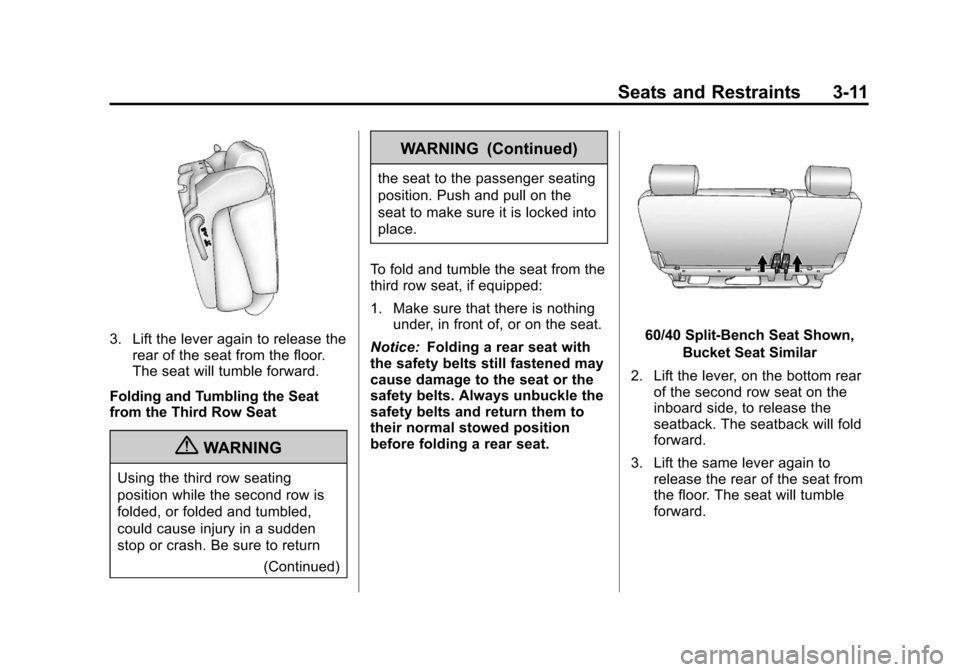
3. Lift the lever again to release therear of the seat from the floor.
The seat will tumble forward.
Folding and Tumbling the Seat
from the Third Row Seat
{WARNING
Using the third row seating
position while the second row is
folded, or folded and tumbled,
could cause injury in a sudden
stop or crash. Be sure to return (Continued)
WARNING (Continued)
the seat to the passenger seating
position. Push and pull on the
seat to make sure it is locked into
place.
To fold and tumble the seat from the
third row seat, if equipped:
1. Make sure that there is nothing under, in front of, or on the seat.
Notice: Folding a rear seat with
the safety belts still fastened may
cause damage to the seat or the
safety belts. Always unbuckle the
safety belts and return them to
their normal stowed position
before folding a rear seat.
60/40 Split-Bench Seat Shown,
Bucket Seat Similar
2. Lift the lever, on the bottom rear of the second row seat on the
inboard side, to release the
seatback. The seatback will fold
forward.
3. Lift the same lever again to release the rear of the seat from
the floor. The seat will tumble
forward.
Page 66 of 538
Black plate (12,1)Cadillac Escalade/Escalade ESV Owner Manual - 2012
3-12 Seats and Restraints
Automatic Fold and Tumble
Feature
The transmission must be in
P (Park) for this feature to work.
{WARNING
Automatically folding and
tumbling the seat when someone
is sitting in the seat, could cause
injury to the person sitting there.
Always make sure there is no one
sitting in the seat before pressing
the automatic seat release button.Folding and Tumbling the Second
Row Seat from the Third Row Seat
or Outside the Vehicle
{WARNING
Using the third row seating
position while the second row is
folded, or folded and tumbled,
could cause injury in a sudden
stop or crash. Be sure to return
the seat to the passenger seating
position. Push and pull on the
seat to make sure it is locked into
place.To fold and tumble the seat from the
third row seat, if equipped:
1. Make sure that there is nothing
under, in front of, or on the seat.
Notice: Folding a rear seat with
the safety belts still fastened may
cause damage to the seat or the
safety belts. Always unbuckle the
safety belts and return them to
their normal stowed position
before folding a rear seat.
Page 67 of 538
Black plate (13,1)Cadillac Escalade/Escalade ESV Owner Manual - 2012
Seats and Restraints 3-13
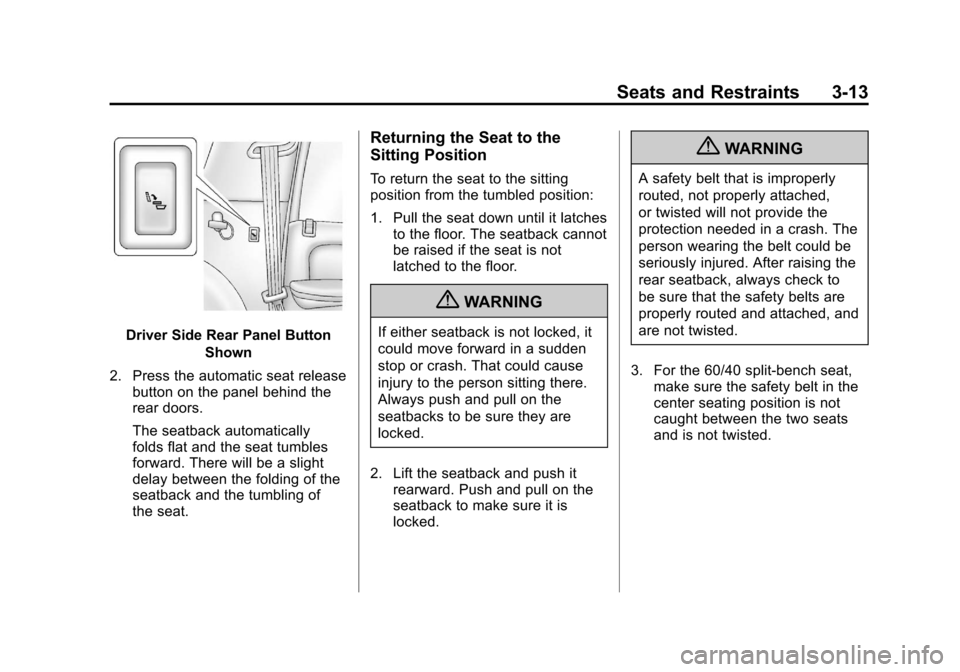
Driver Side Rear Panel ButtonShown
2. Press the automatic seat release button on the panel behind the
rear doors.
The seatback automatically
folds flat and the seat tumbles
forward. There will be a slight
delay between the folding of the
seatback and the tumbling of
the seat.
Returning the Seat to the
Sitting Position
To return the seat to the sitting
position from the tumbled position:
1. Pull the seat down until it latchesto the floor. The seatback cannot
be raised if the seat is not
latched to the floor.
{WARNING
If either seatback is not locked, it
could move forward in a sudden
stop or crash. That could cause
injury to the person sitting there.
Always push and pull on the
seatbacks to be sure they are
locked.
2. Lift the seatback and push it rearward. Push and pull on the
seatback to make sure it is
locked.
{WARNING
A safety belt that is improperly
routed, not properly attached,
or twisted will not provide the
protection needed in a crash. The
person wearing the belt could be
seriously injured. After raising the
rear seatback, always check to
be sure that the safety belts are
properly routed and attached, and
are not twisted.
3. For the 60/40 split-bench seat, make sure the safety belt in the
center seating position is not
caught between the two seats
and is not twisted.
Page 68 of 538
Black plate (14,1)Cadillac Escalade/Escalade ESV Owner Manual - 2012
3-14 Seats and Restraints
Third Row Seats
If the vehicle has a third row seat,
the seatback can be folded, and
the entire seat can be tumbled or
removed from the vehicle.
Folding the Seatback
To fold the seatback:
1. Open the liftgate to access thecontrols for the seat.
2. Remove all items on the seat cushion.
Notice: Folding a rear seat with
the safety belts still fastened may
cause damage to the seat or the
safety belts. Always unbuckle the
safety belts and return them to
their normal stowed position
before folding a rear seat.
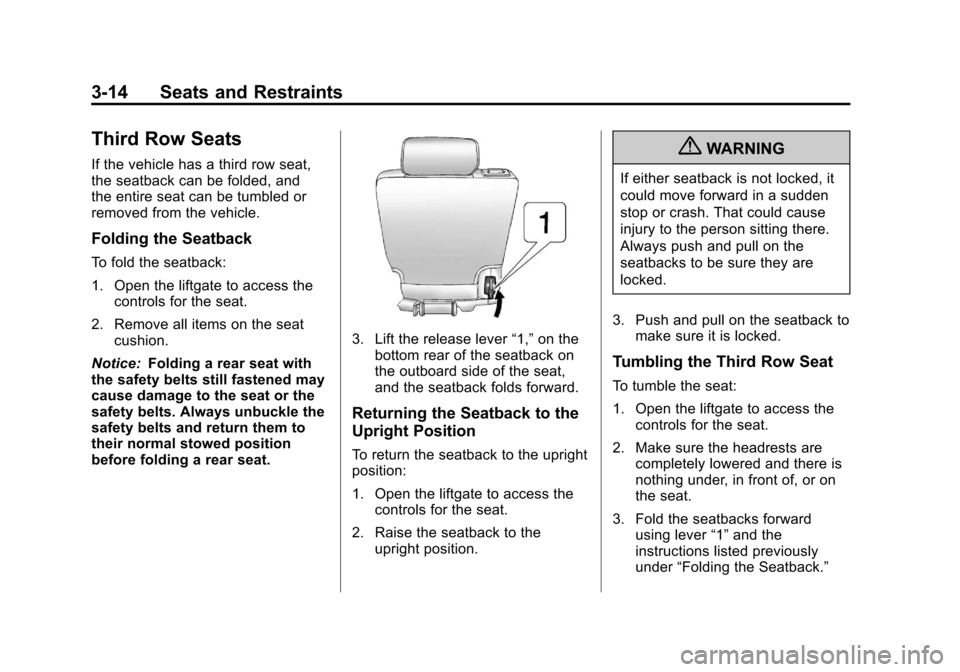
3. Lift the release lever “1,”on the
bottom rear of the seatback on
the outboard side of the seat,
and the seatback folds forward.
Returning the Seatback to the
Upright Position
To return the seatback to the upright
position:
1. Open the liftgate to access the controls for the seat.
2. Raise the seatback to the upright position.
{WARNING
If either seatback is not locked, it
could move forward in a sudden
stop or crash. That could cause
injury to the person sitting there.
Always push and pull on the
seatbacks to be sure they are
locked.
3. Push and pull on the seatback to make sure it is locked.
Tumbling the Third Row Seat
To tumble the seat:
1. Open the liftgate to access thecontrols for the seat.
2. Make sure the headrests are completely lowered and there is
nothing under, in front of, or on
the seat.
3. Fold the seatbacks forward using lever “1”and the
instructions listed previously
under “Folding the Seatback.”
Page 69 of 538
Black plate (15,1)Cadillac Escalade/Escalade ESV Owner Manual - 2012
Seats and Restraints 3-15
The seat cannot be unlatched
from the floor unless the
seatback is folded.
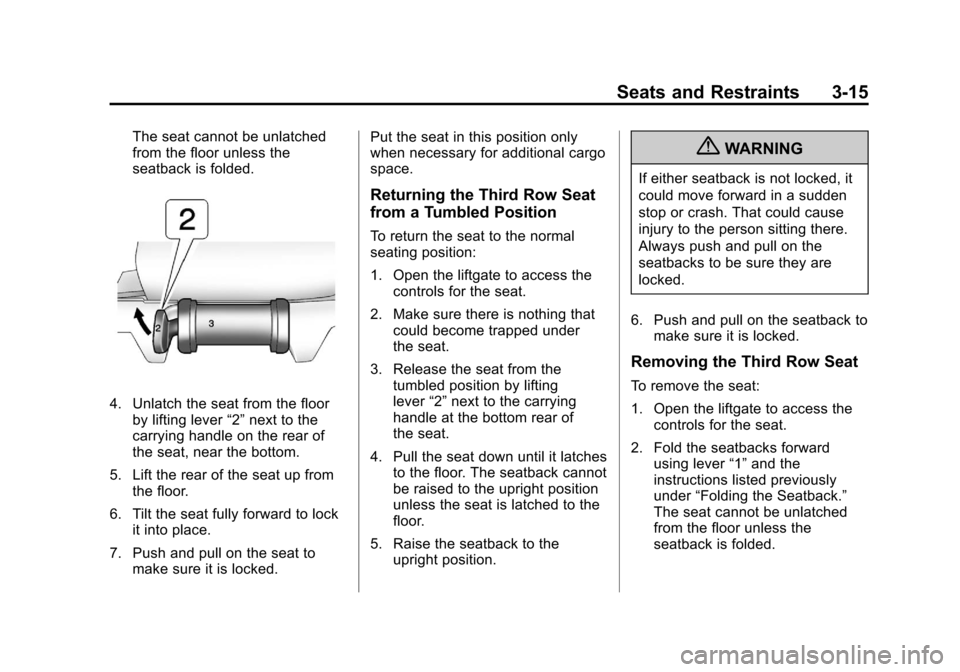
4. Unlatch the seat from the floorby lifting lever “2”next to the
carrying handle on the rear of
the seat, near the bottom.
5. Lift the rear of the seat up from the floor.
6. Tilt the seat fully forward to lock it into place.
7. Push and pull on the seat to make sure it is locked. Put the seat in this position only
when necessary for additional cargo
space.
Returning the Third Row Seat
from a Tumbled Position
To return the seat to the normal
seating position:
1. Open the liftgate to access the
controls for the seat.
2. Make sure there is nothing that could become trapped under
the seat.
3. Release the seat from the tumbled position by lifting
lever “2”next to the carrying
handle at the bottom rear of
the seat.
4. Pull the seat down until it latches to the floor. The seatback cannot
be raised to the upright position
unless the seat is latched to the
floor.
5. Raise the seatback to the upright position.
{WARNING
If either seatback is not locked, it
could move forward in a sudden
stop or crash. That could cause
injury to the person sitting there.
Always push and pull on the
seatbacks to be sure they are
locked.
6. Push and pull on the seatback to make sure it is locked.
Removing the Third Row Seat
To remove the seat:
1. Open the liftgate to access thecontrols for the seat.
2. Fold the seatbacks forward using lever “1”and the
instructions listed previously
under “Folding the Seatback.”
The seat cannot be unlatched
from the floor unless the
seatback is folded.
Page 70 of 538
Black plate (16,1)Cadillac Escalade/Escalade ESV Owner Manual - 2012
3-16 Seats and Restraints
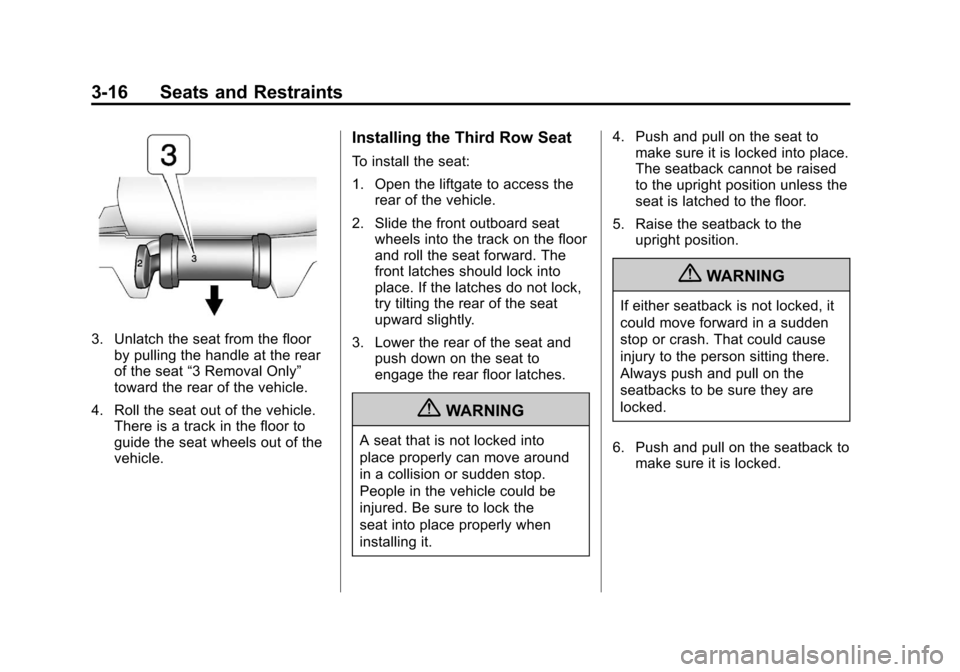
3. Unlatch the seat from the floorby pulling the handle at the rear
of the seat “3 Removal Only”
toward the rear of the vehicle.
4. Roll the seat out of the vehicle. There is a track in the floor to
guide the seat wheels out of the
vehicle.
Installing the Third Row Seat
To install the seat:
1. Open the liftgate to access therear of the vehicle.
2. Slide the front outboard seat wheels into the track on the floor
and roll the seat forward. The
front latches should lock into
place. If the latches do not lock,
try tilting the rear of the seat
upward slightly.
3. Lower the rear of the seat and push down on the seat to
engage the rear floor latches.
{WARNING
A seat that is not locked into
place properly can move around
in a collision or sudden stop.
People in the vehicle could be
injured. Be sure to lock the
seat into place properly when
installing it. 4. Push and pull on the seat to
make sure it is locked into place.
The seatback cannot be raised
to the upright position unless the
seat is latched to the floor.
5. Raise the seatback to the upright position.
{WARNING
If either seatback is not locked, it
could move forward in a sudden
stop or crash. That could cause
injury to the person sitting there.
Always push and pull on the
seatbacks to be sure they are
locked.
6. Push and pull on the seatback to make sure it is locked.