brake CADILLAC ESCALADE 2012 3.G Repair Manual
[x] Cancel search | Manufacturer: CADILLAC, Model Year: 2012, Model line: ESCALADE, Model: CADILLAC ESCALADE 2012 3.GPages: 538, PDF Size: 7.59 MB
Page 393 of 538
Black plate (25,1)Cadillac Escalade/Escalade ESV Owner Manual - 2012
Vehicle Care 10-25
Brake Fluid
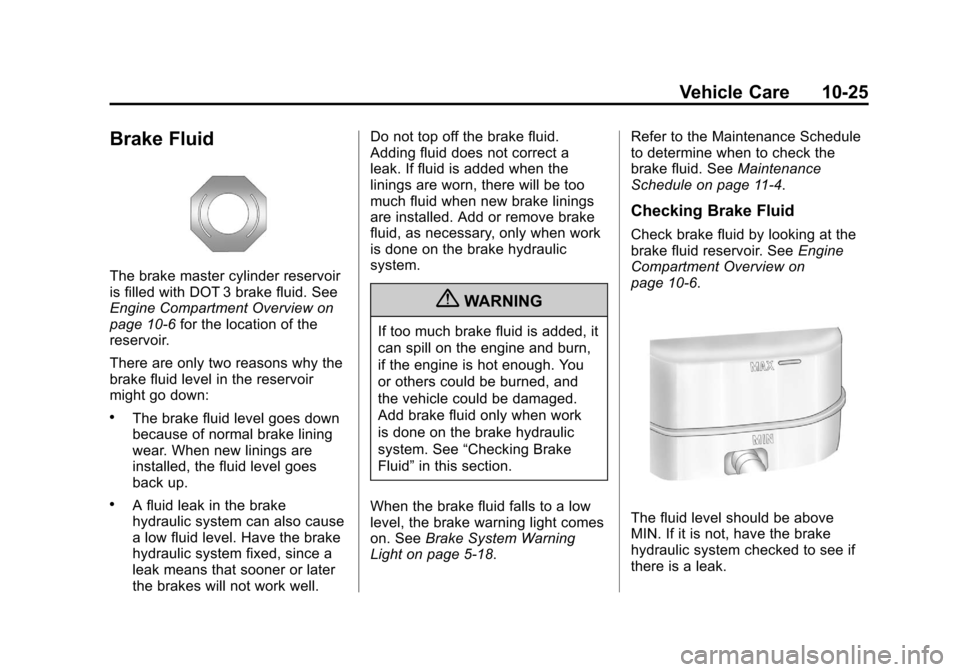
The brake master cylinder reservoir
is filled with DOT 3 brake fluid. See
Engine Compartment Overview on
page 10‑6for the location of the
reservoir.
There are only two reasons why the
brake fluid level in the reservoir
might go down:
.The brake fluid level goes down
because of normal brake lining
wear. When new linings are
installed, the fluid level goes
back up.
.A fluid leak in the brake
hydraulic system can also cause
a low fluid level. Have the brake
hydraulic system fixed, since a
leak means that sooner or later
the brakes will not work well. Do not top off the brake fluid.
Adding fluid does not correct a
leak. If fluid is added when the
linings are worn, there will be too
much fluid when new brake linings
are installed. Add or remove brake
fluid, as necessary, only when work
is done on the brake hydraulic
system.
{WARNING
If too much brake fluid is added, it
can spill on the engine and burn,
if the engine is hot enough. You
or others could be burned, and
the vehicle could be damaged.
Add brake fluid only when work
is done on the brake hydraulic
system. See
“Checking Brake
Fluid” in this section.
When the brake fluid falls to a low
level, the brake warning light comes
on. See Brake System Warning
Light on page 5‑18. Refer to the Maintenance Schedule
to determine when to check the
brake fluid. See
Maintenance
Schedule on page 11‑4.
Checking Brake Fluid
Check brake fluid by looking at the
brake fluid reservoir. See Engine
Compartment Overview on
page 10‑6.
The fluid level should be above
MIN. If it is not, have the brake
hydraulic system checked to see if
there is a leak.
Page 394 of 538

Black plate (26,1)Cadillac Escalade/Escalade ESV Owner Manual - 2012
10-26 Vehicle Care
After work is done on the brake
hydraulic system, make sure the
level is above the MIN but not over
the MAX mark.
What to Add
Use only new DOT 3 brake fluid
from a sealed container. See
Recommended Fluids and
Lubricants on page 11‑13.
Always clean the brake fluid
reservoir cap and the area around
the cap before removing it. This
helps keep dirt from entering the
reservoir.
{WARNING
With the wrong kind of fluid in the
brake hydraulic system, the
brakes might not work well. This
could cause a crash. Always use
the proper brake fluid.Notice
.Using the wrong fluid
can badly damage brake
hydraulic system parts. For
example, just a few drops of
mineral-based oil, such as
engine oil, in the brake
hydraulic system can
damage brake hydraulic
system parts so badly that
they will have to be replaced.
Do not let someone put in
the wrong kind of fluid.
.If brake fluid is spilled on the
vehicle's painted surfaces,
the paint finish can be
damaged. Be careful not
to spill brake fluid on the
vehicle. If you do, wash it off
immediately.
Battery
If the vehicle is a hybrid, see
the hybrid supplement for more
information.
Refer to the replacement number
on the original battery label when
a new battery is needed. See
Engine Compartment Overview on
page 10‑6
for battery location.
{WARNING
Battery posts, terminals, and
related accessories contain lead
and lead compounds, chemicals
known to the State of California to
cause cancer and reproductive
harm. Wash hands after handling.
Page 398 of 538
Black plate (30,1)Cadillac Escalade/Escalade ESV Owner Manual - 2012
10-30 Vehicle Care
Starter Switch Check
{WARNING
When you are doing this
inspection, the vehicle could
move suddenly. If the vehicle
moves, you or others could be
injured.
1. Before starting this check, be sure there is enough room
around the vehicle.
2. Firmly apply both the parking brake and the regular brake.
See Parking Brake on
page 9‑35.
Do not use the accelerator
pedal, and be ready to turn off
the engine immediately if it
starts. 3. Try to start the engine in each
gear. The vehicle should start
only in P (Park) or N (Neutral).
If the vehicle starts in any other
position, contact your dealer for
service.
Automatic Transmission
Shift Lock Control
Function Check
{WARNING
When you are doing this
inspection, the vehicle could
move suddenly. If the vehicle
moves, you or others could be
injured.
1. Before starting this check, be sure there is enough room
around the vehicle. It should be
parked on a level surface.
2. Firmly apply the parking brake. See Parking Brake on
page 9‑35. Be ready to apply the regular
brake immediately if the vehicle
begins to move.
3. With the engine off, turn the ignition on, but do not start the
engine. Without applying the
regular brake, try to move the
shift lever out of P (Park) with
normal effort. If the shift lever
moves out of P (Park), contact
your dealer for service.
Ignition Transmission
Lock Check
While parked, and with the parking
brake set, try to turn the ignition to
LOCK/OFF in each shift lever
position.
.The ignition should turn to
LOCK/OFF only when the shift
lever is in P (Park).
.The ignition key should come
out only in LOCK/OFF.
Contact your dealer if service is
required.
Page 399 of 538
Black plate (31,1)Cadillac Escalade/Escalade ESV Owner Manual - 2012
Vehicle Care 10-31
Park Brake and P (Park)
Mechanism Check
{WARNING
When you are doing this check,
the vehicle could begin to move.
You or others could be injured
and property could be damaged.
Make sure there is room in front
of the vehicle in case it begins to
roll. Be ready to apply the regular
brake at once should the vehicle
begin to move.Park on a fairly steep hill, with the
vehicle facing downhill. Keeping
your foot on the regular brake, set
the parking brake.
.To check the parking brake's
holding ability: With the engine
running and the transmission in
N (Neutral), slowly remove foot
pressure from the regular brake
pedal. Do this until the vehicle is
held by the parking brake only.
.To check the P (Park)
mechanism's holding ability:
With the engine running, shift
to P (Park). Then release the
parking brake followed by the
regular brake.
Contact your dealer if service is
required.
Wiper Blade Replacement
Windshield wiper blades should
be inspected for wear or cracking.
See Maintenance Schedule on
page 11‑4.
Replacement blades come in
different types and are removed in
different ways.
Front Wiper Blade
Replacement
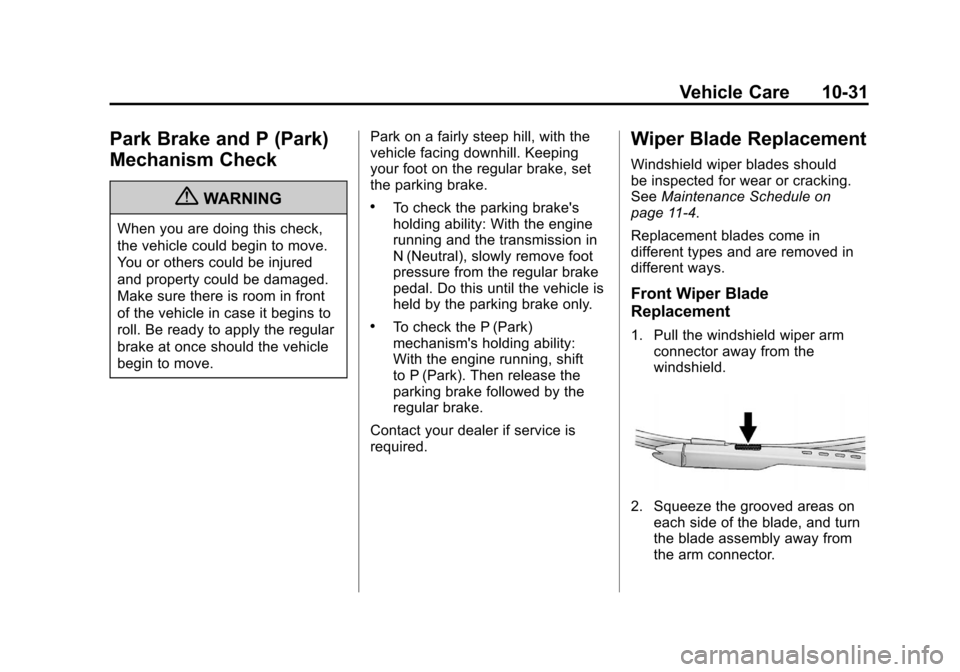
1. Pull the windshield wiper arm connector away from the
windshield.
2. Squeeze the grooved areas on
each side of the blade, and turn
the blade assembly away from
the arm connector.
Page 409 of 538

Black plate (41,1)Cadillac Escalade/Escalade ESV Owner Manual - 2012
Vehicle Care 10-41
The vehicle may not be equipped
with all of the fuses, relays, and
features shown.Fuses Usage
1 Right Trailer Stop/
Turn Lamp
2 Electronic Stability
Suspension Control,
Automatic Level Control
Exhaust
3 Left Trailer Stop/
Turn Lamp
4 Engine Controls
5 Engine Control Module,
Throttle Control
6 Trailer Brake Controller
7 Front Washer
8 Oxygen Sensors
9 Antilock Brakes System 2
10 Trailer Back-up Lamps
11 Driver Side Low-Beam
Headlamp Fuses Usage
12 Engine Control Module
(Battery)
13 Fuel Injectors, Ignition
Coils (Right Side)
14 Transmission Control
Module (Battery)
15 Vehicle Back-up Lamps
16 Passenger Side
Low-Beam Headlamp
17 Air Conditioning
Compressor
18 Oxygen Sensors
19 Transmission Controls
(Ignition)
20 Fuel Pump
21 Fuel System Control
Module
22 Headlamp Washer
23 Rear Windshield Washer
24 Fuel Injectors, Ignition
Coils (Left Side) Fuses Usage
25 Trailer Parking Lamps
26 Driver Side Parking
Lamps
27 Passenger Side Parking
Lamps
28 Fog Lamps
29 Horn
30 Passenger Side
High-Beam Headlamp
31 Daytime Running Lamps
(DRL) (If Equipped)
32 Driver Side High-Beam
Headlamp
33 Daytime Running Lamps 2
(If Equipped)
34 Sunroof
35 Key Ignition System, Theft
Deterrent System
36 Windshield Wiper
37 SEO B2 Upfitter Usage
(Battery)
Page 410 of 538

Black plate (42,1)Cadillac Escalade/Escalade ESV Owner Manual - 2012
10-42 Vehicle Care
FusesUsage
38 Electric Adjustable Pedals
39 Climate Controls (Battery)
40 Airbag System (Ignition)
41 Amplifier
42 Audio System
43 Miscellaneous (Ignition),
Cruise Control
44 Liftgate Release
45 Airbag System (Battery)
46 Instrument Panel Cluster
47 Not Used
48 Auxiliary Climate Control
(Ignition)
49 Center High-Mounted
Stoplamp (CHMSL)
50 Rear Defogger
51 Heated Mirrors Fuses
Usage
52 SEO B1 Upfitter Usage
(Battery)
53 Cigarette Lighter, Auxiliary
Power Outlet
54 Automatic Level Control
Compressor Relay
55 Climate Controls (Ignition)
56 Engine Control Module,
Secondary Fuel Pump
(Ignition)
J-Case Fuses Usage
57 Cooling Fan 1
58 Automatic Level
Control Compressor
59 Heavy Duty Antilock
Braking System
60 Cooling Fan 2 J-Case
Fuses Usage
61 Antilock Brake
System 1
62 Starter
63 Stud 2 (Trailer
Brakes)
64 Left Bussed Electrical
Center 1
65 Electric Running
Boards
66 Not Used
67 Transfer Case
68 Stud 1 (Trailer
Connector Battery
Power)
69 Mid-Bussed Electrical
Center 1
70 Climate Control
Blower
Page 417 of 538
Black plate (49,1)Cadillac Escalade/Escalade ESV Owner Manual - 2012
Vehicle Care 10-49
(B) Tire Width:The three‐digit
number indicates the tire section
width in millimeters from
sidewall to sidewall.
(C) Aspect Ratio
:A two-digit
number that indicates the tire
height-to-width measurements.
For example, if the tire size
aspect ratio is 75, as shown in
item C of the tire illustration,
it would mean that the tire's
sidewall is 75 percent as high as
it is wide.
(D) Construction Code
:A
letter code is used to indicate
the type of ply construction in
the tire. The letter R means
radial ply construction; the
letter D means diagonal or
bias ply construction; and the
letter B means belted‐bias ply
construction.
(E) Rim Diameter
:Diameter of
the wheel in inches. (F) Service Description
:These
characters represent the load
index and speed rating of the
tire. The load index represents
the load carrying capacity a tire
is certified to carry. The speed
rating is the maximum speed a
tire is certified to carry a load.
Tire Terminology and
Definitions
Air Pressure:The amount
of air inside the tire pressing
outward on each square inch
of the tire. Air pressure is
expressed in kPa (kilopascal)
or psi (pounds per square inch).
Accessory Weight
:The
combined weight of optional
accessories. Some examples
of optional accessories are
automatic transmission, power
steering, power brakes, power
windows, power seats, and air
conditioning. Aspect Ratio
:The relationship
of a tire's height to its width.
Belt
:A rubber coated layer of
cords that is located between
the plies and the tread. Cords
may be made from steel or other
reinforcing materials.
Bead
:The tire bead contains
steel wires wrapped by steel
cords that hold the tire onto
the rim.
Bias Ply Tire
:A pneumatic tire
in which the plies are laid at
alternate angles less than
90 degrees to the centerline of
the tread.
Cold Tire Pressure
:The
amount of air pressure in a tire,
measured in kPa (kilopascal)
or psi (pounds per square inch)
before a tire has built up heat
from driving. See Tire Pressure
on page 10‑52.
Page 425 of 538
Black plate (57,1)Cadillac Escalade/Escalade ESV Owner Manual - 2012
Vehicle Care 10-57
.Operating electronic devices or
being near facilities using radio
wave frequencies similar to the
TPMS could cause the TPMS
sensors to malfunction.
If the TPMS is not functioning
properly, it cannot detect or signal a
low tire condition. See your dealer
for service if the TPMS malfunction
light and DIC message comes on
and stays on.
TPMS Sensor Matching
Process
Each TPMS sensor has a unique
identification code. The identification
code needs to be matched to a new
tire/wheel position after rotating the
vehicle’s tires or replacing one or
more of the TPMS sensors. The
TPMS sensor matching process
should also be performed after
replacing a spare tire with a road
tire containing the TPMS sensor.
The malfunction light and the DIC
message should go off at the next
ignition cycle. The sensors are
matched to the tire/wheel positions, using a TPMS relearn tool, in the
following order: driver side front tire,
passenger side front tire, passenger
side rear tire, and driver side rear.
See your dealer for service or to
purchase a relearn tool.
There are two minutes to match
the first tire/wheel position, and
five minutes overall to match all
four tire/wheel positions. If it takes
longer, the matching process stops
and must be restarted.
The TPMS sensor matching process
is outlined below:
1. Set the parking brake.
2. Turn the ignition to ON/RUN with
the engine off.
3. Press
QandKon the
Remote Keyless Entry (RKE)
transmitter at the same time for
approximately five seconds. The
horn sounds twice to signal the
receiver is in relearn mode and
TIRE LEARNING ACTIVE
message displays on the DIC
screen. 4. Start with the driver side
front tire.
5. Place the relearn tool against the tire sidewall, near the valve
stem. Then press the button
to activate the TPMS sensor.
A horn chirp confirms that the
sensor identification code has
been matched to this tire and
wheel position.
6. Proceed to the passenger side front tire, and repeat the
procedure in Step 5.
7. Proceed to the passenger side rear tire, and repeat the
procedure in Step 5.
8. Proceed to the driver side rear tire, and repeat the procedure
in Step 5. The horn sounds
two times to indicate the sensor
identification code has been
matched to the driver side rear
tire, and the TPMS sensor
matching process is no longer
active. The TIRE LEARNING
ACTIVE message on the DIC
display screen goes off.
Page 428 of 538
Black plate (60,1)Cadillac Escalade/Escalade ESV Owner Manual - 2012
10-60 Vehicle Care
The rubber in tires ages over time.
This also applies to the spare tire,
if the vehicle has one, even if it is
never used. Multiple conditions
including temperatures, loading
conditions, and inflation pressure
maintenance affect how fast aging
takes place. Tires will typically need
to be replaced due to wear before
they may need to be replaced
due to age. Consult the tire
manufacturer for more information
on when tires should be replaced.
Vehicle Storage
Tires age when stored normally
mounted on a parked vehicle. Park
a vehicle that will be stored for at
least a month in a cool, dry, clean
area away from direct sunlight to
slow aging. This area should be
free of grease, gasoline or other
substances that can deteriorate
rubber.
Parking for an extended period can
cause flat spots on the tires that
may result in vibrations while
driving. When storing a vehicle forat least a month, remove the tires
or raise the vehicle to reduce the
weight from the tires.
Buying New Tires
GM has developed and matched
specific tires for the vehicle. The
original equipment tires installed
were designed to meet General
Motors Tire Performance Criteria
Specification (TPC Spec) system
rating. When replacement tires are
needed, GM strongly recommends
buying tires with the same TPC
Spec rating.
GM's exclusive TPC Spec system
considers over a dozen critical
specifications that impact the
overall performance of the
vehicle, including brake system
performance, ride and handling,
traction control, and tire pressure
monitoring performance. GM's TPC
Spec number is molded onto the
tire's sidewall near the tire size.
If the tires have an all‐season tread
design, the TPC Spec number will
be followed by MS for mud and
snow. See
Tire Sidewall Labeling on
page 10‑47 for additional
information.
GM recommends replacing all the
tires at the same time. Uniform
tread depth on all tires will help to
maintain the performance of the
vehicle. Braking and handling
performance may be adversely
affected if all the tires are not
replaced at the same time. See
Tire Inspection on page 10‑58 and
Tire Rotation on page 10‑58 for
information on proper tire rotation.
{WARNING
Tires could explode during
improper service. Attempting
to mount or dismount a tire
could cause injury or death.
Only your dealer or authorized
tire service center should
mount or dismount the tires.
Page 430 of 538
Black plate (62,1)Cadillac Escalade/Escalade ESV Owner Manual - 2012
10-62 Vehicle Care
Different Size Tires and
Wheels
If wheels or tires are installed that
are a different size than the original
equipment wheels and tires, vehicle
performance, including its braking,
ride and handling characteristics,
stability, and resistance to rollover
may be affected. If the vehicle has
electronic systems such as antilock
brakes, rollover airbags, traction
control, and electronic stability
control, the performance of these
systems can also be affected.
{WARNING
If different sized wheels are used,
there may not be an acceptable
level of performance and safety if
tires not recommended for those
wheels are selected. This
increases the chance of a crash
and serious injury. Only use GM
specific wheel and tire systems(Continued)
WARNING (Continued)
developed for the vehicle, and
have them properly installed by a
GM certified technician.
See Buying New Tires on
page 10‑60 andAccessories and
Modifications on page 10‑3 for
additional information.
Uniform Tire Quality
Grading
Quality grades can be found
where applicable on the tire
sidewall between tread shoulder
and maximum section width. For
example:
Treadwear 200 Traction AA
Temperature A
The following information relates
to the system developed by the
United States National Highway
Traffic Safety Administration (NHTSA), which grades tires
by treadwear, traction, and
temperature performance. This
applies only to vehicles sold in
the United States. The grades
are molded on the sidewalls of
most passenger car tires. The
Uniform Tire Quality Grading
(UTQG) system does not apply
to deep tread, winter-type snow
tires, space-saver, or temporary
use spare tires, tires with
nominal rim diameters of
10 to 12 inches (25 to 30 cm),
or to some limited-production
tires.
While the tires available on
General Motors passenger cars
and light trucks may vary with
respect to these grades, they
must also conform to federal
safety requirements and
additional General Motors Tire
Performance Criteria (TPC)
standards.