center console CADILLAC ESCALADE 2012 3.G Owners Manual
[x] Cancel search | Manufacturer: CADILLAC, Model Year: 2012, Model line: ESCALADE, Model: CADILLAC ESCALADE 2012 3.GPages: 538, PDF Size: 7.59 MB
Page 15 of 538

Black plate (9,1)Cadillac Escalade/Escalade ESV Owner Manual - 2012
In Brief 1-9
Heated and Ventilated
Seats
The buttons are on the climate
control panel.
{:Press to cool the entire seat.
+:Press to heat the
seatback only.
z: Press to heat the seat and
seatback.
Press the desired button once for
the highest setting. With each press
of the button, the seat will change to
the next lower setting, and then to the off setting. Indicator bars next to
the symbol on the climate control
display show the selected setting:
three for high, two for medium, and
one for low.
See
Heated and Ventilated Front
Seats on page 3‑7.
Heated Rear Seats
The buttons are on the Rear Sear
Audio (RSA) panel on the rear of the
center console. Press
MorLto heat the left
outboard or right outboard seat
cushion and to cycle through the
temperature settings.
See Heated Rear Seats on
page 3‑8.
Head Restraint
Adjustment
Do not drive until the head restraints
for all occupants are installed and
adjusted properly.
To achieve a comfortable seating
position, change the seatback
recline angle as little as necessary
while keeping the seat and the
head restraint height in the proper
position.
For more information see Head
Restraints on page 3‑2 andPower
Seat Adjustment on page 3‑3.
Page 18 of 538

Black plate (12,1)Cadillac Escalade/Escalade ESV Owner Manual - 2012
1-12 In Brief
Throttle and Brake Pedal
Adjustment
The vehicle has adjustable throttle
and brake pedals that allow you to
change their positions.
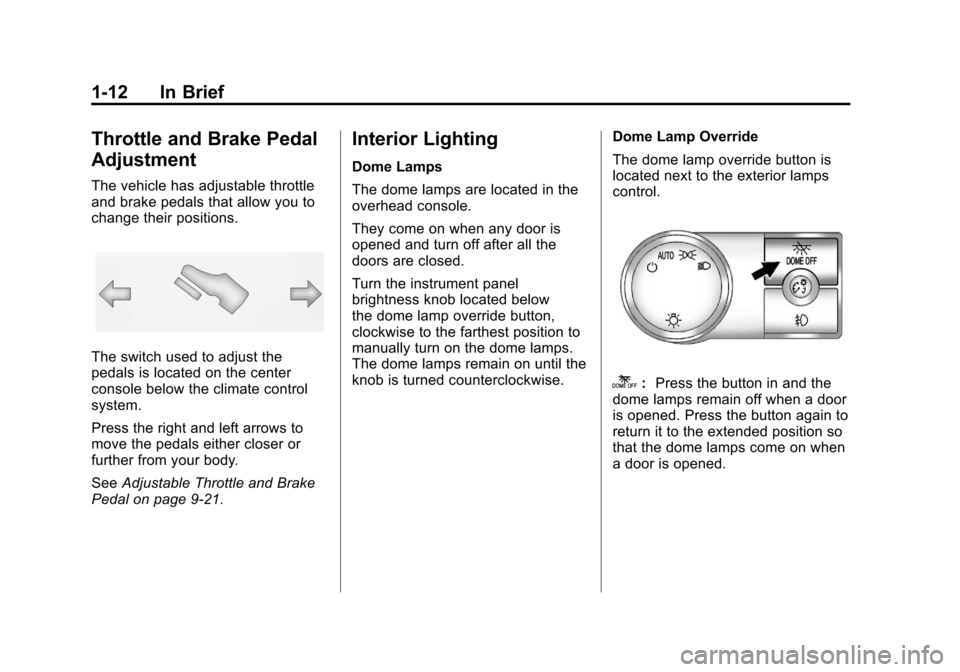
The switch used to adjust the
pedals is located on the center
console below the climate control
system.
Press the right and left arrows to
move the pedals either closer or
further from your body.
SeeAdjustable Throttle and Brake
Pedal on page 9‑21.
Interior Lighting
Dome Lamps
The dome lamps are located in the
overhead console.
They come on when any door is
opened and turn off after all the
doors are closed.
Turn the instrument panel
brightness knob located below
the dome lamp override button,
clockwise to the farthest position to
manually turn on the dome lamps.
The dome lamps remain on until the
knob is turned counterclockwise. Dome Lamp Override
The dome lamp override button is
located next to the exterior lamps
control.
k:
Press the button in and the
dome lamps remain off when a door
is opened. Press the button again to
return it to the extended position so
that the dome lamps come on when
a door is opened.
Page 22 of 538

Black plate (16,1)Cadillac Escalade/Escalade ESV Owner Manual - 2012
1-16 In Brief
This is the highest attainable
range with all lower gears
accessible. As an example,
when 5 (Fifth) gear is selected,
1 (First) through 5 (Fifth) gears
are available.
2. Press the plus/minus buttons, located on the steering column
shift lever, to select the desired
range of gears for current driving
conditions. See Manual Mode on
page 9‑32.
While using DSC, cruise control and
the tow/haul mode can be used.
Grade Braking is not available when
DSC is active. See Tow/Haul Mode
on page 9‑33.Vehicle Features
Radio(s)
This vehicle's radio is part of the
navigation system. See Infotainment
on page 7‑2.
Satellite Radio
XM is a satellite radio service
that is based in the 48 contiguous
United States and 10 Canadian
provinces. XM satellite radio has a
wide variety of programming and
commercial-free music, coast to
coast, and in digital-quality sound.
A fee is required to receive the XM
service.
For more information, refer to:
.www.xmradio.com or call
1-800-929-2100 (U.S.)
.www.xmradio.ca or call
1-877-438-9677 (Canada)
Also, see Satellite Radio on
page 7‑15.
Portable Audio Devices
This vehicle has an auxiliary input,
located on the audio faceplate,
and a USB port located on the
instrument panel and in the center
console. External devices such
as iPod
®, laptop computers,
MP3 players, CD changers, USB
storage device, etc. can be
connected to the auxiliary port using
a 3.5 mm (1/8 in) input jack or the
USB port depending on the audio
system.
See Auxiliary Devices on page 7‑30
or CD/DVD Player on page 7‑18 for
further information.
Bluetooth®
For vehicles with a Bluetooth
system, it allows users with a
Bluetooth‐enabled cell phone to
make and receive hands-free calls
using the vehicle’ s audio system
and controls.
Page 41 of 538

Black plate (11,1)Cadillac Escalade/Escalade ESV Owner Manual - 2012
Keys, Doors, and Windows 2-11
Obstacle Detection Features
If the liftgate encounters an obstacle
during a power open or close cycle,
a warning chime will sound and the
liftgate will automatically reverse
direction to the full closed or open
position. After removing the
obstruction, the power liftgate
operation can be used again.
If the liftgate encounters multiple
obstacles on the same power cycle,
the power function will deactivate,
and you must manually open or
close the liftgate. The REAR
ACCESS OPEN warning message
in the Driver Information Center
(DIC) will indicate that the liftgate
is open. After removing the
obstructions, manually open the
liftgate to the full open position or
close the liftgate to the fully closed
and latched position. The liftgate
will now resume normal power
operation.
Pinch sensors are located on the
sides of the liftgate. If an object is
caught between the liftgate and thebody and presses against this
sensor, the liftgate will reverse
direction and open fully. The liftgate
will remain open until it is activated
again or closed manually. Do not
force the liftgate open or closed
during a power cycle.
Manual Operation of Power
Liftgate
To change the liftgate to manual
operation, press the switch on the
overhead console to the OFF
position.
With the power liftgate disabled and
all of the doors unlocked, the liftgate
can be manually opened and
closed.
To open the liftgate, press the touch
pad on the handle on the outside of
the liftgate, and lift the gate open.
To close the liftgate, use the pull
cup to lower the liftgate and close.
The liftgate latch will power close.
Always close the liftgate before
driving.
If the RKE button or the power close
button on the liftgate is pressed
while power operation is disabled,
the lamps will flash three times, but
the liftgate will not move.
It is not recommended that you
drive with the liftgate open,
however, if you must drive with the
liftgate open, the liftgate should be
set to manual operation by pressing
the OFF switch on the center
console.
The liftgate has an electric latch.
If the battery is disconnected or has
low voltage, the liftgate will not
open. The liftgate will resume
operation when the battery is
reconnected and charged.
If the battery is properly connected
with adequate voltage, the switch is
not disabled, and the liftgate still will
not function, your vehicle should be
taken to a dealer for service.
Page 43 of 538

Black plate (13,1)Cadillac Escalade/Escalade ESV Owner Manual - 2012
Keys, Doors, and Windows 2-13
The liftgate will open after a slight
delay. The vehicle must be in
P (Park) to open the liftgate. To
close the liftgate, use the pull cup or
pull strap as an aid.
The liftgate or liftglass cannot be
opened if the rear wipers are in
motion. Attempting to open the
liftgate or liftglass while the rear
wipers are in motion will cause the
release of the liftglass or liftgate to
delay until the wipers are parked off
the liftglass.
Both the liftglass and liftgate have
an electric latch. If the battery is
disconnected or has low voltage,
the liftglass and liftgate will not
open. The liftglass and liftgate will
resume operation when the battery
is reconnected and charged.
If the battery is properly connected
and has adequate voltage, and
the liftgate or liftglass still will not
function, your vehicle should be
taken to a dealership for service.Power Assist Steps
The vehicle may have power assist
steps.
The switch used to disable the
power assist steps is located on the
center console below the climate
control system.
The power assist steps
automatically extend from beneath
the vehicle on the side in which the
door has been opened. Once the
door is closed, the assist steps
automatically move back under
the vehicle after a brief delay. The
vehicle must not be moving for the
assist steps to extend or retract.
The assist steps cannot be disabled
in the extended position.
Vehicle Security
This vehicle has theft-deterrent
features; however, they do not make
it impossible to steal.
Anti-theft Alarm System
Your vehicle has a content
theft-deterrent alarm system.
This is the security light.
To arm the theft-deterrent system:
1. Open the door.
2. Lock the door with the RemoteKeyless Entry (RKE) transmitter
or the power door lock switch.
Page 52 of 538

Black plate (22,1)Cadillac Escalade/Escalade ESV Owner Manual - 2012
2-22 Keys, Doors, and Windows
Sun Visors
Pull the sun visor down to block
glare. Detach the sun visor from the
center mount to pivot to the side
window, or to extend along the rod,
if available.
Roof
Sunroof
A. Open or Close Sunroof
B. Vent
On vehicles with a sunroof, there
are two sunroof switches on the
overhead console above the
rearview mirror.The sunroof only operates when
the ignition is in ON/RUN or ACC/
ACCESSORY, or in Retained
Accessory Power (RAP). See
Retained Accessory Power (RAP)
on page 9‑25
for more information.
To open or close the sunroof, press
the open or close switch (A) to the
first detent position.
To express open or close the
sunroof, press the open or close
switch (A) to the second detent
position and release. To stop the
movement, press the switch again.
The sunroof has a comfort stop
feature which stops the sunroof from
opening to the full-open position.
From the comfort stop position,
press the open or close switch (A) a
second time to open the sunroof to
the full-open position.
Page 62 of 538

Black plate (8,1)Cadillac Escalade/Escalade ESV Owner Manual - 2012
3-8 Seats and Restraints
Press the desired button once for
the highest setting. With each press
of the button, the seat will change to
the next lower setting, and then to
the off setting. Indicator bars next to
the symbol on the climate control
display show the selected setting:
three for high, two for medium, and
one for low.
The heated and cooled seats
are canceled when the ignition is
turned off. To use this feature after
restarting the vehicle, press the
desired button again.Rear Seats
Heated Rear Seats
{WARNING
If you cannot feel temperature
change or pain to the skin, the
seat heater may cause burns
even at low temperatures. See
the Warning underHeated and
Ventilated Front Seats on
page 3‑7.
The buttons are on the Rear Seat
Audio (RSA) panel on the rear of the
center console.
Press
MorLto heat the left
outboard or right outboard seat
cushion. An indicator on the RSA
display appears when this feature
is on.
Page 119 of 538

Black plate (1,1)Cadillac Escalade/Escalade ESV Owner Manual - 2012
Storage 4-1
Storage
Storage Compartments
Glove Box . . . . . . . . . . . . . . . . . . . . 4-1
Cupholders . . . . . . . . . . . . . . . . . . . 4-1
Armrest Storage . . . . . . . . . . . . . . 4-2
Rear Storage . . . . . . . . . . . . . . . . . 4-2
Center Console Storage . . . . . . 4-3
Roof Rack System
Roof Rack System . . . . . . . . . . . . 4-3
Storage
Compartments
Glove Box
Pull the bottom of the glove box
handle upward to open it. Use
the key to lock and unlock the
glove box.
Cupholders
Cupholders are in the center
console for the front passengers.
Press down on the access door
release to open and use the front
cupholders. Push the door back
down to close it. Push down and
then back on the front cupholder to
remove it for cleaning.
Heated and Cooled
Cupholders
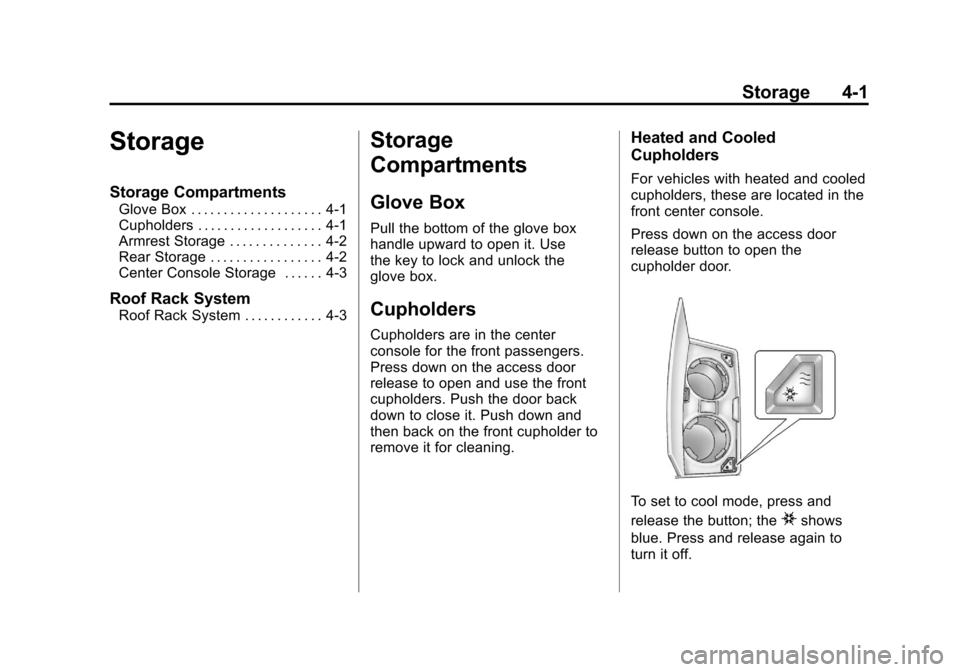
For vehicles with heated and cooled
cupholders, these are located in the
front center console.
Press down on the access door
release button to open the
cupholder door.
To set to cool mode, press and
release the button; the
ishows
blue. Press and release again to
turn it off.
Page 121 of 538

Black plate (3,1)Cadillac Escalade/Escalade ESV Owner Manual - 2012
Storage 4-3
Center Console Storage
A console compartment is located
between the bucket seats.
The console has both an upper and
lower storage bin accessed by lifting
up on the latches located at the
front of the console lid.
The console may have an
accessory power outlet inside.
SeePower Outlets on page 5‑8.
The rear of the console also has a
cupholder that swings down for the
rear seat passengers to use.
Roof Rack System
{WARNING
If something is carried on top of
the vehicle that is longer or wider
than the roof rack —like paneling,
plywood, or a mattress —the
wind can catch it while the vehicle
is being driven. The item being
carried could be violently torn off,
and this could cause a collision
and damage the vehicle. Never
carry something longer or wider
than the roof rack on top of the
vehicle unless using a GM
certified accessory carrier.
For vehicles with a roof rack, the
rack can be used to load items.
For roof racks that do not have
crossrails included, GM Certified
crossrails can be purchased as an
accessory. See your dealer for
additional information. For vehicles with crossrails, they
can be moved back and forth to
help secure cargo. To adjust them,
turn the knob located at each end of
the crossrail counterclockwise until
the crossrail can move freely. To
secure the crossrail, turn the knob
located at each end of the crossrail
clockwise until tightened. Tie the
load to the siderails or siderail
supports.
Notice:
Loading cargo on the
roof rack that weighs more than
91 kg (200 lbs) or hangs over the
rear or sides of the vehicle may
damage the vehicle. Load cargo
so that it rests evenly between
the crossrails, making sure to
fasten cargo securely.
To prevent damage or loss of
cargo when driving, check to make
sure crossrails and cargo are
securely fastened. Loading cargo
on the roof rack will make the
vehicle’s center of gravity higher.
Page 131 of 538

Black plate (9,1)Cadillac Escalade/Escalade ESV Owner Manual - 2012
Instruments and Controls 5-9
Power Outlet 110 Volt
Alternative Current
The vehicle may have a power
outlet that can be used to plug in
electrical equipment that uses a
maximum limit of 150 watts.
The power outlet is located on the
rear of the center console.
An indicator light on the outlet turns
on to show it is in use. The light
comes on when the ignition is in
ON/RUN and equipment requiringless than 150 watts is plugged into
the outlet, and no system fault is
detected.
If equipment is connected using
more than 150 watts or a system
fault is detected, a protection circuit
shuts off the power supply and the
indicator light turns off. To reset the
circuit, unplug the item and plug
it back in or turn the Remote
Accessory Power (RAP) off and
then back on. See
Retained
Accessory Power (RAP) on
page 9‑25
The power outlet is not designed for
and may not work properly, if the
following are plugged in:
.Equipment with high initial
peak wattage such as:
compressor-driven refrigerators
and electric power tools.
.Other equipment requiring
an extremely stable
power supply such as:
microcomputer-controlled
electric blankets, touch sensor
lamps, etc.
Cigarette Lighter
The cigarette lighter is located in the
center console near the cupholders.
Press on the access door to open it
and use the lighter.
To use the cigarette lighter, push it
in all the way, and let go. When it is
ready, it will pop back out by itself.
Notice: Holding a cigarette lighter
in while it is heating does not let
the lighter back away from the
heating element when it is hot.
Damage from overheating can
occur to the lighter or heating
element, or a fuse could be
blown. Do not hold a cigarette
lighter in while it is heating.