sensor CADILLAC ESCALADE 2013 3.G User Guide
[x] Cancel search | Manufacturer: CADILLAC, Model Year: 2013, Model line: ESCALADE, Model: CADILLAC ESCALADE 2013 3.GPages: 532, PDF Size: 7.69 MB
Page 155 of 532
Black plate (35,1)Cadillac Escalade/Escalade ESV Owner Manual - 2013 - CRC 2nd Edition - 10/
9/12
Instruments and Controls 5-35
.The message displays if an
engine or vehicle related
problem has been detected and
the vehicle needs service. See
your dealer.
The message turns off as soon as
the conditions that caused the
message to be displayed are no
longer present.
Airbag System Messages
SERVICE AIR BAG
This message displays if there is a
problem with the airbag system.
Have your dealer inspect the
system for problems. See Airbag
Readiness Light on page 5‑14 and
Airbag System on page 3‑26 for
more information.
Security Messages
SERVICE THEFT DETERRENT
SYSTEM
This message displays when there
is a problem with the theft-deterrent
system. The vehicle may or may not restart so you may want to take the
vehicle to your dealer before turning
off the engine. See
Immobilizer
Operation on page 2‑14 for more
information.
Tire Messages
SERVICE TIRE MONITOR
SYSTEM
On vehicles with the Tire Pressure
Monitor System (TPMS), this
message displays if a part on the
TPMS is not working properly. The
tire pressure light also flashes and
then remains on during the same
ignition cycle. See Tire Pressure
Light on page 5‑21. Several
conditions may cause this message
to appear. See Tire Pressure
Monitor Operation on page 10‑50 for
more information. If the warning
comes on and stays on, there may
be a problem with the TPMS. See
your dealer.
TIRE LEARNING ACTIVE
On vehicles with the Tire Pressure
Monitor System (TPMS), this
message displays when the TPMS
is re-learning the tire positions on
your vehicle. The tire positions must
be re-learned after rotating the tires
or after replacing a tire or sensor.
See Tire Inspection on page 10‑53,
Tire Rotation on page 10‑53, Tire
Pressure Monitor System on
page 10‑49, and Tire Pressure on
page 10‑47 for more information.
TIRE LOW ADD AIR TO TIRE
On vehicles with the Tire Pressure
Monitor System (TPMS), this
message displays when the
pressure in one or more of the
vehicle's tires needs to be checked.
This message also displays LEFT
FRT (left front), RIGHT FRT (right
front), LEFT RR (left rear),
or RIGHT RR (right rear) to indicate
the location of the low tire. The low
tire pressure warning light will also
come on. See Tire Pressure Light
on page 5‑21. You can receive more
Page 174 of 532
Black plate (2,1)Cadillac Escalade/Escalade ESV Owner Manual - 2013 - CRC 2nd Edition - 10/
9/12
6-2 Lighting
For vehicles first sold in Canada,
the off position only works when the
vehicle is shifted into the P (Park)
position.
AUTO (Automatic):Automatically
turns on the headlamps at normal
brightness, together with the
following:
.Parking Lamps
.Instrument Panel Lights
.Taillamps
.License Plate Lamps
;(Parking Lamps): Turns on the
parking lamps together with the
following:
.Instrument Panel Lights
.Taillamps
.License Plate Lamps
2(Headlamps): Turns on the
headlamps together with the
following:
.Parking Lamps
.Instrument Panel Lights
.Taillamps
.License Plate Lamps
When the headlamps are turned on
while the vehicle is on, the
headlamps will turn off automatically
10 minutes after the ignition is
turned off. When the headlamps are
turned on while the vehicle is off,
the headlamps will stay on for
10 minutes before automatically
turning off to prevent the battery
from being drained. Turn the
headlamp control to off and then
back to the headlamp on position to
make the headlamps stay on for an
additional 10 minutes.
IntelliBeam®Intelligent
High-Beam Headlamp Control
System
For vehicles with this feature, be
sure to read this entire section
before using it.
IntelliBeam is an enhancement to
the vehicle's headlamp system.
Using a digital light sensor on the
rearview mirror, this system will turn the vehicle's high-beam headlamps
on and off according to surrounding
traffic conditions.
The IntelliBeam system turns the
high-beam headlamps on when it is
dark enough, there is no other traffic
present, and the IntelliBeam system
is enabled.
Turning On and Enabling
IntelliBeam
Press and release the IntelliBeam
button on the inside rear view
mirror. The IntelliBeam indicator on
the mirror will turn on to let you
know the system has been turned
on. Once the system has been
turned on, it will remain on each
time the vehicle is started.
Additionally, the IntelliBeam system
must be enabled.
To enable the IntelliBeam system,
turn the exterior lamp control to
AUTO, with the turn signal/
multifunction lever in its neutral
position. The High-Beam On Light
will appear on the instrument panel
cluster when the high-beams are on.
Page 175 of 532
Black plate (3,1)Cadillac Escalade/Escalade ESV Owner Manual - 2013 - CRC 2nd Edition - 10/
9/12
Lighting 6-3
Driving with IntelliBeam
IntelliBeam will only activate your
high-beams when driving over
32 km/h (20 mph).
The high-beam headlamps will
remain on, under the automatic
control of IntelliBeam, until any of
the following situations occur:
.The system detects an
approaching vehicle's
headlamps.
.The system detects a preceding
vehicle's taillamps.
.The outside light is bright
enough that high-beam
headlamps are not required.
.The vehicle's speed drops below
24 km/h (15 mph).
.The headlamp stalk is moved
forward to the high-beam
position.
When either of these conditions
occur, the IntelliBeam feature
will be disabled and the
IntelliBeam light in the mirror willturn off until the high-beam stalk
is returned to the neutral
position.
.If IntelliBeam was using
low-beams prior to this action,
the IntelliBeam feature will be
temporarily disabled until the
stalk is returned to the neutral
position.
.The exterior lamp control is
turned to any setting
except AUTO.
When this occurs, IntelliBeam
will be disabled until the control
is turned back to the AUTO
position.
.The IntelliBeam system is turned
off at the inside rearview mirror.
IntelliBeam may not turn off the
high-beams if the system cannot
detect other vehicle's lamps
because of any of the following:
.The others vehicle's lamp(s) are
missing, damaged, obstructed
from view or otherwise
undetected.
.The other vehicle's lamp(s) are
covered with dirt, snow and/or
road spray.
.The other vehicle's lamp(s)
cannot be detected due to dense
exhaust, smoke, fog, snow, road
spray, mist or other airborne
obstructions.
.Your vehicle's windshield is dirty,
cracked or obstructed by
something that blocks the view
of the IntelliBeam light sensor.
.Your vehicle's windshield is
covered with ice, dirt, haze or
other obstructions.
.Your vehicle is loaded such that
the front end of the vehicle
points upward, causing the
IntelliBeam sensor to aim high
and not detect headlamps and
taillamps.
.You are driving on winding or
hilly roads.
Page 176 of 532
Black plate (4,1)Cadillac Escalade/Escalade ESV Owner Manual - 2013 - CRC 2nd Edition - 10/
9/12
6-4 Lighting
You may need to manually disable
or cancel the high-beam headlamps
by turning the low-beam headlamps
on, if any of the above conditions
exist.
Disabling and Resetting
IntelliBeam at the Rearview Mirror
IntelliBeam can be disabled by
using the controls on the inside
rearview mirror.
AUTO
3(On/Off):To disable the
system, press this button on the
inside rearview mirror. The
IntelliBeam indicator will turn off and
will not come back on until the
IntelliBeam button is pressed again.
(Stalk Disable): When IntelliBeam
has turned on the high-beams, pull
or push the high-beam stalk. This
will disable IntelliBeam. The
IntelliBeam indicator on the mirror
will turn off. To re-enable
IntelliBeam, press the IntelliBeam
button on the mirror. A different sensitivity setting is
available for dealer diagnostics.
This is done by pushing and holding
this button for 20 seconds until the
IntelliBeam indicator light flashes
three times. If you accidentally
activate this, the vehicle's setting
will automatically be reset each time
the ignition is turned off and then on
again.
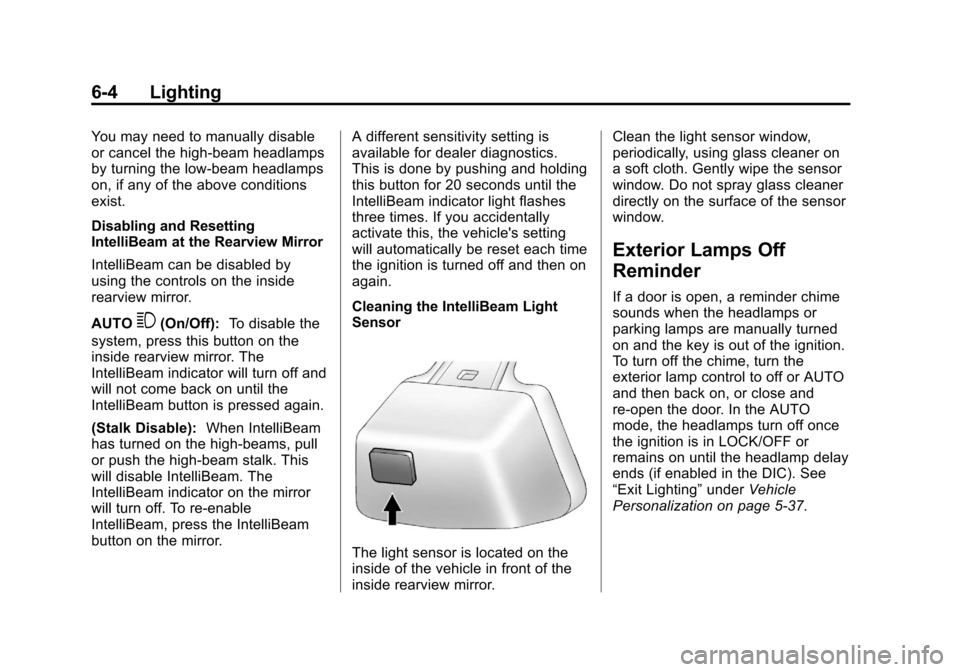
Cleaning the IntelliBeam Light
Sensor
The light sensor is located on the
inside of the vehicle in front of the
inside rearview mirror.Clean the light sensor window,
periodically, using glass cleaner on
a soft cloth. Gently wipe the sensor
window. Do not spray glass cleaner
directly on the surface of the sensor
window.
Exterior Lamps Off
Reminder
If a door is open, a reminder chime
sounds when the headlamps or
parking lamps are manually turned
on and the key is out of the ignition.
To turn off the chime, turn the
exterior lamp control to off or AUTO
and then back on, or close and
re-open the door. In the AUTO
mode, the headlamps turn off once
the ignition is in LOCK/OFF or
remains on until the headlamp delay
ends (if enabled in the DIC). See
“Exit Lighting”
underVehicle
Personalization on page 5‑37.
Page 177 of 532
Black plate (5,1)Cadillac Escalade/Escalade ESV Owner Manual - 2013 - CRC 2nd Edition - 10/
9/12
Lighting 6-5
Headlamp High/
Low-Beam Changer
5 3
(Headlamp High/Low Beam
Changer): To change the
headlamps from low to high beam,
push the turn signal lever toward the
instrument panel. To return to
low-beam headlamps, pull the lever
toward you. Then release it.
When the high beams are on, this
indicator light on the instrument
cluster will also be on.
Flash-to-Pass
Use your high-beam headlamps to
signal to a driver in front that you
want to pass. It works even if the
headlamps are in the automatic
position. To use it, pull the turn signal lever
toward you, then release it.
If the headlamps are in the
automatic position or on low beam,
the high-beam headlamps turn on.
They stay on as long as the lever is
held. The high-beam indicator on
the instrument panel cluster comes
on. Release the lever to return to
normal operation.
Daytime Running
Lamps (DRL)
Daytime Running Lamps (DRL) can
make it easier for others to see the
front of your vehicle during the day.
Fully functional daytime running
lamps are required on all vehicles
first sold in Canada.
The DRL system comes on when
the following conditions are met:
.The ignition is on.
.The exterior lamp control is
in AUTO.
.The transmission is not in Park.
.The light sensor determines it is
daytime.
When the DRL system is on, only
the DRL lamps are on. The
taillamps, sidemarker, instrument
panel lights, and other lamps will not
be on.
When it begins to get dark, the
automatic headlamp system
switches from DRL to the
headlamps.
To turn off the DRL lamps, turn the
exterior lamp control to the OFF
position and then release. For
vehicles first sold in Canada, the
transmission must be in the P (Park)
position before the DRL lamps can
be turned off.
Page 178 of 532
Black plate (6,1)Cadillac Escalade/Escalade ESV Owner Manual - 2013 - CRC 2nd Edition - 10/
9/12
6-6 Lighting
Automatic Headlamp
System
When it is dark enough outside, the
automatic headlamp system turns
on the headlamps at the normal
brightness, along with the taillamps,
sidemarker, parking lamps, and the
instrument panel lights. The radio
lights will also be dim.
To turn off the automatic headlamp
system, turn the exterior lamps
control to
Pand then release it.
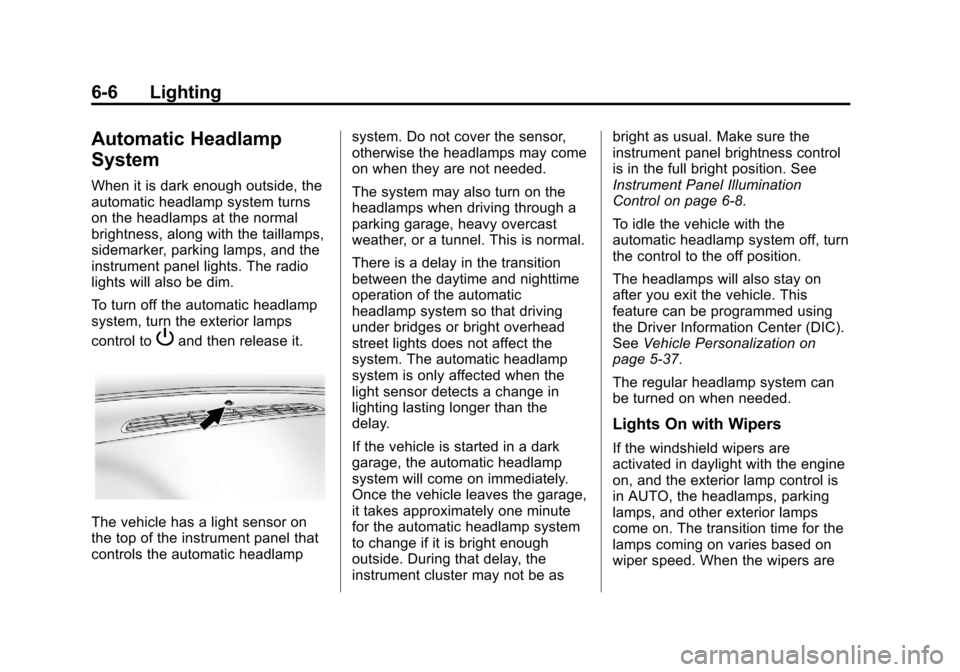
The vehicle has a light sensor on
the top of the instrument panel that
controls the automatic headlampsystem. Do not cover the sensor,
otherwise the headlamps may come
on when they are not needed.
The system may also turn on the
headlamps when driving through a
parking garage, heavy overcast
weather, or a tunnel. This is normal.
There is a delay in the transition
between the daytime and nighttime
operation of the automatic
headlamp system so that driving
under bridges or bright overhead
street lights does not affect the
system. The automatic headlamp
system is only affected when the
light sensor detects a change in
lighting lasting longer than the
delay.
If the vehicle is started in a dark
garage, the automatic headlamp
system will come on immediately.
Once the vehicle leaves the garage,
it takes approximately one minute
for the automatic headlamp system
to change if it is bright enough
outside. During that delay, the
instrument cluster may not be asbright as usual. Make sure the
instrument panel brightness control
is in the full bright position. See
Instrument Panel Illumination
Control on page 6‑8.
To idle the vehicle with the
automatic headlamp system off, turn
the control to the off position.
The headlamps will also stay on
after you exit the vehicle. This
feature can be programmed using
the Driver Information Center (DIC).
See
Vehicle Personalization on
page 5‑37.
The regular headlamp system can
be turned on when needed.
Lights On with Wipers
If the windshield wipers are
activated in daylight with the engine
on, and the exterior lamp control is
in AUTO, the headlamps, parking
lamps, and other exterior lamps
come on. The transition time for the
lamps coming on varies based on
wiper speed. When the wipers are
Page 216 of 532
Black plate (34,1)Cadillac Escalade/Escalade ESV Owner Manual - 2013 - CRC 2nd Edition - 10/
9/12
7-34 Infotainment System
L. STOPc
.Press once to stop playing
a DVD.
There is a pre-stop feature
for DVD and video CD
only. This feature resumes
playback of the disc where
it was stopped. Press the
stop button once during
disc playback and
c
displays on the DVD
startup screen. This icon
disappears after a few
seconds. Press the stop
button a second time,
or eject the disc, to cancel
the pre-stop feature and to
clear the disc position
memory.M. EJECT
X
.Press to eject a disc from
the DVD slot.
If a disc is ejected from the
player, but not removed, it
will automatically reload
into the player. Another
way to reload a disc that
has been ejected, but not
removed from the DVD
player, is to press the eject
button or the play button.
Infrared Remote Sensor: Located
in the top center of the video display
screen. Do not block the signal from
the remote to the sensor.
Infrared Transmitters: Located in
the top center of the video display
screen. Do not block the signal from
the headphones to the transmitter.
Using the Base RSE
On-Screen Display (OSD)
Menus
Use the OSD setup display
menus for:
.Initial setup
.Display setup
.Parental control setup
.Adjusting the picture quality
.Setting the various outputs
.On-screen display language
To use the OSD menus while using
the DVD player or an auxiliary
device:
1. Press the SETUP button on the remote control to display the
icons and pages on the display
screen.
2. Select the desired page by using the left/right navigation arrows to
move the cursor.
3. Press the SETUP button again on the remote control to cancel
use of the setup display.
Page 222 of 532

Black plate (40,1)Cadillac Escalade/Escalade ESV Owner Manual - 2013 - CRC 2nd Edition - 10/
9/12
7-40 Infotainment System
J. 3.5 mm (1/8 in) Output Jack
.Wired headphones can be
plugged in with a 3.5 mm
(1/8 in) jack.
K. PLAY
r
.Press this button located
below the video display
screen to start playback of
a disc. On DVDs and video
CDs with playback
control (PBC), menu
screens can display
automatically. It might be
necessary to press the
play button again to begin
play. There is a play
position memory feature
for DVD and video CD
only. If the DVD player is
turned off and then turned
back on, the DVD player
resumes playback where
the disc stopped. The play
position memory is erased
if the disc is removed. L. STOP
c
.Press once to stop playing
a DVD.
There is a pre-stop feature
for DVD and video CD
only. This feature resumes
playback of the disc where
it was stopped. Press the
stop button once during
disc playback and
c
displays on the DVD
startup screen. This icon
disappears after a few
seconds. Press the stop
button a second time,
or eject the disc, to cancel
the pre-stop feature and to
clear the disc position
memory.
M. EJECT
X
.Press to eject a disc from
the DVD slot.
If a disc is ejected from the
player, but not removed, it
will automatically reload
into the player. Another
way to reload a disc that
has been ejected, but not
removed from the DVD
player, is to press the eject
button or the play button.
Infrared Remote Sensor: Located
in the top center of the video display
screen. Do not block the signal from
the remote to the sensor.
Infrared Transmitters: Located in
the top center of the video display
screen. Do not block the signal from
the headphones to the transmitter.
Page 227 of 532
Black plate (45,1)Cadillac Escalade/Escalade ESV Owner Manual - 2013 - CRC 2nd Edition - 10/
9/12
Infotainment System 7-45
OFF/ON (Power):Turn the power
switch located on the earpiece to
turn the wireless headphones on or
off. Each headphone has a light to
indicate ON. If the light does not
come on, the batteries may need to
be replaced. See “Battery
Replacement” underRear Seat
Entertainment (RSE) System
(Headrest DVD) on page 7‑31 or
Rear Seat Entertainment (RSE)
System (Overhead) on page 7‑50
for more information.
The headphones shut off
automatically if the RSE system is
turned off or if the headphones are
out of range of the transmitter for
more than three minutes.
VOL
0(Volume): Use to adjust
the volume on the headphones.
Notice: Do not store the
headphones in heat or direct
sunlight. This could damage the
headphones and repairs will not
be covered by the warranty.
Storage in extreme cold can weaken the batteries. Keep the
headphones stored in a cool, dry
place.
Remote Control
To use the remote control, aim at
the remote sensor located on top
center of the video display screen
and press the desired button.
Objects blocking the line-of-sight
can affect the function of the remote
control. Direct or very bright light
can affect the ability of the
transmitter to receive signals from
the remote control. If the remote
control does not seem to be
working, the batteries might need to
be replaced. See
“Battery
Replacement” following this section.
The remote control provided with
the Headrest DVD RSE system, is
not a universal remote control and
will not control other equipment.
Notice: Storing the remote
control in a hot area or in direct
sunlight can damage it, and the
repairs will not be covered by the warranty. Storage in extreme cold
can weaken the batteries. Keep
the remote control stored in a
cool, dry place.
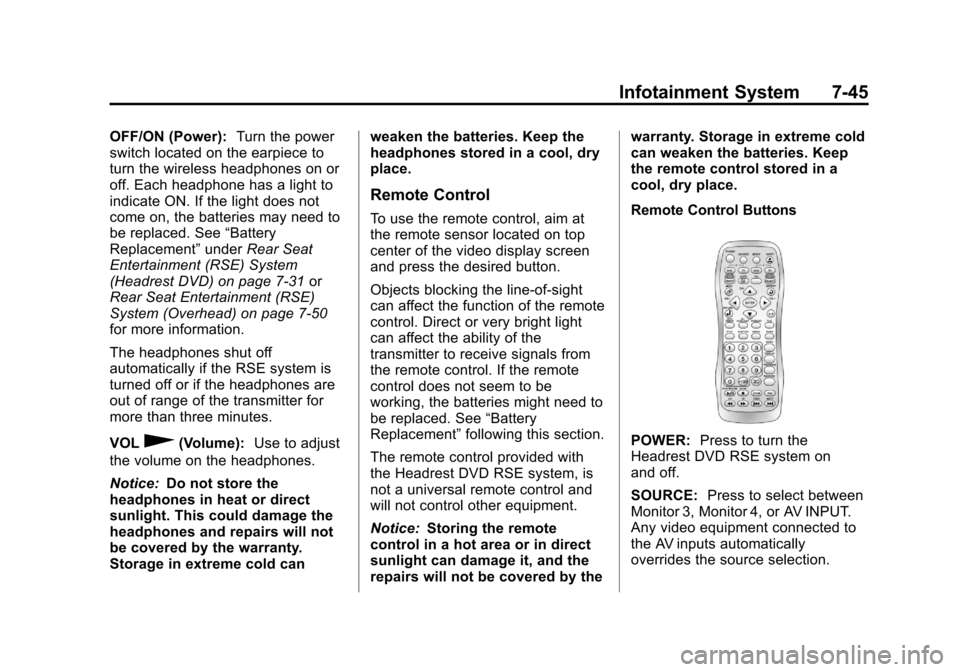
Remote Control Buttons
POWER:
Press to turn the
Headrest DVD RSE system on
and off.
SOURCE: Press to select between
Monitor 3, Monitor 4, or AV INPUT.
Any video equipment connected to
the AV inputs automatically
overrides the source selection.
Page 232 of 532
Black plate (50,1)Cadillac Escalade/Escalade ESV Owner Manual - 2013 - CRC 2nd Edition - 10/
9/12
7-50 Infotainment System
Tips and Troubleshooting
IR Sensor Inoperative:Check that
the batteries are good in the remote
control. Check that the remote
Control IR Sensor is not blocked.
Aim the remote control toward the
IR Sensor being controlled. Select
the correct screen, 3 or 4.
No picture: Check that the correct
video input mode is selected. Check
that the video cable is plugged into
the jack securely.
No Sound: Check that the correct
audio input mode is selected. Check
that the audio cable is securely
plugged into the jack.
Cleaning the Video Screens
The video display screens are made
of a specially coated glass and can
be scratched or damaged by
abrasive products, solvents,
or ammonia-based window
cleaners. Clean with a soft, lint-free,
cotton cloth that has been slightly dampened with warm water. Dry the
screens by wiping with a clean dry
cotton cloth.
Cleaning the Components
Use care when touching or cleaning
the components such as the DVD
player or the discs.
Do not use DVD lens cleaners for
DVD players because the lens of
the DVD optics can become
contaminated by lubricants.
Handle CDs and DVDs carefully.
Store them in their original cases or
other protective cases and away
from direct sunlight and dust. The
DVD player scans the bottom
surface of the disc. If the surface of
a CD or DVD is damaged, such as
cracked, broken, or scratched, the
CD or DVD may not play properly or
not at all. If the surface of a CD or
DVD is soiled, take a soft, lint free
cloth or dampen a clean, soft cloth
in a mild, neutral detergent solution
mixed with water, and clean it. Make
sure the wiping process starts from
the center to the edge.Do not touch the bottom side of a
CD or DVD while handling it; this
could damage the surface. Pick up
CDs or DVDs by grasping the outer
edges or the edge of the hole and
the outer edge.
Rear Seat Entertainment
(RSE) System (Overhead)
The vehicle may have an Overhead
DVD Rear Seat
Entertainment (RSE) system. The
RSE system works with the
vehicle's audio system. The DVD
player is part of the front radio. The
RSE system includes a radio with a
DVD player, a video display screen,
and if the vehicle has a third row
seat, it could have a second video
display screen, audio/video jacks,
two wireless headphones, and a
remote control. See
CD/DVD Player
on page 7‑18 for more information
on the vehicle's DVD system.