battery CADILLAC ESCALADE 2013 3.G Owners Manual
[x] Cancel search | Manufacturer: CADILLAC, Model Year: 2013, Model line: ESCALADE, Model: CADILLAC ESCALADE 2013 3.GPages: 532, PDF Size: 7.69 MB
Page 26 of 532
Black plate (20,1)Cadillac Escalade/Escalade ESV Owner Manual - 2013 - CRC 2nd Edition - 10/
9/12
1-20 In Brief
To clean the camera lens, located
above the license plate, rinse it with
water and wipe it with a soft cloth.
SeeRear Vision Camera (RVC) on
page 9‑47.
Ultrasonic Parking Assist
If available, this system uses
sensors on the rear bumper to
assist with parking and avoiding
objects while in R (Reverse).
It operates at speeds less than
8 km/h (5 mph). URPA uses audible
beeps to provide distance and
system information.
Keep the sensors on the vehicle's
rear bumper clean to ensure proper
operation.
See Ultrasonic Parking Assist on
page 9‑44.
Power Outlets
The accessory power outlets can be
used to plug in electrical equipment,
such as a cell phone or MP3 player.
The vehicle has three accessory
power outlets:
.Inside the floor console
storage bin.
.On the rear of the floor console.
.In the rear cargo area on the
passenger side.
The accessory power outlets are
powered, even when the ignition is
in LOCK/OFF. Continuing to use
power outlets while the ignition is in
LOCK/OFF may cause the vehicle's
battery to run down.
See Power Outlets on page 5‑7.
Universal Remote System
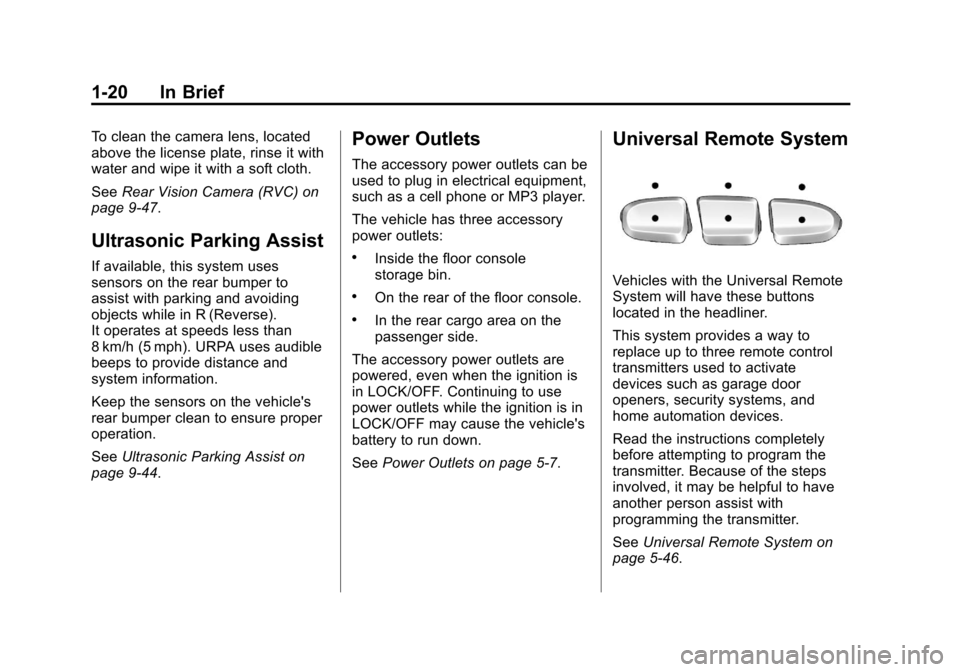
Vehicles with the Universal Remote
System will have these buttons
located in the headliner.
This system provides a way to
replace up to three remote control
transmitters used to activate
devices such as garage door
openers, security systems, and
home automation devices.
Read the instructions completely
before attempting to program the
transmitter. Because of the steps
involved, it may be helpful to have
another person assist with
programming the transmitter.
SeeUniversal Remote System on
page 5‑46.
Page 32 of 532
Black plate (2,1)Cadillac Escalade/Escalade ESV Owner Manual - 2013 - CRC 2nd Edition - 10/
9/12
2-2 Keys, Doors, and Windows
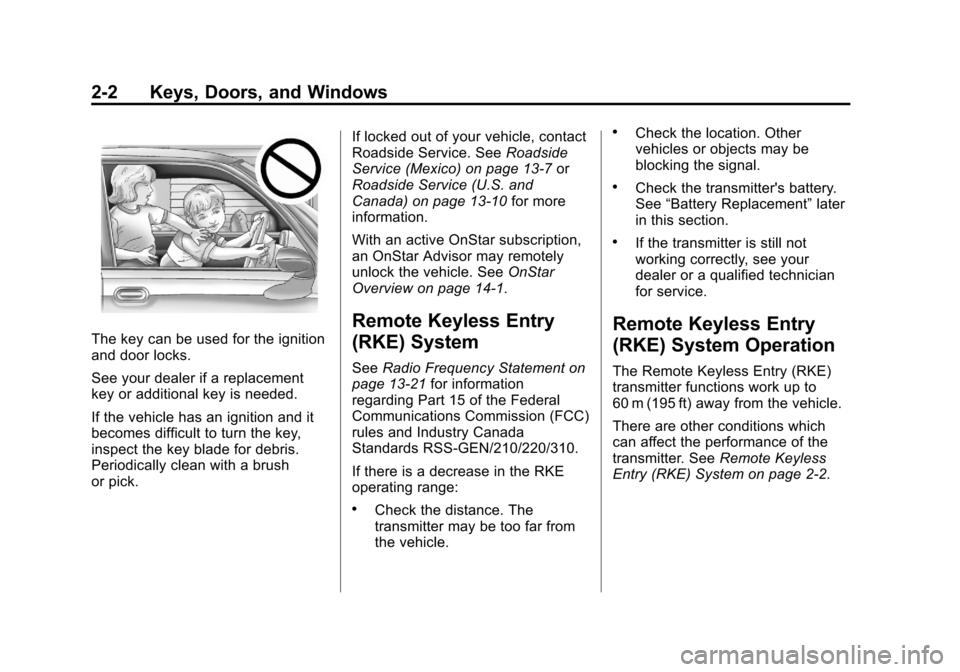
The key can be used for the ignition
and door locks.
See your dealer if a replacement
key or additional key is needed.
If the vehicle has an ignition and it
becomes difficult to turn the key,
inspect the key blade for debris.
Periodically clean with a brush
or pick.If locked out of your vehicle, contact
Roadside Service. See
Roadside
Service (Mexico) on page 13‑7 or
Roadside Service (U.S. and
Canada) on page 13‑10 for more
information.
With an active OnStar subscription,
an OnStar Advisor may remotely
unlock the vehicle. See OnStar
Overview on page 14‑1.
Remote Keyless Entry
(RKE) System
See Radio Frequency Statement on
page 13‑21 for information
regarding Part 15 of the Federal
Communications Commission (FCC)
rules and Industry Canada
Standards RSS-GEN/210/220/310.
If there is a decrease in the RKE
operating range:
.Check the distance. The
transmitter may be too far from
the vehicle.
.Check the location. Other
vehicles or objects may be
blocking the signal.
.Check the transmitter's battery.
See “Battery Replacement” later
in this section.
.If the transmitter is still not
working correctly, see your
dealer or a qualified technician
for service.
Remote Keyless Entry
(RKE) System Operation
The Remote Keyless Entry (RKE)
transmitter functions work up to
60 m (195 ft) away from the vehicle.
There are other conditions which
can affect the performance of the
transmitter. See Remote Keyless
Entry (RKE) System on page 2‑2.
Page 34 of 532
Black plate (4,1)Cadillac Escalade/Escalade ESV Owner Manual - 2013 - CRC 2nd Edition - 10/
9/12
2-4 Keys, Doors, and Windows
Press and holdLfor
three seconds to activate the panic
alarm. The turn signal lamps flash
and the horn sounds repeatedly for
30 seconds. The alarm turns off
when the ignition is moved to ON/
RUN or
Lis pressed again. The
ignition must be in LOCK/OFF for
the panic alarm to work.
The vehicle comes with
two transmitters. Each transmitter
will have a number on top of it,
“1” or“2”. These numbers
correspond to the driver of the
vehicle. For example, the memory
seat position for driver 1 will be
recalled when using the transmitter
labeled “1”, if enabled through the
DIC. See Memory Seats on
page 3‑5 for more information.
Programming Transmitters to
the Vehicle
Only RKE transmitters programmed
to this vehicle will work. If a
transmitter is lost or stolen, a
replacement can be purchased and programmed through your dealer.
When the replacement transmitter is
programmed to this vehicle, all
remaining transmitters must also be
reprogrammed. Any lost or stolen
transmitters will no longer work
once the new transmitter is
programmed. Each vehicle can
have up to eight transmitters
programmed to it. See your dealer
to have transmitters programmed to
the vehicle.
Battery Replacement
Replace the battery if the REPLACE
BATTERY IN REMOTE KEY
message displays in the DIC. See
“REPLACE BATTERY IN REMOTE
KEY”
under Key and Lock
Messages on page 5‑32 for
additional information.
Notice: When replacing the
battery, do not touch any of the
circuitry on the transmitter. Static
from your body could damage the
transmitter.
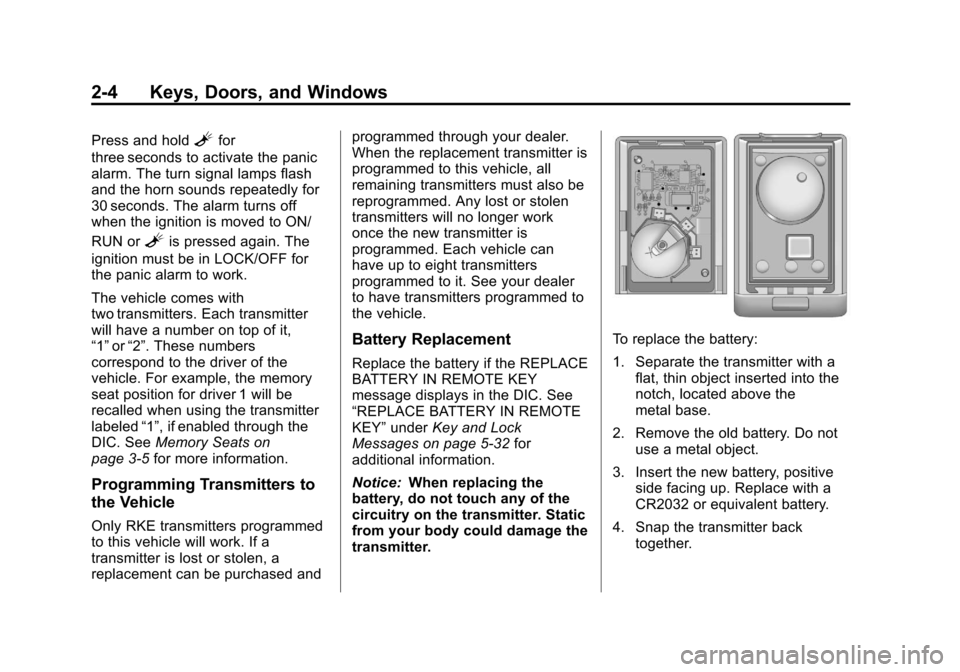
To replace the battery:
1. Separate the transmitter with a flat, thin object inserted into the
notch, located above the
metal base.
2. Remove the old battery. Do not use a metal object.
3. Insert the new battery, positive side facing up. Replace with a
CR2032 or equivalent battery.
4. Snap the transmitter back together.
Page 40 of 532
Black plate (10,1)Cadillac Escalade/Escalade ESV Owner Manual - 2013 - CRC 2nd Edition - 10/
9/12
2-10 Keys, Doors, and Windows
{WARNING
You, or others, could be injured if
caught in the path of the power
liftgate. Make sure there is no one
in the way of the liftgate as it is
opening and closing.
There are several ways to open and
close the power liftgate:
.Press and hold8on the RKE
transmitter until the liftgate starts
moving.
.Press8on the overhead
console.
.Presslon the bottom of the
liftgate next to the latch to close.
Pressing a second time while the
liftgate is moving reverses the
direction.
To disable the power liftgate
function, press OFF on the liftgate
switch. The power liftgate may be
temporarily disabled under extreme
temperatures, or under low battery
conditions. If this occurs, the liftgate
can still be operated manually.
If the transmission is shifted out of P
(Park) while the power function is in
progress, the liftgate power function
will continue to completion. If the
transmission is shifted out of P
(Park) and the vehicle accelerates
before the power liftgate latches
closed, the liftgate may reverse to
the open position. Cargo could fall
out of the vehicle. Always make
sure the power liftgate is closed and
latched before driving away.
If the liftgate is opened using power
operation and the liftgate support
struts have lost pressure, the turn
signals flash and a chime will
sound. The liftgate stays open
temporarily, and then slowly closes.
See a dealer for service before
using the liftgate.
Obstacle Detection Features
If the liftgate encounters an obstacle
during a power open or close cycle,
a warning chime will sound and the
liftgate will automatically reverse
direction to the full closed or open
position. After removing the
obstruction, the power liftgate
operation can be used again. If the
liftgate encounters multiple
obstacles on the same power cycle,
the power function will deactivate
and a message will display in the
Driver Information Center (DIC).
See
Object Detection System
Messages on page 5‑32. After
removing the obstructions, the
liftgate will resume normal power
operation.
Pinch sensors are located on the
side edges of the liftgate. If an
object is caught between the liftgate
and the vehicle and presses against
this sensor, the liftgate will reverse
direction and open fully. The liftgate
will remain open until it is activated
again or closed manually.
Page 41 of 532
Black plate (11,1)Cadillac Escalade/Escalade ESV Owner Manual - 2013 - CRC 2nd Edition - 10/
9/12
Keys, Doors, and Windows 2-11
Manual Operation of Power
Liftgate
To change the liftgate to manual
operation, press OFF on the liftgate
switch.
With the power liftgate disabled and
all of the doors unlocked, the liftgate
can be manually opened and
closed.
To open the liftgate, press the touch
pad on the handle (B) and lift up.
Use the pull cup to lower and close
the liftgate. Do not press the touch
pad while closing the liftgate. This
will cause the liftgate to be
unlatched. The liftgate latch will
power close. Always close the
liftgate before driving.If
8on the RKE transmitter or
lon the liftgate is pressed while
power operation is disabled, the
lamps will flash three times, but the
liftgate will not move.
It is not recommended to drive with
the liftgate open, however, when
driving with the liftgate open; the
liftgate should be set to manual
operation by pressing OFF on the
liftgate switch on the center console.
The liftgate has an electric latch.
If the battery is disconnected or has
low voltage, the liftgate will not
open. The liftgate will resume
operation when the battery is
reconnected and charged.
If the battery is properly connected
with adequate voltage, the switch is
not disabled, and the liftgate still will
not function, see a dealer for
service. Liftglass
If equipped, there are two ways to
open the liftglass:
.Press the button on the
underside of the license plate
applique (A).
.Pressmon the RKE
transmitter.
Page 43 of 532
Black plate (13,1)Cadillac Escalade/Escalade ESV Owner Manual - 2013 - CRC 2nd Edition - 10/
9/12
Keys, Doors, and Windows 2-13
2. Lock the door with the RemoteKeyless Entry (RKE) transmitter
or the power door lock switch.
The security light will come on to
inform the driver the system is
arming. If a door is open when
the doors are locked, the
security light will flash.
If the delayed locking feature is
turned on, the theft-deterrent
system will not start the arming
process until the last door is
closed and the delay timer has
expired. See Delayed Locking
on page 2‑7.
3. Close all doors. The security light should go off after about
30 seconds. The alarm is not
armed until the security light
goes off.
If a locked driver door is opened
without using the RKE transmitter, a
10-second pre-alarm will occur. The
horn will chirp and the lights will
flash. If the key is not placed in the
ignition and turned to START or the
door is not unlocked by pressing the unlock button on the RKE
transmitter during the 10-second
pre-alarm, the alarm will go off. Your
vehicle's headlamps will flash and
the horn will sound for about
30 seconds, then will turn off to save
the battery power.
The theft-deterrent system will not
activate if the doors are locked with
the vehicle's key or the manual door
lock. It activates only if you use the
power door lock switch with the door
open or the RKE transmitter. You
should also remember that you can
start your vehicle with the correct
ignition key if the alarm has been
set off.
To avoid setting off the alarm by
accident:
.If you do not want to activate the
theft-deterrent system, the
vehicle should be locked with
the door key after the doors are
closed.
.Always unlock the doors with the
RKE transmitter. Unlocking a
door any other way will set off
the alarm if it is armed.
If you set off the alarm by accident,
press unlock on the RKE transmitter
or place the key in the ignition and
turn it to START to turn off the
alarm. The alarm will not stop if you
try to unlock a door any other way.
Testing the Alarm
To test the alarm:
1. From inside the vehicle, lower the driver window and open the
driver door.
2. Activate the system by locking the doors with the power door
lock switch while the door is
open, or with the RKE
transmitter.
3. Get out of the vehicle, close the door and wait for the security
light to go out.
Page 49 of 532
Black plate (19,1)Cadillac Escalade/Escalade ESV Owner Manual - 2013 - CRC 2nd Edition - 10/
9/12
Keys, Doors, and Windows 2-19
Express-Down/Up Windows
Windows with the express feature
allow the windows to be raised and
lowered all the way without holding
the switch.
Press or pull the switch fully and
release it to activate the express
feature.
The express mode can be canceled
at any time by briefly pressing or
pulling the switch.
Express Window Anti-Pinch
Feature
If any object is in the path of the
window when the express-up is
active, the window will stop at the
obstruction and auto-reverse to a
preset factory position. Weather
conditions such as severe icing may
also cause the window to
auto-reverse. The window will return
to normal operation once the
obstruction or condition is removed.
Express Window Anti-Pinch
Override
{WARNING
If express override is activated,
the window will not reverse
automatically. You or others could
be injured and the window could
be damaged. Before you use
express override, make sure that
all people and obstructions are
clear of the window path.
In an emergency, the anti-pinch
feature can be overridden in a
supervised mode. Hold the window
switch all the way up to the second
position. The window will rise for as
long as the switch is held. Once the
switch is released, the express
mode is re-activated.
In this mode, the window can still
close on an object in its path. Use
care when using the override mode.
Programming the Power
Windows
If the battery on the vehicle has
been recharged, disconnected, or is
not working, you will need to
reprogram each front power window
for the express-up feature to work.
Before reprogramming, replace or
recharge the vehicle's battery.
To program each front window,
follow these steps:
1. With the ignition in ACC/ ACCESSORY, ON/RUN,
or when RAP is active, close all
doors.
2. Press and hold the power window switch until the window
is fully open.
3. Pull the power window switch up until the window is fully closed.
4. Continue holding the switch up for approximately two seconds
after the window is completely
closed.
Page 90 of 532
Black plate (38,1)Cadillac Escalade/Escalade ESV Owner Manual - 2013 - CRC 2nd Edition - 10/
9/12
3-38 Seats and Restraints
If the shoulder portion of the belt is
pulled out all the way, the child
restraint locking feature will be
engaged. This may unintentionally
cause the passenger sensing
system to turn the airbag off for
some adult‐size occupants. If this
happens, let the belt go back all the
way and start again.
A thick layer of additional material,
such as a blanket or cushion,
or aftermarket equipment such as
seat covers, seat heaters, and seat
massagers, can affect how well the
passenger sensing system
operates. We recommend that you
not use seat covers or other
aftermarket equipment except when
approved by GM for your specific
vehicle. SeeAdding Equipment to
the Airbag-Equipped Vehicle on
page 3‑39 for more information
about modifications that can affect
how the system operates.
The on indicator may be lit if an
object, such as a briefcase,
handbag, grocery bag, laptop,
or other electronic device, is put on an unoccupied seat. If this is not
desired, remove the object from
the seat.
{WARNING
Stowing of articles under the
passenger seat or between the
passenger seat cushion and
seatback may interfere with the
proper operation of the passenger
sensing system.
Servicing the
Airbag-Equipped Vehicle
Airbags affect how the vehicle
should be serviced. There are parts
of the airbag system in several
places around the vehicle. Your
dealer and the service manual have
information about servicing the
vehicle and the airbag system. To
purchase a service manual, see
Service Publications Ordering
Information on page 13‑17.
{WARNING
For up to 10 seconds after the
vehicle is turned off and the
battery is disconnected, an airbag
can still inflate during improper
service. You can be injured if you
are close to an airbag when it
inflates. Avoid yellow connectors.
They are probably part of the
airbag system. Be sure to follow
proper service procedures, and
make sure the person performing
work for you is qualified to do so.
Page 121 of 532
Black plate (1,1)Cadillac Escalade/Escalade ESV Owner Manual - 2013 - CRC 2nd Edition - 10/
9/12
Instruments and Controls 5-1
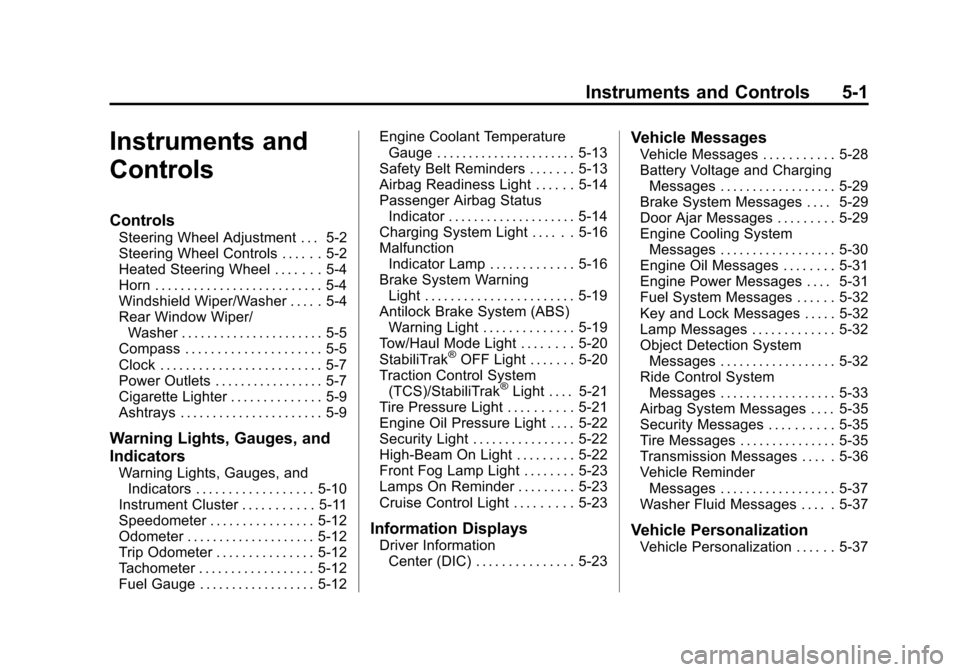
Instruments and
Controls
Controls
Steering Wheel Adjustment . . . 5-2
Steering Wheel Controls . . . . . . 5-2
Heated Steering Wheel . . . . . . . 5-4
Horn . . . . . . . . . . . . . . . . . . . . . . . . . . 5-4
Windshield Wiper/Washer . . . . . 5-4
Rear Window Wiper/Washer . . . . . . . . . . . . . . . . . . . . . . 5-5
Compass . . . . . . . . . . . . . . . . . . . . . 5-5
Clock . . . . . . . . . . . . . . . . . . . . . . . . . 5-7
Power Outlets . . . . . . . . . . . . . . . . . 5-7
Cigarette Lighter . . . . . . . . . . . . . . 5-9
Ashtrays . . . . . . . . . . . . . . . . . . . . . . 5-9
Warning Lights, Gauges, and
Indicators
Warning Lights, Gauges, and Indicators . . . . . . . . . . . . . . . . . . 5-10
Instrument Cluster . . . . . . . . . . . 5-11
Speedometer . . . . . . . . . . . . . . . . 5-12
Odometer . . . . . . . . . . . . . . . . . . . . 5-12
Trip Odometer . . . . . . . . . . . . . . . 5-12
Tachometer . . . . . . . . . . . . . . . . . . 5-12
Fuel Gauge . . . . . . . . . . . . . . . . . . 5-12 Engine Coolant Temperature
Gauge . . . . . . . . . . . . . . . . . . . . . . 5-13
Safety Belt Reminders . . . . . . . 5-13
Airbag Readiness Light . . . . . . 5-14
Passenger Airbag Status Indicator . . . . . . . . . . . . . . . . . . . . 5-14
Charging System Light . . . . . . 5-16
Malfunction Indicator Lamp . . . . . . . . . . . . . 5-16
Brake System Warning Light . . . . . . . . . . . . . . . . . . . . . . . 5-19
Antilock Brake System (ABS) Warning Light . . . . . . . . . . . . . . 5-19
Tow/Haul Mode Light . . . . . . . . 5-20
StabiliTrak
®OFF Light . . . . . . . 5-20
Traction Control System (TCS)/StabiliTrak
®Light . . . . 5-21
Tire Pressure Light . . . . . . . . . . 5-21
Engine Oil Pressure Light . . . . 5-22
Security Light . . . . . . . . . . . . . . . . 5-22
High-Beam On Light . . . . . . . . . 5-22
Front Fog Lamp Light . . . . . . . . 5-23
Lamps On Reminder . . . . . . . . . 5-23
Cruise Control Light . . . . . . . . . 5-23
Information Displays
Driver Information Center (DIC) . . . . . . . . . . . . . . . 5-23
Vehicle Messages
Vehicle Messages . . . . . . . . . . . 5-28
Battery Voltage and ChargingMessages . . . . . . . . . . . . . . . . . . 5-29
Brake System Messages . . . . 5-29
Door Ajar Messages . . . . . . . . . 5-29
Engine Cooling System Messages . . . . . . . . . . . . . . . . . . 5-30
Engine Oil Messages . . . . . . . . 5-31
Engine Power Messages . . . . 5-31
Fuel System Messages . . . . . . 5-32
Key and Lock Messages . . . . . 5-32
Lamp Messages . . . . . . . . . . . . . 5-32
Object Detection System Messages . . . . . . . . . . . . . . . . . . 5-32
Ride Control System Messages . . . . . . . . . . . . . . . . . . 5-33
Airbag System Messages . . . . 5-35
Security Messages . . . . . . . . . . 5-35
Tire Messages . . . . . . . . . . . . . . . 5-35
Transmission Messages . . . . . 5-36
Vehicle Reminder Messages . . . . . . . . . . . . . . . . . . 5-37
Washer Fluid Messages . . . . . 5-37
Vehicle Personalization
Vehicle Personalization . . . . . . 5-37
Page 127 of 532

Black plate (7,1)Cadillac Escalade/Escalade ESV Owner Manual - 2013 - CRC 2nd Edition - 10/
9/12
Instruments and Controls 5-7
To calibrate the compass, use the
following procedure:
Compass Calibration Procedure
1. Before calibrating the compass,make sure the compass zone is
set to the variance zone in which
the vehicle is located. See
“Compass Variance (Zone)
Procedure” earlier in this
section.
Do not operate any switches
such as window, sunroof,
climate controls, seats, etc.
during the calibration procedure.
2. Press the vehicle information button until PRESS
VTO
CALIBRATE COMPASS
displays.
3. Press the set/reset button to start the compass calibration.
4. The DIC will display CALIBRATING: DRIVE IN
CIRCLES. Drive the vehicle in
tight circles at less than 8 km/h
(5 mph) to complete the
calibration. The DIC will display CALIBRATION COMPLETE for a
few seconds when the
calibration is complete. The DIC
display will then return to the
previous menu.
Clock
The analog clock is not connected
with any other vehicle system and
runs by itself.
To adjust the clock, do the following:
1. Locate the adjustment button,
near the lower left corner of the
clock.
2. Push and hold the adjustment button to advance the clock
hands. Holding the button down
will cause the clock to advance
faster. Release the button before
you get to the desired time.
3. Push and release the button to increase the time by one minute
increments until the desired time
is reached.
Power Outlets
The accessory power outlets can be
used to plug in electrical equipment,
such as a cell phone or MP3 player.
The vehicle has three accessory
power outlets located:
.Inside the floor console
storage bin.
.On the rear of the floor console.
.In the rear cargo area on the
passenger side.
Remove the cover to use and
replace when not in use.
The accessory power outlets are
powered, even when the ignition is
in LOCK/OFF. Continuing to use
power outlets while the ignition is in
LOCK/OFF may cause the vehicle's
battery to run down.