Power Outlets CADILLAC ESCALADE 2014 Owner's Manual
[x] Cancel search | Manufacturer: CADILLAC, Model Year: 2014, Model line: ESCALADE, Model: CADILLAC ESCALADE 2014Pages: 508, PDF Size: 7.64 MB
Page 7 of 508
Black plate (1,1)Cadillac Escalade/Escalade ESV Owner Manual (GMNA-Localizing-U.S./
Canada/Mexico-6081529) - 2014 - CRC 1st Edition - 4/23/13
In Brief 1-1
In Brief
Instrument Panel
Instrument Panel . . . . . . . . . . . . . . 1-2
Initial Drive Information
Initial Drive Information . . . . . . . . 1-4
Remote Keyless Entry (RKE)System . . . . . . . . . . . . . . . . . . . . . . 1-4
Remote Vehicle Start . . . . . . . . . 1-4
Door Locks . . . . . . . . . . . . . . . . . . . 1-5
Liftgate . . . . . . . . . . . . . . . . . . . . . . . . 1-6
Windows . . . . . . . . . . . . . . . . . . . . . . 1-7
Seat Adjustment . . . . . . . . . . . . . . 1-7
Memory Features . . . . . . . . . . . . . 1-8
Second Row Seats . . . . . . . . . . . 1-8
Third Row Seats . . . . . . . . . . . . . . 1-8
Heated and Ventilated Seats . . . . . . . . . . . . . . . . . . . . . . . . 1-9 Head Restraint Adjustment . . . . 1-9
Safety Belts . . . . . . . . . . . . . . . . . . 1-10
Passenger Sensing
System . . . . . . . . . . . . . . . . . . . . . 1-10
Mirror Adjustment . . . . . . . . . . . . 1-11
Steering Wheel
Adjustment . . . . . . . . . . . . . . . . . 1-12
Throttle and Brake Pedal Adjustment . . . . . . . . . . . . . . . . . 1-12
Interior Lighting . . . . . . . . . . . . . . 1-13
Exterior Lighting . . . . . . . . . . . . . 1-13
Windshield Wiper/Washer . . . . 1-14
Climate Controls . . . . . . . . . . . . . 1-15
Transmission . . . . . . . . . . . . . . . . 1-15
Vehicle Features
Steering Wheel Controls . . . . . 1-16
Cruise Control . . . . . . . . . . . . . . . 1-17
Navigation System . . . . . . . . . . . 1-17 Driver Information
Center (DIC) . . . . . . . . . . . . . . . 1-17
Side Blind Zone Alert (SBZA) . . . . . . . . . . . . . . . 1-18
Rear Vision
Camera (RVC) . . . . . . . . . . . . . 1-18
Ultrasonic Parking Assist . . . . 1-18
Power Outlets . . . . . . . . . . . . . . . 1-19
Universal Remote System . . . 1-19
Sunroof . . . . . . . . . . . . . . . . . . . . . . 1-19
Performance and Maintenance
StabiliTrak®System . . . . . . . . . 1-20
Tire Pressure Monitor . . . . . . . . 1-21
Engine Oil Life System . . . . . . 1-21
E85 or FlexFuel . . . . . . . . . . . . . . 1-21
Driving for Better Fuel Economy . . . . . . . . . . . . . . . . . . . 1-21
Roadside Service . . . . . . . . . . . . 1-22
OnStar
®. . . . . . . . . . . . . . . . . . . . . 1-22
Page 25 of 508
Black plate (19,1)Cadillac Escalade/Escalade ESV Owner Manual (GMNA-Localizing-U.S./
Canada/Mexico-6081529) - 2014 - CRC 1st Edition - 4/23/13
In Brief 1-19
8 km/h (5 mph). URPA uses audible
beeps to provide distance and
system information.
Keep the sensors on the vehicle's
rear bumper clean to ensure proper
operation.
SeeUltrasonic Parking Assist on
page 9-42.
Power Outlets
The accessory power outlets can be
used to plug in electrical equipment,
such as a cell phone or MP3 player.
The vehicle has three accessory
power outlets:
.Inside the floor console
storage bin.
.On the rear of the floor console.
.In the rear cargo area on the
passenger side.
The accessory power outlets are
powered, even when the ignition is
in LOCK/OFF. Continuing to use power outlets while the ignition is in
LOCK/OFF may cause the vehicle's
battery to run down.
See
Power Outlets on page 5-6.
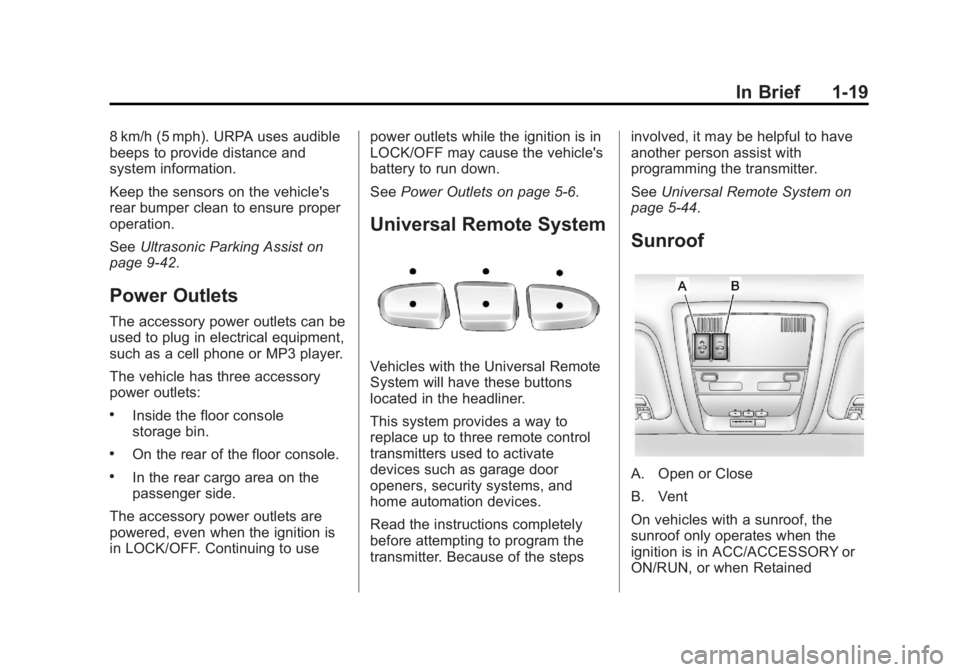
Universal Remote System
Vehicles with the Universal Remote
System will have these buttons
located in the headliner.
This system provides a way to
replace up to three remote control
transmitters used to activate
devices such as garage door
openers, security systems, and
home automation devices.
Read the instructions completely
before attempting to program the
transmitter. Because of the steps involved, it may be helpful to have
another person assist with
programming the transmitter.
See
Universal Remote System on
page 5-44.
Sunroof
A. Open or Close
B. Vent
On vehicles with a sunroof, the
sunroof only operates when the
ignition is in ACC/ACCESSORY or
ON/RUN, or when Retained
Page 36 of 508
Black plate (8,1)Cadillac Escalade/Escalade ESV Owner Manual (GMNA-Localizing-U.S./
Canada/Mexico-6081529) - 2014 - CRC 1st Edition - 4/23/13
2-8 Keys, Doors, and Windows
Information Center (DIC). See
Vehicle Personalization on
page 5-35.
Lockout Protection
If the driver side power door lock
switch is pressed when the driver
door is open and the key is in the
ignition, all of the doors will lock and
then the driver door will unlock.
If the passenger side power door
lock switch is pressed when the
front passenger door is open and
the key is in the ignition, all of the
doors will lock and then the front
passenger door will unlock.
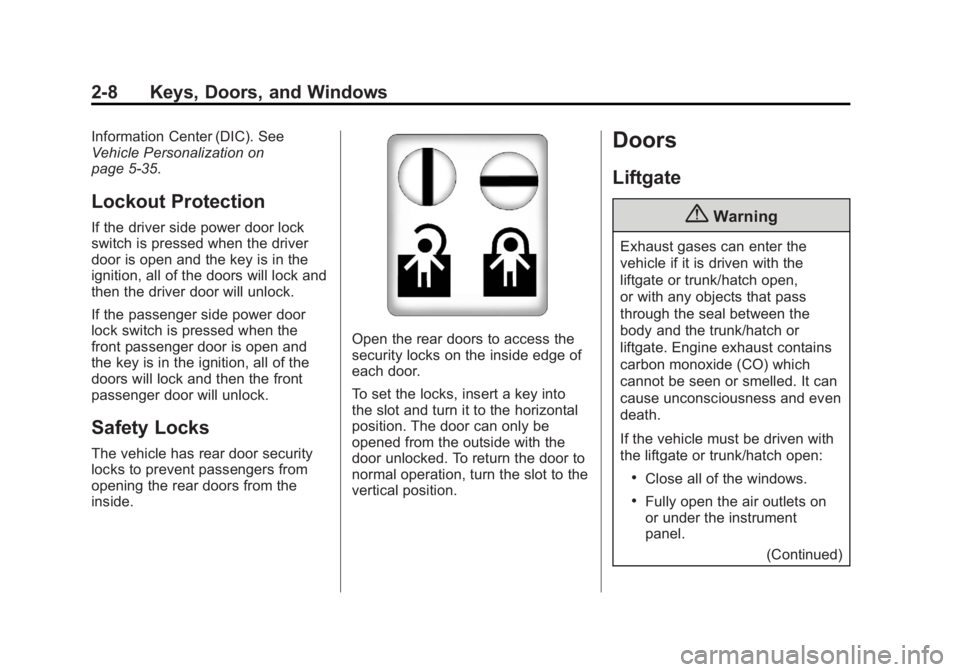
Safety Locks
The vehicle has rear door security
locks to prevent passengers from
opening the rear doors from the
inside.
Open the rear doors to access the
security locks on the inside edge of
each door.
To set the locks, insert a key into
the slot and turn it to the horizontal
position. The door can only be
opened from the outside with the
door unlocked. To return the door to
normal operation, turn the slot to the
vertical position.
Doors
Liftgate
{Warning
Exhaust gases can enter the
vehicle if it is driven with the
liftgate or trunk/hatch open,
or with any objects that pass
through the seal between the
body and the trunk/hatch or
liftgate. Engine exhaust contains
carbon monoxide (CO) which
cannot be seen or smelled. It can
cause unconsciousness and even
death.
If the vehicle must be driven with
the liftgate or trunk/hatch open:
.Close all of the windows.
.Fully open the air outlets on
or under the instrument
panel.(Continued)
Page 110 of 508
Black plate (2,1)Cadillac Escalade/Escalade ESV Owner Manual (GMNA-Localizing-U.S./
Canada/Mexico-6081529) - 2014 - CRC 1st Edition - 4/23/13
4-2 Storage
Insulated containers will not work
properly. Use only non-insulated
containers.
Notice:When the cuphholder is
turned on, the inside receptacles
are hot or cold. Temperature
variations in the cupholders may
cause condensation. To avoid
damage, do not store electronic
devices or other items here.
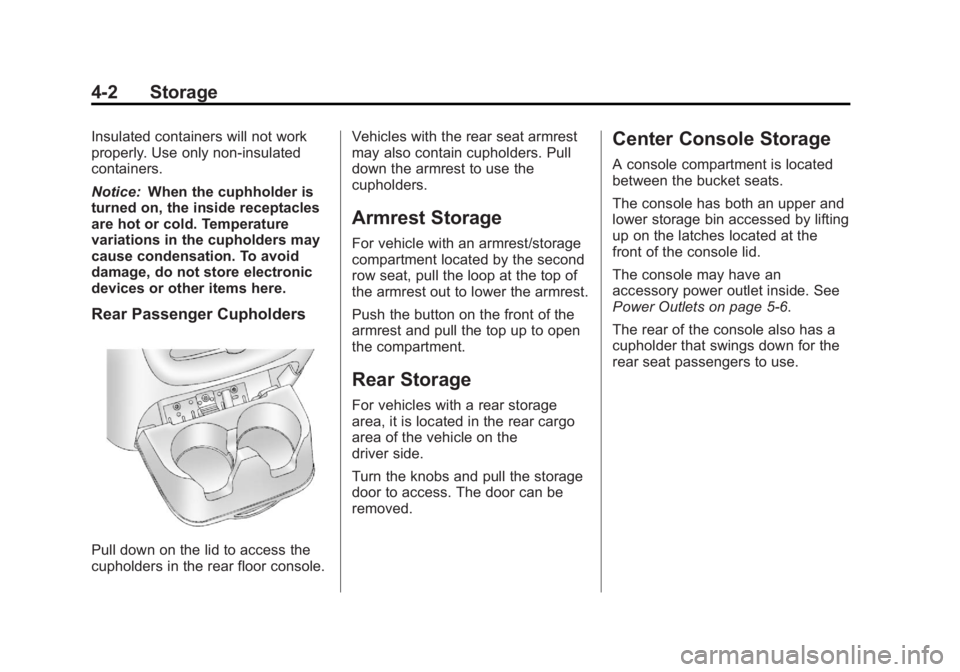
Rear Passenger Cupholders
Pull down on the lid to access the
cupholders in the rear floor console. Vehicles with the rear seat armrest
may also contain cupholders. Pull
down the armrest to use the
cupholders.
Armrest Storage
For vehicle with an armrest/storage
compartment located by the second
row seat, pull the loop at the top of
the armrest out to lower the armrest.
Push the button on the front of the
armrest and pull the top up to open
the compartment.
Rear Storage
For vehicles with a rear storage
area, it is located in the rear cargo
area of the vehicle on the
driver side.
Turn the knobs and pull the storage
door to access. The door can be
removed.
Center Console Storage
A console compartment is located
between the bucket seats.
The console has both an upper and
lower storage bin accessed by lifting
up on the latches located at the
front of the console lid.
The console may have an
accessory power outlet inside. See
Power Outlets on page 5-6.
The rear of the console also has a
cupholder that swings down for the
rear seat passengers to use.
Page 113 of 508
Black plate (1,1)Cadillac Escalade/Escalade ESV Owner Manual (GMNA-Localizing-U.S./
Canada/Mexico-6081529) - 2014 - CRC 1st Edition - 4/23/13
Instruments and Controls 5-1
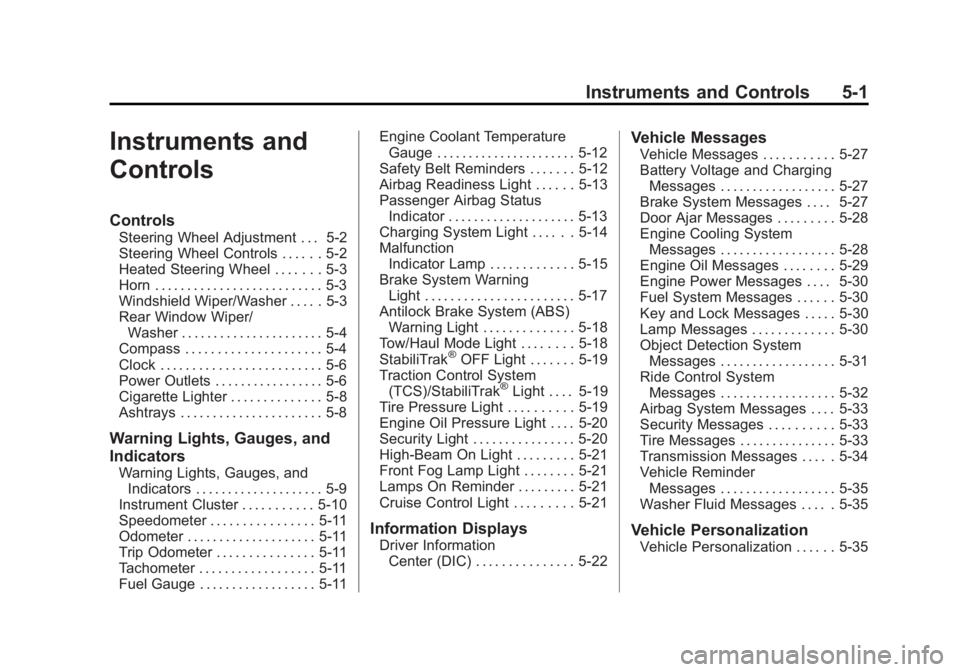
Instruments and
Controls
Controls
Steering Wheel Adjustment . . . 5-2
Steering Wheel Controls . . . . . . 5-2
Heated Steering Wheel . . . . . . . 5-3
Horn . . . . . . . . . . . . . . . . . . . . . . . . . . 5-3
Windshield Wiper/Washer . . . . . 5-3
Rear Window Wiper/Washer . . . . . . . . . . . . . . . . . . . . . . 5-4
Compass . . . . . . . . . . . . . . . . . . . . . 5-4
Clock . . . . . . . . . . . . . . . . . . . . . . . . . 5-6
Power Outlets . . . . . . . . . . . . . . . . . 5-6
Cigarette Lighter . . . . . . . . . . . . . . 5-8
Ashtrays . . . . . . . . . . . . . . . . . . . . . . 5-8
Warning Lights, Gauges, and
Indicators
Warning Lights, Gauges, and Indicators . . . . . . . . . . . . . . . . . . . . 5-9
Instrument Cluster . . . . . . . . . . . 5-10
Speedometer . . . . . . . . . . . . . . . . 5-11
Odometer . . . . . . . . . . . . . . . . . . . . 5-11
Trip Odometer . . . . . . . . . . . . . . . 5-11
Tachometer . . . . . . . . . . . . . . . . . . 5-11
Fuel Gauge . . . . . . . . . . . . . . . . . . 5-11 Engine Coolant Temperature
Gauge . . . . . . . . . . . . . . . . . . . . . . 5-12
Safety Belt Reminders . . . . . . . 5-12
Airbag Readiness Light . . . . . . 5-13
Passenger Airbag Status Indicator . . . . . . . . . . . . . . . . . . . . 5-13
Charging System Light . . . . . . 5-14
Malfunction Indicator Lamp . . . . . . . . . . . . . 5-15
Brake System Warning Light . . . . . . . . . . . . . . . . . . . . . . . 5-17
Antilock Brake System (ABS) Warning Light . . . . . . . . . . . . . . 5-18
Tow/Haul Mode Light . . . . . . . . 5-18
StabiliTrak
®OFF Light . . . . . . . 5-19
Traction Control System (TCS)/StabiliTrak
®Light . . . . 5-19
Tire Pressure Light . . . . . . . . . . 5-19
Engine Oil Pressure Light . . . . 5-20
Security Light . . . . . . . . . . . . . . . . 5-20
High-Beam On Light . . . . . . . . . 5-21
Front Fog Lamp Light . . . . . . . . 5-21
Lamps On Reminder . . . . . . . . . 5-21
Cruise Control Light . . . . . . . . . 5-21
Information Displays
Driver Information Center (DIC) . . . . . . . . . . . . . . . 5-22
Vehicle Messages
Vehicle Messages . . . . . . . . . . . 5-27
Battery Voltage and ChargingMessages . . . . . . . . . . . . . . . . . . 5-27
Brake System Messages . . . . 5-27
Door Ajar Messages . . . . . . . . . 5-28
Engine Cooling System Messages . . . . . . . . . . . . . . . . . . 5-28
Engine Oil Messages . . . . . . . . 5-29
Engine Power Messages . . . . 5-30
Fuel System Messages . . . . . . 5-30
Key and Lock Messages . . . . . 5-30
Lamp Messages . . . . . . . . . . . . . 5-30
Object Detection System Messages . . . . . . . . . . . . . . . . . . 5-31
Ride Control System Messages . . . . . . . . . . . . . . . . . . 5-32
Airbag System Messages . . . . 5-33
Security Messages . . . . . . . . . . 5-33
Tire Messages . . . . . . . . . . . . . . . 5-33
Transmission Messages . . . . . 5-34
Vehicle Reminder Messages . . . . . . . . . . . . . . . . . . 5-35
Washer Fluid Messages . . . . . 5-35
Vehicle Personalization
Vehicle Personalization . . . . . . 5-35
Page 118 of 508
Black plate (6,1)Cadillac Escalade/Escalade ESV Owner Manual (GMNA-Localizing-U.S./
Canada/Mexico-6081529) - 2014 - CRC 1st Edition - 4/23/13
5-6 Instruments and Controls
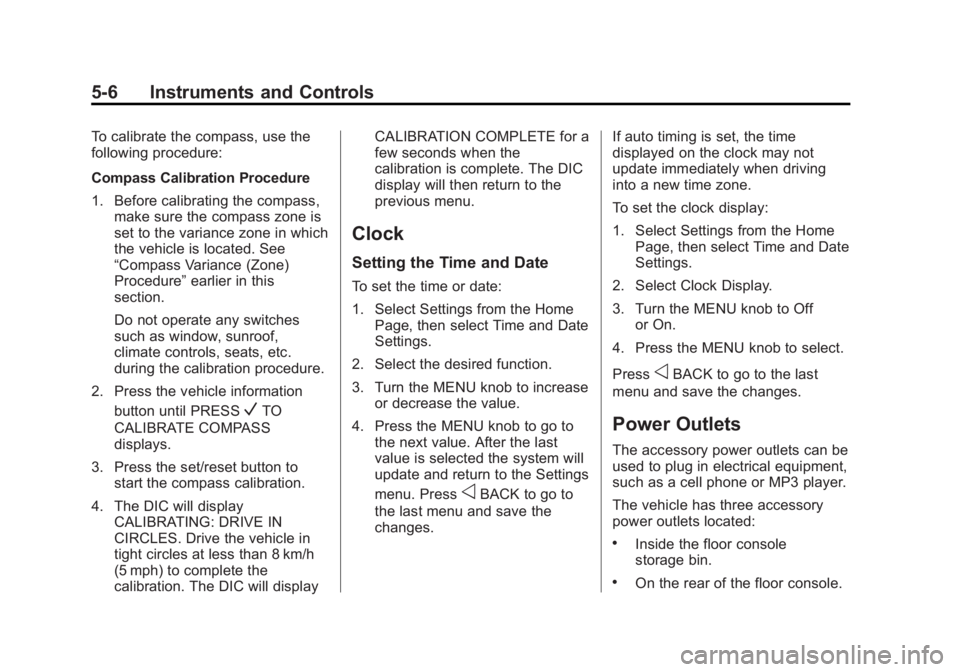
To calibrate the compass, use the
following procedure:
Compass Calibration Procedure
1. Before calibrating the compass,make sure the compass zone is
set to the variance zone in which
the vehicle is located. See
“Compass Variance (Zone)
Procedure” earlier in this
section.
Do not operate any switches
such as window, sunroof,
climate controls, seats, etc.
during the calibration procedure.
2. Press the vehicle information button until PRESS
VTO
CALIBRATE COMPASS
displays.
3. Press the set/reset button to start the compass calibration.
4. The DIC will display CALIBRATING: DRIVE IN
CIRCLES. Drive the vehicle in
tight circles at less than 8 km/h
(5 mph) to complete the
calibration. The DIC will display CALIBRATION COMPLETE for a
few seconds when the
calibration is complete. The DIC
display will then return to the
previous menu.
Clock
Setting the Time and Date
To set the time or date:
1. Select Settings from the Home
Page, then select Time and Date
Settings.
2. Select the desired function.
3. Turn the MENU knob to increase or decrease the value.
4. Press the MENU knob to go to the next value. After the last
value is selected the system will
update and return to the Settings
menu. Press
oBACK to go to
the last menu and save the
changes. If auto timing is set, the time
displayed on the clock may not
update immediately when driving
into a new time zone.
To set the clock display:
1. Select Settings from the Home
Page, then select Time and Date
Settings.
2. Select Clock Display.
3. Turn the MENU knob to Off or On.
4. Press the MENU knob to select.
Press
oBACK to go to the last
menu and save the changes.
Power Outlets
The accessory power outlets can be
used to plug in electrical equipment,
such as a cell phone or MP3 player.
The vehicle has three accessory
power outlets located:
.Inside the floor console
storage bin.
.On the rear of the floor console.
Page 119 of 508

Black plate (7,1)Cadillac Escalade/Escalade ESV Owner Manual (GMNA-Localizing-U.S./
Canada/Mexico-6081529) - 2014 - CRC 1st Edition - 4/23/13
Instruments and Controls 5-7
.In the rear cargo area on the
passenger side.
Remove the cover to use and
replace when not in use.
The accessory power outlets are
powered, even when the ignition is
in LOCK/OFF. Continuing to use
power outlets while the ignition is in
LOCK/OFF may cause the vehicle's
battery to run down.
{Warning
Power is always supplied to the
outlets. Do not leave electrical
equipment plugged in when the
vehicle is not in use because the
vehicle could catch fire and cause
injury or death.
Notice: Leaving electrical
equipment plugged in for an
extended period of time while the
vehicle is off will drain the
battery. Always unplug electrical
equipment when not in use and do not plug in equipment that
exceeds the maximum 20 ampere
rating.
Certain power accessory plugs may
not be compatible with the
accessory power outlet and could
overload adapter or vehicle fuses.
If a problem is experienced, see
your dealer.
When adding electrical equipment,
be sure to follow the proper
installation instructions included with
the equipment. Do not use
equipment exceeding the
maximum amperage rating of
20 amperes. See
Add-On Electrical
Equipment on page 9-65.
Notice: Hanging heavy
equipment from the power outlet
can cause damage not covered
by the vehicle warranty. The
power outlets are designed for
accessory power plugs only, such
as cell phone charge cords.
Power Outlet 110 Volt
Alternative Current
The vehicle may have a power
outlet that can be used to plug in
electrical equipment that uses a
maximum limit of 150 watts.
The power outlet is on the rear of
the center console.
An indicator light on the outlet turns
on to show it is in use. The light
comes on when the ignition is in
ON/RUN and equipment requiring
Page 172 of 508

Black plate (10,1)Cadillac Escalade/Escalade ESV Owner Manual (GMNA-Localizing-U.S./
Canada/Mexico-6081529) - 2014 - CRC 1st Edition - 4/23/13
6-10 Lighting
Battery Load
Management
The vehicle has Electric Power
Management (EPM) that estimates
the battery's temperature and state
of charge. It then adjusts the voltage
for best performance and extended
life of the battery.
When the battery's state of charge
is low, the voltage is raised slightly
to quickly bring the charge back up.
When the state of charge is high,
the voltage is lowered slightly to
prevent overcharging. If the vehicle
has a voltmeter gauge or a voltage
display on the Driver Information
Center (DIC), you may see the
voltage move up or down. This is
normal. If there is a problem, an
alert will be displayed.The battery can be discharged at
idle if the electrical loads are very
high. This is true for all vehicles.
This is because the generator
(alternator) may not be spinning fast
enough at idle to produce all the
power that is needed for very high
electrical loads.
A high electrical load occurs when
several of the following are on, such
as: headlamps, high beams, fog
lamps, rear window defogger,
climate control fan at high speed,
heated seats, engine cooling fans,
trailer loads, and loads plugged into
accessory power outlets.
EPM works to prevent excessive
discharge of the battery. It does this
by balancing the generator's output
and the vehicle's electrical needs.
It can increase engine idle speed to
generate more power, whenever
needed. It can temporarily reduce
the power demands of some
accessories.Normally, these actions occur in
steps or levels, without being
noticeable. In rare cases at the
highest levels of corrective action,
this action may be noticeable to the
driver. If so, a Driver Information
Center (DIC) message might be
displayed, such as BATTERY LOW
START VEHICLE. If this message
displays, it is recommended that the
driver reduce the electrical loads as
much as possible and restart the
vehicle. See
Battery Voltage and
Charging Messages on page 5-27.
Battery Power Protection
This feature shuts off the dome
lamps if they are left on for more
than 10 minutes when the ignition is
in LOCK/OFF. This helps to prevent
the battery from running down.
Page 391 of 508

Black plate (37,1)Cadillac Escalade/Escalade ESV Owner Manual (GMNA-Localizing-U.S./
Canada/Mexico-6081529) - 2014 - CRC 1st Edition - 4/23/13
Vehicle Care 10-37
The vehicle may not be equipped
with all of the fuses, relays, and
features shown.Fuses Usage
1 Rear Seats
2 Rear Accessory Power Outlet Fuses Usage
3 Steering Wheel Controls Backlight
4 Driver Door Module
5 Dome Lamps, Driver Side Turn Signal Fuses Usage
6 Driver Side Turn Signal, Stoplamp
7 Instrument Panel Back Lighting
8 Passenger Side Turn Signal, Stoplamp
9 Passenger Door Module, Driver Unlock
10 Power Door Lock 2 (Unlock Feature)
11 Power Door Lock 2 (Lock Feature)
12 Stoplamps, Center High‐Mounted
Stoplamp
13 Rear Climate Controls
14 Power Mirror
15 Body Control Module (BCM)
16 Accessory Power Outlets
Page 418 of 508

Black plate (64,1)Cadillac Escalade/Escalade ESV Owner Manual (GMNA-Localizing-U.S./
Canada/Mexico-6081529) - 2014 - CRC 1st Edition - 4/23/13
10-64 Vehicle Care
6. Plug the power plug (C) into theaccessory power outlet in the
vehicle. Unplug all items from
other accessory power outlets.
See Power Outlets on page 5-6
in the owner manual.
If the vehicle has an accessory
power outlet, do not use the
cigarette lighter.
If the vehicle only has a cigarette
lighter, use the cigarette lighter.
Do not pinch the power plug
cord in the door or window.
7. Start the vehicle. The vehicle must be running while using the
air compressor.
8. Press the on/off (D) button to turn the tire sealant and
compressor kit on.
The compressor will inject
sealant and air into the tire.
The pressure gauge (E) will
initially show a high pressure
while the compressor pushes the
sealant into the tire. Once the
sealant is completely dispersed into the tire, the pressure will
quickly drop and start to rise
again as the tire inflates with
air only.
9. Inflate the tire to the recommended inflation pressure
using the pressure gauge (E).
The recommended inflation
pressure can be found on the
Tire and Loading Information
label. See Tire Pressure on
page 10-46.
The pressure gauge (E) may
read higher than the actual tire
pressure while the compressor is
on. Turn the compressor off to
get an accurate pressure
reading. The compressor may
be turned on/off until the correct
pressure is reached.
Notice: If the recommended
pressure cannot be reached after
approximately 25 minutes, the
vehicle should not be driven
farther. The tire is too severely
damaged and the tire sealant and
compressor kit cannot inflate the tire. Remove the power plug from
the accessory power outlet and
unscrew the inflating hose from
the tire valve. See
Roadside
Service on page 13-5.
10. Press the on/off button (D) to turn the tire sealant and
compressor kit off.
The tire is not sealed and will
continue to leak air until the
vehicle is driven and the
sealant is distributed in the tire,
therefore, Steps 11 through
17 must be done immediately
after Step 10.
Be careful while handling the
tire sealant and compressor kit
as it could be warm after
usage.
11. Unplug the power plug (C) from the accessory power outlet in
the vehicle.
12. Turn the sealant/air hose (G) counterclockwise to remove it
from the tire valve stem.