engine CADILLAC ESCALADE 2015 4.G User Guide
[x] Cancel search | Manufacturer: CADILLAC, Model Year: 2015, Model line: ESCALADE, Model: CADILLAC ESCALADE 2015 4.GPages: 435, PDF Size: 4.59 MB
Page 37 of 435
Black plate (6,1)Cadillac Escalade Owner Manual (GMNA-Localizing-U.S./Canada/Mexico-
7063683) - 2015 - crc - 2/24/14
2-6 Keys, Doors, and Windows
3. Remove the key lock cylindercap on the driver door handle.
See Door Locks on page 2-10.
Insert the vehicle key into the
key lock cylinder on the driver
door handle; then turn the key
counterclockwise, to the unlock
position five times within
10 seconds.
The Driver Information Center
(DIC) displays READY FOR
REMOTE #2, 3, 4, ETC.
4. Place the new transmitter in the transmitter pocket/insert. The
transmitter pocket/insert next to
the center console storage area.
5. Press the ENGINE START/ STOP button. When the
transmitter is learned, the DIC
display will show that it is ready
to program the next transmitter.
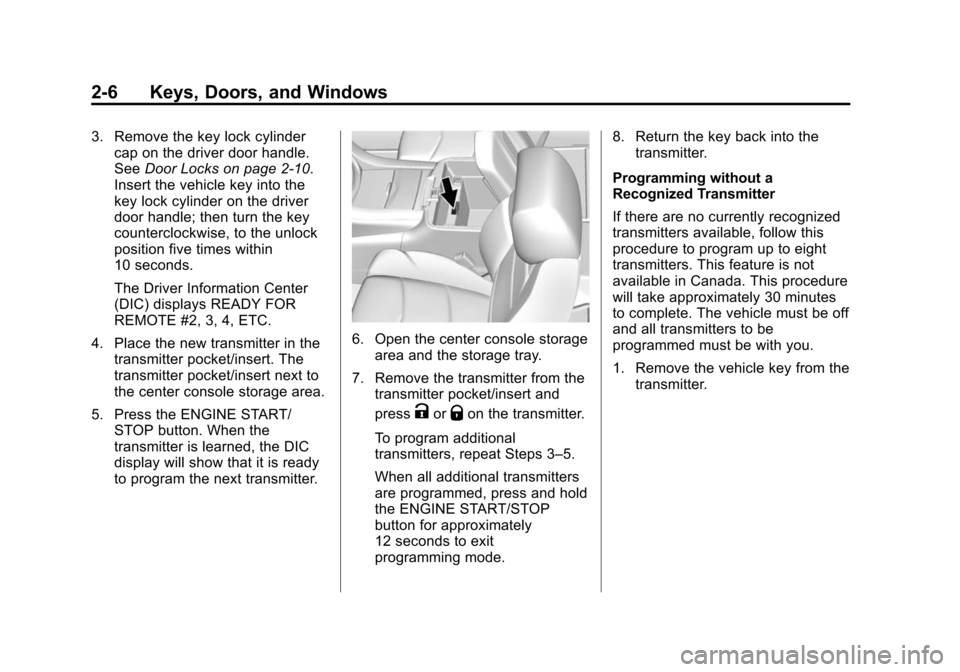
6. Open the center console storagearea and the storage tray.
7. Remove the transmitter from the transmitter pocket/insert and
press
KorQon the transmitter.
To program additional
transmitters, repeat Steps 3–5.
When all additional transmitters
are programmed, press and hold
the ENGINE START/STOP
button for approximately
12 seconds to exit
programming mode. 8. Return the key back into the
transmitter.
Programming without a
Recognized Transmitter
If there are no currently recognized
transmitters available, follow this
procedure to program up to eight
transmitters. This feature is not
available in Canada. This procedure
will take approximately 30 minutes
to complete. The vehicle must be off
and all transmitters to be
programmed must be with you.
1. Remove the vehicle key from the transmitter.
Page 38 of 435
Black plate (7,1)Cadillac Escalade Owner Manual (GMNA-Localizing-U.S./Canada/Mexico-
7063683) - 2015 - crc - 2/24/14
Keys, Doors, and Windows 2-7
2. Remove the key lock cylindercap on the driver door handle.
See Door Locks on page 2-10.
Insert the vehicle key into the
key lock cylinder on the driver
door handle; then turn the key
counterclockwise, to the unlock
position five times within
10 seconds.
The Driver Information Center
(DIC) displays REMOTE LEARN
PENDING, PLEASE WAIT.
3. Wait for 10 minutes until the DIC displays PRESS ENGINE
START BUTTON TO LEARN,
then press the ENGINE START/
STOP button.
The DIC display will again show
REMOTE LEARN PENDING,
PLEASE WAIT. 4. Repeat Step 2 two additional
times. After the third time all
previously known transmitters
will no longer work with the
vehicle. Remaining transmitters
can be relearned during the next
steps.
The DIC display should now
show READY FOR REMOTE
# 1.
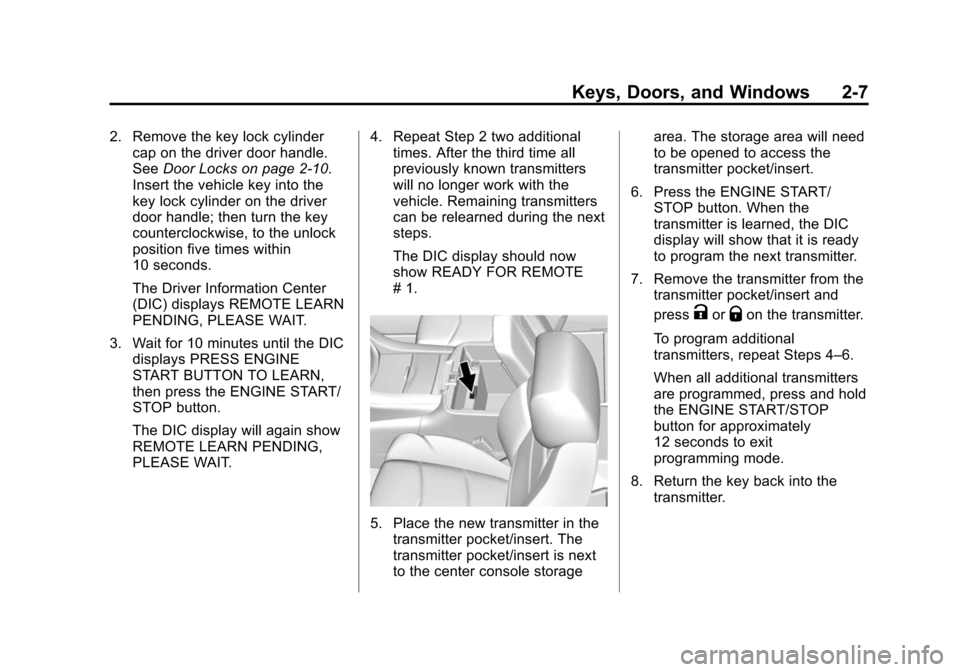
5. Place the new transmitter in thetransmitter pocket/insert. The
transmitter pocket/insert is next
to the center console storage area. The storage area will need
to be opened to access the
transmitter pocket/insert.
6. Press the ENGINE START/ STOP button. When the
transmitter is learned, the DIC
display will show that it is ready
to program the next transmitter.
7. Remove the transmitter from the transmitter pocket/insert and
press
KorQon the transmitter.
To program additional
transmitters, repeat Steps 4–6.
When all additional transmitters
are programmed, press and hold
the ENGINE START/STOP
button for approximately
12 seconds to exit
programming mode.
8. Return the key back into the transmitter.
Page 39 of 435
Black plate (8,1)Cadillac Escalade Owner Manual (GMNA-Localizing-U.S./Canada/Mexico-
7063683) - 2015 - crc - 2/24/14
2-8 Keys, Doors, and Windows
Starting the Vehicle with a Low
Transmitter Battery
If the transmitter battery is weak or if
there is interference with the signal,
the DIC may display NO REMOTE
DETECTED or NO REMOTE KEY
WAS DETECTED PLACE KEY IN
TRANSMITTER POCKET THEN
START YOUR VEHICLE when
starting the vehicle. SeeKey and
Lock Messages on page 5-37.
To start the vehicle:
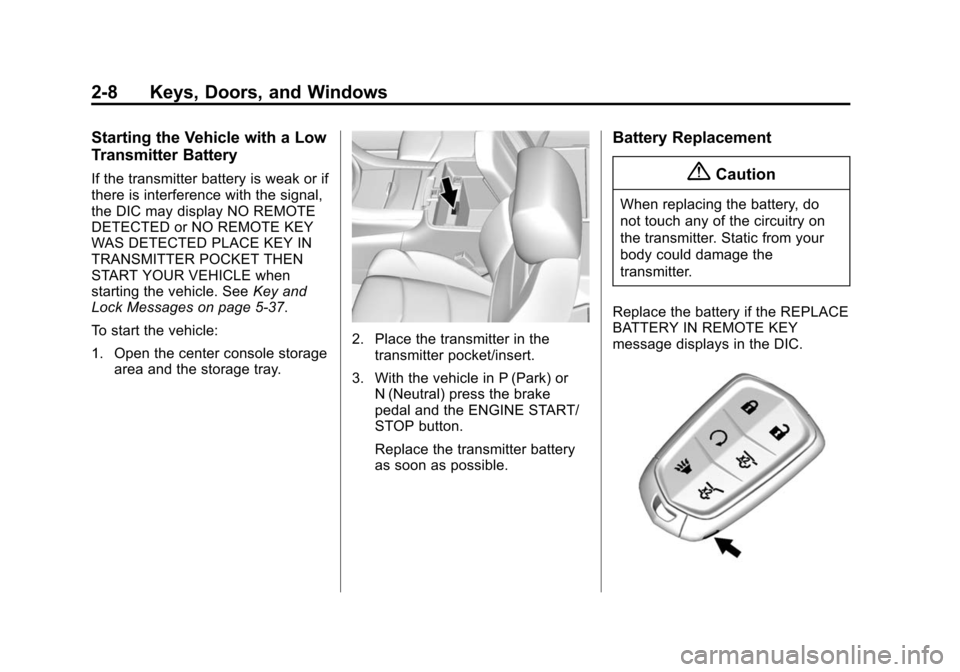
1. Open the center console storage area and the storage tray.
2. Place the transmitter in the
transmitter pocket/insert.
3. With the vehicle in P (Park) or N (Neutral) press the brake
pedal and the ENGINE START/
STOP button.
Replace the transmitter battery
as soon as possible.
Battery Replacement
{Caution
When replacing the battery, do
not touch any of the circuitry on
the transmitter. Static from your
body could damage the
transmitter.
Replace the battery if the REPLACE
BATTERY IN REMOTE KEY
message displays in the DIC.
Page 41 of 435
Black plate (10,1)Cadillac Escalade Owner Manual (GMNA-Localizing-U.S./Canada/Mexico-
7063683) - 2015 - crc - 2/24/14
2-10 Keys, Doors, and Windows
.There is an emission control
system malfunction and the
malfunction indicator lamp is on.
The engine will turn off during a
remote vehicle start if:
.The coolant temperature gets
too high.
.The oil pressure gets low.
The RKE transmitter range may be
less while the vehicle is running.
Other conditions can affect the
performance of the transmitter. See
Remote Keyless Entry (RKE)
System on page 2-2 orVehicle
Personalization on page 5-45.
Starting the Engine Using Remote
Start
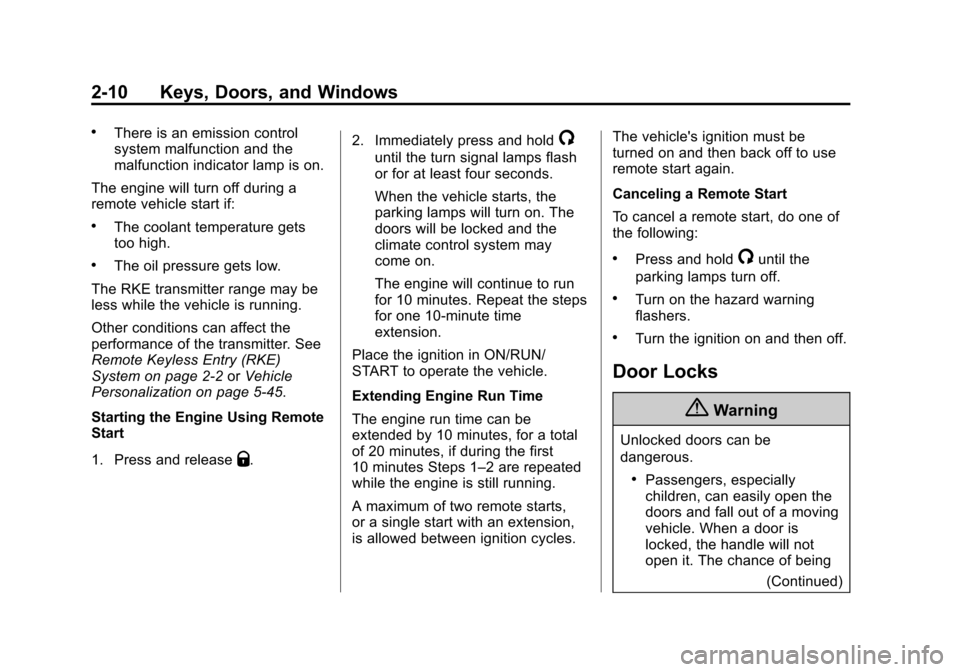
1. Press and release
Q. 2. Immediately press and hold
/
until the turn signal lamps flash
or for at least four seconds.
When the vehicle starts, the
parking lamps will turn on. The
doors will be locked and the
climate control system may
come on.
The engine will continue to run
for 10 minutes. Repeat the steps
for one 10-minute time
extension.
Place the ignition in ON/RUN/
START to operate the vehicle.
Extending Engine Run Time
The engine run time can be
extended by 10 minutes, for a total
of 20 minutes, if during the first
10 minutes Steps 1–2 are repeated
while the engine is still running.
A maximum of two remote starts,
or a single start with an extension,
is allowed between ignition cycles. The vehicle's ignition must be
turned on and then back off to use
remote start again.
Canceling a Remote Start
To cancel a remote start, do one of
the following:
.Press and hold/until the
parking lamps turn off.
.Turn on the hazard warning
flashers.
.Turn the ignition on and then off.
Door Locks
{Warning
Unlocked doors can be
dangerous.
.Passengers, especially
children, can easily open the
doors and fall out of a moving
vehicle. When a door is
locked, the handle will not
open it. The chance of being
(Continued)
Page 44 of 435
Black plate (13,1)Cadillac Escalade Owner Manual (GMNA-Localizing-U.S./Canada/Mexico-
7063683) - 2015 - crc - 2/24/14
Keys, Doors, and Windows 2-13
vehicle will check for RKE
transmitters inside. If an RKE
transmitter is detected and the
number of RKE transmitters inside
has not reduced, the driver door will
unlock.
Lockout Protection can be manually
overridden with the driver door open
by pressing and holding
Qon the
power door lock switch.
If Unlocked Door Anti-Lockout is
turned on and the vehicle is off, the
driver door is open, and locking is
requested, all the doors will lock and
only the driver door will unlock. The
Unlocked Door Anti-Lockout feature
can be turned on or off using the
vehicle personalization menus. See
Vehicle Personalization on
page 5-45.
Safety Locks
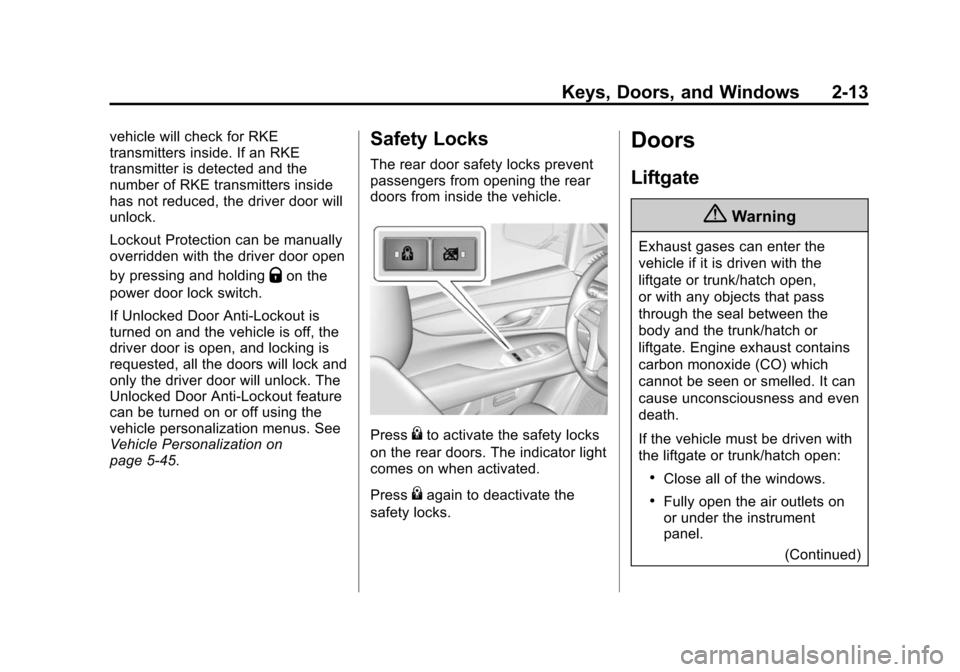
The rear door safety locks prevent
passengers from opening the rear
doors from inside the vehicle.
Press{to activate the safety locks
on the rear doors. The indicator light
comes on when activated.
Press
{again to deactivate the
safety locks.
Doors
Liftgate
{Warning
Exhaust gases can enter the
vehicle if it is driven with the
liftgate or trunk/hatch open,
or with any objects that pass
through the seal between the
body and the trunk/hatch or
liftgate. Engine exhaust contains
carbon monoxide (CO) which
cannot be seen or smelled. It can
cause unconsciousness and even
death.
If the vehicle must be driven with
the liftgate or trunk/hatch open:
.Close all of the windows.
.Fully open the air outlets on
or under the instrument
panel.
(Continued)
Page 45 of 435
Black plate (14,1)Cadillac Escalade Owner Manual (GMNA-Localizing-U.S./Canada/Mexico-
7063683) - 2015 - crc - 2/24/14
2-14 Keys, Doors, and Windows
Warning (Continued)
.Adjust the climate control
system to a setting that
brings in only outside air and
set the fan speed to the
highest setting. See“Climate
Control Systems” in the
Index.
.If the vehicle is equipped with
a power liftgate, disable the
power liftgate function.
See Engine Exhaust on
page 9-26.
{Caution
To avoid damage to the liftgate or
liftgate glass, make sure the area
above and behind the liftgate is
clear before opening it.
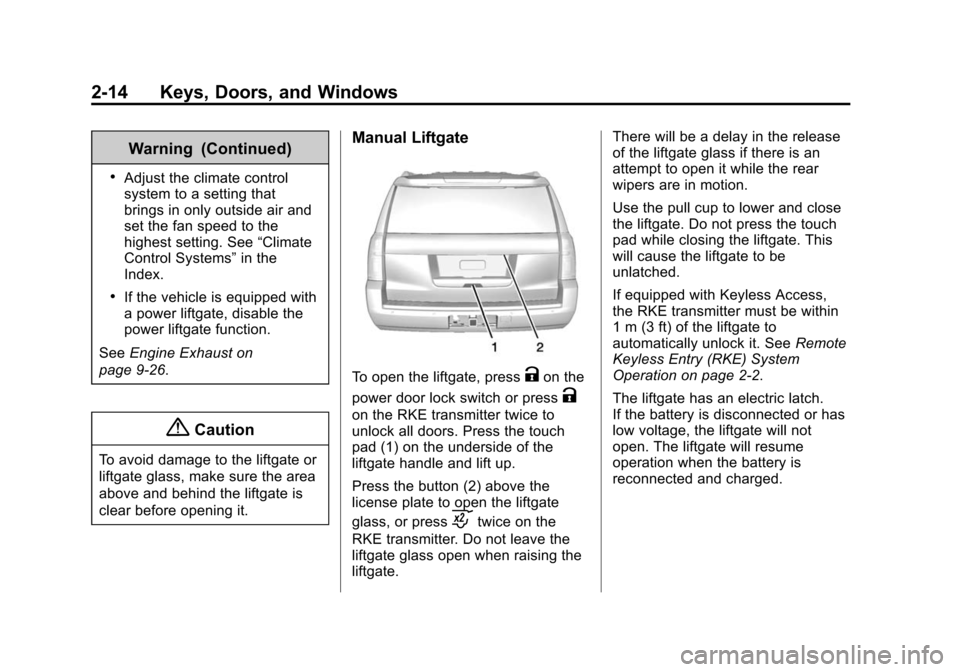
Manual Liftgate
To open the liftgate, pressKon the
power door lock switch or press
K
on the RKE transmitter twice to
unlock all doors. Press the touch
pad (1) on the underside of the
liftgate handle and lift up.
Press the button (2) above the
license plate to open the liftgate
glass, or press
ctwice on the
RKE transmitter. Do not leave the
liftgate glass open when raising the
liftgate. There will be a delay in the release
of the liftgate glass if there is an
attempt to open it while the rear
wipers are in motion.
Use the pull cup to lower and close
the liftgate. Do not press the touch
pad while closing the liftgate. This
will cause the liftgate to be
unlatched.
If equipped with Keyless Access,
the RKE transmitter must be within
1 m (3 ft) of the liftgate to
automatically unlock it. See
Remote
Keyless Entry (RKE) System
Operation on page 2-2.
The liftgate has an electric latch.
If the battery is disconnected or has
low voltage, the liftgate will not
open. The liftgate will resume
operation when the battery is
reconnected and charged.
Page 52 of 435
Black plate (21,1)Cadillac Escalade Owner Manual (GMNA-Localizing-U.S./Canada/Mexico-
7063683) - 2015 - crc - 2/24/14
Keys, Doors, and Windows 2-21
Immobilizer
SeeRadio Frequency Statement on
page 13-12.
Immobilizer Operation
This vehicle has a passive
theft-deterrent system.
The system does not have to be
manually armed or disarmed.
The vehicle is automatically
immobilized when the transmitter
leaves the vehicle.
The immobilization system is
disarmed when the ignition button is
pressed in and a valid transmitter is
found in the vehicle.
The security light in the instrument
cluster comes on if there is a
problem with arming or disarming
the theft-deterrent system.
The system has one or more
transmitters matched to an
immobilizer control unit in the
vehicle. Only a correctly matched
transmitter will start the vehicle.
If the transmitter is ever damaged,
you may not be able to start the
vehicle.
If the engine does not start and the
security light stays on, there is a
problem with the system. Turn the
vehicle off and try again.
If the RKE transmitter appears to be
undamaged, try another transmitter
or place the transmitter in the
transmitter pocket/insert next to the
center console storage area
between the driver and front
passenger seats. See “Starting the
Vehicle with a Low Transmitter
Battery” underRemote Keyless
Entry (RKE) System Operation on
page 2-2. If the engine does not start with the
other transmitter or when the
transmitter is in the pocket/insert,
the vehicle needs service. See your
dealer who can service the
theft-deterrent system and have a
new transmitter programmed to the
vehicle.
Do not leave the transmitter or
device that disarms or deactivates
the theft-deterrent system in the
vehicle.
Page 69 of 435
Black plate (8,1)Cadillac Escalade Owner Manual (GMNA-Localizing-U.S./Canada/Mexico-
7063683) - 2015 - crc - 2/24/14
3-8 Seats and Restraints
Warning (Continued)
overheat. An overheated seat
heater may cause a burn or may
damage the seat.
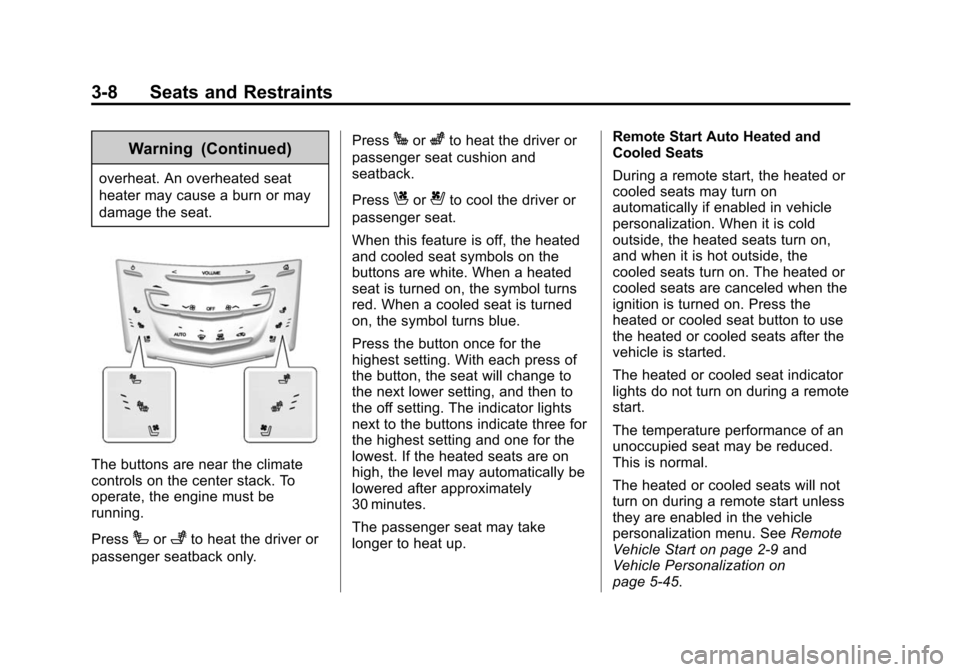
The buttons are near the climate
controls on the center stack. To
operate, the engine must be
running.
Press
Ior+to heat the driver or
passenger seatback only. Press
Jorzto heat the driver or
passenger seat cushion and
seatback.
Press
Cor{to cool the driver or
passenger seat.
When this feature is off, the heated
and cooled seat symbols on the
buttons are white. When a heated
seat is turned on, the symbol turns
red. When a cooled seat is turned
on, the symbol turns blue.
Press the button once for the
highest setting. With each press of
the button, the seat will change to
the next lower setting, and then to
the off setting. The indicator lights
next to the buttons indicate three for
the highest setting and one for the
lowest. If the heated seats are on
high, the level may automatically be
lowered after approximately
30 minutes.
The passenger seat may take
longer to heat up. Remote Start Auto Heated and
Cooled Seats
During a remote start, the heated or
cooled seats may turn on
automatically if enabled in vehicle
personalization. When it is cold
outside, the heated seats turn on,
and when it is hot outside, the
cooled seats turn on. The heated or
cooled seats are canceled when the
ignition is turned on. Press the
heated or cooled seat button to use
the heated or cooled seats after the
vehicle is started.
The heated or cooled seat indicator
lights do not turn on during a remote
start.
The temperature performance of an
unoccupied seat may be reduced.
This is normal.
The heated or cooled seats will not
turn on during a remote start unless
they are enabled in the vehicle
personalization menu. See
Remote
Vehicle Start on page 2-9 and
Vehicle Personalization on
page 5-45.
Page 93 of 435

Black plate (32,1)Cadillac Escalade Owner Manual (GMNA-Localizing-U.S./Canada/Mexico-
7063683) - 2015 - crc - 2/24/14
3-32 Seats and Restraints
Warning (Continued)
system, brake and steering
systems, etc. Even if the vehicle
appears to be drivable after a
moderate crash, there may be
concealed damage that could
make it difficult to safely operate
the vehicle.
Use caution if you should attempt
to restart the engine after a crash
has occurred.
In many crashes severe enough to
inflate the airbag, windshields are
broken by vehicle deformation.
Additional windshield breakage may
also occur from the front outboard
passenger airbag.
.Airbags are designed to inflate
only once. After an airbag
inflates, you will need some new
parts for the airbag system.
If you do not get them, the
airbag system will not be there
to help protect you in another crash. A new system will include
airbag modules and possibly
other parts. The service manual
for the vehicle covers the need
to replace other parts.
.The vehicle has a crash sensing
and diagnostic module which
records information after a
crash. See
Vehicle Data
Recording and Privacy on
page 13-13 andEvent Data
Recorders on page 13-14.
.Let only qualified technicians
work on the airbag systems.
Improper service can mean that
an airbag system will not work
properly. See your dealer for
service.
Passenger Sensing
System
The vehicle has a passenger
sensing system for the front
outboard passenger position. The
passenger airbag status indicator
will light on the overhead console
when the vehicle is started.
United States
Canada and Mexico
The words ON and OFF, or the
symbols for on and off, will be
visible during the system check.
When the system check is
complete, either the word ON or
OFF, or the symbol for on or off, will
be visible. See Passenger Airbag
Status Indicator on page 5-16.
The passenger sensing system
turns off the front outboard
passenger frontal airbag under
Page 128 of 435
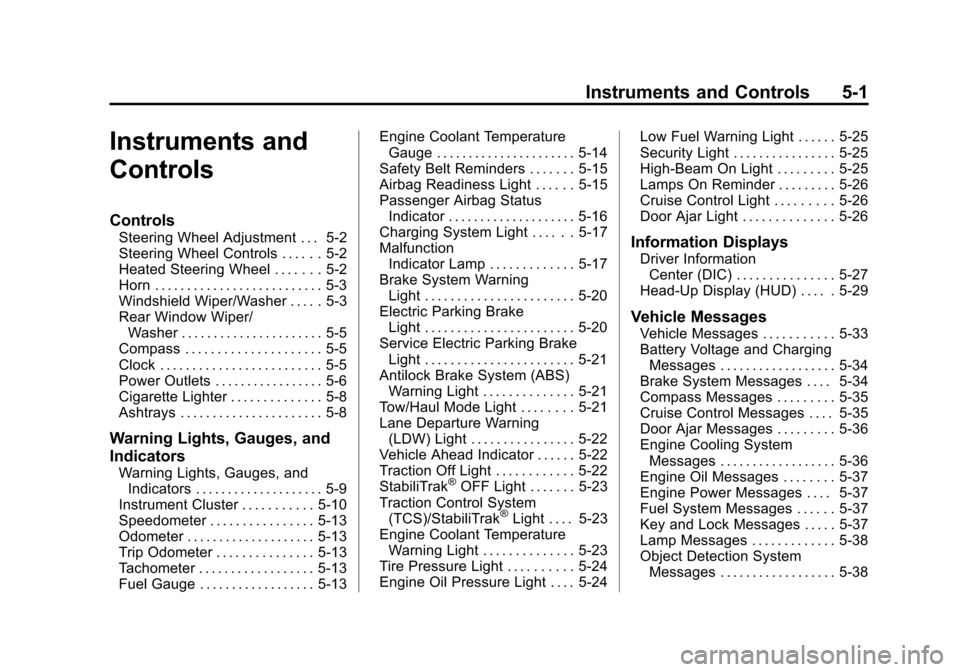
Black plate (1,1)Cadillac Escalade Owner Manual (GMNA-Localizing-U.S./Canada/Mexico-
7063683) - 2015 - crc - 2/24/14
Instruments and Controls 5-1
Instruments and
Controls
Controls
Steering Wheel Adjustment . . . 5-2
Steering Wheel Controls . . . . . . 5-2
Heated Steering Wheel . . . . . . . 5-2
Horn . . . . . . . . . . . . . . . . . . . . . . . . . . 5-3
Windshield Wiper/Washer . . . . . 5-3
Rear Window Wiper/Washer . . . . . . . . . . . . . . . . . . . . . . 5-5
Compass . . . . . . . . . . . . . . . . . . . . . 5-5
Clock . . . . . . . . . . . . . . . . . . . . . . . . . 5-5
Power Outlets . . . . . . . . . . . . . . . . . 5-6
Cigarette Lighter . . . . . . . . . . . . . . 5-8
Ashtrays . . . . . . . . . . . . . . . . . . . . . . 5-8
Warning Lights, Gauges, and
Indicators
Warning Lights, Gauges, and Indicators . . . . . . . . . . . . . . . . . . . . 5-9
Instrument Cluster . . . . . . . . . . . 5-10
Speedometer . . . . . . . . . . . . . . . . 5-13
Odometer . . . . . . . . . . . . . . . . . . . . 5-13
Trip Odometer . . . . . . . . . . . . . . . 5-13
Tachometer . . . . . . . . . . . . . . . . . . 5-13
Fuel Gauge . . . . . . . . . . . . . . . . . . 5-13 Engine Coolant Temperature
Gauge . . . . . . . . . . . . . . . . . . . . . . 5-14
Safety Belt Reminders . . . . . . . 5-15
Airbag Readiness Light . . . . . . 5-15
Passenger Airbag Status Indicator . . . . . . . . . . . . . . . . . . . . 5-16
Charging System Light . . . . . . 5-17
Malfunction Indicator Lamp . . . . . . . . . . . . . 5-17
Brake System Warning Light . . . . . . . . . . . . . . . . . . . . . . . 5-20
Electric Parking Brake Light . . . . . . . . . . . . . . . . . . . . . . . 5-20
Service Electric Parking Brake Light . . . . . . . . . . . . . . . . . . . . . . . 5-21
Antilock Brake System (ABS) Warning Light . . . . . . . . . . . . . . 5-21
Tow/Haul Mode Light . . . . . . . . 5-21
Lane Departure Warning (LDW) Light . . . . . . . . . . . . . . . . 5-22
Vehicle Ahead Indicator . . . . . . 5-22
Traction Off Light . . . . . . . . . . . . 5-22
StabiliTrak®OFF Light . . . . . . . 5-23
Traction Control System (TCS)/StabiliTrak
®Light . . . . 5-23
Engine Coolant Temperature Warning Light . . . . . . . . . . . . . . 5-23
Tire Pressure Light . . . . . . . . . . 5-24
Engine Oil Pressure Light . . . . 5-24 Low Fuel Warning Light . . . . . . 5-25
Security Light . . . . . . . . . . . . . . . . 5-25
High-Beam On Light . . . . . . . . . 5-25
Lamps On Reminder . . . . . . . . . 5-26
Cruise Control Light . . . . . . . . . 5-26
Door Ajar Light . . . . . . . . . . . . . . 5-26
Information Displays
Driver Information
Center (DIC) . . . . . . . . . . . . . . . 5-27
Head-Up Display (HUD) . . . . . 5-29
Vehicle Messages
Vehicle Messages . . . . . . . . . . . 5-33
Battery Voltage and Charging Messages . . . . . . . . . . . . . . . . . . 5-34
Brake System Messages . . . . 5-34
Compass Messages . . . . . . . . . 5-35
Cruise Control Messages . . . . 5-35
Door Ajar Messages . . . . . . . . . 5-36
Engine Cooling System Messages . . . . . . . . . . . . . . . . . . 5-36
Engine Oil Messages . . . . . . . . 5-37
Engine Power Messages . . . . 5-37
Fuel System Messages . . . . . . 5-37
Key and Lock Messages . . . . . 5-37
Lamp Messages . . . . . . . . . . . . . 5-38
Object Detection System Messages . . . . . . . . . . . . . . . . . . 5-38