steering wheel CADILLAC ESCALADE 2015 4.G User Guide
[x] Cancel search | Manufacturer: CADILLAC, Model Year: 2015, Model line: ESCALADE, Model: CADILLAC ESCALADE 2015 4.GPages: 435, PDF Size: 4.59 MB
Page 90 of 435
Black plate (29,1)Cadillac Escalade Owner Manual (GMNA-Localizing-U.S./Canada/Mexico-
7063683) - 2015 - crc - 2/24/14
Seats and Restraints 3-29
Warning (Continued)
that person causing severe injury
or even death. The path of an
inflating airbag must be kept
clear. Do not put anything
between an occupant and an
airbag, and do not attach or put
anything on the steering wheel
hub or on or near any other
airbag covering.
Do not use seat or console
accessories that block the
inflation path of a seat-mounted
side impact airbag or the front
center airbag.
Never secure anything to the roof
of a vehicle with roof-rail airbags
by routing a rope or tie-down
through any door or window
opening. If you do, the path of an
inflating roof-rail airbag will be
blocked.
When Should an Airbag
Inflate?
This vehicle is equipped with
airbags. SeeAirbag System on
page 3-25. Airbags are designed to
inflate if the impact exceeds the
specific airbag system's deployment
threshold. Deployment thresholds
are used to predict how severe a
crash is likely to be in time for the
airbags to inflate and help restrain
the occupants. The vehicle has
electronic sensors that help the
airbag system determine the
severity of the impact. Deployment
thresholds can vary with specific
vehicle design.
Frontal airbags are designed to
inflate in moderate to severe frontal
or near frontal crashes to help
reduce the potential for severe
injuries, mainly to the driver's or
front outboard passenger's head
and chest.
Whether the frontal airbags will or
should inflate is not based primarily
on how fast the vehicle is traveling. It depends on what is hit, the
direction of the impact, and how
quickly the vehicle slows down.
Frontal airbags may inflate at
different crash speeds depending on
whether the vehicle hits an object
straight on or at an angle, and
whether the object is fixed or
moving, rigid or deformable, narrow
or wide.
Frontal airbags are not intended to
inflate during vehicle rollovers, rear
impacts, or many side impacts.
In addition, the vehicle has
advanced technology frontal
airbags. Advanced technology
frontal airbags adjust the restraint
according to crash severity.
The vehicle also has a seat position
sensor that enables the sensing
system to monitor the position of the
driver seat. The seat position sensor
provides information that is used to
adjust the deployment of the driver
frontal airbag.
Page 91 of 435
Black plate (30,1)Cadillac Escalade Owner Manual (GMNA-Localizing-U.S./Canada/Mexico-
7063683) - 2015 - crc - 2/24/14
3-30 Seats and Restraints
The front center airbag is designed
to inflate in moderate to severe side
crashes depending upon the
location of the impact, when either
side of the vehicle is struck. In
addition, the front center airbag is
designed to inflate when the
sensing system predicts that the
vehicle is about to roll over on its
side. The front center airbag is not
designed to inflate in frontal
impacts, near frontal impacts,
or rear impacts.
Seat-mounted side impact airbags
are designed to inflate in moderate
to severe side crashes depending
on the location of the impact.
Seat-mounted side impact airbags
are not designed to inflate in frontal
impacts, near frontal impacts,
rollovers, or rear impacts.
A seat-mounted side impact airbag
is designed to inflate on the side of
the vehicle that is struck.
Roof-rail airbags are designed to
inflate in moderate to severe side
crashes depending on the location
of the impact. In addition, theseroof-rail airbags are designed to
inflate during a rollover or in a
severe frontal impact. Roof-rail
airbags are not designed to inflate in
rear impacts. Both roof-rail airbags
will inflate when either side of the
vehicle is struck, if the sensing
system predicts that the vehicle is
about to roll over on its side, or in a
severe frontal impact.
In any particular crash, no one can
say whether an airbag should have
inflated simply because of the
vehicle damage or the repair costs.
What Makes an Airbag
Inflate?
In a deployment event, the sensing
system sends an electrical signal
triggering a release of gas from the
inflator. Gas from the inflator fills the
airbag causing the bag to break out
of the cover. The inflator, the airbag,
and related hardware are all part of
the airbag module.
For airbag locations, see
Where Are
the Airbags? on page 3-27.
How Does an Airbag
Restrain?
In moderate to severe frontal or
near frontal collisions, even belted
occupants can contact the steering
wheel or the instrument panel. In
moderate to severe side collisions,
even belted occupants can contact
the inside of the vehicle.
Airbags supplement the protection
provided by safety belts by
distributing the force of the impact
more evenly over the
occupant's body.
Rollover capable roof-rail airbags
are also designed to help contain
the head and chest of occupants in
the outboard seating positions in the
first, second, and third rows. The
rollover capable roof-rail airbags are
designed to help reduce the risk of
full or partial ejection in rollover
events, although no system can
prevent all such ejections.
Page 98 of 435
Black plate (37,1)Cadillac Escalade Owner Manual (GMNA-Localizing-U.S./Canada/Mexico-
7063683) - 2015 - crc - 2/24/14
Seats and Restraints 3-37
purchase a service manual, see
Service Publications Ordering
Information on page 13-10.
{Warning
For up to 10 seconds after the
vehicle is turned off and the
battery is disconnected, an airbag
can still inflate during improper
service. You can be injured if you
are close to an airbag when it
inflates. Avoid yellow connectors.
They are probably part of the
airbag system. Be sure to follow
proper service procedures, and
make sure the person performing
work for you is qualified to do so.
Adding Equipment to the
Airbag-Equipped Vehicle
Adding accessories that change the
vehicle's frame, bumper system,
height, front end, or side sheet
metal may keep the airbag system
from working properly.The operation of the airbag system
can also be affected by changing
any parts of the front seats, safety
belts, airbag sensing and diagnostic
module, steering wheel, instrument
panel, any airbag module, ceiling or
pillar garnish trim, overhead
console, front sensors, side impact
sensors, airbag wiring, or front
center console.
Your dealer and the service manual
have information about the location
of the airbag sensors, sensing and
diagnostic module, and airbag
wiring.
In addition, the vehicle has a
passenger sensing system that
includes sensors as part of the front
outboard passenger seat. The
passenger sensing system may not
operate properly if the original seat
trim is replaced with non-GM
covers, upholstery, or trim; or with
GM covers, upholstery, or trim
designed for a different vehicle. Any
object, such as an aftermarket seat
heater or a comfort-enhancing pad
or device, installed under or on topof the seat fabric, could also
interfere with the operation of the
passenger sensing system. This
could either prevent proper
deployment of the passenger
airbag(s) or prevent the passenger
sensing system from properly
turning off the passenger airbag(s).
See
Passenger Sensing System on
page 3-32.
If the vehicle has rollover roof-rail
airbags, see Different Size Tires
and Wheels on page 10-58 for
additional information.
If you have to modify your vehicle
because you have a disability and
you have questions about whether
the modifications will affect the
vehicle's airbag system, or if you
have questions about whether the
airbag system will be affected if the
vehicle is modified for any other
reason, call Customer Assistance.
See Customer Assistance Offices
on page 13-3.
Page 128 of 435
Black plate (1,1)Cadillac Escalade Owner Manual (GMNA-Localizing-U.S./Canada/Mexico-
7063683) - 2015 - crc - 2/24/14
Instruments and Controls 5-1
Instruments and
Controls
Controls
Steering Wheel Adjustment . . . 5-2
Steering Wheel Controls . . . . . . 5-2
Heated Steering Wheel . . . . . . . 5-2
Horn . . . . . . . . . . . . . . . . . . . . . . . . . . 5-3
Windshield Wiper/Washer . . . . . 5-3
Rear Window Wiper/Washer . . . . . . . . . . . . . . . . . . . . . . 5-5
Compass . . . . . . . . . . . . . . . . . . . . . 5-5
Clock . . . . . . . . . . . . . . . . . . . . . . . . . 5-5
Power Outlets . . . . . . . . . . . . . . . . . 5-6
Cigarette Lighter . . . . . . . . . . . . . . 5-8
Ashtrays . . . . . . . . . . . . . . . . . . . . . . 5-8
Warning Lights, Gauges, and
Indicators
Warning Lights, Gauges, and Indicators . . . . . . . . . . . . . . . . . . . . 5-9
Instrument Cluster . . . . . . . . . . . 5-10
Speedometer . . . . . . . . . . . . . . . . 5-13
Odometer . . . . . . . . . . . . . . . . . . . . 5-13
Trip Odometer . . . . . . . . . . . . . . . 5-13
Tachometer . . . . . . . . . . . . . . . . . . 5-13
Fuel Gauge . . . . . . . . . . . . . . . . . . 5-13 Engine Coolant Temperature
Gauge . . . . . . . . . . . . . . . . . . . . . . 5-14
Safety Belt Reminders . . . . . . . 5-15
Airbag Readiness Light . . . . . . 5-15
Passenger Airbag Status Indicator . . . . . . . . . . . . . . . . . . . . 5-16
Charging System Light . . . . . . 5-17
Malfunction Indicator Lamp . . . . . . . . . . . . . 5-17
Brake System Warning Light . . . . . . . . . . . . . . . . . . . . . . . 5-20
Electric Parking Brake Light . . . . . . . . . . . . . . . . . . . . . . . 5-20
Service Electric Parking Brake Light . . . . . . . . . . . . . . . . . . . . . . . 5-21
Antilock Brake System (ABS) Warning Light . . . . . . . . . . . . . . 5-21
Tow/Haul Mode Light . . . . . . . . 5-21
Lane Departure Warning (LDW) Light . . . . . . . . . . . . . . . . 5-22
Vehicle Ahead Indicator . . . . . . 5-22
Traction Off Light . . . . . . . . . . . . 5-22
StabiliTrak®OFF Light . . . . . . . 5-23
Traction Control System (TCS)/StabiliTrak
®Light . . . . 5-23
Engine Coolant Temperature Warning Light . . . . . . . . . . . . . . 5-23
Tire Pressure Light . . . . . . . . . . 5-24
Engine Oil Pressure Light . . . . 5-24 Low Fuel Warning Light . . . . . . 5-25
Security Light . . . . . . . . . . . . . . . . 5-25
High-Beam On Light . . . . . . . . . 5-25
Lamps On Reminder . . . . . . . . . 5-26
Cruise Control Light . . . . . . . . . 5-26
Door Ajar Light . . . . . . . . . . . . . . 5-26
Information Displays
Driver Information
Center (DIC) . . . . . . . . . . . . . . . 5-27
Head-Up Display (HUD) . . . . . 5-29
Vehicle Messages
Vehicle Messages . . . . . . . . . . . 5-33
Battery Voltage and Charging Messages . . . . . . . . . . . . . . . . . . 5-34
Brake System Messages . . . . 5-34
Compass Messages . . . . . . . . . 5-35
Cruise Control Messages . . . . 5-35
Door Ajar Messages . . . . . . . . . 5-36
Engine Cooling System Messages . . . . . . . . . . . . . . . . . . 5-36
Engine Oil Messages . . . . . . . . 5-37
Engine Power Messages . . . . 5-37
Fuel System Messages . . . . . . 5-37
Key and Lock Messages . . . . . 5-37
Lamp Messages . . . . . . . . . . . . . 5-38
Object Detection System Messages . . . . . . . . . . . . . . . . . . 5-38
Page 129 of 435
Black plate (2,1)Cadillac Escalade Owner Manual (GMNA-Localizing-U.S./Canada/Mexico-
7063683) - 2015 - crc - 2/24/14
5-2 Instruments and Controls
Ride Control SystemMessages . . . . . . . . . . . . . . . . . . 5-41
Airbag System Messages . . . . 5-42
Safety Belt Messages . . . . . . . 5-42
Security Messages . . . . . . . . . . 5-42
Service Vehicle Messages . . . 5-42
Steering System Messages . . . . . . . . . . . . . . . . . . 5-42
Starting the Vehicle Messages . . . . . . . . . . . . . . . . . . 5-43
Tire Messages . . . . . . . . . . . . . . . 5-43
Transmission Messages . . . . . 5-43
Vehicle Reminder Messages . . . . . . . . . . . . . . . . . . 5-44
Vehicle Speed Messages . . . . 5-44
Washer Fluid Messages . . . . . 5-45
Window Messages . . . . . . . . . . . 5-45
Vehicle Personalization
Vehicle Personalization . . . . . . 5-45
Universal Remote System
Universal Remote System . . . 5-53
Universal Remote System Programming . . . . . . . . . . . . . . . 5-53
Universal Remote System Operation . . . . . . . . . . . . . . . . . . 5-55
Controls
Steering Wheel
Adjustment
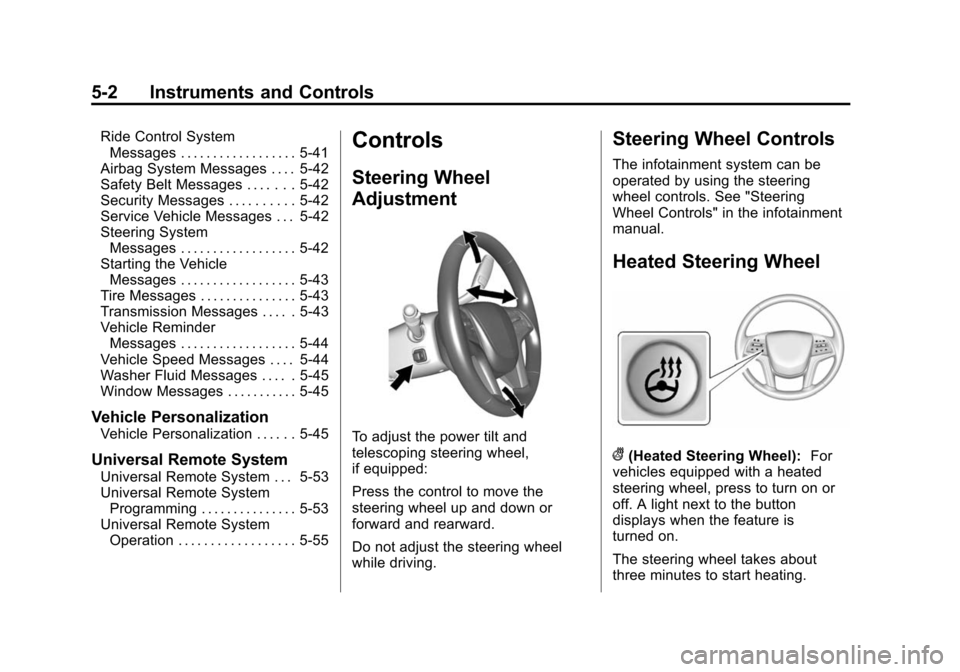
To adjust the power tilt and
telescoping steering wheel,
if equipped:
Press the control to move the
steering wheel up and down or
forward and rearward.
Do not adjust the steering wheel
while driving.
Steering Wheel Controls
The infotainment system can be
operated by using the steering
wheel controls. See "Steering
Wheel Controls" in the infotainment
manual.
Heated Steering Wheel
((Heated Steering Wheel): For
vehicles equipped with a heated
steering wheel, press to turn on or
off. A light next to the button
displays when the feature is
turned on.
The steering wheel takes about
three minutes to start heating.
Page 130 of 435
Black plate (3,1)Cadillac Escalade Owner Manual (GMNA-Localizing-U.S./Canada/Mexico-
7063683) - 2015 - crc - 2/24/14
Instruments and Controls 5-3
Horn
To sound the horn, press the center
pad on the steering wheel.
Windshield Wiper/Washer
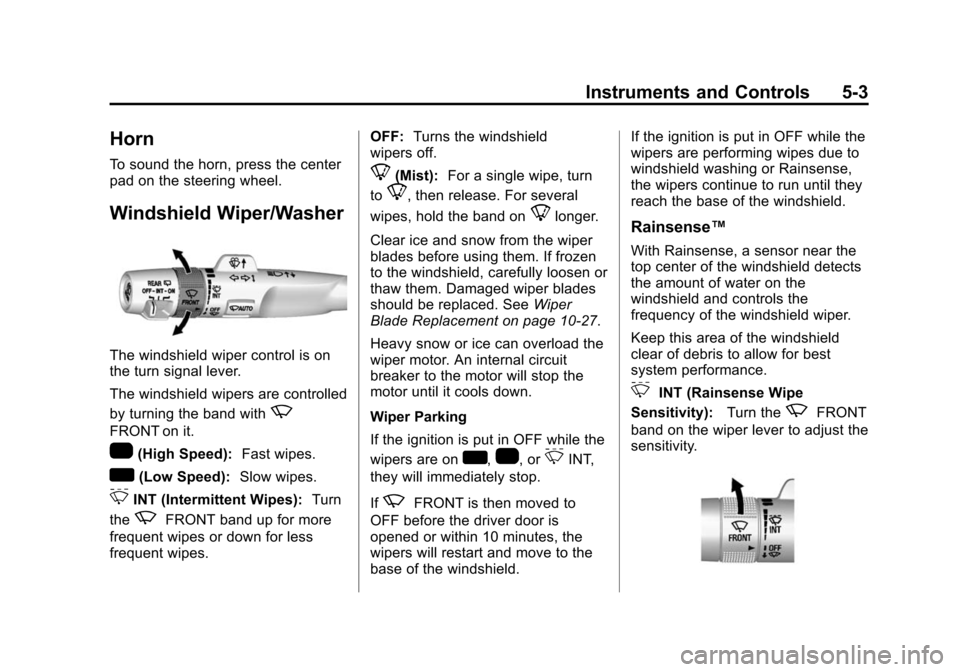
The windshield wiper control is on
the turn signal lever.
The windshield wipers are controlled
by turning the band with
z
FRONT on it.
1(High Speed):Fast wipes.
w(Low Speed):Slow wipes.
3INT (Intermittent Wipes): Turn
the
zFRONT band up for more
frequent wipes or down for less
frequent wipes. OFF:
Turns the windshield
wipers off.
8(Mist): For a single wipe, turn
to
8, then release. For several
wipes, hold the band on
8longer.
Clear ice and snow from the wiper
blades before using them. If frozen
to the windshield, carefully loosen or
thaw them. Damaged wiper blades
should be replaced. See Wiper
Blade Replacement on page 10-27.
Heavy snow or ice can overload the
wiper motor. An internal circuit
breaker to the motor will stop the
motor until it cools down.
Wiper Parking
If the ignition is put in OFF while the
wipers are on
w,1, or3INT,
they will immediately stop.
If
zFRONT is then moved to
OFF before the driver door is
opened or within 10 minutes, the
wipers will restart and move to the
base of the windshield. If the ignition is put in OFF while the
wipers are performing wipes due to
windshield washing or Rainsense,
the wipers continue to run until they
reach the base of the windshield.
Rainsense™
With Rainsense, a sensor near the
top center of the windshield detects
the amount of water on the
windshield and controls the
frequency of the windshield wiper.
Keep this area of the windshield
clear of debris to allow for best
system performance.
3INT (Rainsense Wipe
Sensitivity): Turn the
zFRONT
band on the wiper lever to adjust the
sensitivity.
Page 139 of 435
Black plate (12,1)Cadillac Escalade Owner Manual (GMNA-Localizing-U.S./Canada/Mexico-
7063683) - 2015 - crc - 2/24/14
5-12 Instruments and Controls
Use the five-way control on the right
side of the steering wheel to move
between the different display zones
and scroll through the different
displays.
To change the cluster configuration:
1. Find the Settings page in one ofthe interactive display zones on
the cluster.
2. Press SEL to enter the Settings menu.
3. Scroll down to highlight Display Layout. Then press SEL to
select it.
4. Each layout in the menu is represented by a small preview
image of the display layout.
Scroll up or down and highlight
the selection. Press SEL to
select the desired cluster
configuration.
5. Exit the Display Layout menu by pressing
S.
Cluster Application Displays
The cluster can display information
regarding Navigation, Audio, and
Phone.
Navigation
If there is no active route, a
compass will be displayed. If there
is an active route, press SEL to end
route guidance or turn the voice
prompts on or off.
Audio
While the Audio application page is
displayed, press SEL to enter the
Audio menu. In the Audio menu,
search for music, select from
favorites, or change the audio
source.
Phone
While the Phone application page is
displayed, press SEL to enter the
Phone menu. In the Phone menu,
if there is no active phone call, view
recent calls, select from favorites, or scroll through contacts. If there is
an active call, mute the phone or
switch to handset operation.
Cluster Settings Menu
To enter the cluster settings menu:
1. Use the five-way control on the
right side of the steering wheel
to find the Settings page in one
of the interactive display zones
on the cluster.
2. Press SEL on the center of the five-way control to enter the
Settings menu.
Units: Press SEL while Units is
highlighted to enter the Unit menu.
Choose US or metric units by
pressing SEL while the desired item
is highlighted. A checkmark will be
displayed next to the selected item.
Info Pages: Press SEL while Info
Pages is highlighted to select the
items to be displayed in the DIC info
displays. See Driver Information
Center (DIC) on page 5-27.
Page 146 of 435

Black plate (19,1)Cadillac Escalade Owner Manual (GMNA-Localizing-U.S./Canada/Mexico-
7063683) - 2015 - crc - 2/24/14
Instruments and Controls 5-19
“Filling the Tank with a Portable
Gas Can”underFilling the Tank
on page 9-67. The diagnostic
system can detect if the adapter
has been left installed in the
vehicle, allowing fuel to
evaporate into the atmosphere.
A few driving trips with the
adapter removed should turn off
the light.
.Check that good quality fuel is
used. Poor fuel quality causes
the engine not to run as
efficiently as designed and may
cause stalling after start-up,
stalling when the vehicle is
changed into gear, misfiring,
hesitation on acceleration,
or stumbling on acceleration.
These conditions might go away
once the engine is warmed up.
If one or more of these conditions
occurs, change the fuel brand used.
It may require at least one full tank
of the proper fuel to turn the light off.
See Fuel on page 9-66. If none of the above have made the
light turn off, your dealer can check
the vehicle. The dealer has the
proper test equipment and
diagnostic tools to fix any
mechanical or electrical problems
that might have developed.
Emissions Inspection and
Maintenance Programs
Depending on where you live, your
vehicle may be required to
participate in an emission control
system inspection and maintenance
program. For the inspection, the
emission system test equipment will
likely connect to the vehicle's Data
Link Connector (DLC).
The DLC is under the instrument
panel to the left of the steering
wheel. See your dealer if assistance
is needed.
The vehicle may not pass
inspection if:
.The malfunction indicator lamp is
on with the engine running, or if
the vehicle is placed in Service
Only Mode and the malfunction
indicator lamp does not come
on. See your dealer for
assistance in verifying proper
operation of the malfunction
indicator lamp.
.The OBD II (On-Board
Diagnostics) system determines
that critical emission control
systems have not been
completely diagnosed. The
vehicle would be considered not
ready for inspection. This can
happen if the 12-volt battery has
recently been replaced or run
down. The diagnostic system is
designed to evaluate critical
emission control systems during
Page 157 of 435
Black plate (30,1)Cadillac Escalade Owner Manual (GMNA-Localizing-U.S./Canada/Mexico-
7063683) - 2015 - crc - 2/24/14
5-30 Instruments and Controls
If equipped with HUD, some
information concerning the
operation of the vehicle is projected
onto the windshield. The image is
projected through the HUD lens on
top of the instrument panel. The
information appears as an image
focused out toward the front of the
vehicle.
{Caution
If you try to use the HUD image
as a parking aid, you may
misjudge the distance and
damage your vehicle. Do not use
the HUD image as a parking aid.
The HUD information can be
displayed in various languages. The
speedometer reading and other
numerical values can be displayed
in either English or metric units. The language selection is changed
through the radio and the units of
measurement is changed through
the instrument cluster. See
Vehicle
Personalization on page 5-45 and
“Cluster Settings Menu” under
Instrument Cluster on page 5-10.
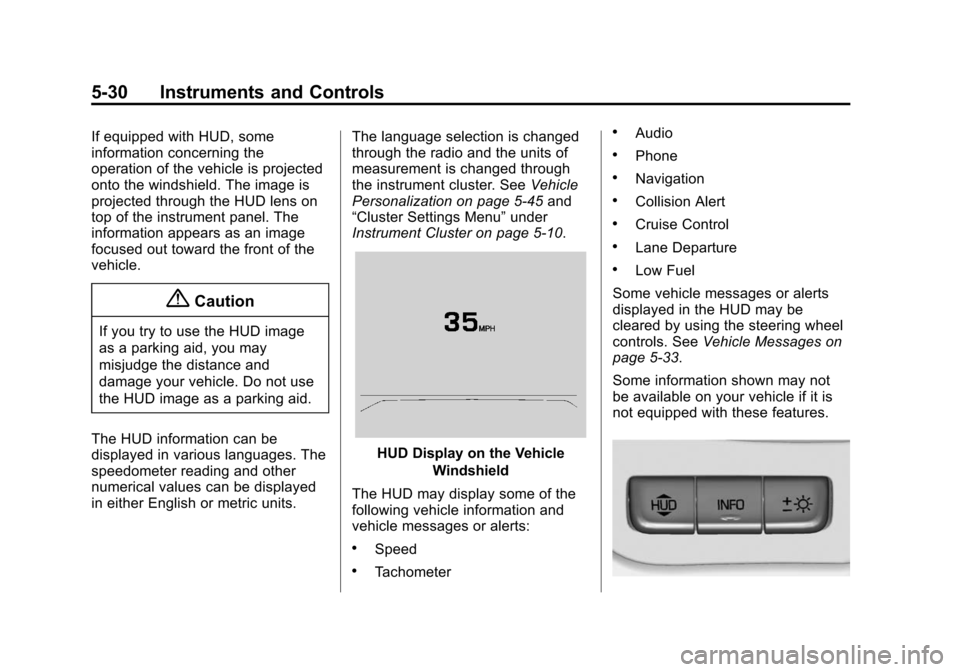
HUD Display on the Vehicle
Windshield
The HUD may display some of the
following vehicle information and
vehicle messages or alerts:
.Speed
.Tachometer
.Audio
.Phone
.Navigation
.Collision Alert
.Cruise Control
.Lane Departure
.Low Fuel
Some vehicle messages or alerts
displayed in the HUD may be
cleared by using the steering wheel
controls. See Vehicle Messages on
page 5-33.
Some information shown may not
be available on your vehicle if it is
not equipped with these features.
Page 158 of 435
Black plate (31,1)Cadillac Escalade Owner Manual (GMNA-Localizing-U.S./Canada/Mexico-
7063683) - 2015 - crc - 2/24/14
Instruments and Controls 5-31
The HUD control is to the left of the
steering wheel.
To adjust the HUD image:
1. Adjust the driver seat.
2. Start the engine.
3. Use the following settings toadjust the HUD.
$(Image Adjustment): Press
down or lift up to center the HUD
image. The HUD image can only be
adjusted up and down, not side
to side.
!(Display View): Press to
select the display view. Each press
will change the display view.
D(Image Brightness): Lift up
and hold to brighten the display.
Press down and hold to dim the
display. Hold down to turn the
display off.
The HUD image will automatically
dim and brighten to compensate for
outside lighting. The HUD
brightness control can also be
adjusted as needed. The HUD image can temporarily
light up depending on the angle and
position of the sunlight on the HUD
display. This is normal.
Polarized sunglasses could make
the HUD image harder to see.
HUD Views
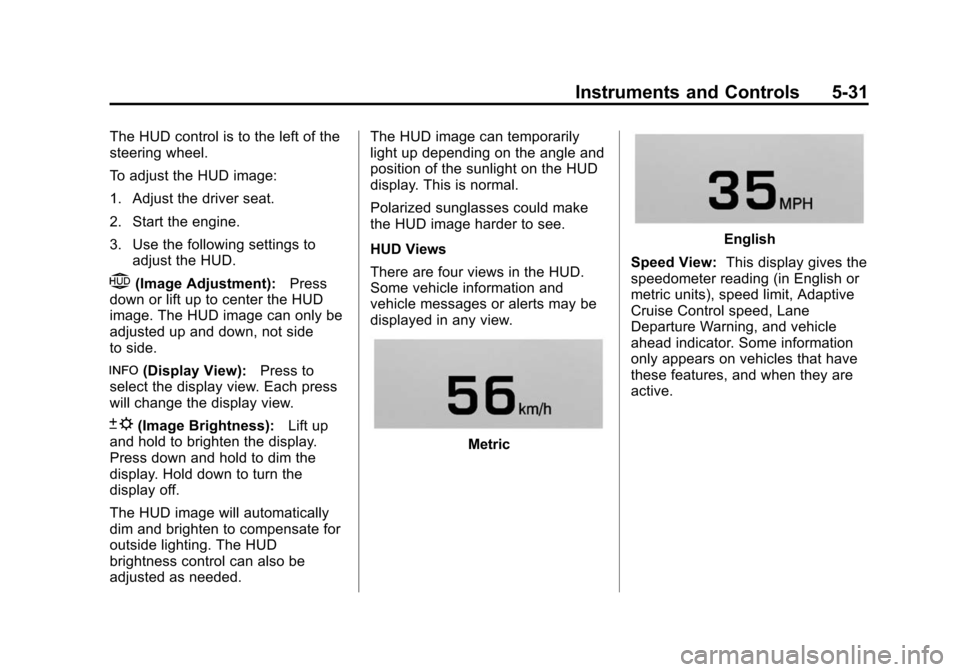
There are four views in the HUD.
Some vehicle information and
vehicle messages or alerts may be
displayed in any view.
Metric
English
Speed View: This display gives the
speedometer reading (in English or
metric units), speed limit, Adaptive
Cruise Control speed, Lane
Departure Warning, and vehicle
ahead indicator. Some information
only appears on vehicles that have
these features, and when they are
active.