instrument panel CADILLAC ESCALADE 2015 4.G Owner's Manual
[x] Cancel search | Manufacturer: CADILLAC, Model Year: 2015, Model line: ESCALADE, Model: CADILLAC ESCALADE 2015 4.GPages: 435, PDF Size: 4.59 MB
Page 188 of 435
Black plate (5,1)Cadillac Escalade Owner Manual (GMNA-Localizing-U.S./Canada/Mexico-
7063683) - 2015 - crc - 2/24/14
Lighting 6-5
brightness, along with the taillamps,
sidemarker, parking lamps, and the
instrument panel lights. The radio
lights will also be dim.
To turn off the automatic headlamp
system, turn the exterior lamp
control to
Pand then release it.
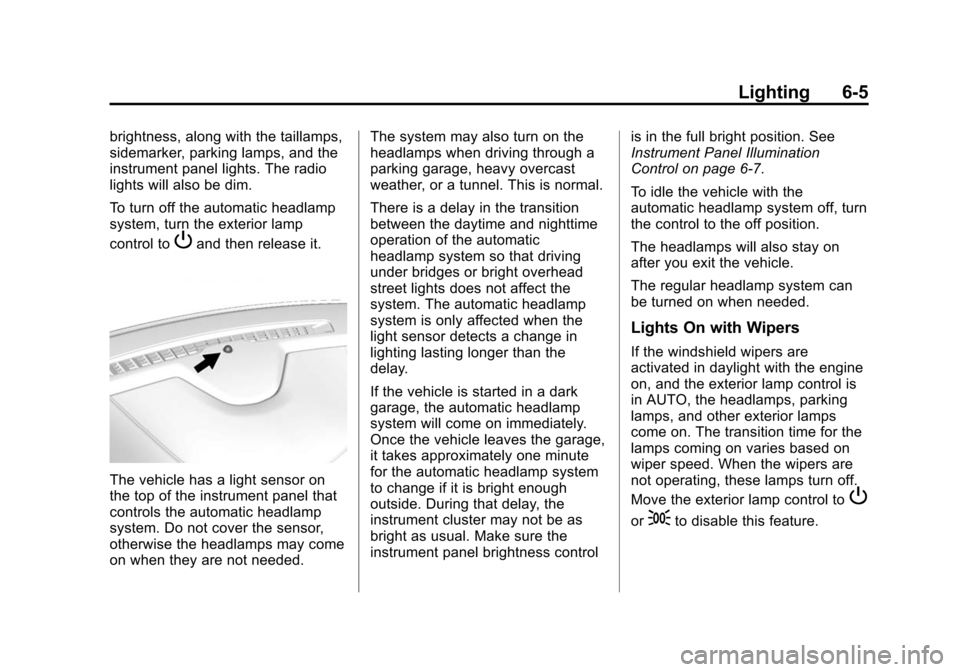
The vehicle has a light sensor on
the top of the instrument panel that
controls the automatic headlamp
system. Do not cover the sensor,
otherwise the headlamps may come
on when they are not needed.The system may also turn on the
headlamps when driving through a
parking garage, heavy overcast
weather, or a tunnel. This is normal.
There is a delay in the transition
between the daytime and nighttime
operation of the automatic
headlamp system so that driving
under bridges or bright overhead
street lights does not affect the
system. The automatic headlamp
system is only affected when the
light sensor detects a change in
lighting lasting longer than the
delay.
If the vehicle is started in a dark
garage, the automatic headlamp
system will come on immediately.
Once the vehicle leaves the garage,
it takes approximately one minute
for the automatic headlamp system
to change if it is bright enough
outside. During that delay, the
instrument cluster may not be as
bright as usual. Make sure the
instrument panel brightness control
is in the full bright position. See
Instrument Panel Illumination
Control on page 6-7.
To idle the vehicle with the
automatic headlamp system off, turn
the control to the off position.
The headlamps will also stay on
after you exit the vehicle.
The regular headlamp system can
be turned on when needed.
Lights On with Wipers
If the windshield wipers are
activated in daylight with the engine
on, and the exterior lamp control is
in AUTO, the headlamps, parking
lamps, and other exterior lamps
come on. The transition time for the
lamps coming on varies based on
wiper speed. When the wipers are
not operating, these lamps turn off.
Move the exterior lamp control to
P
or;to disable this feature.
Page 190 of 435
Black plate (7,1)Cadillac Escalade Owner Manual (GMNA-Localizing-U.S./Canada/Mexico-
7063683) - 2015 - crc - 2/24/14
Lighting 6-7
Cornering Lamps
For vehicles equipped with
cornering lamps, they automatically
come on when all of the following
occur:
.The low-beam headlamps
are on.
.The turn signals are activated or
the steering wheel is at a
calibrated angle.
.The vehicle speed is below the
calibrated speed.
Interior Lighting
Instrument Panel
Illumination Control
This feature controls the brightness
of the instrument panel lights and is
next to the exterior lamp control.
D(Instrument Panel
Illumination): Move the
thumbwheel up or down to brighten
or dim the lights.
Dome Lamps
There are dome lamps in the
overhead console and the headliner,
if equipped.
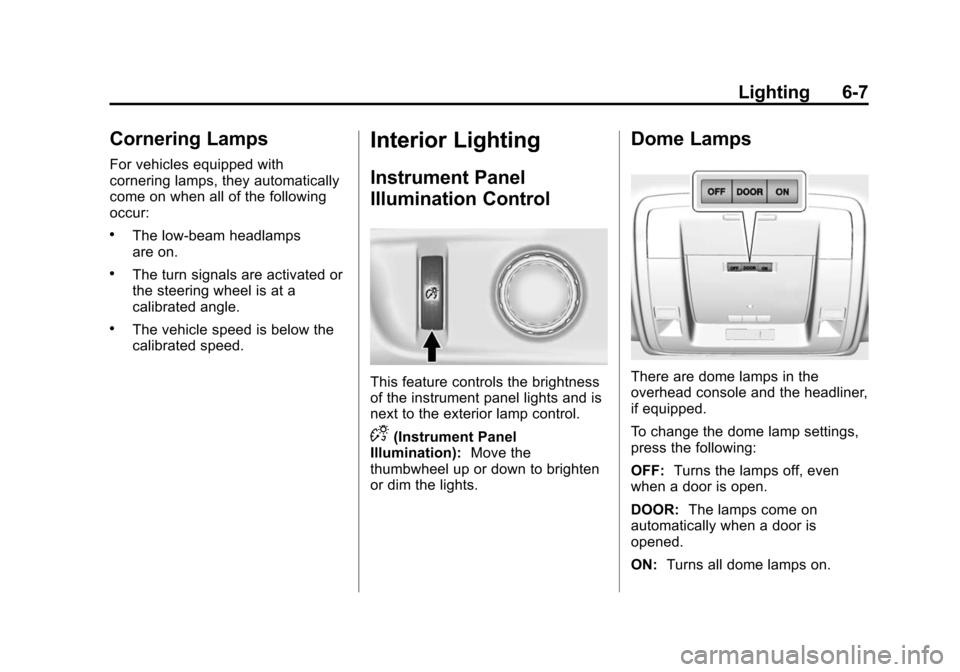
To change the dome lamp settings,
press the following:
OFF: Turns the lamps off, even
when a door is open.
DOOR: The lamps come on
automatically when a door is
opened.
ON: Turns all dome lamps on.
Page 198 of 435
Black plate (3,1)Cadillac Escalade Owner Manual (GMNA-Localizing-U.S./Canada/Mexico-
7063683) - 2015 - crc - 2/24/14
Climate Controls 8-3
English units can be changed to
metric units through the instrument
cluster. See“Cluster Settings Menu”
under Instrument Cluster on
page 5-10.
OFF (Fan): Press the OFF button
to turn the fan on or off. The
temperature control and air delivery
mode can still be adjusted with the
fan off.
w/x(Driver and Passenger
Temperature Controls): The
temperature can be adjusted
separately for the driver and the
passenger. Press to increase or
decrease the temperature. Press
and hold to rapidly increase or
decrease the temperature.
The driver and passenger
temperatures can also be adjusted
by pressing the controls on the
touch screen.
SYNC (Synchronized
Temperature): Press SYNC on the
touch screen to link all climate zone
settings to the driver settings. Adjust
the driver side temperature control to change the linked temperature.
When the passenger settings are
adjusted, the SYNC button is
displayed when the temperatures
are unlinked.
Rear (If Equipped):
Press this
button on the front climate control
touch screen to open the rear
climate control screen. The rear
climate control settings can now be
adjusted from the front
passenger area.
Manual Operation
z 9 y(Fan Control): Press the
fan control buttons or the touch
screen fan control, to increase or
decrease the fan speed. Press and
hold the buttons or the touch screen
control to adjust speed more
quickly. The fan speed setting
displays. Pressing either button
cancels automatic fan control and
the fan can be controlled manually.
Press AUTO to return to automatic
operation. To turn off the fan and
climate control system, press the
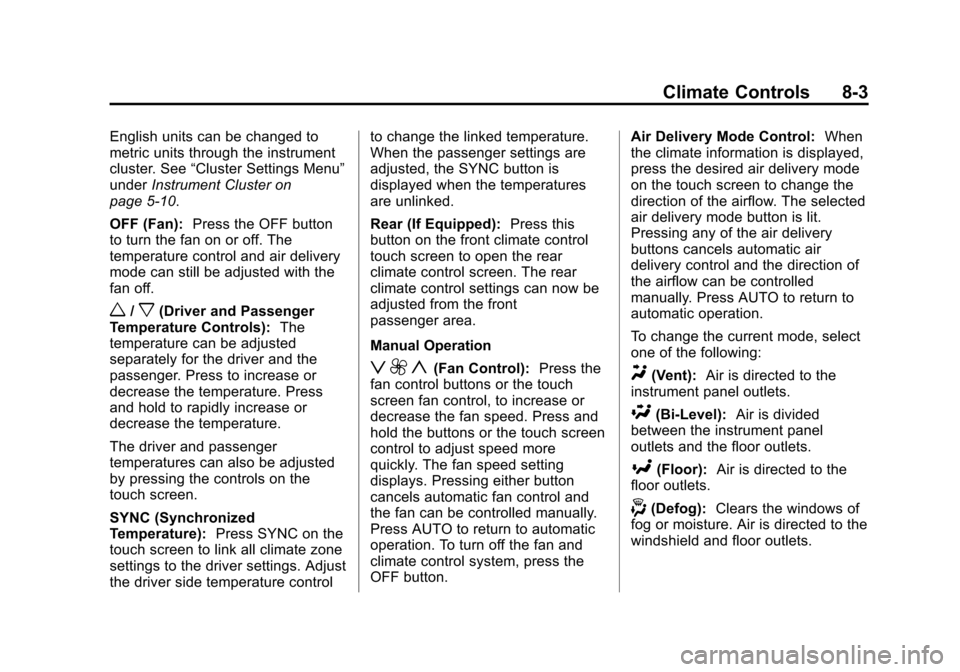
OFF button. Air Delivery Mode Control:
When
the climate information is displayed,
press the desired air delivery mode
on the touch screen to change the
direction of the airflow. The selected
air delivery mode button is lit.
Pressing any of the air delivery
buttons cancels automatic air
delivery control and the direction of
the airflow can be controlled
manually. Press AUTO to return to
automatic operation.
To change the current mode, select
one of the following:Y(Vent): Air is directed to the
instrument panel outlets.
\(Bi-Level): Air is divided
between the instrument panel
outlets and the floor outlets.
[(Floor): Air is directed to the
floor outlets.
-(Defog): Clears the windows of
fog or moisture. Air is directed to the
windshield and floor outlets.
Page 200 of 435
Black plate (5,1)Cadillac Escalade Owner Manual (GMNA-Localizing-U.S./Canada/Mexico-
7063683) - 2015 - crc - 2/24/14
Climate Controls 8-5
The heated outside rearview mirrors
turn on when the rear window
defogger button is on and help to
clear fog or frost from the surface of
the mirrors.
{Caution
Do not try to clear frost or other
material from the inside of the
front windshield and rear window
with a razor blade or anything
else that is sharp. This may
damage the rear window
defogger grid and affect the
radio's ability to pick up stations
clearly. The repairs would not be
covered by the vehicle warranty.
Driver and Passenger Heated and
Cooled Seats (If Equipped): Press
Ior+to heat the driver or
passenger seatback only.
Press
Jorzto heat the driver or
passenger seat cushion and
seatback. Press
Cor{to cool the driver or
passenger seat. See Heated and
Cooled Front Seats on page 3-7.
Remote Start Climate Control
Operation: If equipped with the
remote start feature, the climate
control system may run when the
vehicle is started remotely. The
system uses the driver ’s previous
settings to heat or cool the inside of
the vehicle. The rear defog may
come on during remote start based
on cold ambient conditions. The
rear defog indicator light does not
come on during a remote start.
If equipped with heated or cooled
seats, they may come on during a
remote start. See Remote Vehicle
Start on page 2-9 andHeated and
Cooled Front Seats on page 3-7.Sensor
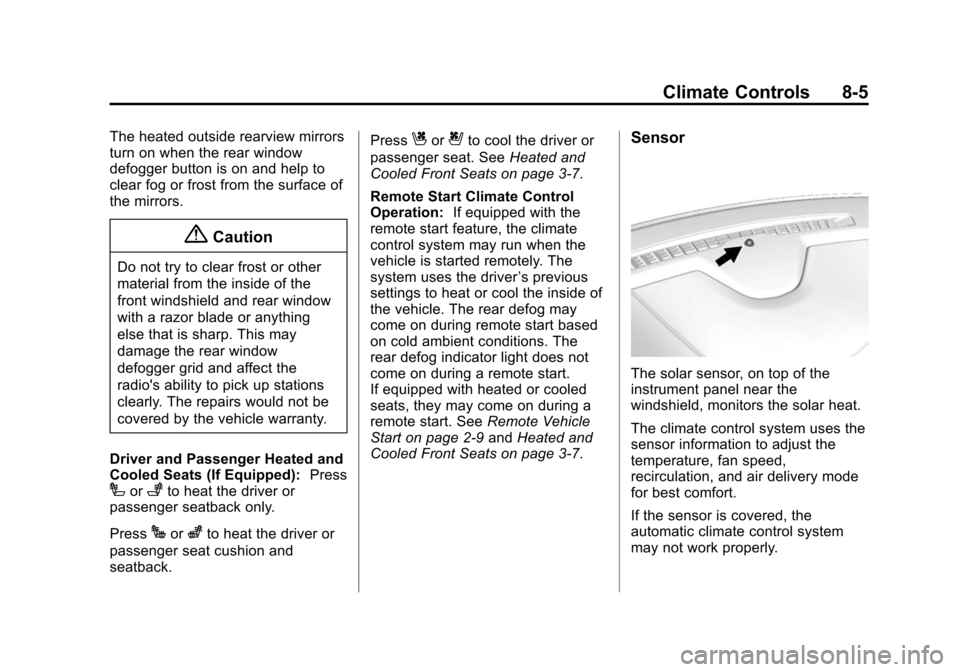
The solar sensor, on top of the
instrument panel near the
windshield, monitors the solar heat.
The climate control system uses the
sensor information to adjust the
temperature, fan speed,
recirculation, and air delivery mode
for best comfort.
If the sensor is covered, the
automatic climate control system
may not work properly.
Page 202 of 435
Black plate (7,1)Cadillac Escalade Owner Manual (GMNA-Localizing-U.S./Canada/Mexico-
7063683) - 2015 - crc - 2/24/14
Climate Controls 8-7
The SYNC button will be lit. Press
the TEMP, MODE, or AUTO button
twice to unlink the set driver and
rear temperatures. The SYNC
button turns off.
Rear Control Lockout:Press Rear
Control Lockout on the touch screen
to lock or unlock control of the rear
climate control system from the front
climate control touch screen. When
locked the rear climate control
cannot be adjusted from the rear
climate control faceplate.
Automatic Operation
Rear AUTO: Press to turn on or off.
The air delivery and fan speed are
controlled automatically. The AUTO
indicator appears on the display.
If the Mode or fan control buttons
are manually adjusted, this cancels
the automatic operation.
Manual Operation
S A T(Fan Control): Press
briefly or press and hold the rear
climate control buttons or touch
screen to increase or decrease the airflow. Pressing
A
Twhen the
system is off will turn the system on.
The air delivery mode remains in its
previous setting.
w/x(Temperature Control):
Press briefly or press and hold the
rear temperature control buttons or
touch screen to adjust the rear
passenger temperature. Press
w
for warmer air and pressxfor
cooler air.
Y/\/Y(Air Delivery Mode
Control): Press the desired mode
button on the touch screen or the
MODE button on the rear faceplate
to change the direction of the airflow
in the rear seating area.
MorL(Heated Rear Seats):
Press
MorLto heat the left or
right outboard seat cushion and
seatback. See Heated Rear Seats
on page 3-9.
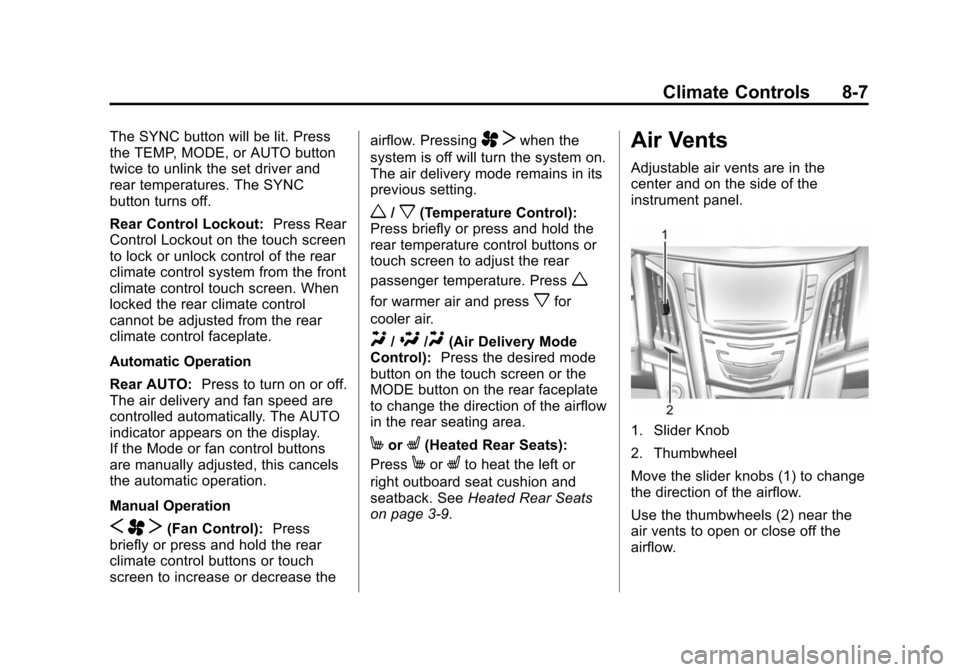
Air Vents
Adjustable air vents are in the
center and on the side of the
instrument panel.
1. Slider Knob
2. Thumbwheel
Move the slider knobs (1) to change
the direction of the airflow.
Use the thumbwheels (2) near the
air vents to open or close off the
airflow.
Page 217 of 435
Black plate (12,1)Cadillac Escalade Owner Manual (GMNA-Localizing-U.S./Canada/Mexico-
7063683) - 2015 - crc - 2/24/14
9-12 Driving and Operating
curve or an overpass can remain icy
when the surrounding roads are
clear. Avoid sudden steering
maneuvers and braking while
on ice.
SeeAntilock Brake System (ABS)
on page 9-34.
Turn off cruise control on slippery
surfaces.
Blizzard Conditions
Being stuck in snow can be a
serious situation. Stay with the
vehicle unless there is help nearby.
If possible, use Roadside Service.
See Roadside Service on
page 13-5. To get help and keep
everyone in the vehicle safe:
.Turn on the hazard warning
flashers.
.Tie a red cloth to an outside
mirror.
{Warning
Snow can trap engine exhaust
under the vehicle. This may
cause exhaust gases to get
inside. Engine exhaust contains
carbon monoxide (CO) which
cannot be seen or smelled. It can
cause unconsciousness and even
death.
If the vehicle is stuck in the snow:
.Clear away snow from around
the base of your vehicle,
especially any that is blocking
the exhaust pipe.
.Check again from time to
time to be sure snow does
not collect there.
.Open a window about 5 cm
(2 in) on the side of the
vehicle that is away from the
wind to bring in fresh air.
(Continued)
Warning (Continued)
.Fully open the air outlets on
or under the instrument
panel.
.Adjust the climate control
system to a setting that
circulates the air inside the
vehicle and set the fan speed
to the highest setting. See
“Climate Control Systems”.
For more information about
carbon monoxide, see Engine
Exhaust on page 9-26.
To save fuel, run the engine for only
short periods as needed to warm
the vehicle and then shut the engine
off and close the window most of
the way to save heat. Repeat this
until help arrives but only when you
feel really uncomfortable from the
cold. Moving about to keep warm
also helps.
Page 241 of 435
Black plate (36,1)Cadillac Escalade Owner Manual (GMNA-Localizing-U.S./Canada/Mexico-
7063683) - 2015 - crc - 2/24/14
9-36 Driving and Operating
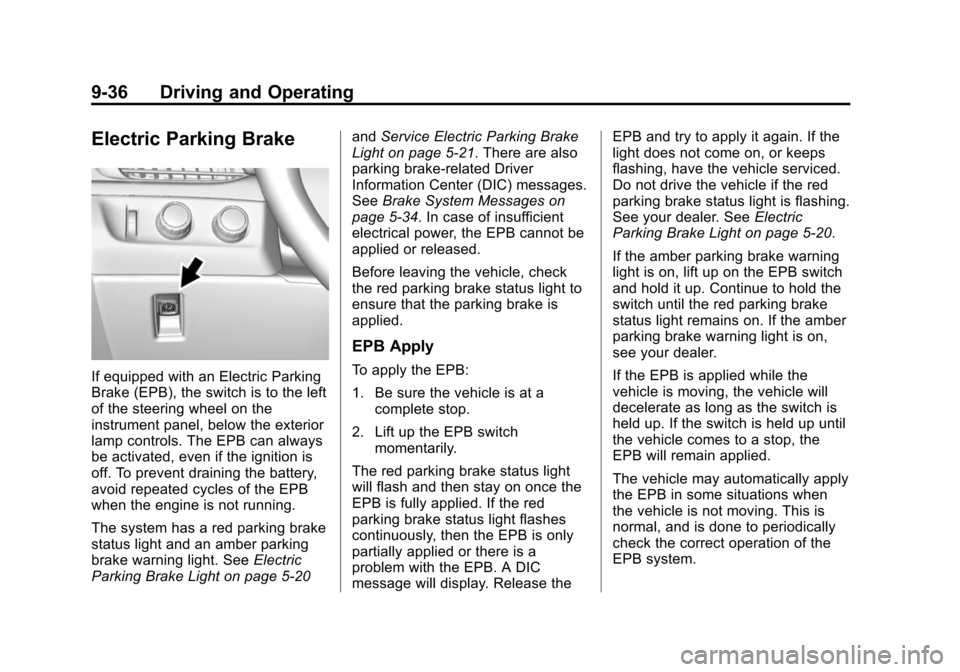
Electric Parking Brake
If equipped with an Electric Parking
Brake (EPB), the switch is to the left
of the steering wheel on the
instrument panel, below the exterior
lamp controls. The EPB can always
be activated, even if the ignition is
off. To prevent draining the battery,
avoid repeated cycles of the EPB
when the engine is not running.
The system has a red parking brake
status light and an amber parking
brake warning light. SeeElectric
Parking Brake Light on page 5-20 and
Service Electric Parking Brake
Light on page 5-21. There are also
parking brake-related Driver
Information Center (DIC) messages.
See Brake System Messages on
page 5-34. In case of insufficient
electrical power, the EPB cannot be
applied or released.
Before leaving the vehicle, check
the red parking brake status light to
ensure that the parking brake is
applied.
EPB Apply
To apply the EPB:
1. Be sure the vehicle is at a
complete stop.
2. Lift up the EPB switch momentarily.
The red parking brake status light
will flash and then stay on once the
EPB is fully applied. If the red
parking brake status light flashes
continuously, then the EPB is only
partially applied or there is a
problem with the EPB. A DIC
message will display. Release the EPB and try to apply it again. If the
light does not come on, or keeps
flashing, have the vehicle serviced.
Do not drive the vehicle if the red
parking brake status light is flashing.
See your dealer. See
Electric
Parking Brake Light on page 5-20.
If the amber parking brake warning
light is on, lift up on the EPB switch
and hold it up. Continue to hold the
switch until the red parking brake
status light remains on. If the amber
parking brake warning light is on,
see your dealer.
If the EPB is applied while the
vehicle is moving, the vehicle will
decelerate as long as the switch is
held up. If the switch is held up until
the vehicle comes to a stop, the
EPB will remain applied.
The vehicle may automatically apply
the EPB in some situations when
the vehicle is not moving. This is
normal, and is done to periodically
check the correct operation of the
EPB system.
Page 275 of 435
Black plate (70,1)Cadillac Escalade Owner Manual (GMNA-Localizing-U.S./Canada/Mexico-
7063683) - 2015 - crc - 2/24/14
9-70 Driving and Operating
Trailer Towing
General Towing
Information
Only use towing equipment that has
been designed for the vehicle.
Contact your dealer or trailering
dealer for assistance with preparing
the vehicle for towing a trailer. Read
the entire section before towing a
trailer.
For towing a disabled vehicle, see
Towing the Vehicle on page 10-76.
For towing the vehicle behind
another vehicle such as a motor
home, seeRecreational Vehicle
Towing on page 10-76.
Driving Characteristics
and Towing Tips
Driving with a Trailer
When towing a trailer:
.Become familiar with the state
and local laws that apply to
trailer towing.
.Do not tow a trailer during the
first 800 km (500 mi) to prevent
damage to the engine, axle,
or other parts.
.Then during the first 800 km
(500 mi) of trailer towing, do not
drive over 80 km/h (50 mph) and
do not make starts at full throttle.
.Vehicles can tow in D (Drive).
Shift the transmission to a lower
gear if the transmission shifts
too often under heavy loads and/
or hilly conditions.
.Do not use Adaptive Cruise
Control when towing.
.Turn off Park Assist when
towing.
.The Automatic Collision
Preparation System should be
set to Off when towing. See
Active Emergency Braking
System on page 9-59.
{Warning
When towing a trailer, exhaust
gases may collect at the rear of
the vehicle and enter if the
liftgate, trunk/hatch, or rear-most
window is open.
When towing a trailer:
.Do not drive with the liftgate,
trunk/hatch, or rear-most
window open.
.Fully open the air outlets on
or under the instrument
panel.
.Also adjust the climate
control system to a setting
that brings in only outside air.
See “Climate Control
Systems” in the Index.
For more information about
Carbon Monoxide, see Engine
Exhaust on page 9-26.
Page 286 of 435
Black plate (1,1)Cadillac Escalade Owner Manual (GMNA-Localizing-U.S./Canada/Mexico-
7063683) - 2015 - crc - 2/24/14
Vehicle Care 10-1
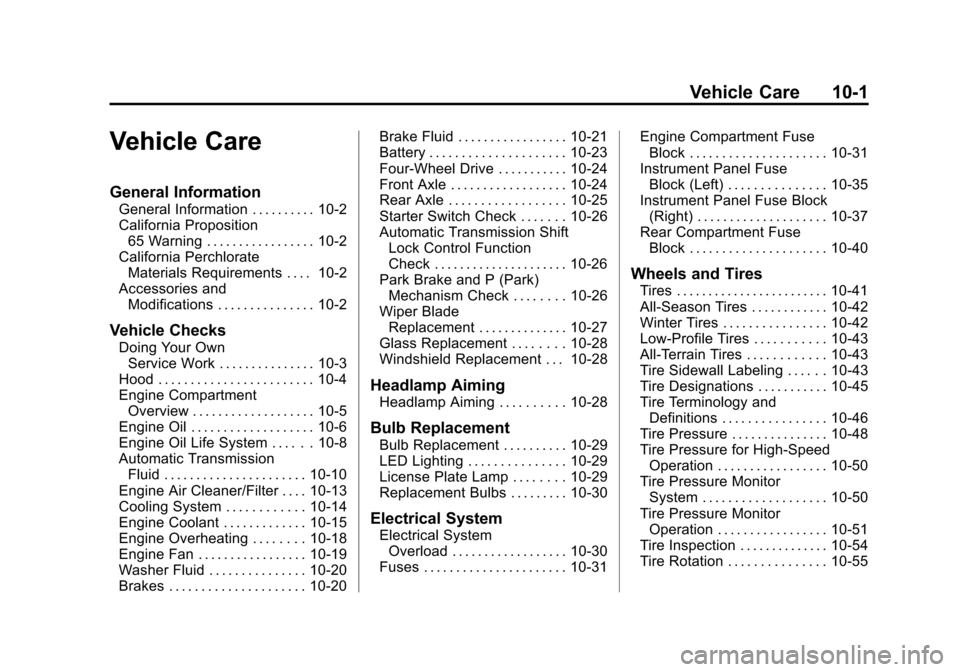
Vehicle Care
General Information
General Information . . . . . . . . . . 10-2
California Proposition65 Warning . . . . . . . . . . . . . . . . . 10-2
California Perchlorate Materials Requirements . . . . 10-2
Accessories and Modifications . . . . . . . . . . . . . . . 10-2
Vehicle Checks
Doing Your OwnService Work . . . . . . . . . . . . . . . 10-3
Hood . . . . . . . . . . . . . . . . . . . . . . . . 10-4
Engine Compartment Overview . . . . . . . . . . . . . . . . . . . 10-5
Engine Oil . . . . . . . . . . . . . . . . . . . 10-6
Engine Oil Life System . . . . . . 10-8
Automatic Transmission Fluid . . . . . . . . . . . . . . . . . . . . . . 10-10
Engine Air Cleaner/Filter . . . . 10-13
Cooling System . . . . . . . . . . . . 10-14
Engine Coolant . . . . . . . . . . . . . 10-15
Engine Overheating . . . . . . . . 10-18
Engine Fan . . . . . . . . . . . . . . . . . 10-19
Washer Fluid . . . . . . . . . . . . . . . 10-20
Brakes . . . . . . . . . . . . . . . . . . . . . 10-20 Brake Fluid . . . . . . . . . . . . . . . . . 10-21
Battery . . . . . . . . . . . . . . . . . . . . . 10-23
Four-Wheel Drive . . . . . . . . . . . 10-24
Front Axle . . . . . . . . . . . . . . . . . . 10-24
Rear Axle . . . . . . . . . . . . . . . . . . 10-25
Starter Switch Check . . . . . . . 10-26
Automatic Transmission Shift
Lock Control Function
Check . . . . . . . . . . . . . . . . . . . . . 10-26
Park Brake and P (Park) Mechanism Check . . . . . . . . 10-26
Wiper Blade Replacement . . . . . . . . . . . . . . 10-27
Glass Replacement . . . . . . . . 10-28
Windshield Replacement . . . 10-28
Headlamp Aiming
Headlamp Aiming . . . . . . . . . . 10-28
Bulb Replacement
Bulb Replacement . . . . . . . . . . 10-29
LED Lighting . . . . . . . . . . . . . . . 10-29
License Plate Lamp . . . . . . . . 10-29
Replacement Bulbs . . . . . . . . . 10-30
Electrical System
Electrical System Overload . . . . . . . . . . . . . . . . . . 10-30
Fuses . . . . . . . . . . . . . . . . . . . . . . 10-31 Engine Compartment Fuse
Block . . . . . . . . . . . . . . . . . . . . . 10-31
Instrument Panel Fuse Block (Left) . . . . . . . . . . . . . . . 10-35
Instrument Panel Fuse Block
(Right) . . . . . . . . . . . . . . . . . . . . 10-37
Rear Compartment Fuse Block . . . . . . . . . . . . . . . . . . . . . 10-40
Wheels and Tires
Tires . . . . . . . . . . . . . . . . . . . . . . . . 10-41
All-Season Tires . . . . . . . . . . . . 10-42
Winter Tires . . . . . . . . . . . . . . . . 10-42
Low-Profile Tires . . . . . . . . . . . 10-43
All-Terrain Tires . . . . . . . . . . . . 10-43
Tire Sidewall Labeling . . . . . . 10-43
Tire Designations . . . . . . . . . . . 10-45
Tire Terminology andDefinitions . . . . . . . . . . . . . . . . 10-46
Tire Pressure . . . . . . . . . . . . . . . 10-48
Tire Pressure for High-Speed Operation . . . . . . . . . . . . . . . . . 10-50
Tire Pressure Monitor System . . . . . . . . . . . . . . . . . . . 10-50
Tire Pressure Monitor Operation . . . . . . . . . . . . . . . . . 10-51
Tire Inspection . . . . . . . . . . . . . . 10-54
Tire Rotation . . . . . . . . . . . . . . . 10-55
Page 315 of 435
Black plate (30,1)Cadillac Escalade Owner Manual (GMNA-Localizing-U.S./Canada/Mexico-
7063683) - 2015 - crc - 2/24/14
10-30 Vehicle Care
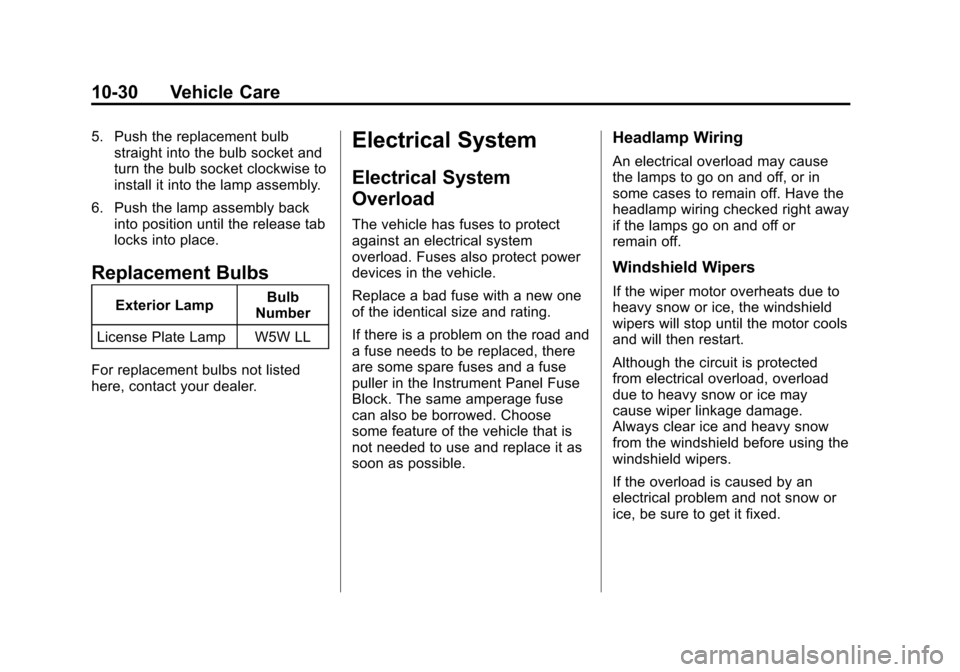
5. Push the replacement bulbstraight into the bulb socket and
turn the bulb socket clockwise to
install it into the lamp assembly.
6. Push the lamp assembly back into position until the release tab
locks into place.
Replacement Bulbs
Exterior Lamp Bulb
Number
License Plate Lamp W5W LL
For replacement bulbs not listed
here, contact your dealer.
Electrical System
Electrical System
Overload
The vehicle has fuses to protect
against an electrical system
overload. Fuses also protect power
devices in the vehicle.
Replace a bad fuse with a new one
of the identical size and rating.
If there is a problem on the road and
a fuse needs to be replaced, there
are some spare fuses and a fuse
puller in the Instrument Panel Fuse
Block. The same amperage fuse
can also be borrowed. Choose
some feature of the vehicle that is
not needed to use and replace it as
soon as possible.
Headlamp Wiring
An electrical overload may cause
the lamps to go on and off, or in
some cases to remain off. Have the
headlamp wiring checked right away
if the lamps go on and off or
remain off.
Windshield Wipers
If the wiper motor overheats due to
heavy snow or ice, the windshield
wipers will stop until the motor cools
and will then restart.
Although the circuit is protected
from electrical overload, overload
due to heavy snow or ice may
cause wiper linkage damage.
Always clear ice and heavy snow
from the windshield before using the
windshield wipers.
If the overload is caused by an
electrical problem and not snow or
ice, be sure to get it fixed.