Personalization CADILLAC ESCALADE 2016 4.G User Guide
[x] Cancel search | Manufacturer: CADILLAC, Model Year: 2016, Model line: ESCALADE, Model: CADILLAC ESCALADE 2016 4.GPages: 357, PDF Size: 3.49 MB
Page 49 of 357
Cadillac Escalade Owner Manual (GMNA-Localizing-MidEast-9369153) -
2016 - crc - 6/19/15
48 Keys, Doors, and Windows
zone. Then, glance over your
shoulder to double check
before moving slowly into the
adjacent lane.
Reverse Tilt Mirrors
If equipped with memory seats, the
passenger and/or driver mirror tilts
to a preselected position when the
vehicle is in R (Reverse). This
allows the curb to be seen when
parallel parking.
The mirror(s) return to the original
position when:
.The vehicle is shifted out of
R (Reverse), or remains in
R (Reverse) for about
30 seconds.
. The ignition is turned off.
. The vehicle is driven in
R (Reverse) above a set speed.
To turn this feature on or off, see
Vehicle Personalization 0156.
Interior Mirrors
Interior Rearview Mirrors
Adjust the rearview mirror for a clear
view of the area behind the vehicle.
Do not spray glass cleaner directly
on the mirror. Use a soft towel
dampened with water.
Automatic Dimming
Rearview Mirror
The rearview mirror automatically
dims to reduce the glare of the
headlamps from behind. This
feature comes on when the vehicle
is started.
Child-View Mirror
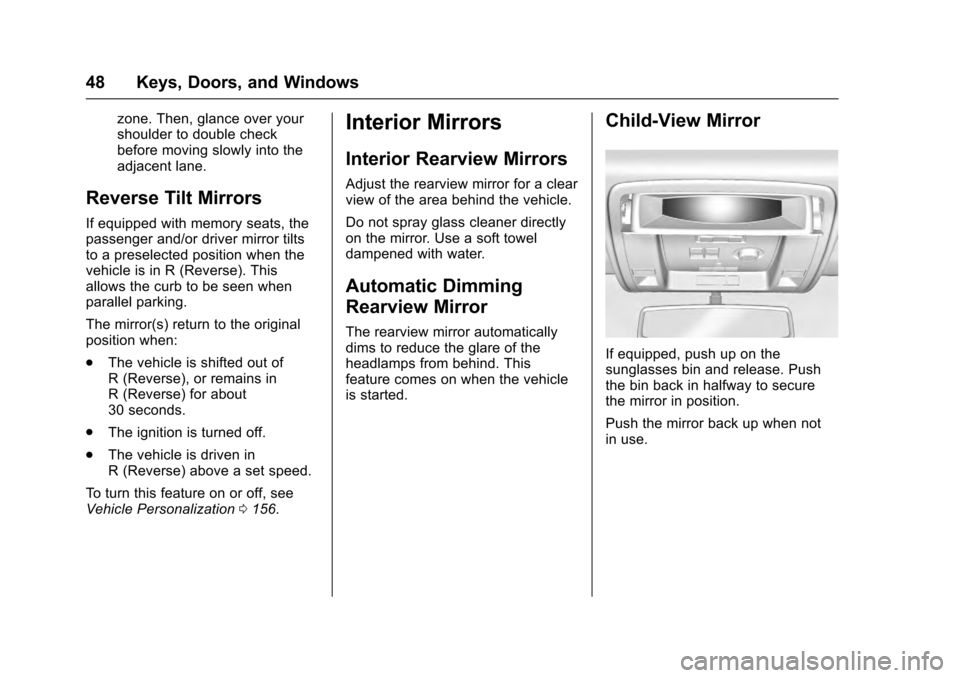
If equipped, push up on the
sunglasses bin and release. Push
the bin back in halfway to secure
the mirror in position.
Push the mirror back up when not
in use.
Page 60 of 357
Cadillac Escalade Owner Manual (GMNA-Localizing-MidEast-9369153) -
2016 - crc - 6/19/15
Seats and Restraints 59
To store exit positions and easy exit
features to the
B(Exit) button,
repeat steps 1–4 using
Bto store
your positions for getting out of the
vehicle.
Manually Recalling Memory
Positions
Press and hold 1, 2, or
B(Exit) to
manually recall the previously
stored memory positions and
massage settings (if equipped).
Releasing 1, 2, or
Bbefore the
stored positions are reached stops
the recall.
If the massage feature is off when
the memory recall is performed, the
previously stored type and intensity
will be recalled, but it will remain off
until activated with the massage
control.
Automatically Recalling Memory
Positions (Auto Memory Recall)
If programmed on in the vehicle
personalization menus, the Auto
(Automatic) Memory Recall feature
automatically recalls the current
driver ’s previously stored 1 or 2 position and massage settings (if
equipped) when the ignition is
changed from OFF to ON/RUN or
ACC/ACCESSORY.
See
“Auto Memory Recall” under
"Comfort and Convenience" in
Vehicle Personalization 0156.
To stop recall movement, press one
of the memory, power mirror,
or power seat controls; press the
power tilt and telescoping steering
column control; or press the
adjustable pedal control.
If the vehicle driver has changed, in
some vehicles the Driver ID may be
displayed for the first few ignition
cycles.
RKE transmitters are not labeled
with a number. If your memory seat
position is stored to 1 or 2 but this
position is not automatically
recalling, then store your positions
to the other button or switch RKE
transmitters with the other driver.
Easy Exit Recall
If programmed on in the vehicle
personalization menu, the easy exit
feature automatically recalls the previously stored EXIT positions
when leaving the vehicle. See
“Storing Memory Positions”
previously in this section. See also
Vehicle Personalization
0156.
Easy exit recall automatically
activates when one of the following
occurs:
. The vehicle is turned off and the
driver door is opened within a
short time.
. The vehicle is turned off with the
driver door open.
Obstructions
If something has blocked the driver
seat, power tilt and telescoping
steering column, and/or adjustable
pedals while recalling a memory
position, the recall may stop.
Remove the obstruction. Then do
one of the following:
. If automatically or manually
recalling the stored memory
position, press and hold the
appropriate manual control for
two seconds. Try recalling again
by pressing the appropriate
memory button.
Page 62 of 357
Cadillac Escalade Owner Manual (GMNA-Localizing-MidEast-9369153) -
2016 - crc - 6/19/15
Seats and Restraints 61
The buttons are near the climate
controls on the center stack. To
operate, the engine must be
running.
Press
Ior+to heat the driver or
passenger seatback only.
Press
Jorzto heat the driver or
passenger seat cushion and
seatback.
Press
Cor{to cool the driver or
passenger seat.
When this feature is off, the heated
and cooled seat symbols on the
buttons are white. When a heated
seat is turned on, the symbol turns
red. When a cooled seat is turned
on, the symbol turns blue.
Press the button once for the
highest setting. With each press of
the button, the seat will change to
the next lower setting, and then to
the off setting. The indicator lights
next to the buttons indicate three for
the highest setting and one for the
lowest. If the heated seats are on
high for an extended time, their level
may automatically be lowered. The passenger seat may take
longer to heat up.
Remote Start Auto Heated and
Cooled Seats
During a remote start, the heated or
cooled seats may turn on
automatically if enabled in vehicle
personalization. When it is cold
outside, the heated seats turn on,
and when it is hot outside, the
cooled seats turn on. The heated or
cooled seats are canceled when the
ignition is turned on. Press the
heated or cooled seat button to use
the heated or cooled seats after the
vehicle is started.
The heated or cooled seat indicator
lights do not turn on during a remote
start.
The temperature performance of an
unoccupied seat may be reduced.
This is normal.
The heated or cooled seats will not
turn on during a remote start unless
they are enabled in the vehicle
personalization menu. See
Remote
Vehicle Start 034 and Vehicle
Personalization 0156.
Auto Heated Seats
When the vehicle is on, this feature
will automatically activate the
heated seats at the level required by
the vehicle's interior temperature.
The active high, medium, low or off
heated seat level will be indicated
by the manual heated seat button
lights on the center stack. Use the
manual heated buttons on the
center stack to turn the auto heated
seats off. If the passenger seat is
unoccupied, the auto heated seats
feature will not activate the seat.
The auto heated seats feature can
be programmed to always be
enabled when the vehicle is on. See
"Auto Heated Seats" under Vehicle
Personalization 0156.
Page 116 of 357
Cadillac Escalade Owner Manual (GMNA-Localizing-MidEast-9369153) -
2016 - crc - 6/19/15
Instruments and Controls 115
Security Messages . . . . . . . . . . . 153
Service Vehicle Messages . . . . 153
Steering SystemMessages . . . . . . . . . . . . . . . . . . . 153
Starting the Vehicle
Messages . . . . . . . . . . . . . . . . . . . 153
Tire Messages . . . . . . . . . . . . . . . . 153
Transmission Messages . . . . . . 154
Vehicle Reminder Messages . . . . . . . . . . . . . . . . . . . 155
Vehicle Speed Messages . . . . . 155
Washer Fluid Messages . . . . . . 155
Window Messages . . . . . . . . . . . 155
Vehicle Personalization
Vehicle Personalization . . . . . . . 156
Universal Remote System
Universal Remote System Programming . . . . . . . . . . . . . . . 163
Universal Remote System Operation . . . . . . . . . . . . . . . . . . . 165
Controls
Steering Wheel
Adjustment
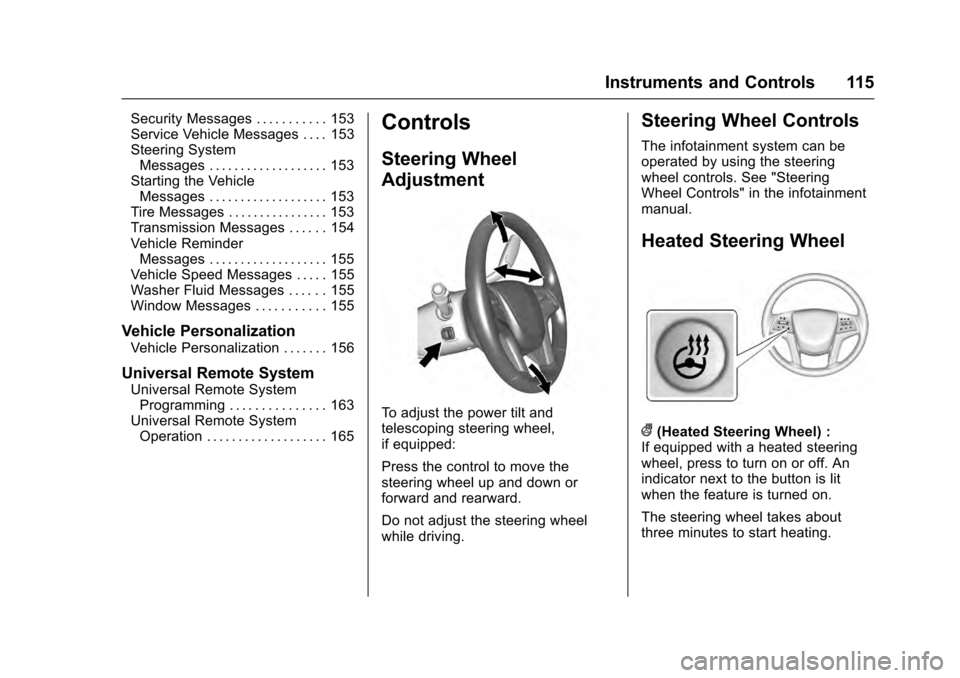
To adjust the power tilt and
telescoping steering wheel,
if equipped:
Press the control to move the
steering wheel up and down or
forward and rearward.
Do not adjust the steering wheel
while driving.
Steering Wheel Controls
The infotainment system can be
operated by using the steering
wheel controls. See "Steering
Wheel Controls" in the infotainment
manual.
Heated Steering Wheel
((Heated Steering Wheel) :
If equipped with a heated steering
wheel, press to turn on or off. An
indicator next to the button is lit
when the feature is turned on.
The steering wheel takes about
three minutes to start heating.
Page 119 of 357
Cadillac Escalade Owner Manual (GMNA-Localizing-MidEast-9369153) -
2016 - crc - 6/19/15
118 Instruments and Controls
Rear Window Wiper/
Washer
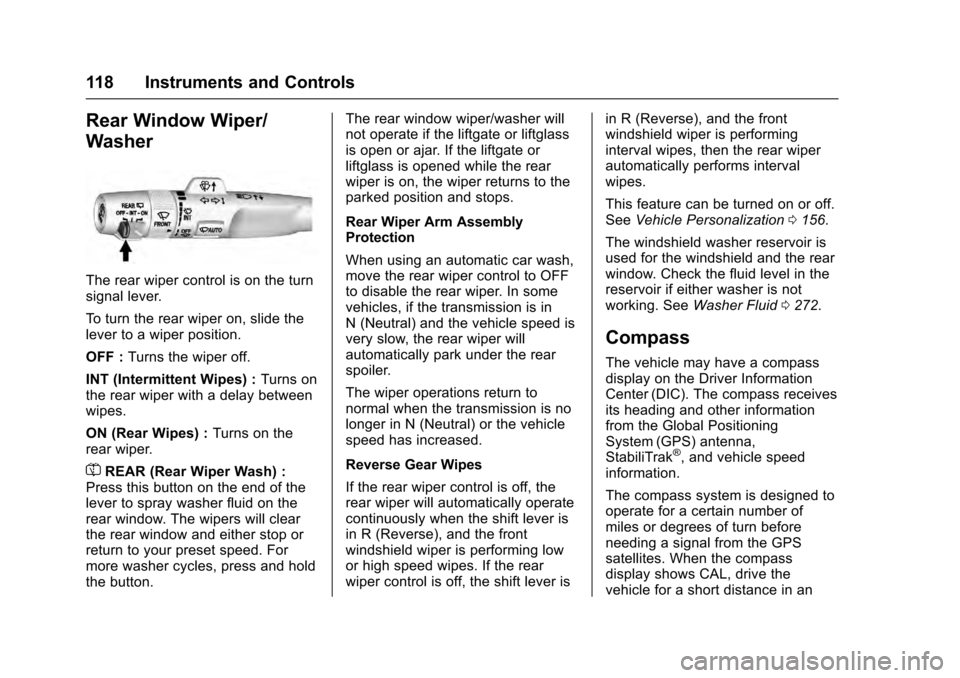
The rear wiper control is on the turn
signal lever.
To turn the rear wiper on, slide the
lever to a wiper position.
OFF :Turns the wiper off.
INT (Intermittent Wipes) : Turns on
the rear wiper with a delay between
wipes.
ON (Rear Wipes) : Turns on the
rear wiper.
=REAR (Rear Wiper Wash) :
Press this button on the end of the
lever to spray washer fluid on the
rear window. The wipers will clear
the rear window and either stop or
return to your preset speed. For
more washer cycles, press and hold
the button. The rear window wiper/washer will
not operate if the liftgate or liftglass
is open or ajar. If the liftgate or
liftglass is opened while the rear
wiper is on, the wiper returns to the
parked position and stops.
Rear Wiper Arm Assembly
Protection
When using an automatic car wash,
move the rear wiper control to OFF
to disable the rear wiper. In some
vehicles, if the transmission is in
N (Neutral) and the vehicle speed is
very slow, the rear wiper will
automatically park under the rear
spoiler.
The wiper operations return to
normal when the transmission is no
longer in N (Neutral) or the vehicle
speed has increased.
Reverse Gear Wipes
If the rear wiper control is off, the
rear wiper will automatically operate
continuously when the shift lever is
in R (Reverse), and the front
windshield wiper is performing low
or high speed wipes. If the rear
wiper control is off, the shift lever is
in R (Reverse), and the front
windshield wiper is performing
interval wipes, then the rear wiper
automatically performs interval
wipes.
This feature can be turned on or off.
See
Vehicle Personalization 0156.
The windshield washer reservoir is
used for the windshield and the rear
window. Check the fluid level in the
reservoir if either washer is not
working. See Washer Fluid 0272.
Compass
The vehicle may have a compass
display on the Driver Information
Center (DIC). The compass receives
its heading and other information
from the Global Positioning
System (GPS) antenna,
StabiliTrak
®, and vehicle speed
information.
The compass system is designed to
operate for a certain number of
miles or degrees of turn before
needing a signal from the GPS
satellites. When the compass
display shows CAL, drive the
vehicle for a short distance in an
Page 143 of 357
Cadillac Escalade Owner Manual (GMNA-Localizing-MidEast-9369153) -
2016 - crc - 6/19/15
142 Instruments and Controls
Caution
If you try to use the HUD image
as a parking aid, you may
misjudge the distance and
damage your vehicle. Do not use
the HUD image as a parking aid.
The HUD information can be
displayed in various languages. The
speedometer reading and other
numerical values can be displayed
in either English or metric units.
The language selection is changed
through the radio and the units of
measurement is changed through
the instrument cluster. See Vehicle
Personalization 0156 and“Cluster
Settings Menu” underInstrument
Cluster 0124.
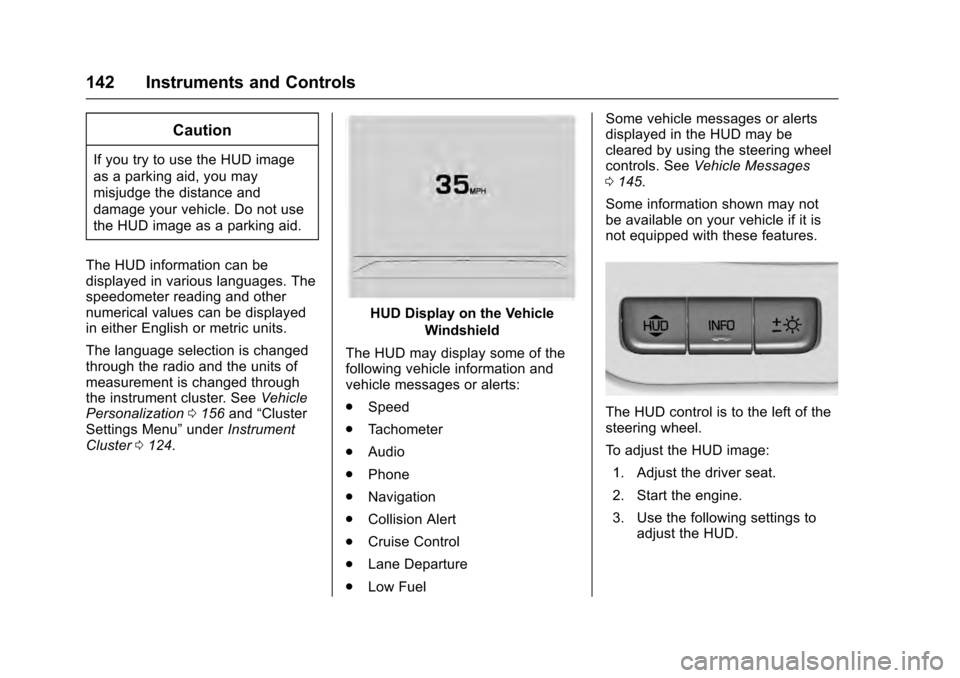
HUD Display on the Vehicle
Windshield
The HUD may display some of the
following vehicle information and
vehicle messages or alerts:
. Speed
. Tachometer
. Audio
. Phone
. Navigation
. Collision Alert
. Cruise Control
. Lane Departure
. Low Fuel Some vehicle messages or alerts
displayed in the HUD may be
cleared by using the steering wheel
controls. See
Vehicle Messages
0 145.
Some information shown may not
be available on your vehicle if it is
not equipped with these features.
The HUD control is to the left of the
steering wheel.
To adjust the HUD image: 1. Adjust the driver seat.
2. Start the engine.
3. Use the following settings to adjust the HUD.
Page 157 of 357
Cadillac Escalade Owner Manual (GMNA-Localizing-MidEast-9369153) -
2016 - crc - 6/19/15
156 Instruments and Controls
Vehicle
Personalization
Use the audio system controls to
access the personalization menus
for customizing vehicle features.
The following are all possible
personalization features. Depending
on the vehicle, some may not be
available.
Audio System Controls1. Press the desired feature to display a list of available
options.
2. Press to select the desired feature setting.
3. Press
oBACK on the
faceplate or the
0screen
button to return to the previous
menu or exit.
To access the Settings menu, select
SETTINGS from the Home page on
the infotainment system display. Personalization Menus
The following list of menu items may
be available:
.
Time and Date
. Language (Language)
. Valet Mode
. Radio
. Vehicle
. Bluetooth
. Voice
. Display
. Rear Camera
. Return to Factory Settings
. Software Information
Detailed information for each menu
follows:
Time and Date
Manually set the time and date. See
Clock 0119.
Language (Language)
Select Language, then select from
the available language(s). The selected language will display
on the system.
Valet Mode (If Equipped)
This will lock the infotainment
system and steering wheel controls.
It may also limit access to vehicle
storage locations (if equipped).
To enable valet mode:
1. Enter a four-digit code on the keypad.
2. Select Enter to go to the confirmation screen.
3. Re-enter the four-digit code.
Press LOCK or UNLOCK to lock or
unlock the system. Press Back to go
back to the previous menu.
Radio
Press to display the Radio Menu
and the following may display:
. Manage Favorites
. Number of Favorites Pages
. Audible Touch Feedback
. Auto Volume
. Maximum Start Up Volume
Page 169 of 357
Cadillac Escalade Owner Manual (GMNA-Localizing-MidEast-9369153) -
2016 - crc - 6/19/15
168 Lighting
.The vehicle's windshield is dirty,
cracked, or obstructed by
something that blocks the view
of the light sensor.
. The vehicle is loaded such that
the front end points upward,
causing the light sensor to aim
high and not detect headlamps
and taillamps.
. The vehicle is being driven on
winding or hilly roads.
The automatic high-beam
headlamps may need to be disabled
if any of the above conditions exist.
This feature can be turned on or off
in vehicle personalization. See
Vehicle Personalization 0156.
Exterior Lamps Off
Reminder
If a door is open, a reminder chime
sounds when the headlamps or
parking lamps are manually turned
on and the ignition is off. To turn off
the chime, turn the exterior lamp
control to off or AUTO and then
back on, or close and re-open the
door. In the AUTO mode, the headlamps turn off once the ignition
is off or remain on until the
headlamp delay ends (if enabled in
the DIC). See
“Exit Lighting” under
Vehicle Personalization 0156.
Headlamp High/
Low-Beam Changer
$
(Headlamp High/Low-Beam
Changer) : Push the turn signal
lever toward the instrument panel to
change the headlamps from low to
high beam.
Pull the turn signal lever toward you
and release it to return to low-beam
headlamps.
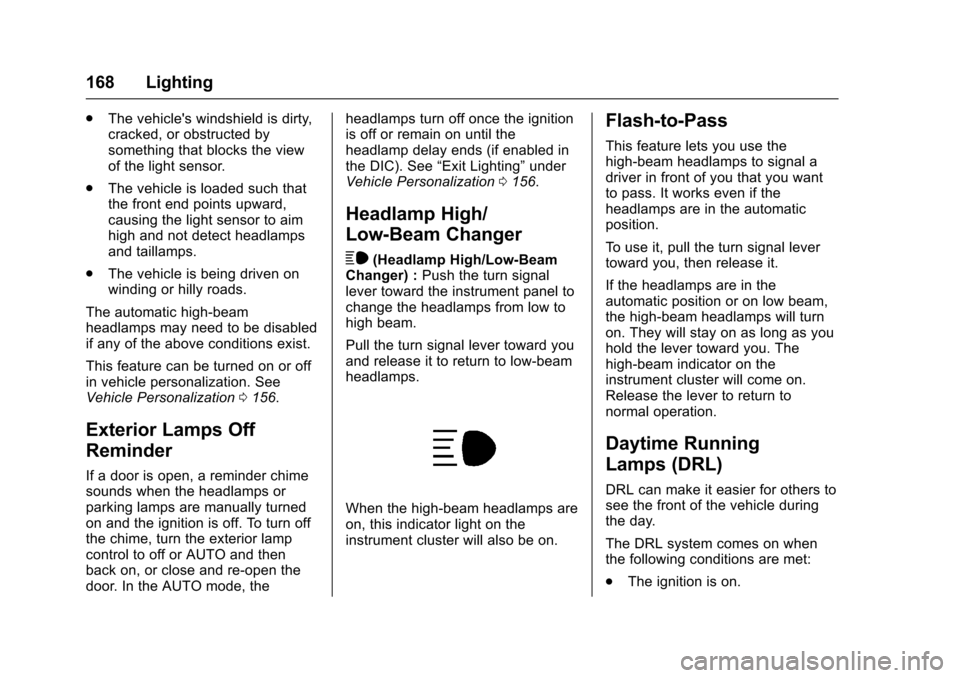
When the high-beam headlamps are
on, this indicator light on the
instrument cluster will also be on.
Flash-to-Pass
This feature lets you use the
high-beam headlamps to signal a
driver in front of you that you want
to pass. It works even if the
headlamps are in the automatic
position.
To use it, pull the turn signal lever
toward you, then release it.
If the headlamps are in the
automatic position or on low beam,
the high-beam headlamps will turn
on. They will stay on as long as you
hold the lever toward you. The
high-beam indicator on the
instrument cluster will come on.
Release the lever to return to
normal operation.
Daytime Running
Lamps (DRL)
DRL can make it easier for others to
see the front of the vehicle during
the day.
The DRL system comes on when
the following conditions are met:
. The ignition is on.
Page 174 of 357
Cadillac Escalade Owner Manual (GMNA-Localizing-MidEast-9369153) -
2016 - crc - 6/19/15
Lighting 173
Lighting Features
Entry Lighting
Some exterior lamps and the interior
lamps turn on briefly at night, or in
areas with limited lighting, when
K
is pressed on the Remote Keyless
Entry (RKE) transmitter. When a
door is opened, the interior lamps
come on if the dome lamp control is
in the DOOR position. After about
30 seconds the exterior lamps turn
off. Entry lighting can be disabled
manually by changing the ignition
out of the OFF position, or by
pressing the RKE transmitter
Q
button.
This feature can be changed. See
“Vehicle Locator Lights”under
Vehicle Personalization 0156.
Exit Lighting
Some exterior lamps and interior
lamps come on at night, or in areas
with limited lighting, when the driver
door is opened after the ignition is
turned off. The exterior lamps and interior lamps remain on for a set
amount of time, then automatically
turn off.
The exterior lamps turn off
immediately by turning the exterior
lamp control off.
This feature can be changed. See
Vehicle Personalization
0156.
Battery Load
Management
The vehicle has Electric Power
Management (EPM), which
estimates the battery's temperature
and state of charge. It then adjusts
the voltage for best performance
and extended life of the battery.
When the battery's state of charge
is low, the voltage is raised slightly
to quickly bring the charge back up.
When the state of charge is high,
the voltage is lowered slightly to
prevent overcharging. The voltmeter
gauge or the voltage display on the
Driver Information Center (DIC),
if equipped, may show the voltage moving up or down. This is normal.
If there is a problem, an alert will be
displayed.
The battery can be discharged at
idle if the electrical loads are very
high. This is true for all vehicles.
This is because the generator
(alternator) may not be spinning fast
enough at idle to produce all the
power that is needed for very high
electrical loads.
A high electrical load occurs when
several of the following are on, such
as: headlamps, high beams, fog
lamps, rear window defogger,
climate control fan at high speed,
heated seats, engine cooling fans,
trailer loads, and loads plugged into
accessory power outlets.
EPM works to prevent excessive
discharge of the battery. It does this
by balancing the generator's output
and the vehicle's electrical needs.
It can increase engine idle speed to
generate more power, whenever
needed. It can temporarily reduce
the power demands of some
accessories.
Page 180 of 357
Cadillac Escalade Owner Manual (GMNA-Localizing-MidEast-9369153) -
2016 - crc - 6/19/15
Climate Controls 179
conditioning on or off. If the fan is
turned off or the outside
temperature falls below freezing, the
air conditioner will not run.
Press AUTO to return to automatic
operation and the air conditioner
runs as needed.
Automatic Air Recirculation :
When the AUTO indicator light is
on, the air is automatically
recirculated as needed to help
quickly cool the inside of the
vehicle.
The climate control system may
have a sensor to detect air pollution.
When using automatic air
recirculation, the air quality control
system may operate. To adjust the
sensitivity of the air quality sensor,
see“Climate and Air Quality” under
Vehicle Personalization 0156.
@(Recirculation) : Press to
alternate between recirculating air
inside the vehicle or pulling in
outside air. The indicator light on the
button is lit when recirculation mode
is active. This helps to quickly cool
the air inside the vehicle and reduce
the entry of outside air and odors. Pressing this button cancels
automatic recirculation. Press AUTO
to return to automatic operation;
recirculation runs automatically as
needed.
Manual recirculation mode is not
available when in Defrost or Defog
modes.
Auto Defog :
The climate control
system may have a sensor to
automatically detect high humidity
inside the vehicle. When high
humidity is detected, the climate
control system may adjust to
outside air supply and turn on the
air conditioner. If the climate control
system does not detect possible
window fogging, it returns to normal
operation. To turn Auto Defog off or
on, see “Climate and Air Quality”
under Vehicle Personalization
0 156.Rear Window Defogger
=(Rear Window Defogger) :
Press to turn the rear window
defogger on or off. An indicator light
on the button comes on to show that
the rear window defogger is on. The rear window defogger only
works when the ignition is in ON/
RUN. The defogger turns off if the
ignition is turned to ACC/
ACCESSORY or LOCK/OFF.
The heated outside rearview mirrors
turn on when the rear window
defogger button is on and help to
clear fog or frost from the surface of
the mirrors.
Caution
Do not try to clear frost or other
material from the inside of the
front windshield and rear window
with a razor blade or anything
else that is sharp. This may
damage the rear window
defogger grid and affect the
radio's ability to pick up stations
clearly. The repairs would not be
covered by the vehicle warranty.
Driver and Passenger Heated and
Cooled Seats (If Equipped) : Press
Ior+to heat the driver or
passenger seatback only.